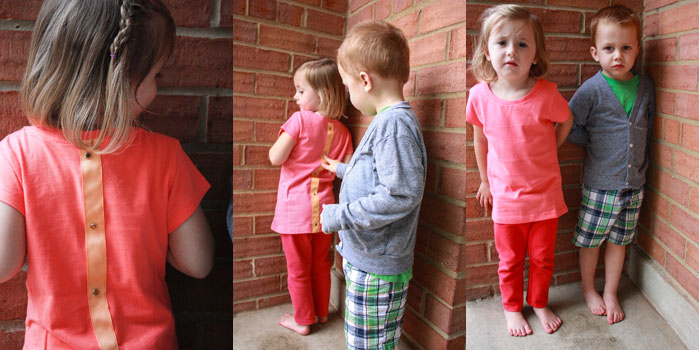
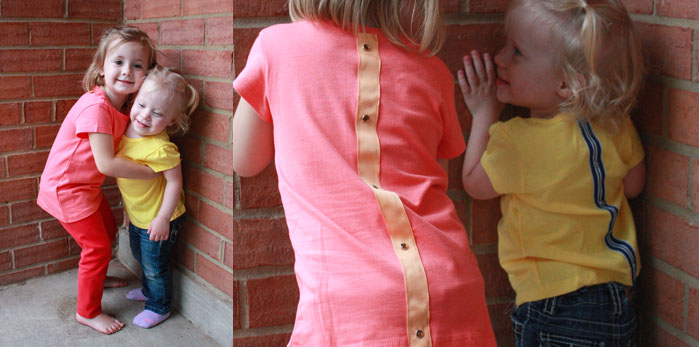
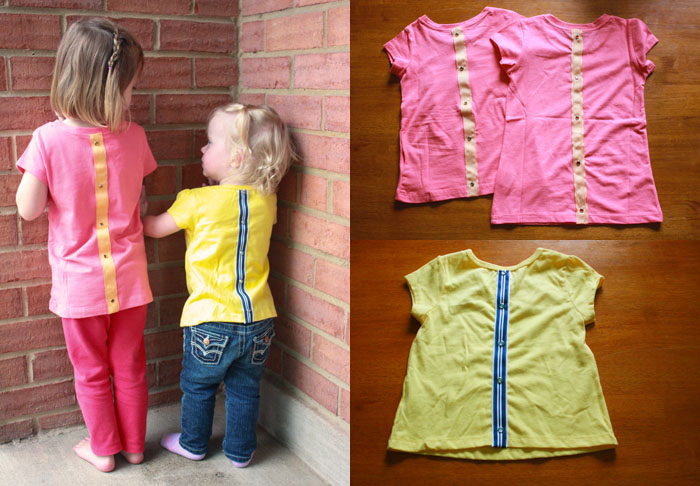
A couple weeks ago I was offered the opportunity to try out some of the products from the new Fashion Art Projects line of crafting goodness from Wal-Mart. The product that I was immediately excited about was the Fashion Decorator. I was a child of the 80’s and I maintain a healthy appreciation for studs and rhinestones:) Wal-Mart generously sent me a few sample products, including the Fashion Decorator machine, and last weekend while my sister was visiting, we used it to make these great faux button back tees.
The machine comes with a whole variety of different studs and nail heads, and I thought my nieces would appreciate the sparkly gemstones more than my boys. The Fashion Decorator is relatively easy to use, comes with clear instructions, and once it’s set up it is simple enough the kids can even help push the tool to secure the studs. Milo didn’t get a tee this time, but I’ve got a fun idea for a decorated boy tee using some plain nail heads, so he’ll get one soon.
Chelsea, Katie and I each made one shirt, and the whole project took less than an hour start to finish. We literally packed the finished tees into Chelsea’s carryon as she walked out the door to fly home! It was a super fun craft to easily make together, and I am excited to use the Fashion Decorator on a few more projects I’ve got on my list! Here’s the simple steps to decorating an ordinary tee awesome.
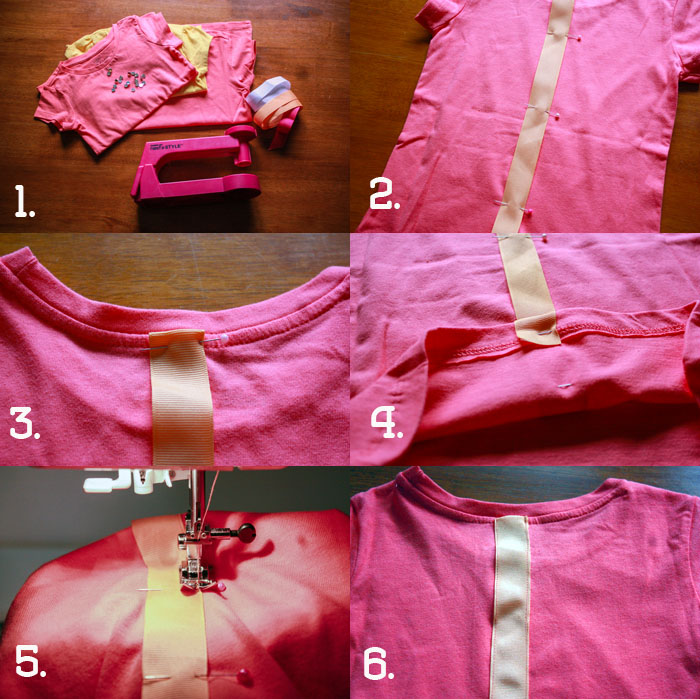
1. You will need: a plain tee, some grosgrain ribbon long enough to fit down the back of the tee, a sewing machine, and the Fashion Decorator. 2. Pin the grosgrain ribbon down the center of the back. 3. Tuck the top end under and pin below neckline 4. Fold the bottom end underneath the hemline and pin 5. Stitch doen each side of the ribbon, as close as possible to the edge 6. The ribbon should be nice and secure down the center back.
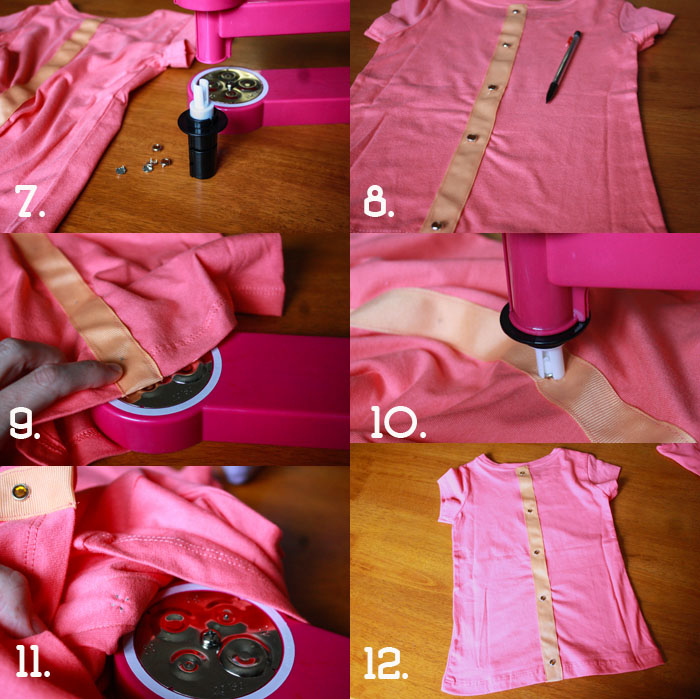
7. Choose the size of gemstone studs you want to use and fit corresponding pieces onto the fashion decorator according to instruction manual 8. Set studs onto the ribbon to get an idea of even spacing and mark with a pencil 9. Line up a pencil mark on the baseplate of the Fashion Decorator (**at this point, you may want to add a dot of fabric glue to reinforce the studs) 10. Press the gemstone stud firmly into the shirt 11. Ensure all four prongs have bend into the center of the back 12. Repeat with the remaining gemstones and admire your handiwork!
We had so much fun making these and the girls were pretty excited about their sparkly button tops. I love that the shirts are still simple and classy with some cute, unexpected bling in the back. I can’t wait to decorate something for me, too!
In addition to the sample of Fashion Art Projects products I received, Wal-Mart has offered to give some away to one of you fine folks! The giveaway prize package includes: A Fashion Decorator Kit, some Iron on Letters and Appliques, and a Bandana surface (for you to bling up!) This giveaway is open to US residents over the age of 18 and will end Thursday May 31st at Midnight EST. I’ll announce the winner on this post on Friday June 1st. (whaaa? June? Where’d that come from?!)
To enter:
1. Leave a comment on this post telling me what you might decorate if you win!
For additional entries:
*Like One Little Minute Blog on Facebook
*Like Fashion Art Projects on Facebook
*Subscribe to One Little Minute Blog in the reader of your choice
Good Luck!!


