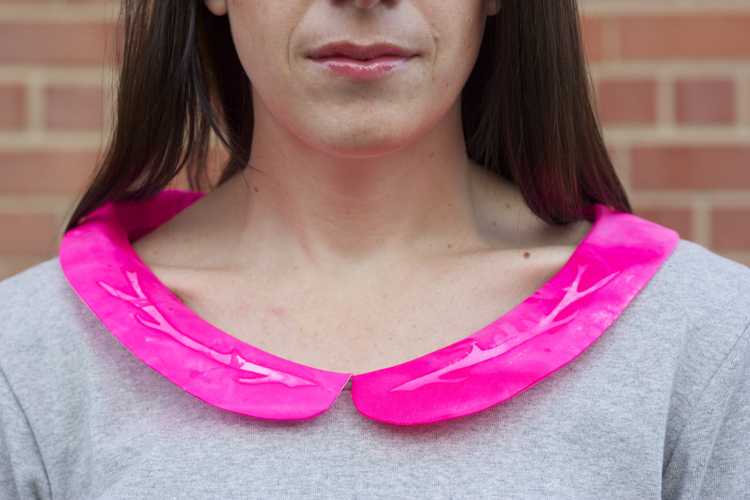
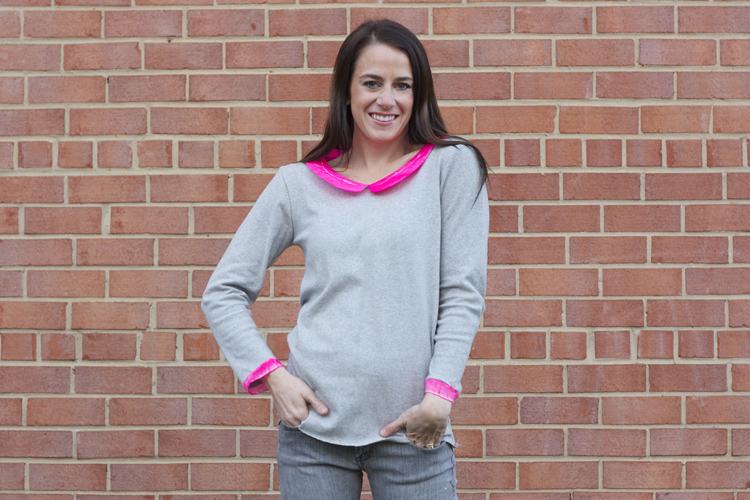
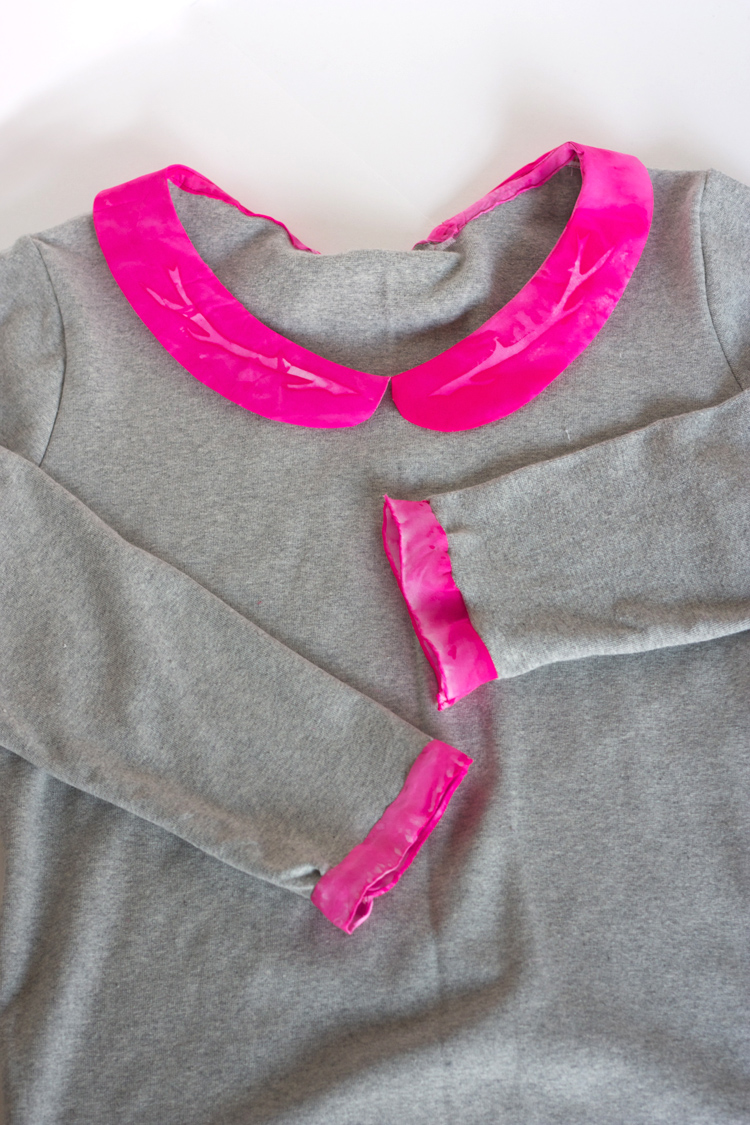
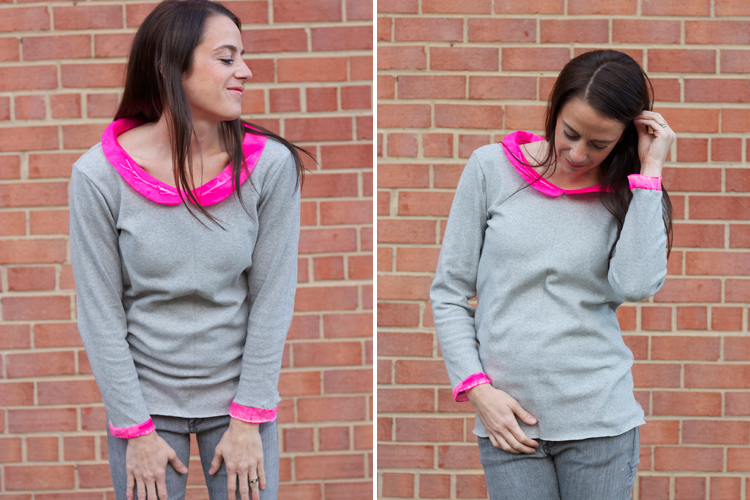
The first time I spotted this knit tee with a silk collar, I was completely smitten. There is something so cool about adding a woven element to an otherwise basic tee. For Reindeer Week I took it up a notch and sun-dyed antlers onto the silk (in hot pink!) before adding the peter pan collar to my knit tee.
The following steps will show you the basics of adding a woven collar to a tee shirt, and also the basics of sun-dying with Dye-Na-Flow. This is the first time I have used each of these techniques. Although I’m a super beginner, everything turned out great, so don’t be intimidated if this tutorial inspires you to try something new. I hope it does!
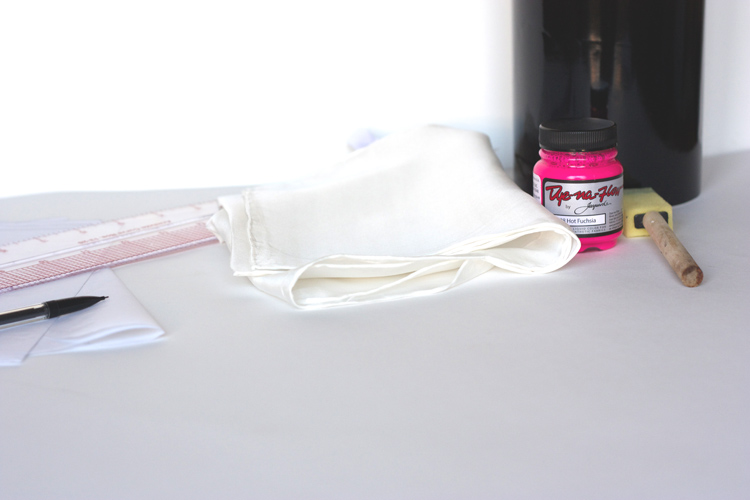
You’ll need a basic tee shirt with a higher neckline. I made mine using a pattern I made from one of my favorite tees, but any basic tee will do. You’ll also need: tracing paper (or lightweight printer paper), a ruler, pencil, sharpie, enough white fabric to cut four collar pieces (I used silk), some medium weight fusible interfacing, vinyl or sticker paper, a sponge brush, and your favorite color of Dye-Na-Flow. Brownie points if you choose Hot Fuchsia!
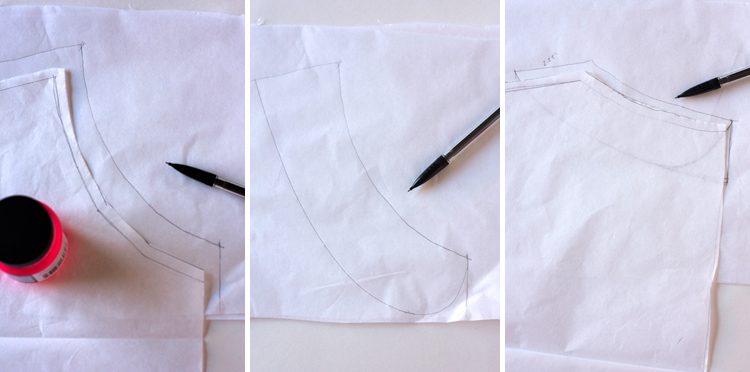
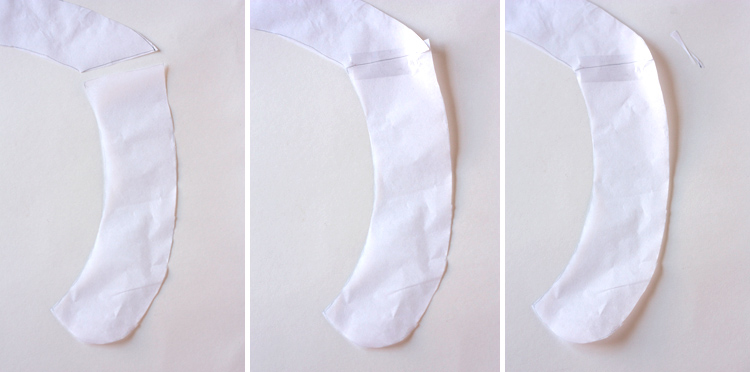
Fold your tee in half, with the front on the outside, and lay your paper down underneath the neckline of your tee. Trace right along the edge of the neckline from the shoulder seam all the way to the front center line (here I am using my pattern, and I move the paper for you to see the line I traced!) Starting from that neckline, create whatever collar shape you’d like. Mine is a gently curved collar about 2.5″ wide. Do the same on the back neckline.
Cut out your collar pattern and tape the ends together, overlapping just slightly at the outer edge (thanks for the tip Carrie!) Cut off the pointed ends from the overlap. This little overlap will allow the collar to lay flat over the shoulder, rather than sticking up like a little wing!
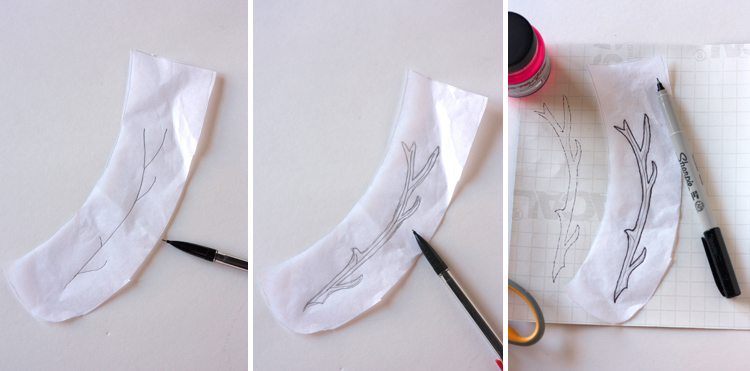
Draw a stick antler on your front collar piece, then outline it to widen a bit. Use a sharpie to trace over the outline onto the back of your vinyl or sticker paper. Flip the antler pattern to trace a reflection of the antler for the opposite collar.
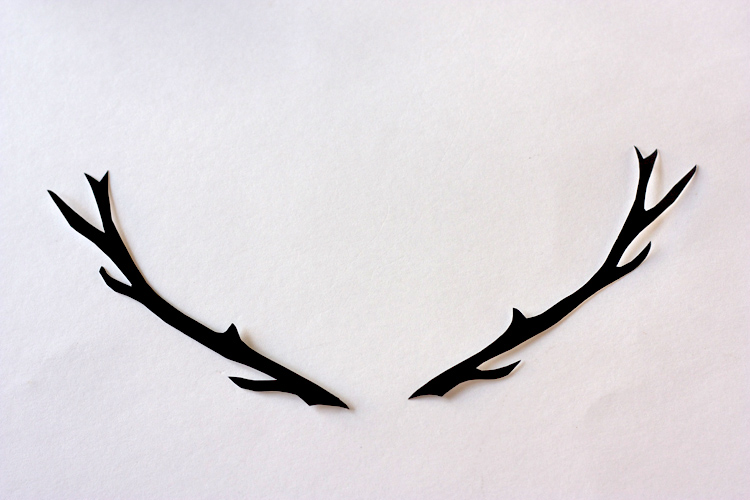
Cut around your antler pattern and admire your handiwork. You will use these pieces to block out the sun when dying the white fabric. The dye will react less beneath these antlers than on the exposed surfaces! Cool, eh?
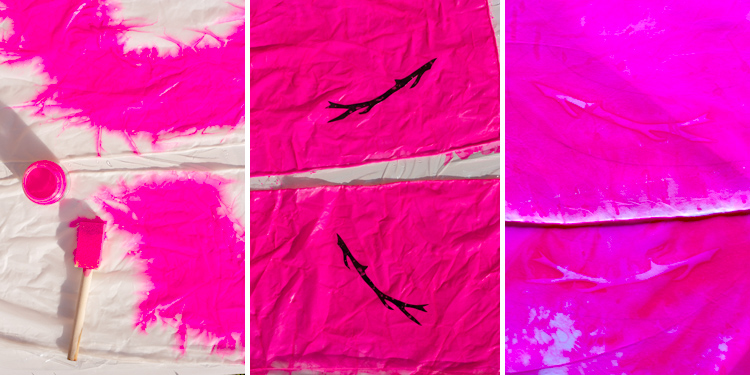
You’ll want to move your project outside to a sunny place and lay some plastic down to protect the ground. Wet your fabric with water and lay it flat onto the plastic. Paint the Dye-Na-Flow onto the wet fabric. Peel the paper backing from the vinyl antlers and stick them down onto the painted fabric, then leave it all to dry in full sun. When the fabric is dry (it took my silk about 2 hours), peel off the vinyl stickers and iron to heat-set the design.
I didn’t know what to expect, so I am thrilled with the cool variations in my antler design. I appreciate the subtlety of the pattern on such a bright color!
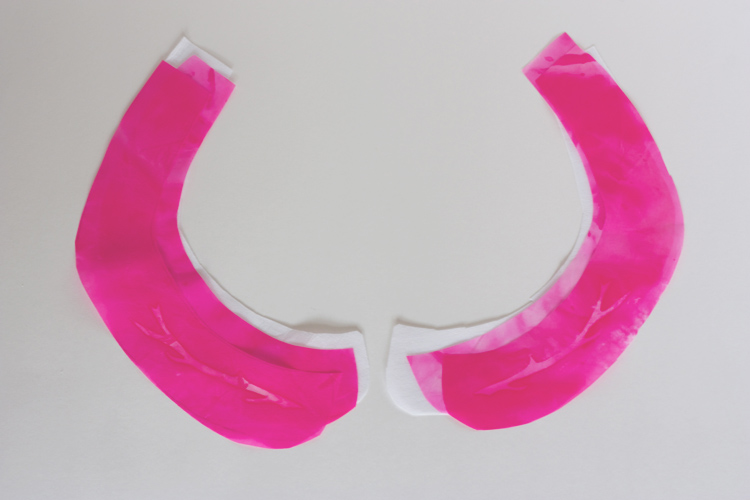
At this point, cut around your collar pattern, centering the antler design on the front collar. Cut the same pattern a second time out of silk (without an antler design) and a third time of medium-weight, fusible interfacing. Fuse the interfacing to the plain silk piece (not the one with the antler design.) Sandwich the three layers as shown, with the interfacing on the bottom, and the antler design on the top.
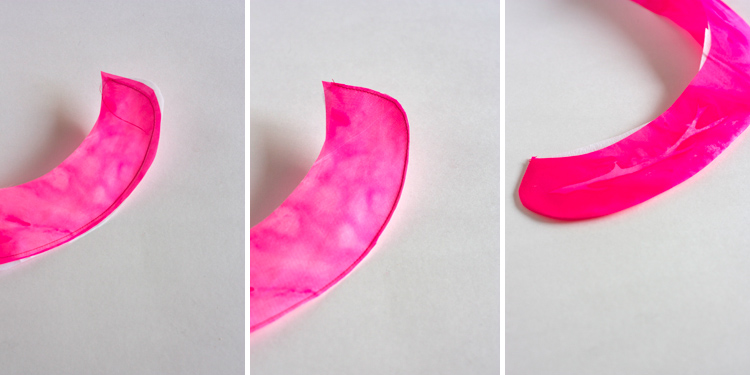
Sew around the bottom edges of the collar with a 1/4″ seam allowance, then trim the curve closely (thanks for the tip Jen!) Turn the collar right-side out and press. Repeat with the other side.
Now, to add the woven collar to the knit tee, I used a bias facing. My neckline is wide enough that it fits over my head without stretching. If your tee has a narrower neckline, you’ll need to add a button or short zipper to the back center, because the neckline will no longer stretch once the collar is on.
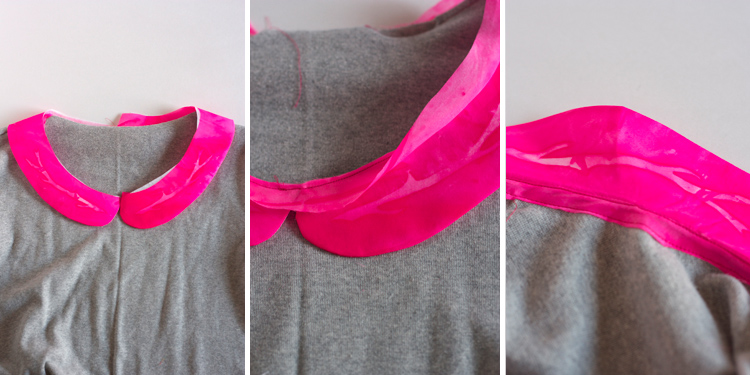
Lay both collar sides down on the tee, center, and pin in place. Cut a 1″ bias strip from the silk and stitch it onto the right side top edge of the neckline, with a 1/4″ seam allowance. Turn, press, and understitch. Then fold the raw edge of the bias stip under, press and pin, then stitch onto the wrong side of the tee at the neckline, keeping the collar out of the way of the stitches. Press, press, press.
If you’re feeling especially fancy, add a couple strips of silk to the wrists. You just measure the sleeve circumference at the opening, cut a strip of silk 1/2″ longer than that measurement, then sew into a loop (right sides together) with a 1/4″ seam allowance. Align the seams, with right sides together, and stitch along the inside edge with a zig zag stitch. Press the seam and hem the silk.
There is something really fun about this tee. Of course the hot pink is rad, and it’s great to dress up a basic, comfy tee shirt with some silk, but I also love how the antler pattern on the collar invites you to take a second look. I’ve already worn it twice, and when I do I feel so hip! Who knew silk, jersey, fuchsia, and reindeer could work so well together?
Tomorrow I’ll be sharing a really easy project that would be fun to make with (and for!) your kids. Mine love theirs, so come check it out!

