 My kids are obsessed with animals, and with dressing up. So it was only a matter of time before I found a way to marry the two in a more socially acceptable than full-costume-everyday sort of way! I’m excited to partner with Animal Jam to share a fun and simple DIY for a couple different animal hoodies that can be worn anytime (and if your kids are like mine, that means all-the-time.) I kept them super simple in style and steps, and I love how they came out.
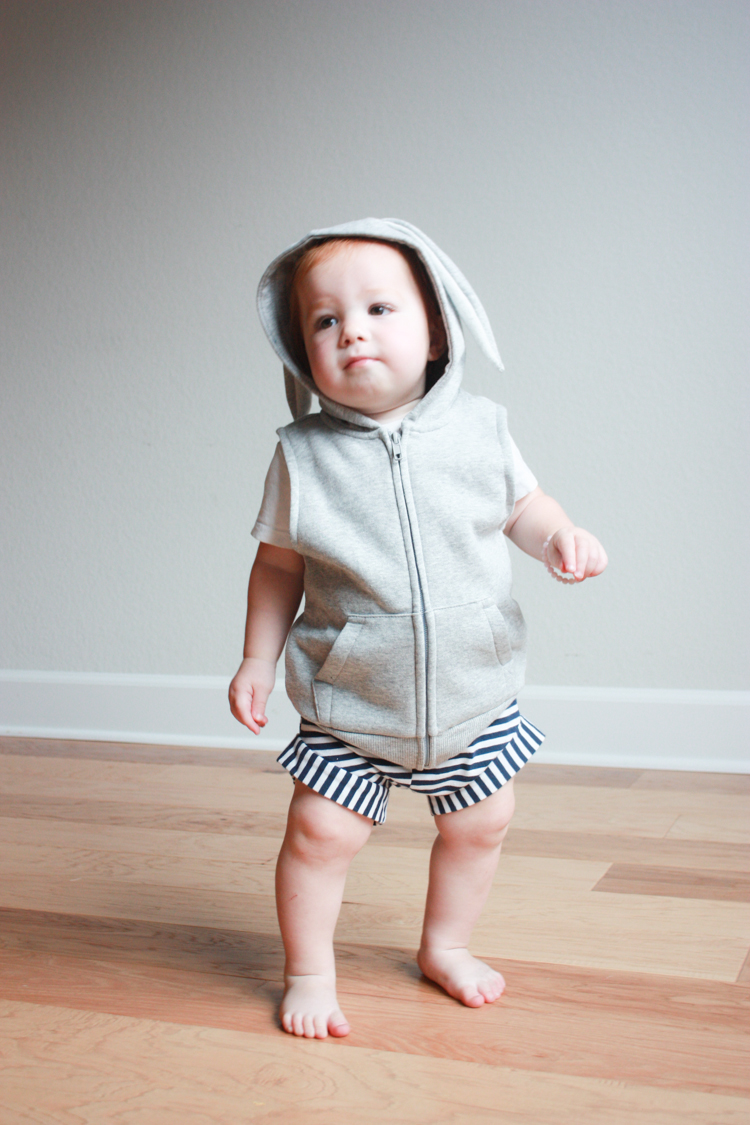
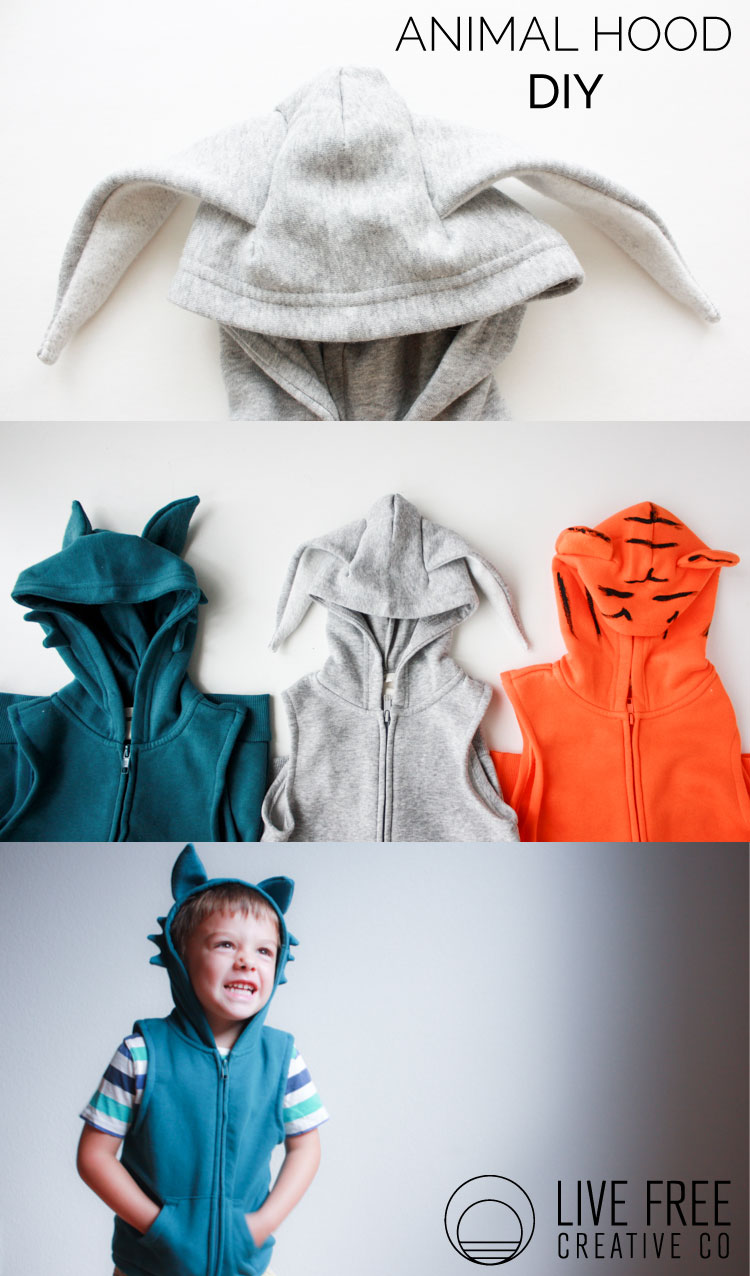
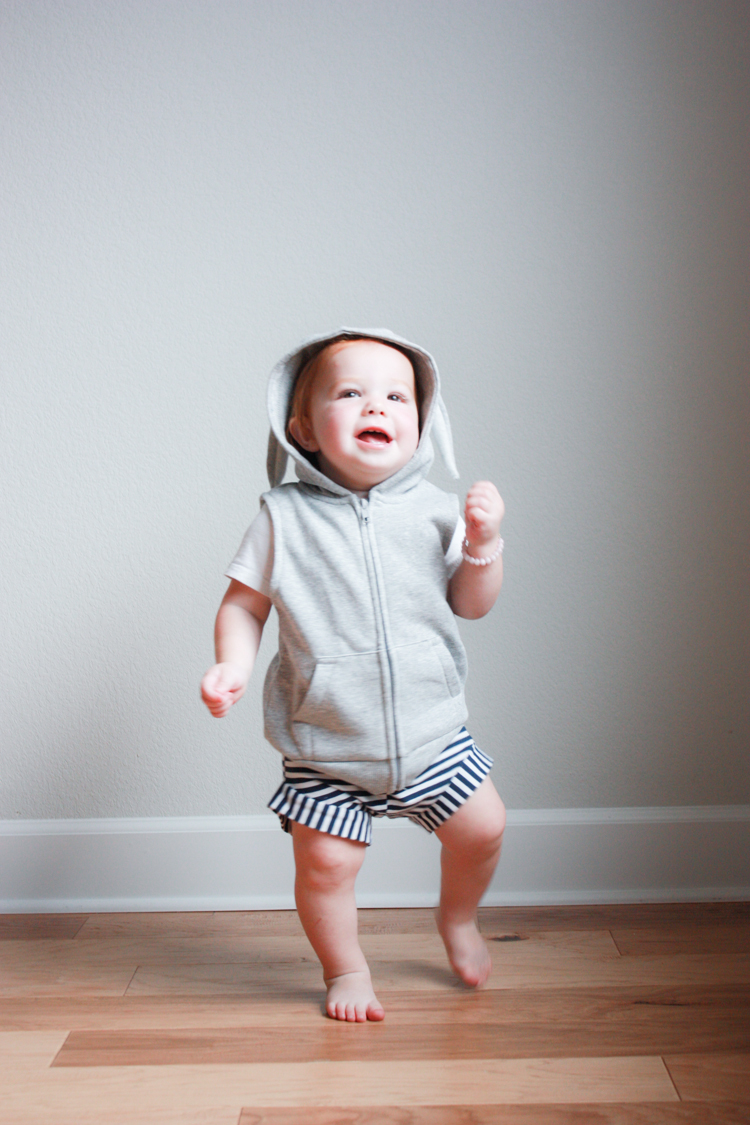
 The kids each chose their favorite Animal Jam character for their animal hood (I chose for Plum because, baby in bunny ears? How could I resist!)
My boys have just started getting into playing computer and video games, and I am quite selective about what I let them use. Animal Jam has been really fun for them and I appreciate that it has been developed as a safe, learning environment. They love creating their avatar animal, going on adventures and collecting new animal facts along the way. When they’re a little bit older, I’m sure they’ll enjoy the social engagement piece, too. We just learned about the Animal Jam Academy, where we can take some of the learning offline in the form of simple science projects and coloring pages. These will be a total lifesaver in the upcoming long days of summer!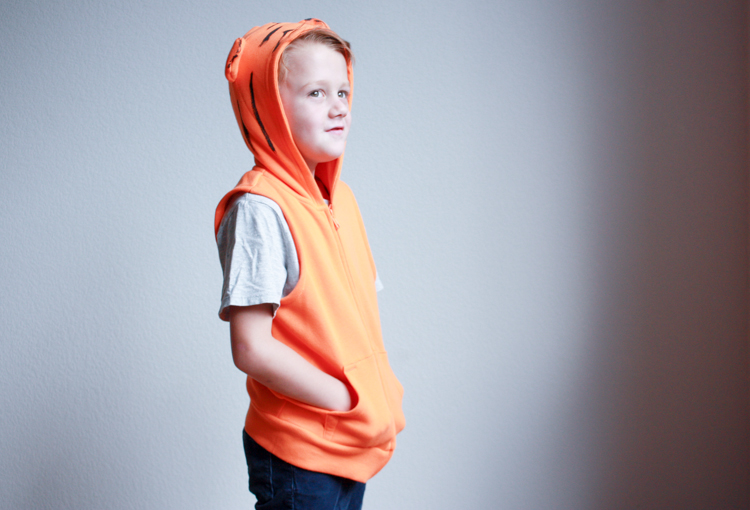 Do you have a kid who loves animals, too? He or she would probably love Animal Jam, and you can follow the simple steps below to create a bunny hood, wolf hood, or tiger hood, or use the ideas to make your own favorite animal to become offline!
For each animal hoodie, all you’ll need:
a plain, zip-front, long-sleeved hoodie
scissors
a sewing machine or serger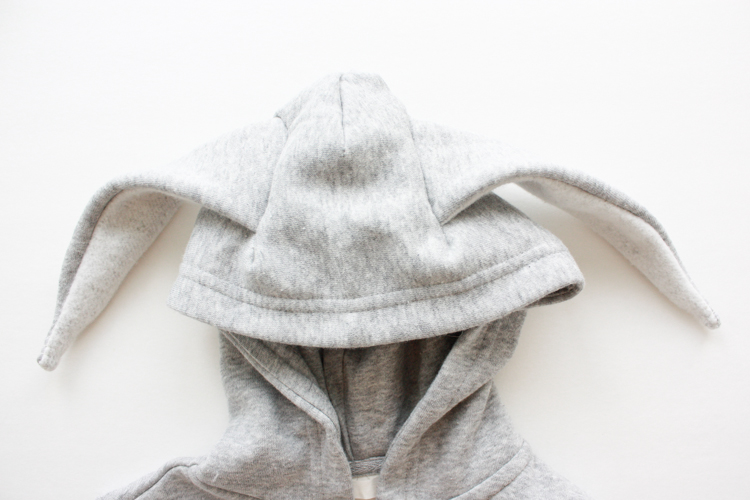
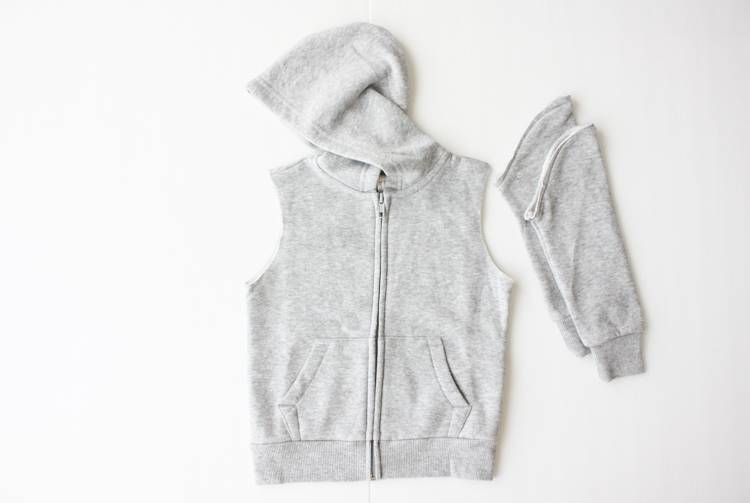
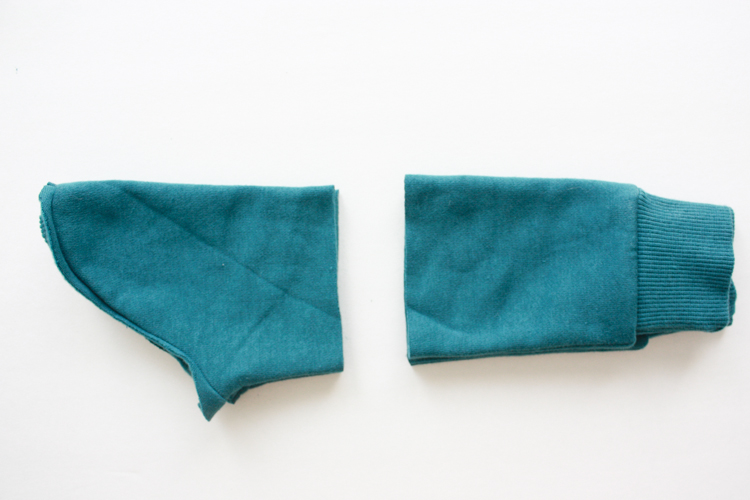
For any of the animals, you’ll start by cutting the sleeves off right on the inside of the seam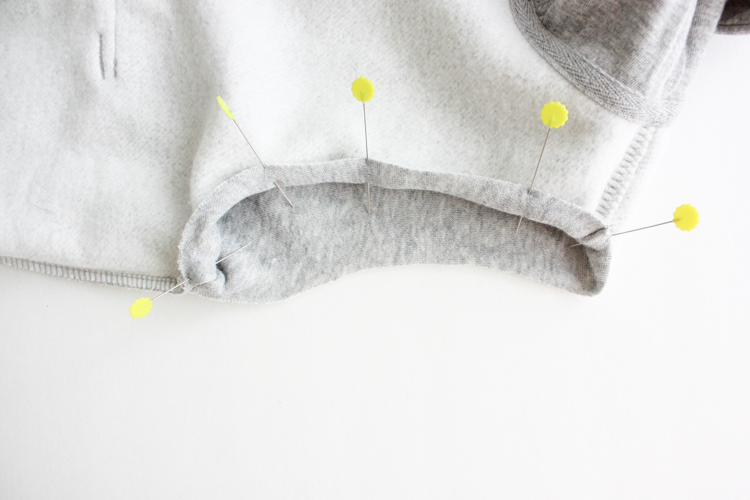
Finish the arm holes back off by turning the sweatshirt inside out, folding the raw edge over about 1/2″, and pinning. Because the fabric is stretchy and knit, it should stretch along the rounded hole no problem, and it won’t fray.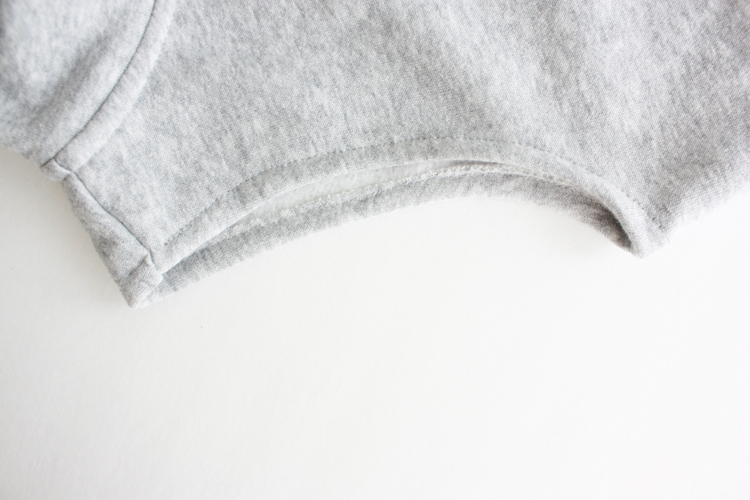
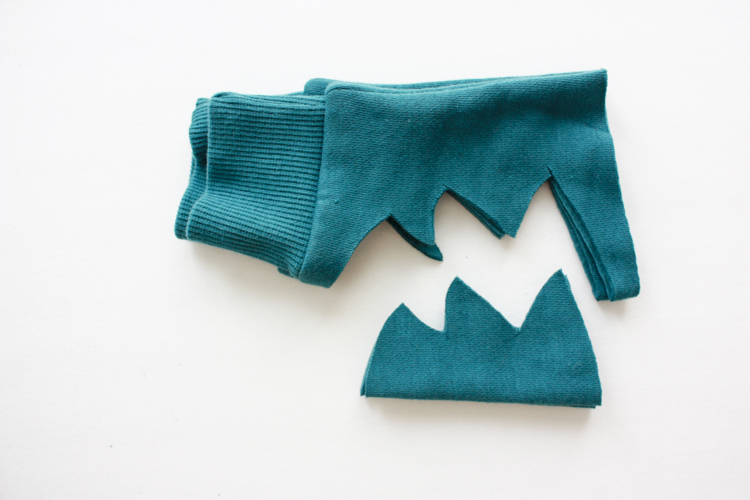
Stitch a straight stitch along the edge to finish off each arm hole.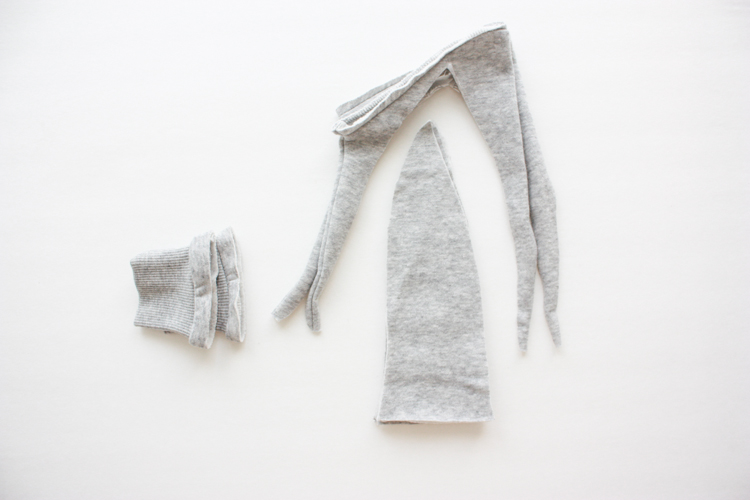 Next we’ll do bunny ears. Cut the cuffs of each sleeve, and cut a long skinny bunny ear shape through both sleeves (you’ll have four layers of fabric).
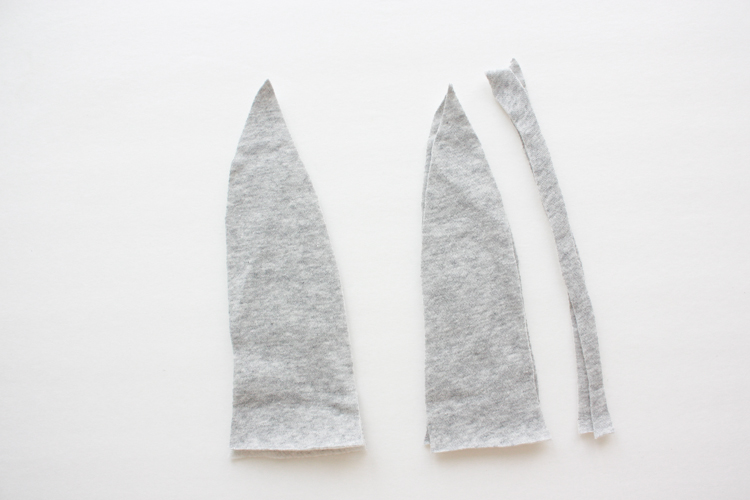 We’re going to use one layer for the outside of the ear, and one for the inside flipped fuzzy-side out. So, cut about 1/2″ off of the edge of two of the ear pieces.
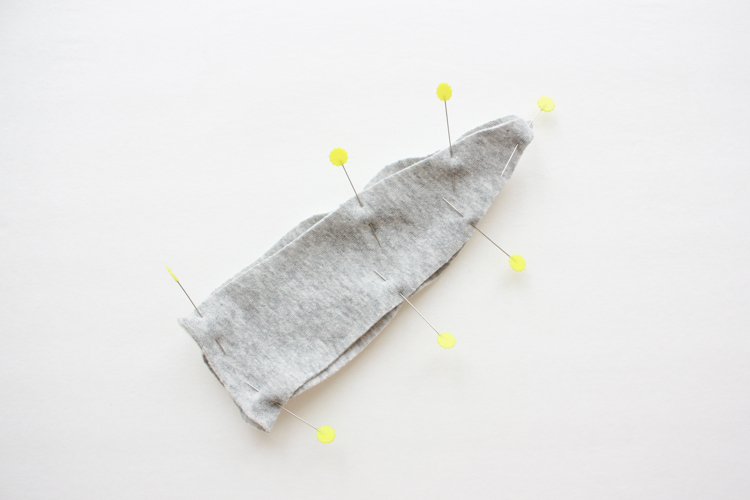
With the fuzzy side of the smaller ear piece against the smooth side of the larger ear piece, pin around the edges. The larger piece will be a bit baggy in the back.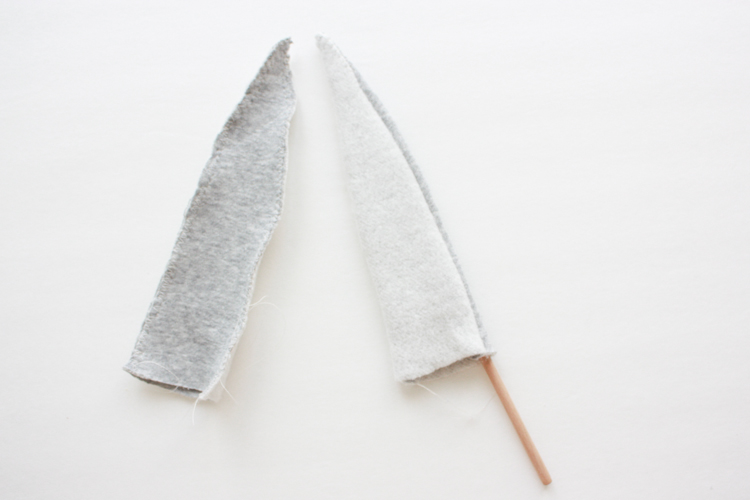 Stitch around the edge and repeat on the other ear, then turn them right side out.
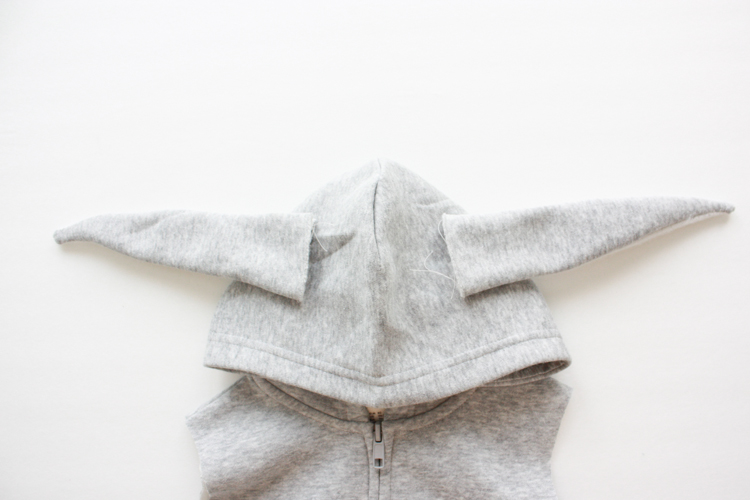
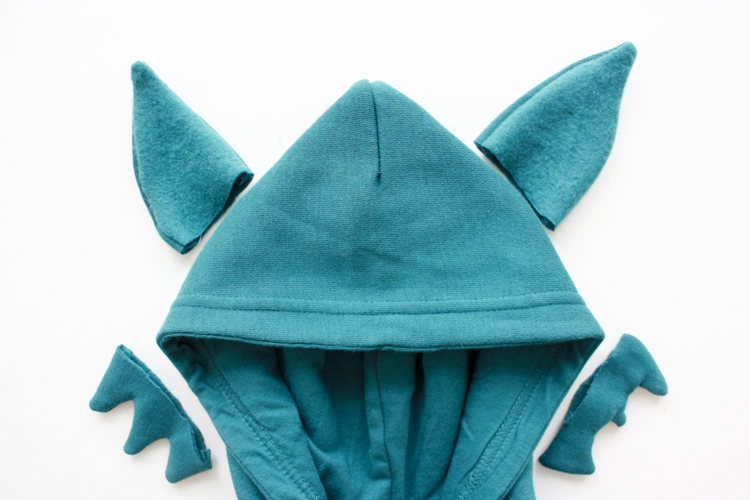
Fold the front of the hood down flat and lay out where you’d like to position the ears. I spaced them a couple inches from the center, about half way back on the hood.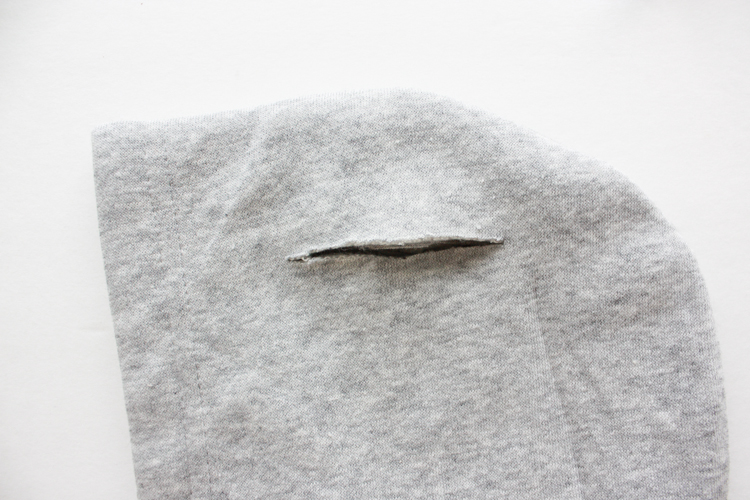 Cut a straight hole into the hood on either side, just as wide as the base of the bunny ears.
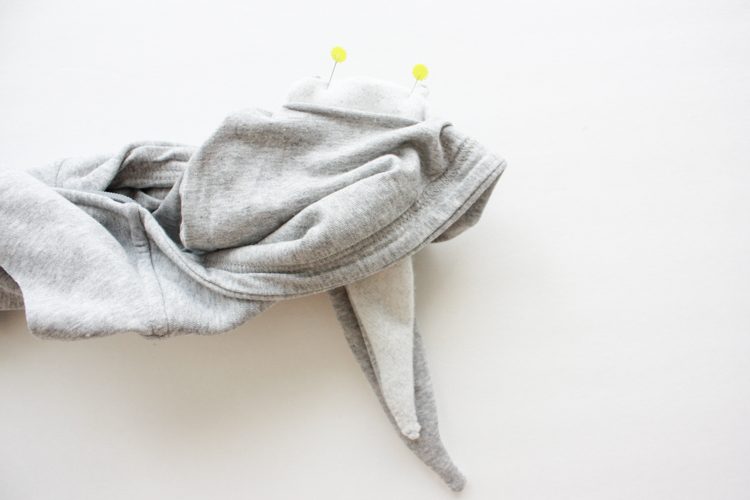 Being careful to have the inside of the ear (the fuzzy part) facing down on the hood, tuck the end of each ear into the hole you cut, and pin all of the layers in place.
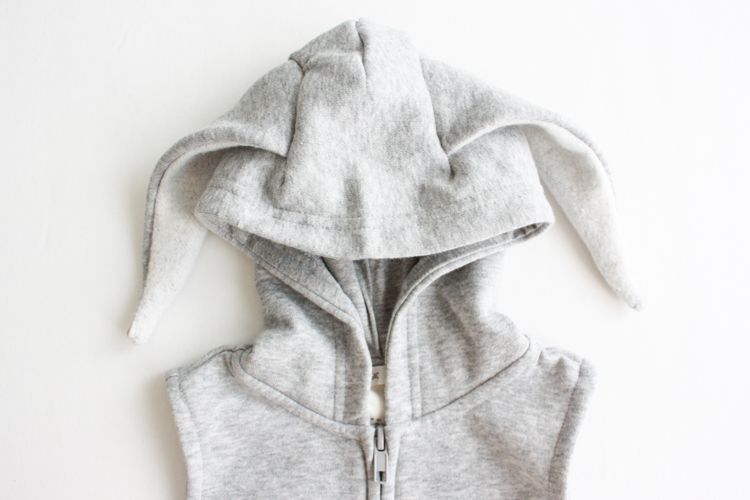
Stitch up the ear+hood layer sandwich, and trim the thread.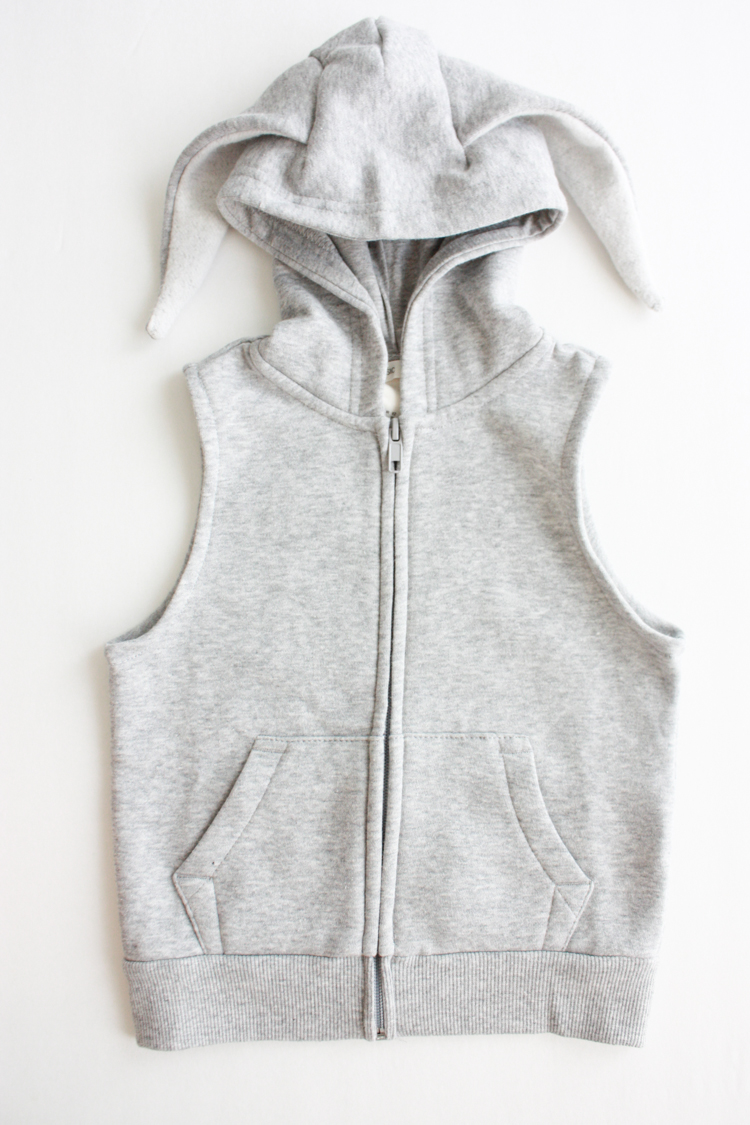 Cute, simple, and so fun!
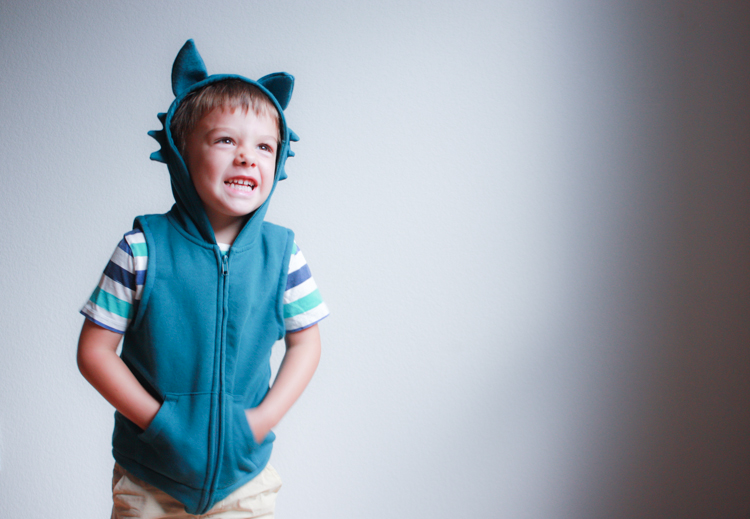
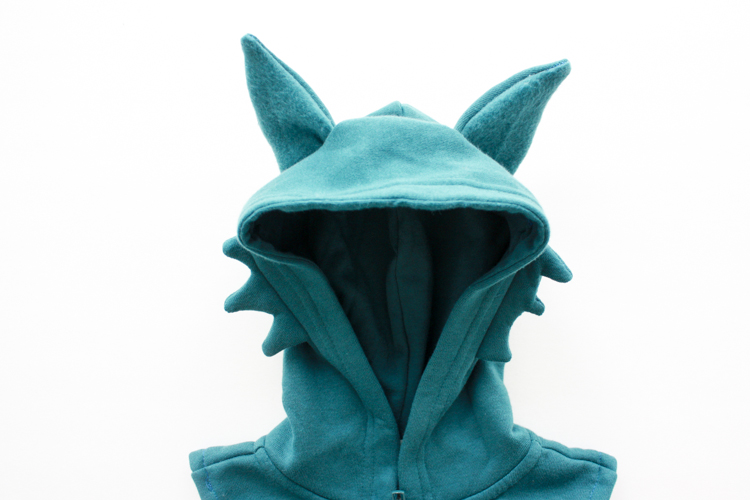 Let’s do the wolf next.
 Cut off the sleeves and finish the arms as above. Then cut the arms in half.
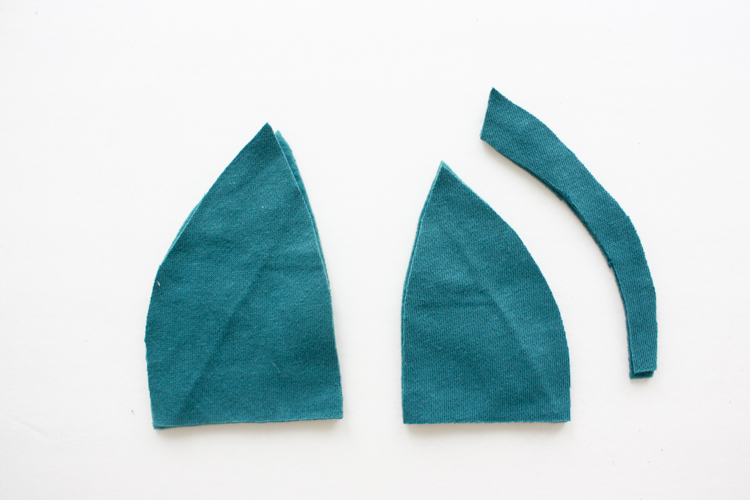 With one half, cut smaller, pointed ear shapes (4) and then cut 1/2″ off of 2 of them to be the inner ear pieces.
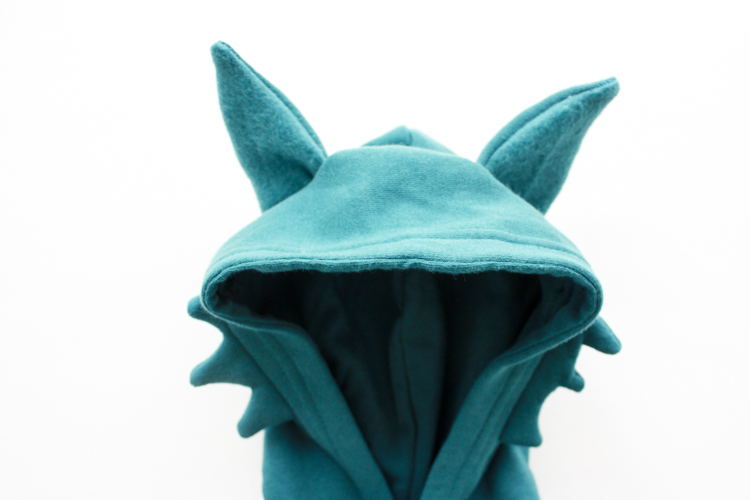
 With the other half of the arms, cut a small fringe shaper to be used as the fur sticking out from the wolf cheeks.
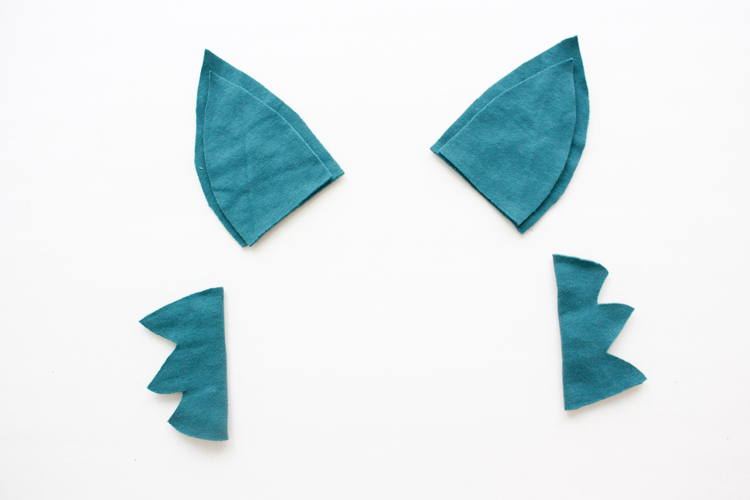 The pieces will be positioned like this around the hood.
 Make the ears the same way you did the bunny ears above, and make the fur by pinning right sides together, stitching around the pointed edges, then turning right sides out. Align them around the hood.
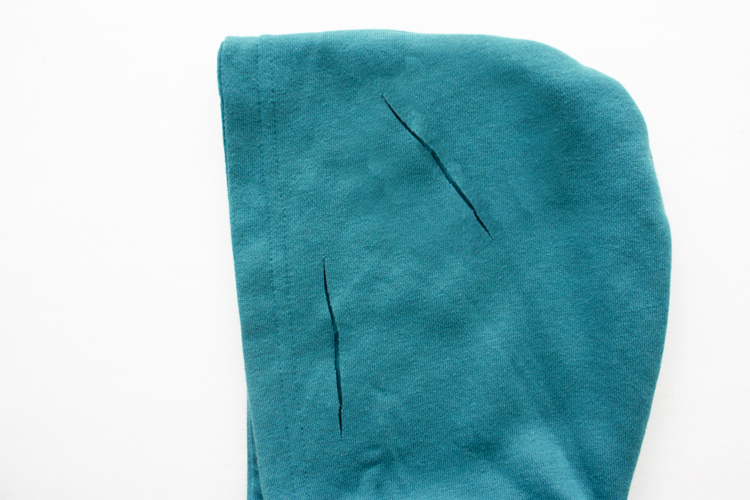 To make the wolf ears stick up a bit more than the bunny ears, cut the ear hole on the diagonal, rather than flat. The fur holes should be about parallel with the hood hem.
 Pin each ear and fur piece inside the holes and stitch in place. Trim the threads.
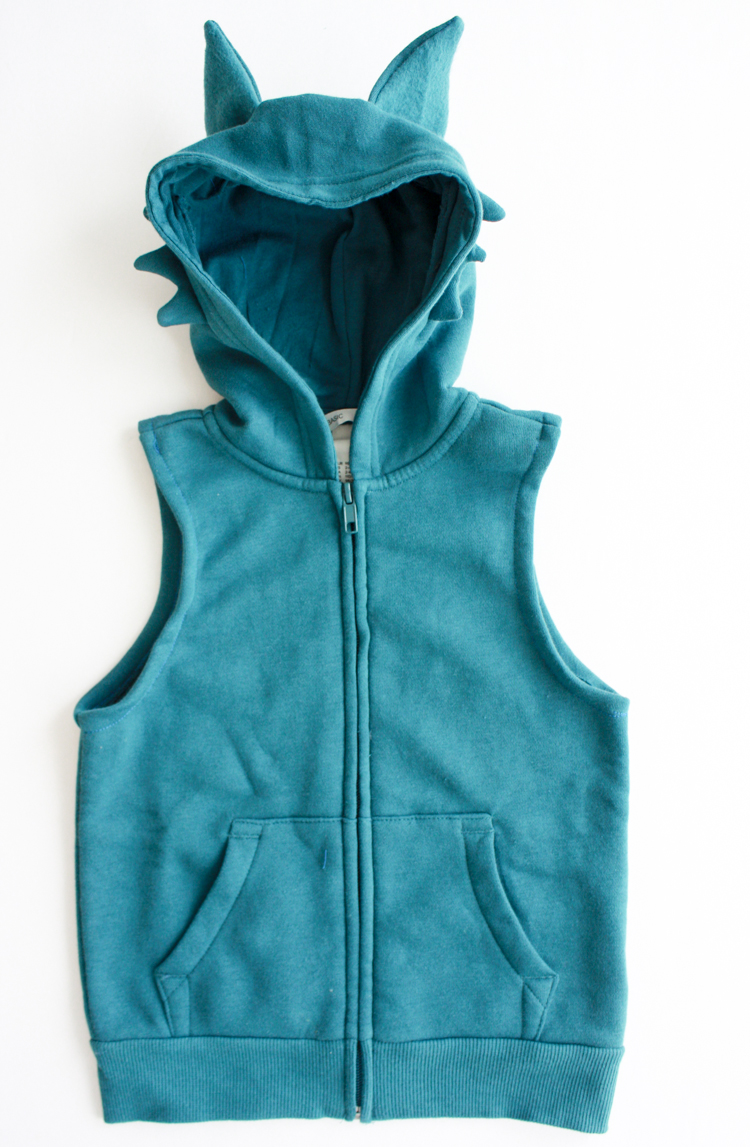 I thought about trying to add eyes or some sort of snout to the wolf to make it more obvious, but in the end I love it simple, and it looks like a wolf to me!
 Next up, the tiger hood!
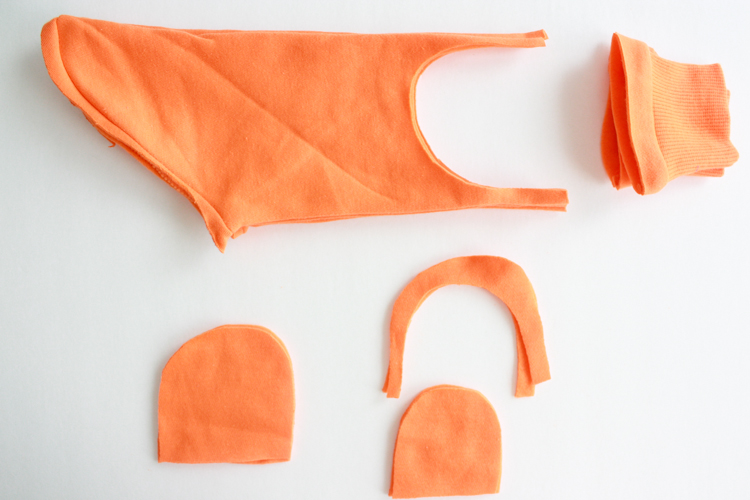
This time after you finish each arm hole, cut a small, rounded ear shape (4) from the sleeves, then take 1/2″ off of 2 for the inner ears (feel familiar?)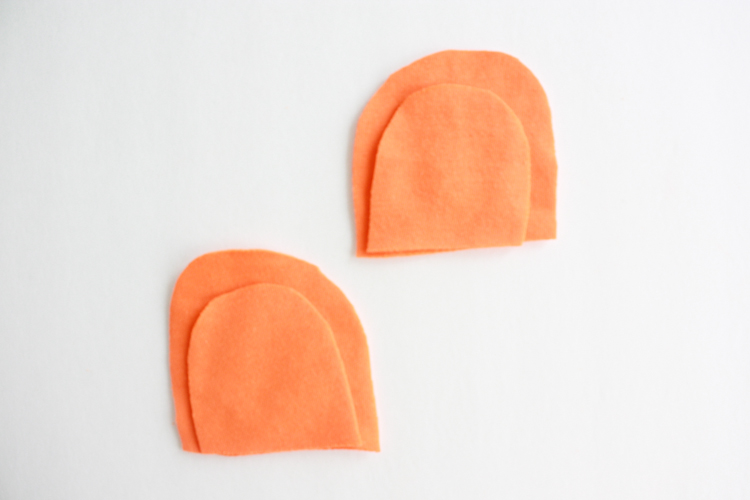 Again match the fuzzy side up to the smooth, and pin and stitch, and turn right side out.
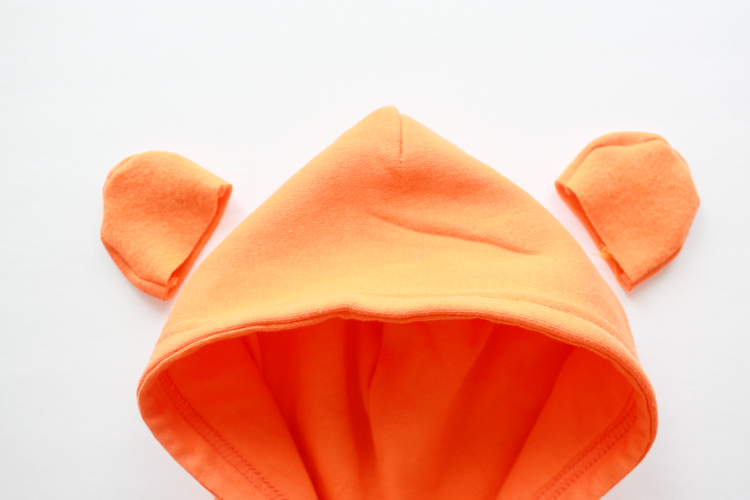 Lay out the hood and determine ear placement.
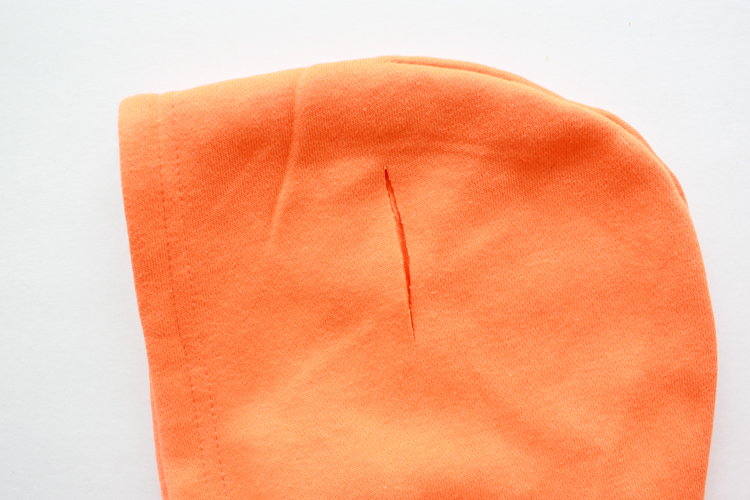 This time, because tiger ears stick straight out, cut almost vertical holes into the hood.
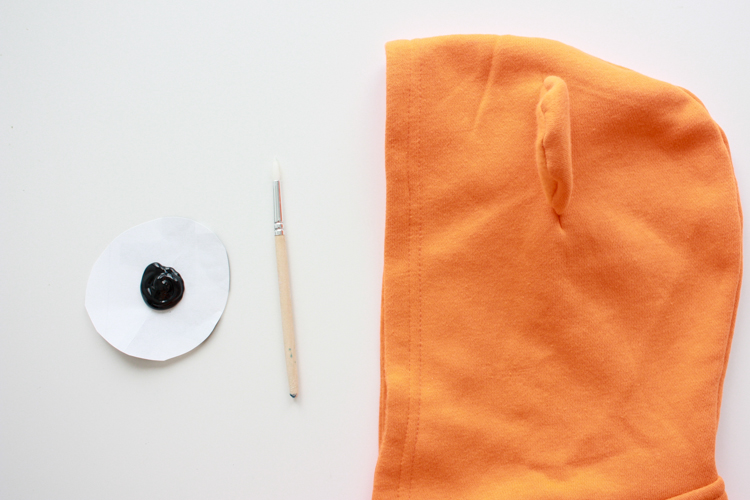 After you pin and stitch the ears into each side, get some black fabric paint out to do the tiger stripes. I still prefer them simple, but without the stripes, the tiger just looks like an orange bear!
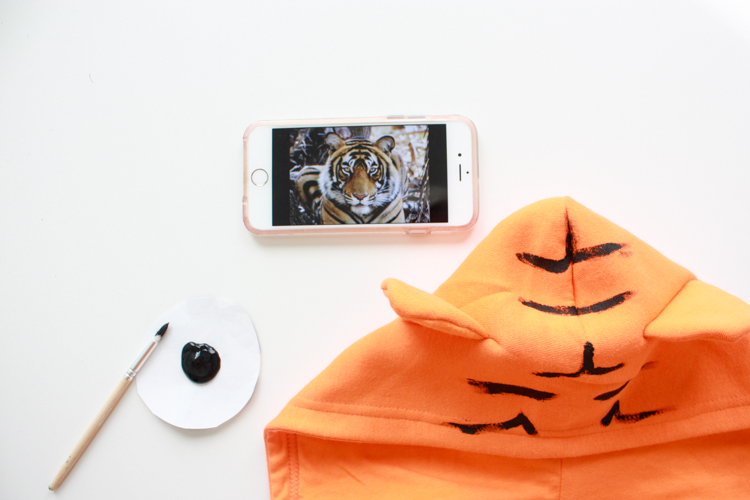 I referred to a photo of a tiger as I made some simple lines along the hood center and sides. I also painted the tiniest bit onto the round tip of each ear, but I left the vest itself stripe-free.
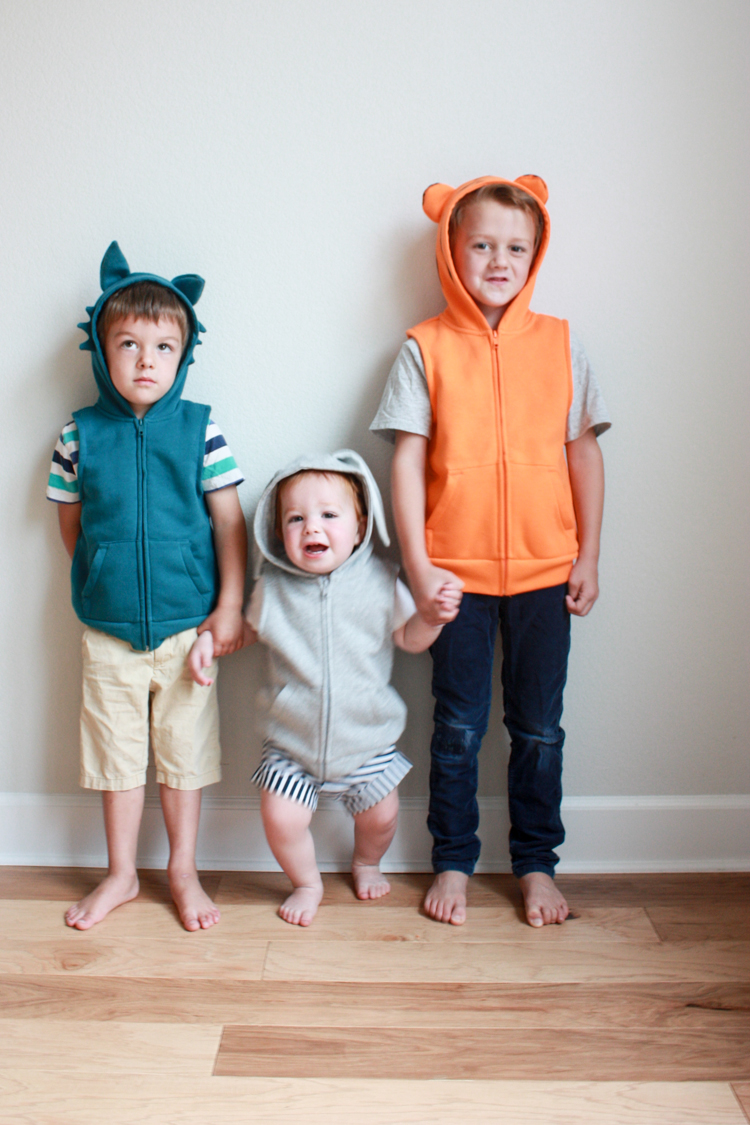
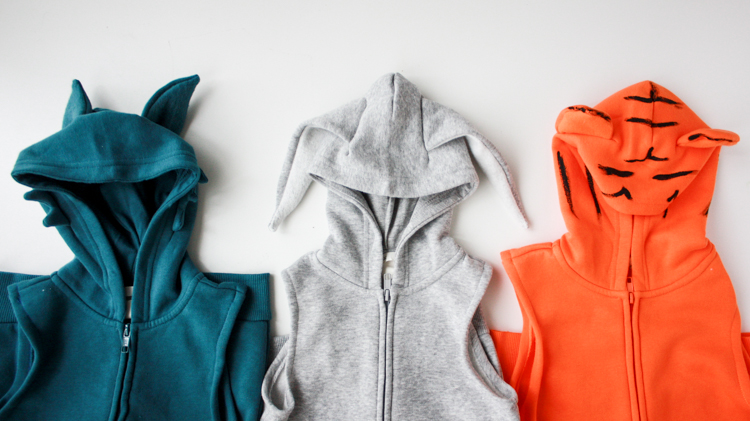
And there you have it! Three simple Animal Jam wild animal hoodies for your kids (or yourself!)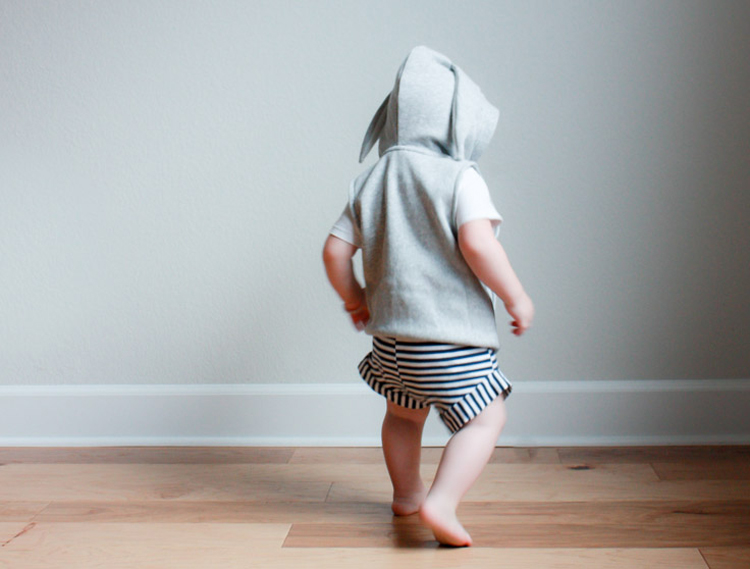
 I think these would be fun for any animal, too. Big ears for an elephant, or a full circle of fur bits to make a lion’s mane. By changing the ear placement the river could be a monkey, or change the color and make him a panda! Let your imagination and creativity run wild!
This post created in partnership with Animal Jam in association with National Geographic. Thank you for supporting the collaborations that make DIY’s like this possible!