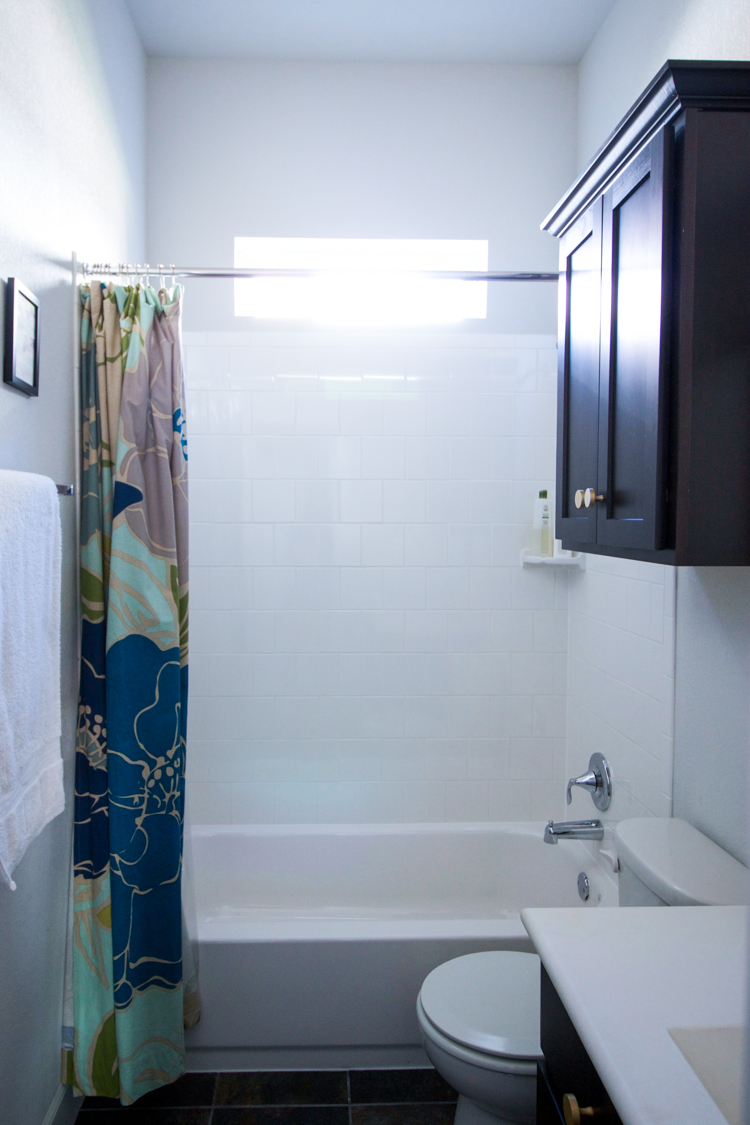
When we built our house two years ago, we only had two weeks to choose all of the interior finishes so that the builder could be efficient once they broke ground. I paid closest attention to the kitchen and living areas, where I knew we’d spend the most amount of time. Then I chose what felt like beautiful, timeless basics for everywhere else, knowing I could change and upgrade slowly as the years went by.
Well, after two years, I’m thrilled to be beginning some small DIY design details that will make our home feel even more like our own. I started out with this really simple project that has huge impact: staining tile grout in the bathrooms.
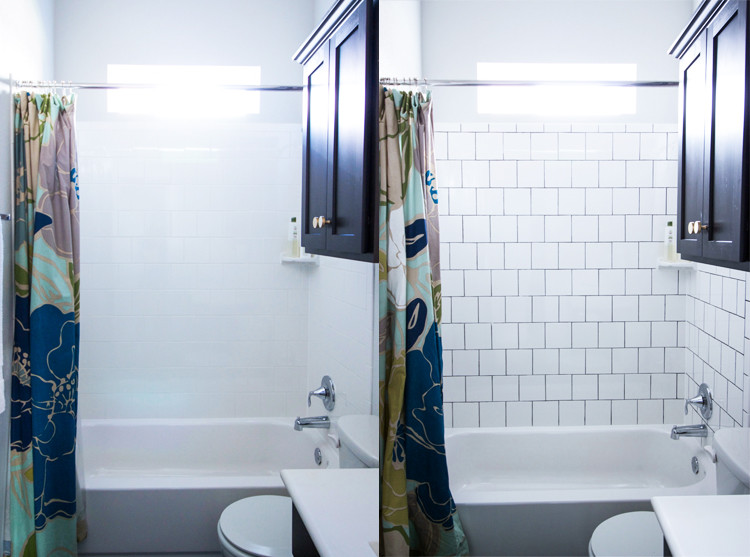 I love the look of the square white tile we chose for all three bathrooms, but with the white grout it disappears! The clean, classic tile is pretty, but with dark grout it pops and looks custom, intentional, and modern. This simple staining tile grout DIY project would just as easily work on any existing home where you didn’t choose the tile or grout, but want to give it an updated look.
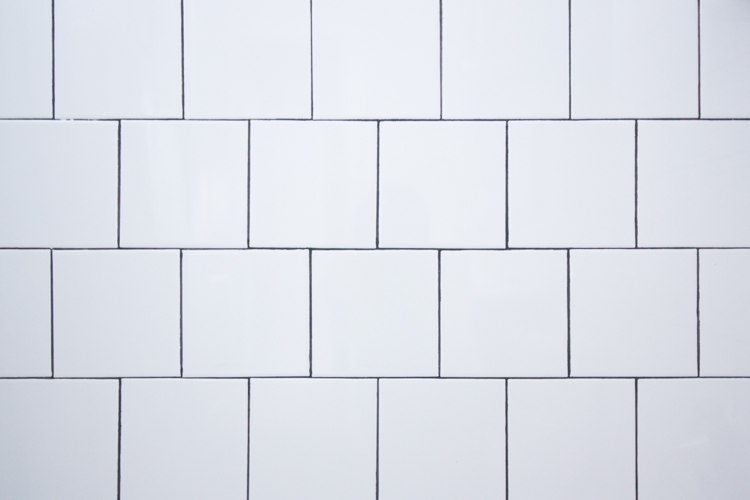
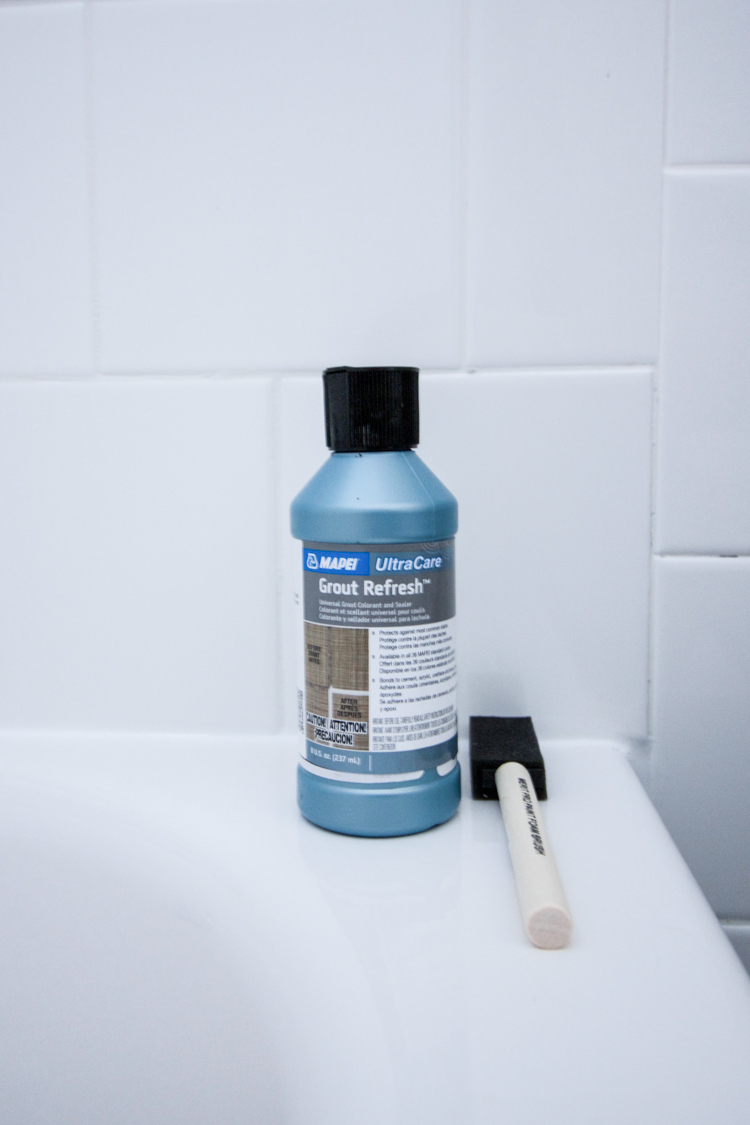 The change from light to dark is as simple as brushing on and wiping off some dark grout stain, letting it dry in between. I found this grout refresh at a local tile store, and saw some is also available online. The stain and sealer adheres and penetrates the porous grout, but is easily wiped off of the ceramic tile, so when you’re finished the lines are thin and clean looking like the original grout. Let me give you a closer look.
 Start with clean, dry tile and grout. I did a test area before I began completing the entire shower enclosure, and it worked beautifully.
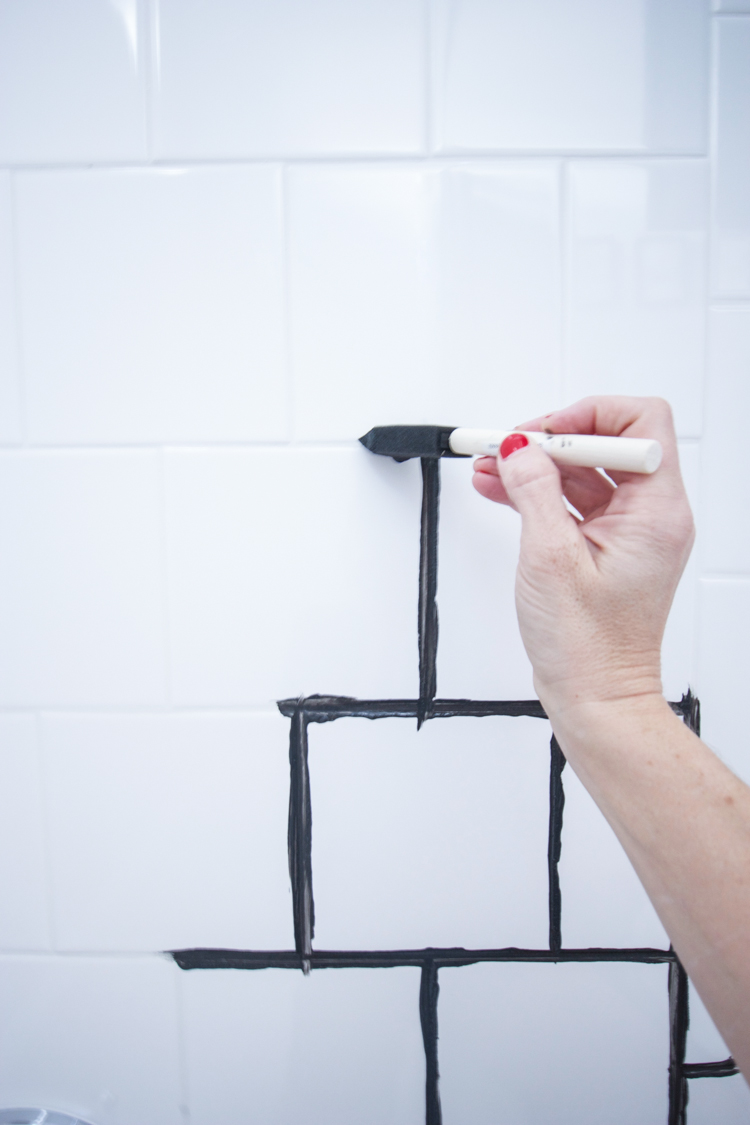 Shake the bottle of stain vigorously, then pour about 1/2 cup into a plastic cup for easy application. Using a foam brush, paint the stain and sealer along the grout lines of the tile. It’s not a big deal if you paint outside of the lines, but know whatever you paint on will have to be cleaned off.

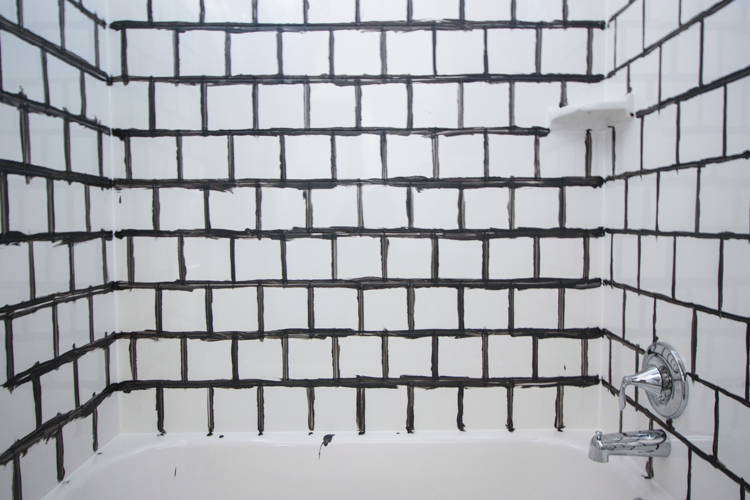 My lines definitely got thicker and messier as I went along because my arm was getting tired! Once all of the stain is painted on, wait for 30 minutes or 1 hour, according to the instructions on your specific label. I started cleaning some of the stain off after about an hour, but then I was super tired and went to bed. Luckily, even after 24 hours, when I finally got back to it, it was just as easy to wipe off.
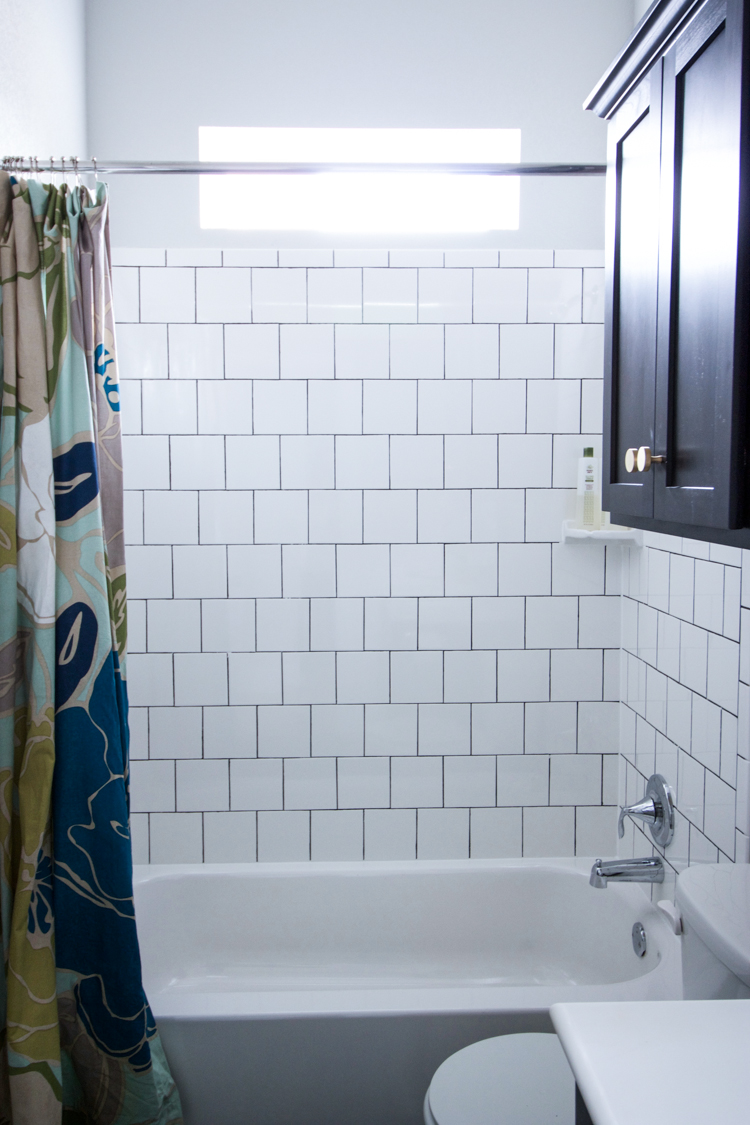
To wipe the excess stain off, you’ll want to spray it with water to loosen it up a bit, then use a damp cloth to wipe down. The stain will come off in sheets and sections, like peeled paint. It gets a bit messy, and I found the best way for me to clean it all off easily was to fill the tub with about 2 inches of water, then start at the top corner of a wall, dipping and rinsing the cloth in the tub water between wipes to rinse off the stain. In this way, I was able to clean each of the walls in about an hour. Once the thick lines had been wiped away, I went back and gave some detailed attention to the grout lines, making sure they were clean and even. 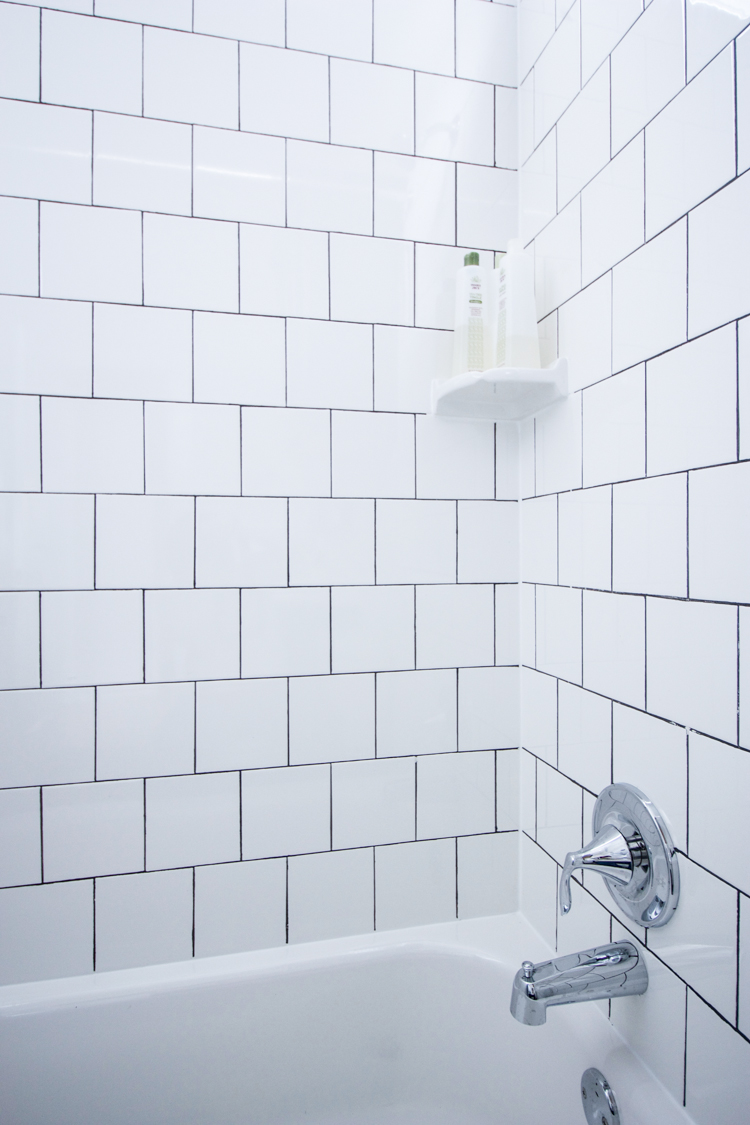 There are two or three tiny spots that I need to go back and touch up, where my wiping took a little patch of the stain off the grout. Overall, the finished tile and grout look amazing, and far more interesting than before. I love the look and can’t wait to do some grout staining in the other bathrooms. The stain says to wait 24 hours after cleaning off to use the shower and get the tile soaking wet. Because it’s a stain and sealer, I think the dark will not only look nice, but protect and seal the grout from wear over time.
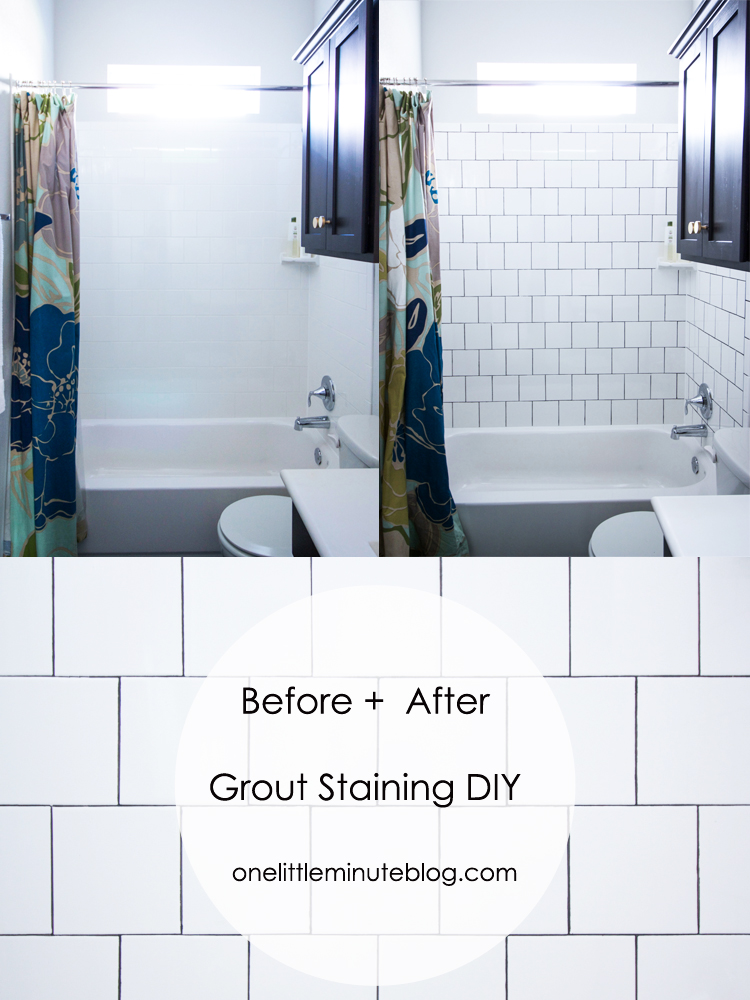
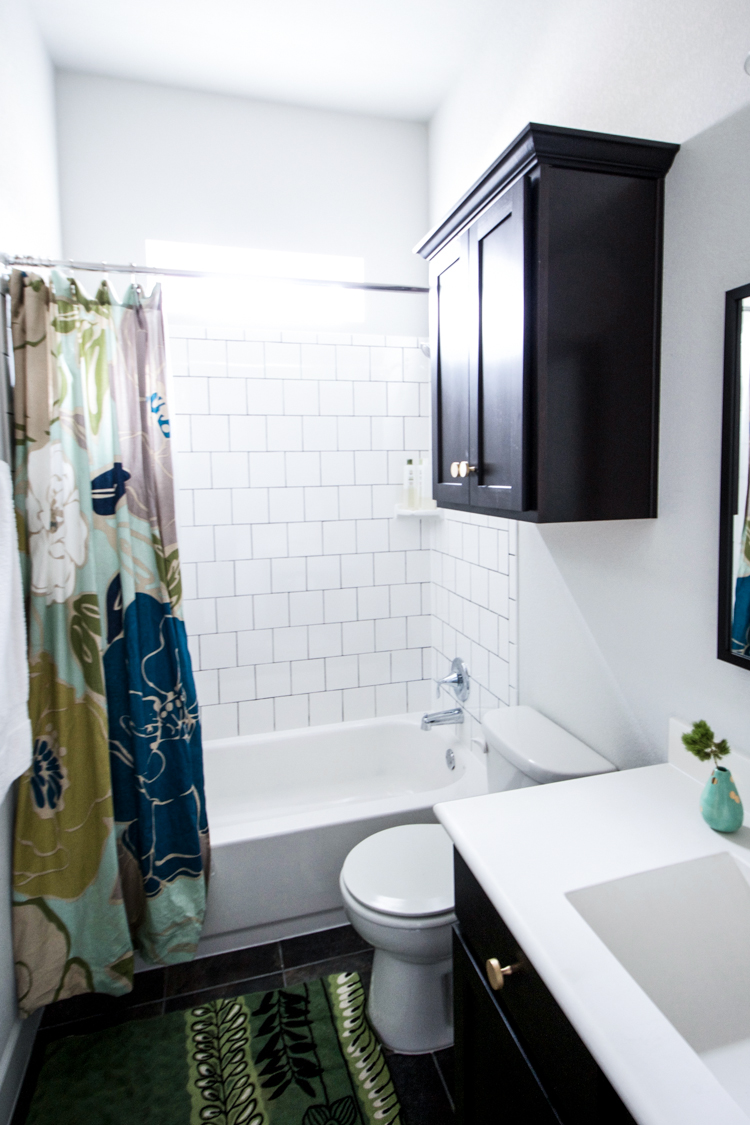
 For under $20, staining tile grout is quite an effective and inexpensive update! I couldn’t be happier with how it turned out in our guest bathroom, and am motivated to keep finding small projects to continue customizing our home. (Next up this room gets wallpaper, floating shelving, and some new linens.)

