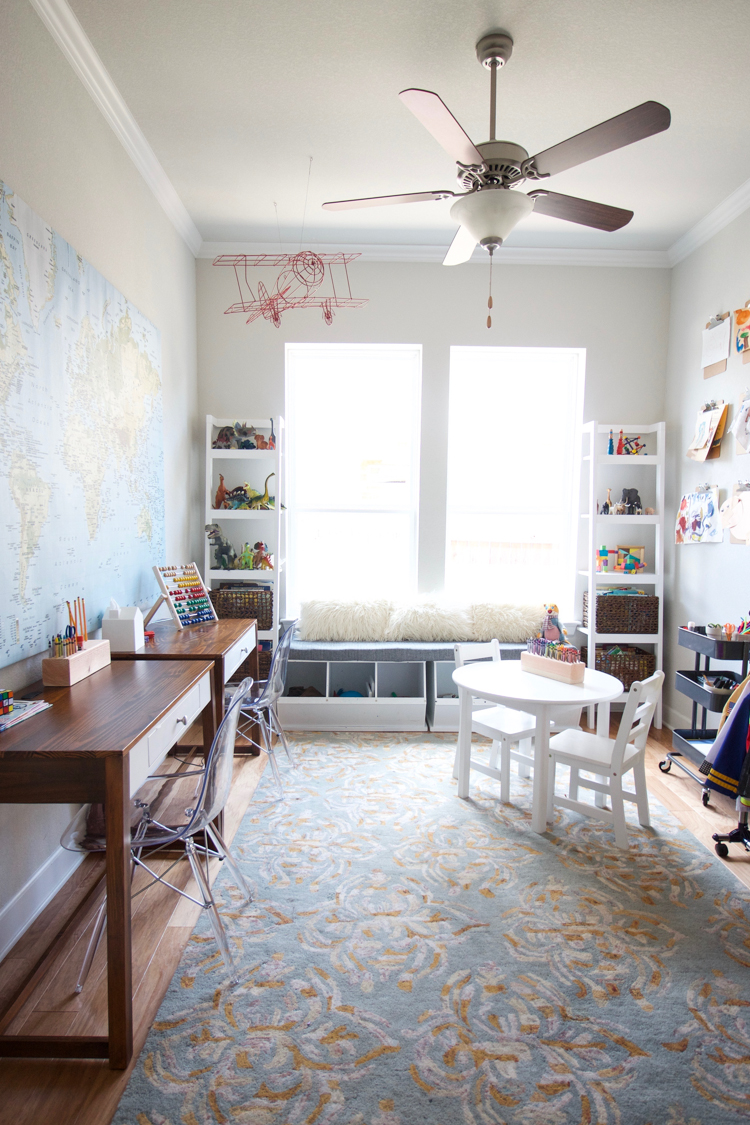
School starts next week and we’ve been getting prepared with everything from new backpacks to early bedtimes in anticipation of the year ahead. With both boys headed to full-day elementary this year and Plum in preschool, I feel like our family is headed into a new transition. Along with the kids growing up, I decided it was time to transform the playroom into a more useful and creative space for all of them to spend time together. The result is what we’re calling the Kid’s Studio– a space for homework alongside crafting, dress-ups in one corner and dinosaurs in another, and all of us intentionally spending meaningful time together. 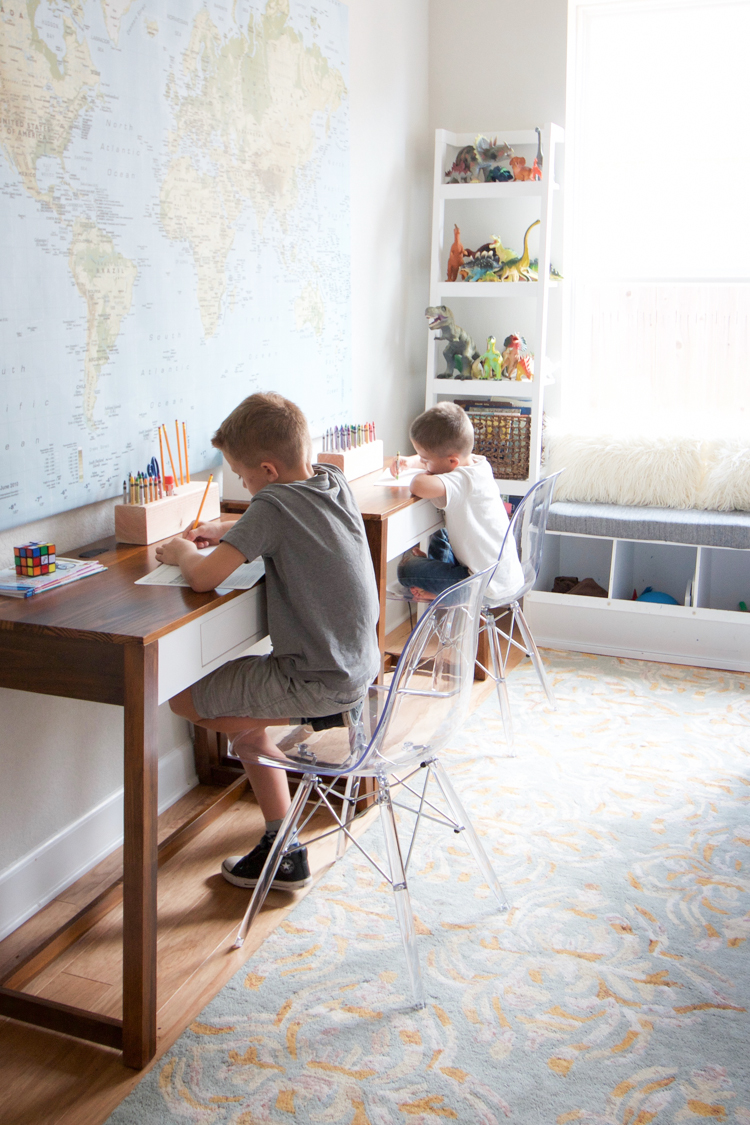
 In my recent home tour post, I shared my feelings about how homes should be useful and purposeful. That means transformation as the needs of each family changes. The Kid’s Studio is a great example of that principle working in our home.
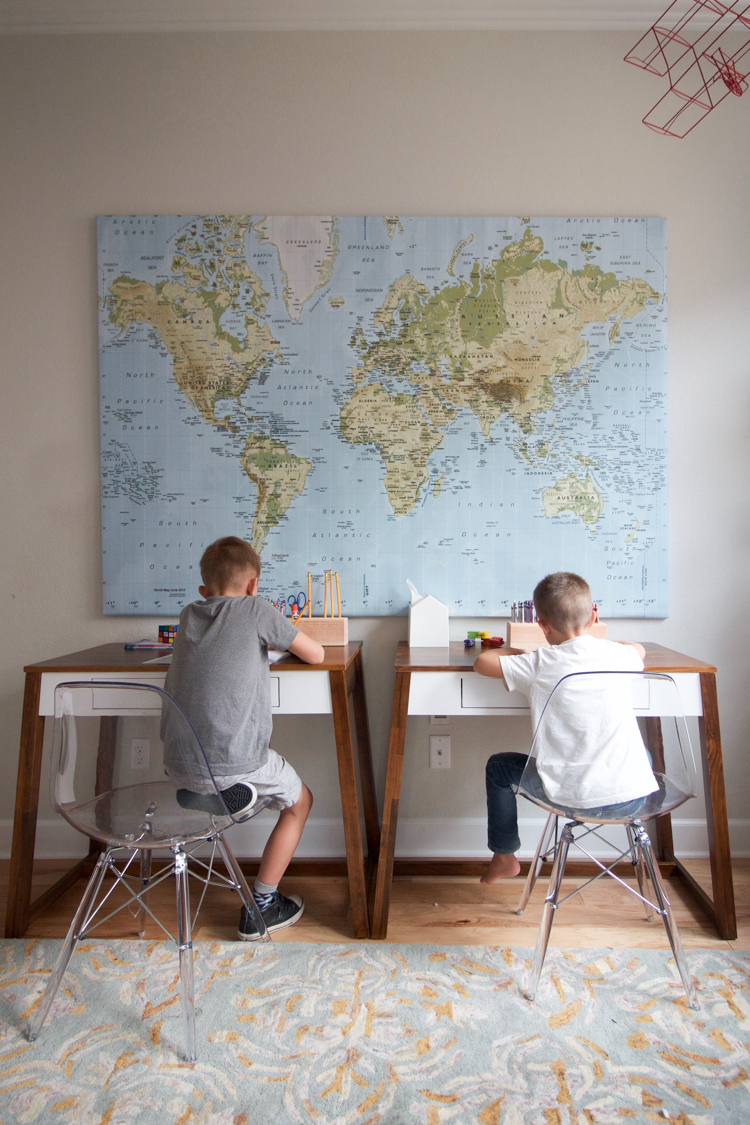
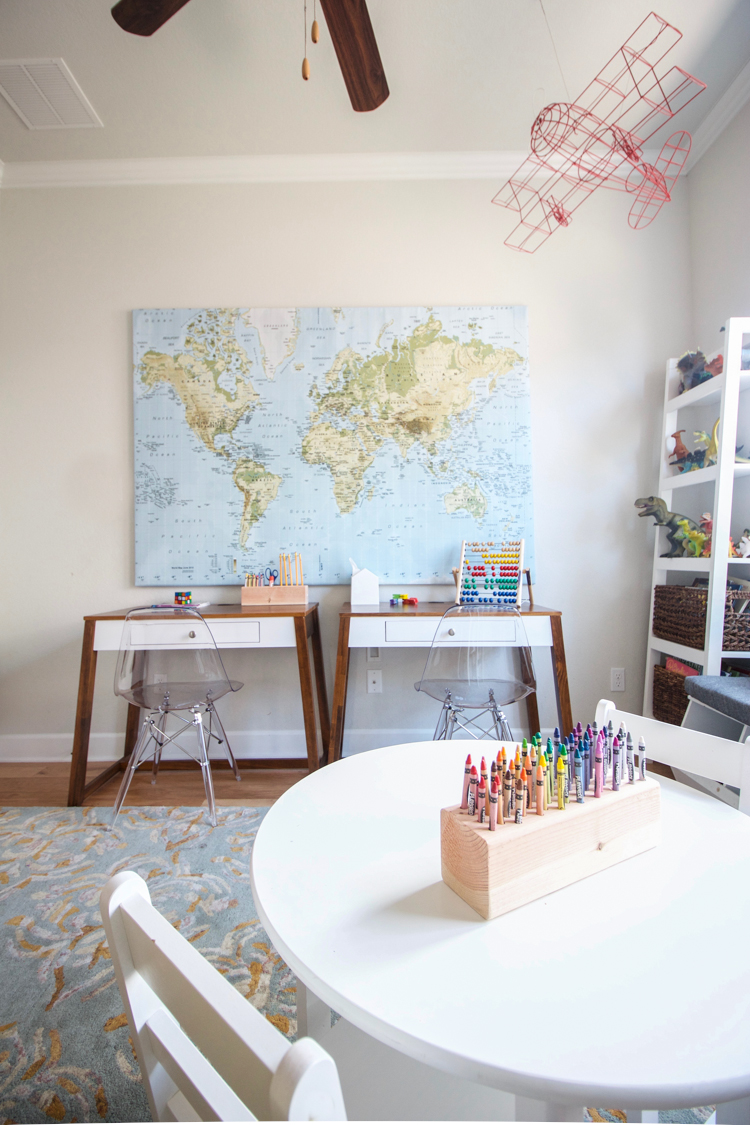
When we moved into this house, we created a dedicated playroom in what was the office on the plans. But even as we were building, we talked about how in several years the kids would grow out of a playroom, and we could change the space into a homework area, then even a little older add a couch and tv for a teenage hangout spot. With this in mind we wired the wall for a tv, and covered the opening with our map for now.
 For a couple years Milo has been doing homework all over the kitchen table, counter, and couch, being distracted by the tv, dinner preparation, and siblings running in and out the back door. I loved the idea of having somewhere specific to work on school projects. Setting aside a specific place for school work also decreases the chance we’ll forget about or lose something (which unfortunately isn’t uncommon!)
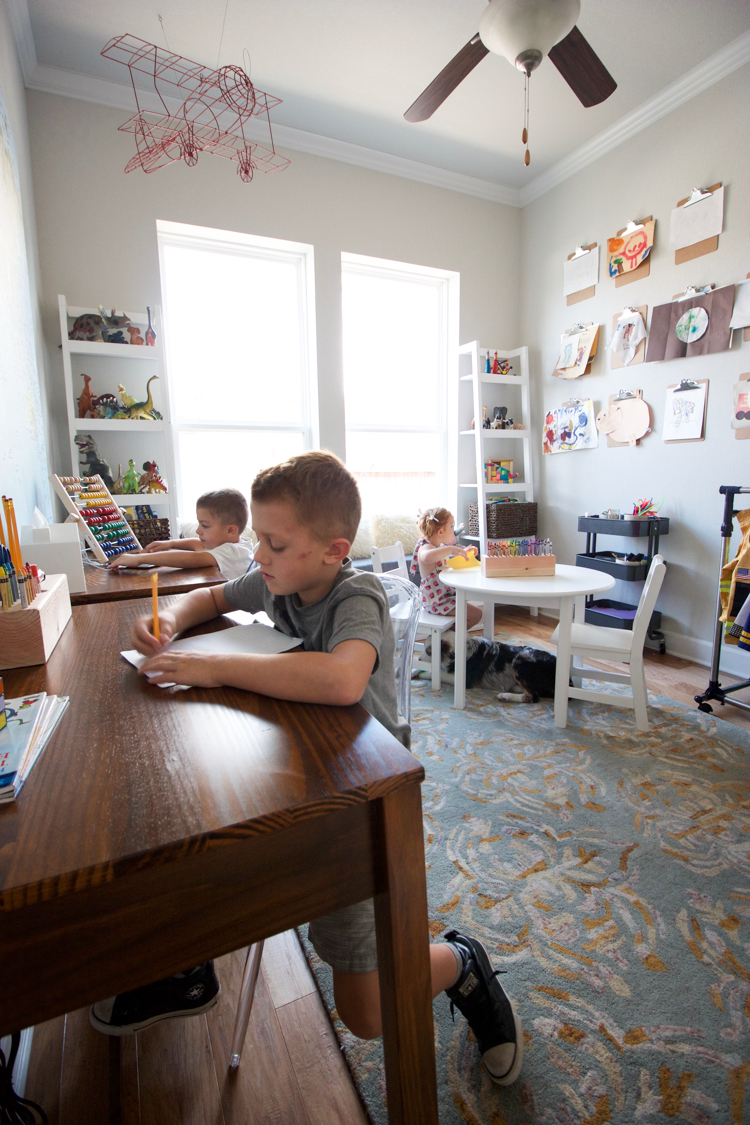
I came across these gorgeous desks at At Home when I was browsing for ideas for this month’s inspiration post. I was instantly in love with the modern design, clean lines, small size, and two-tone white and wood. After measuring my wall, I knew that I could put two together along this wall beneath the map, and they’d fit beautifully.
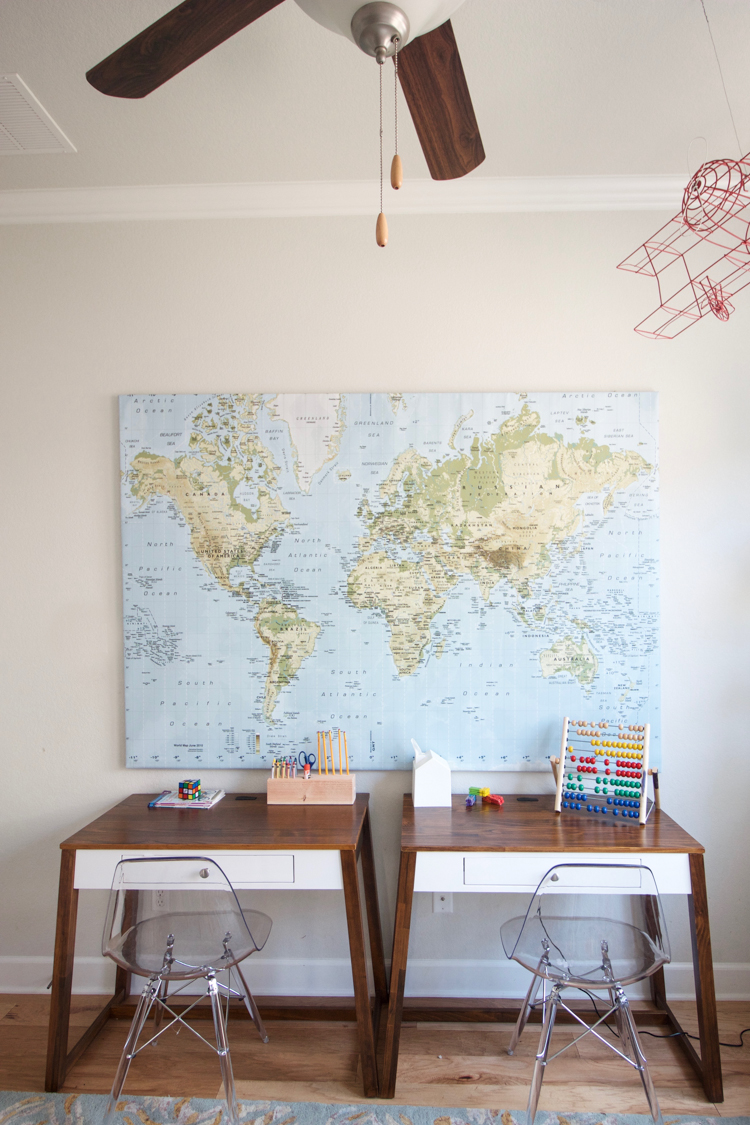
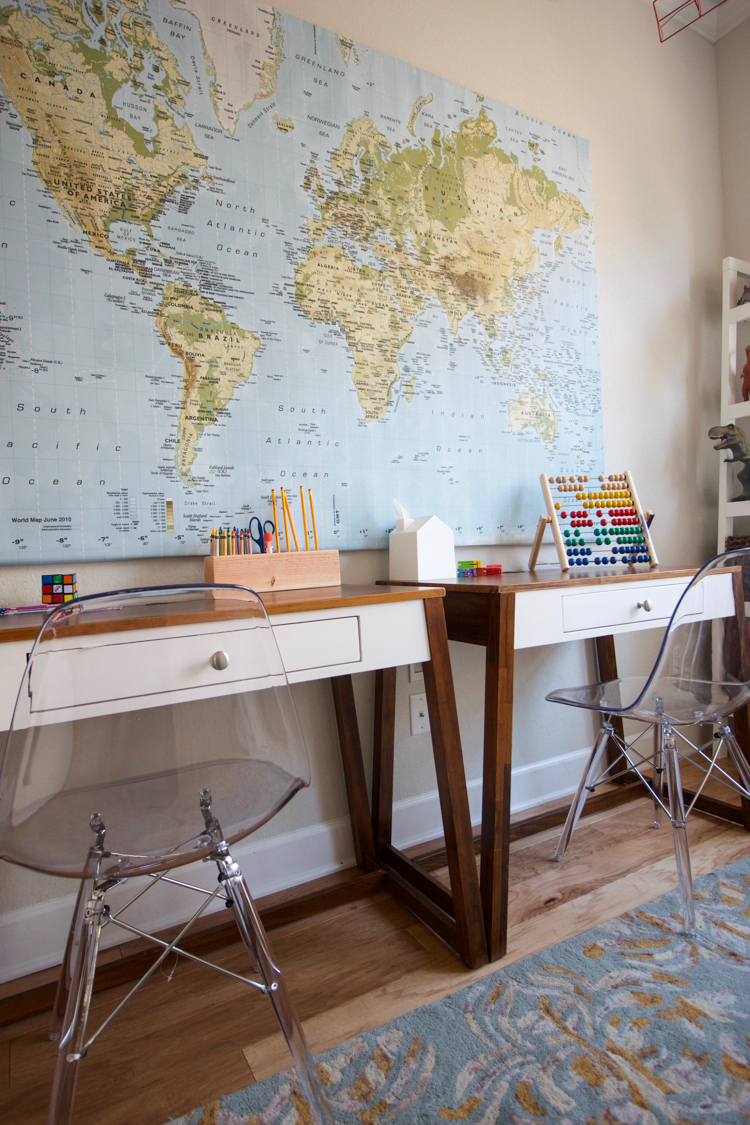 Wanting the boys to feel involved and invested in the process, I brought them along to choose chairs for the desks themselves. I gave them a couple choices and told them they had to agree so that they matched. After some serious in-store sit-testing they concluded the Clear Eiffel Chairs were just right.
After we brought them home I realized how incredible they looked! The chairs disappear leaving the beautiful desk design visible, and because they don’t take up any visual space, the room feels far less crowded than it might with solid chairs. Nice choice boys!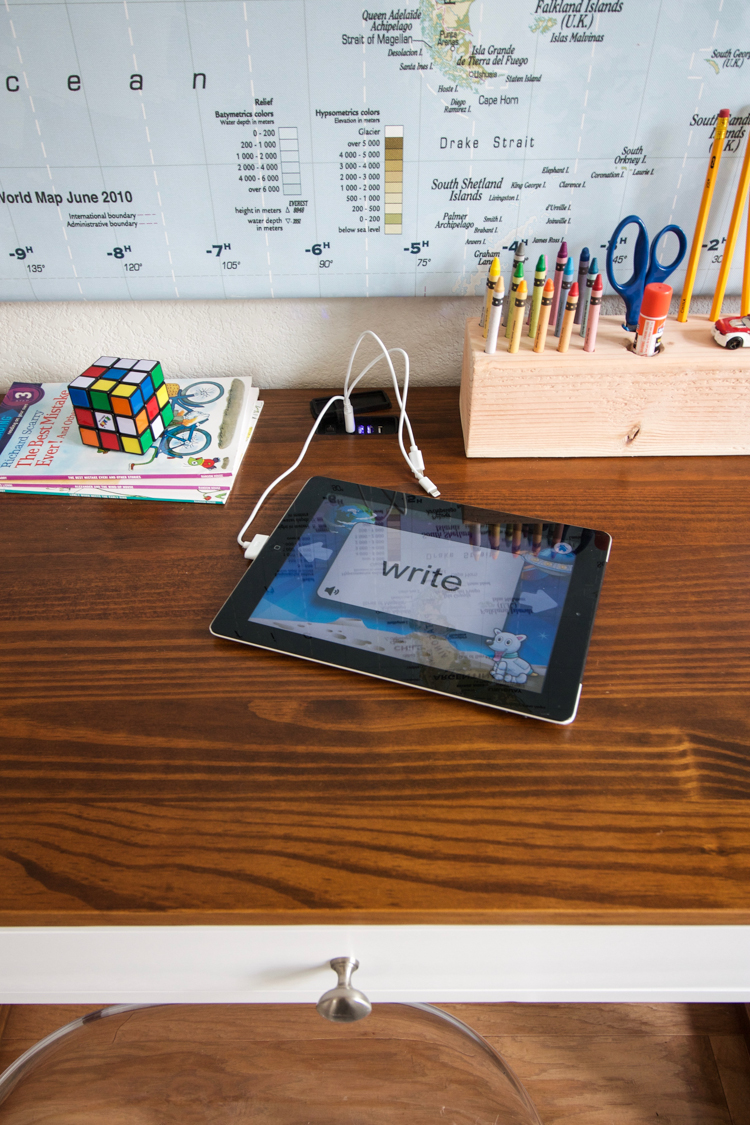
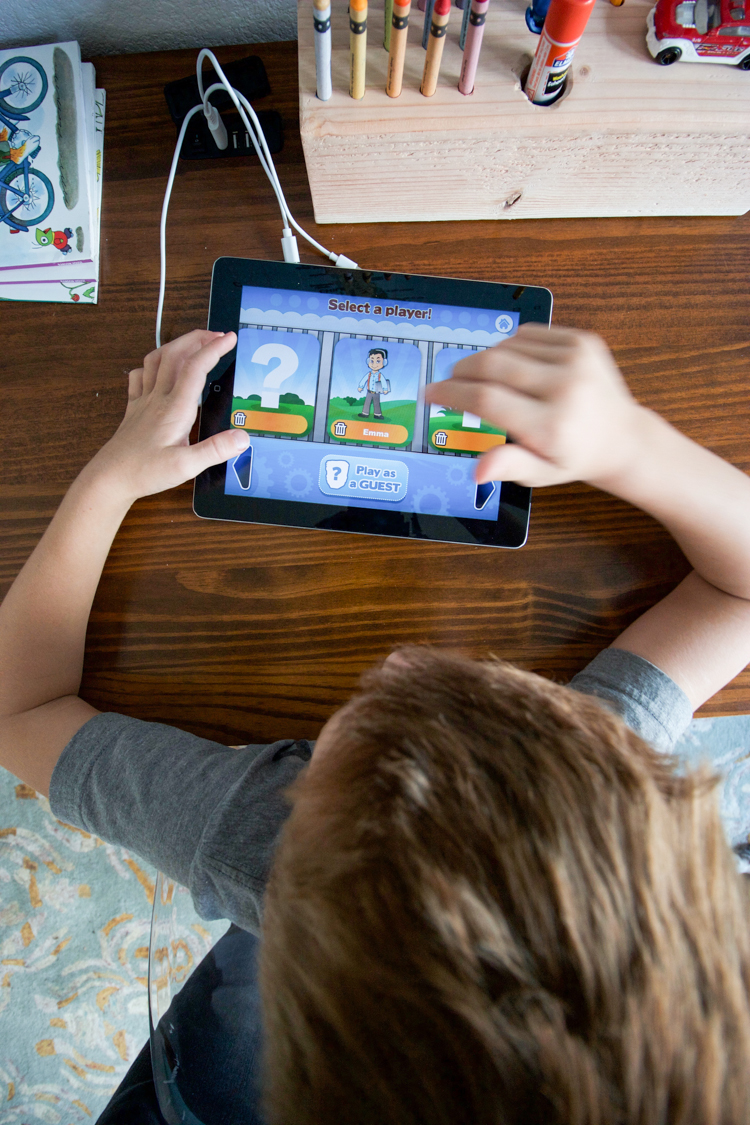 Another fun discovery when I was putting the desks together at home was that they have usb ports included on the surface! Smart desks! With the included power cord attaching the bottom of the desktop to the outlet, a small flap opens on the top to reveal an on-off switch and four usb ports. There was even a multi-use usb charger included with an old and new apple charger and mini usb ends.The boys wasted no time hunting down the iPad and plugging it into it’s new home.
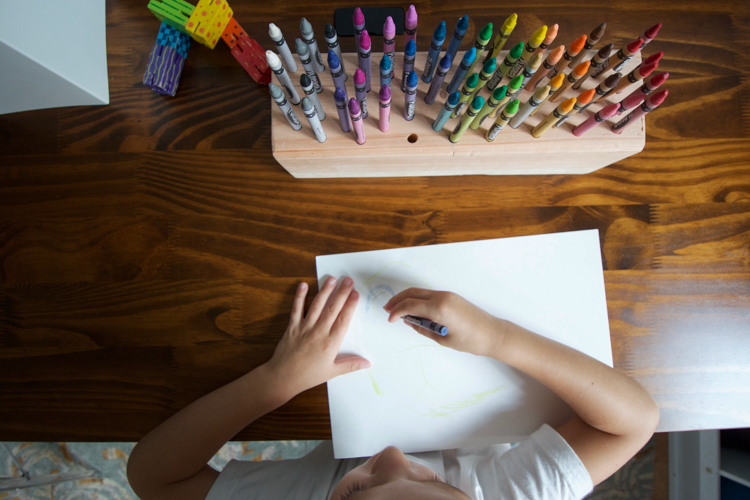
I am a huge fan of technology for teaching, and this setup makes me so excited to do some good research on some more effective learning apps and include them as part of the kid’s study and play time. (I had also lost a cable to charge my favorite mini bluetooth speaker and was finally able to charge it again with the mini usb! Ha! Such a win.)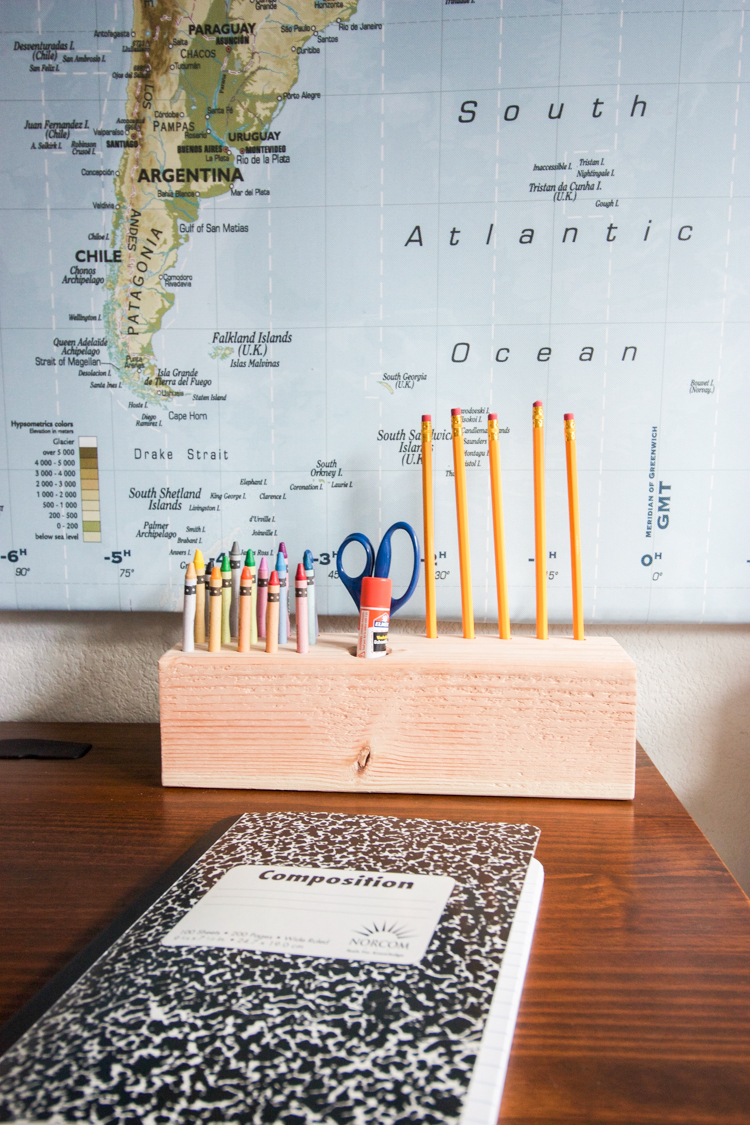 I adore well-designed desktop organization, and I expanded these simple, modern pencil holders I created last year into a full school supply organizer.
I asked Milo what he wanted his to hold and he told me definitively it was to hold five pencils, scissors, a glue stick, and the 15 crayons he had picked out–one of every color. How could I resist such a darling custom order? I used the same method to make the crayon organizer for the craft table, and will whip a supply organizer up for Eliot too as soon as I get his specifics! Check out the full DIY at the end of the post! 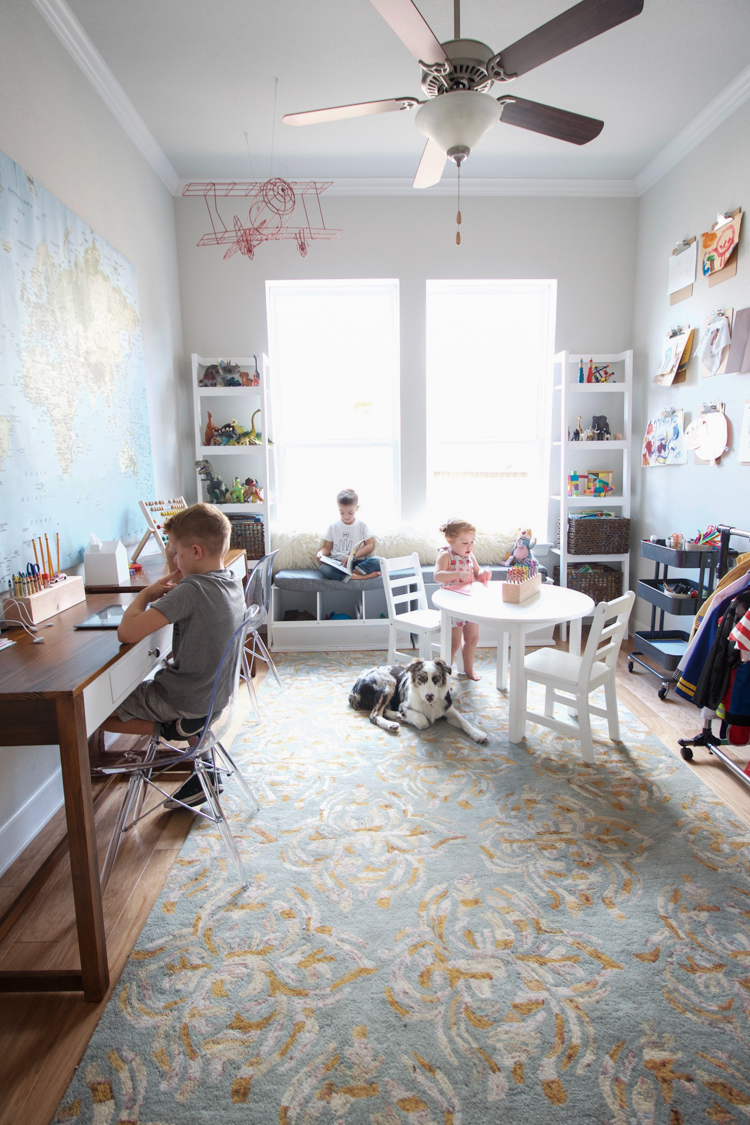
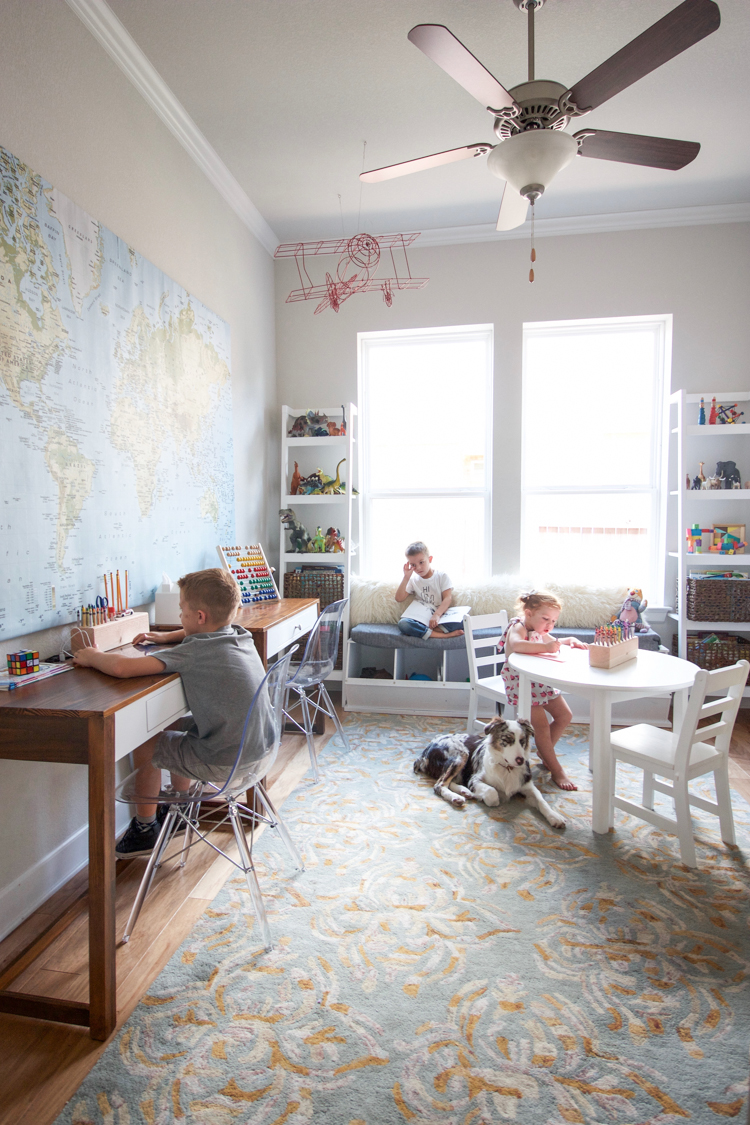
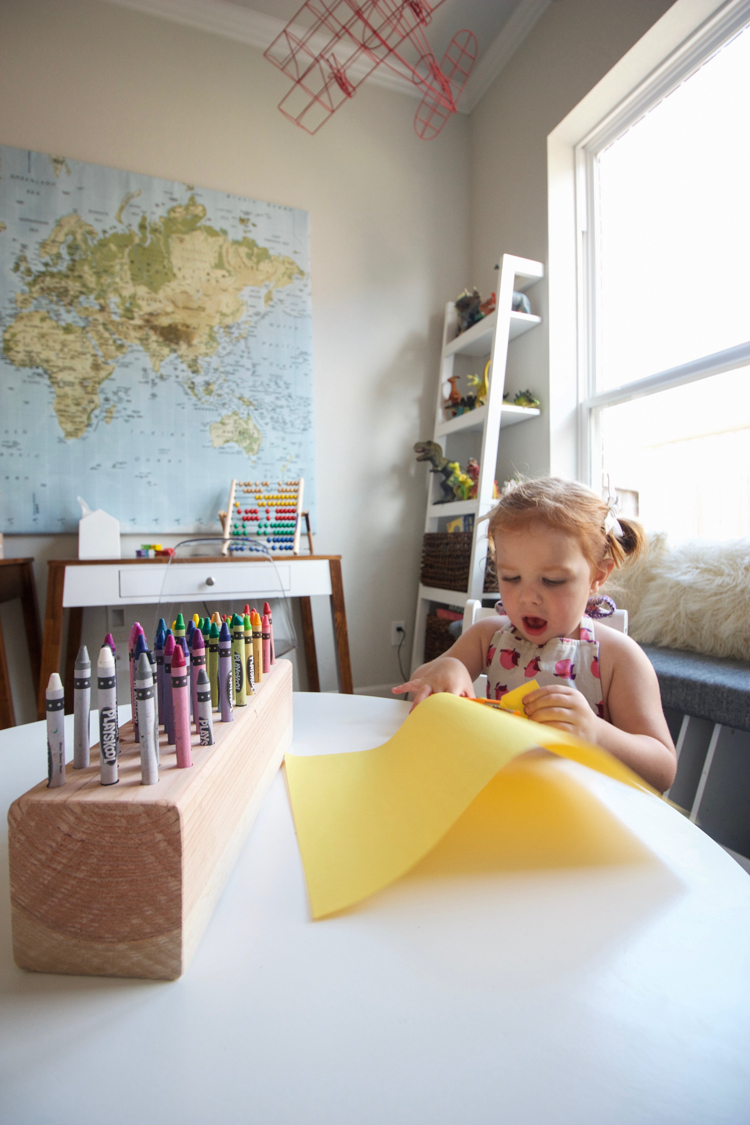 Of course, Plum couldn’t be left out of the playroom updates. When we were at At Home picking up the desks and chairs she saw this kid’s size table and chair set and told me “It’s mine! It’s for me!”
The only one available was the display, so I grabbed a chair and put it in my cart, which she sat on through the whole store until check-out. The manager granted us a discount because one of the display chairs was missing a screw (score!) and we loaded it all up.
And it has become her favorite spot. We had been keeping craft supplies in a cart in the pantry so we could do projects at the kitchen table, and she transitioned seamlessly to having her very own craft table. She will sit for an hour coloring, cutting, then starting all over again. One of my greatest hopes is for my children to grow up curious and confident experimenting. This space feels like it will facilitate more of that.
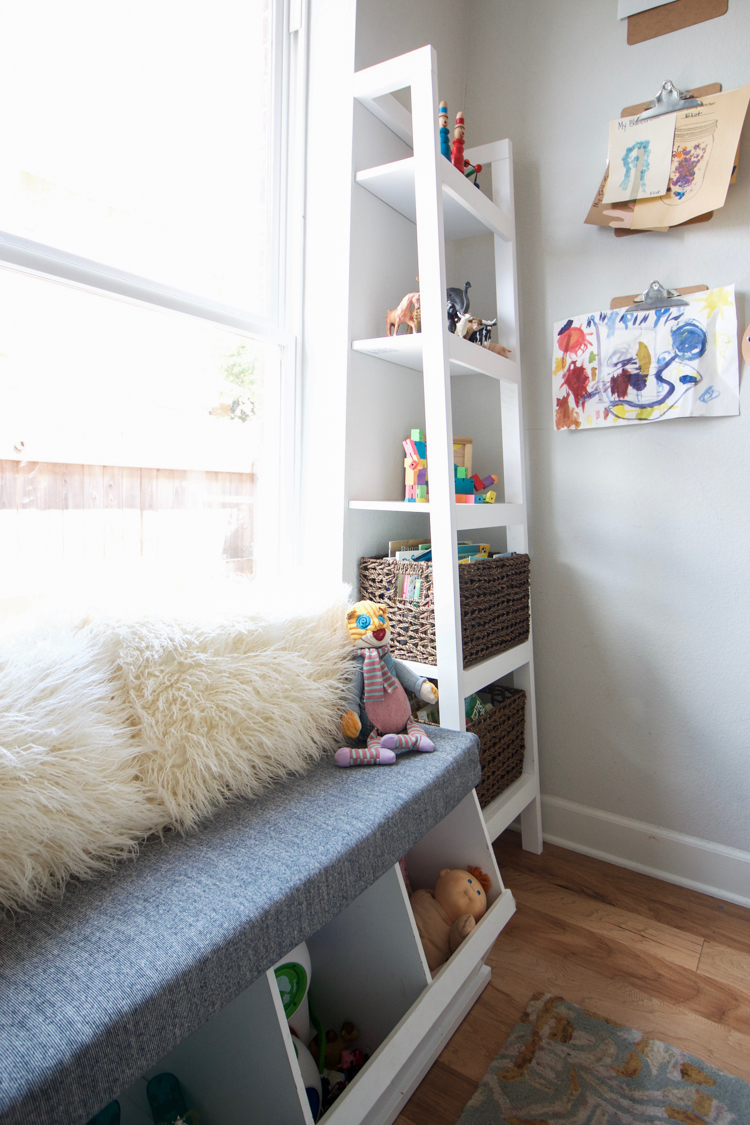
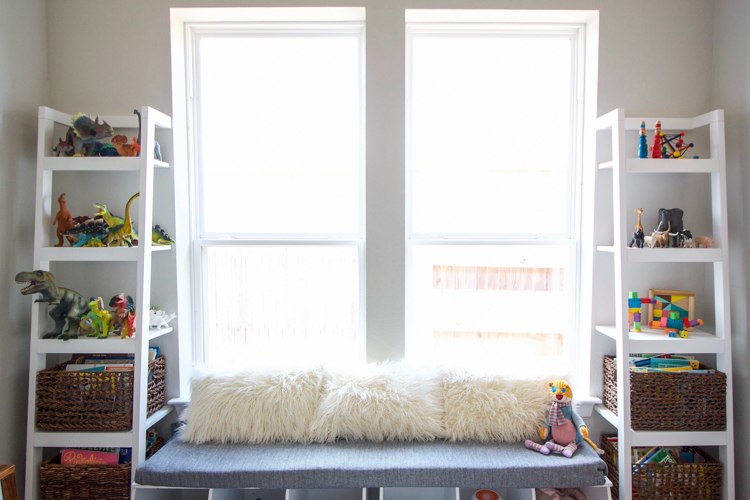
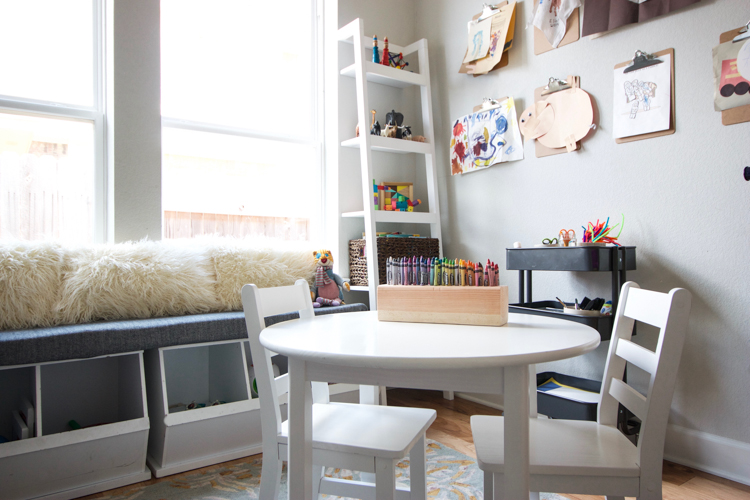
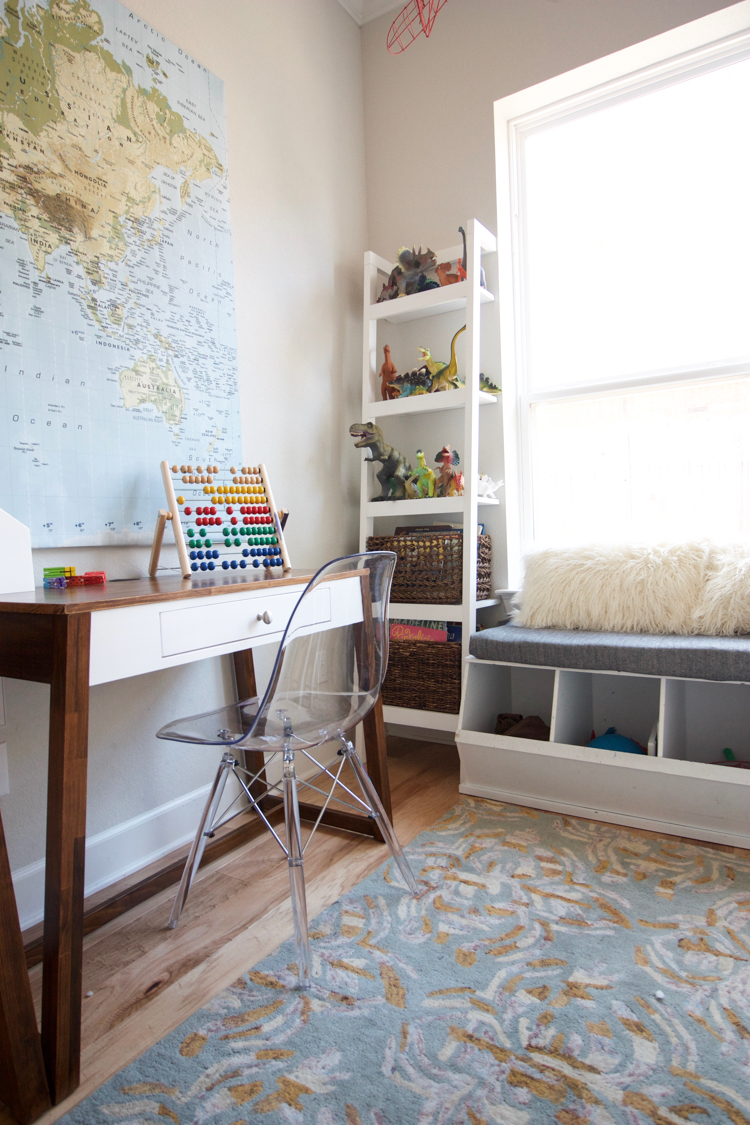 The room transformation also included rearranging the current furniture into new, useful positions. I moved our old toy bins beneath the window where I could push them together and add a cushion to make a cozy window seat. I have been planning on this arrangement for over a year, and loved finally making it happen.
Adding a second, matching bookshelf on the right to what we already had made finished the symmetry and enclosed the window seat nicely. I used a memory foam mattress topper cut in half and covered in soft fabric for the custom-sized cushion, then threw on some fun, fluffy pillows.
I also swapped out my lovely color-coordinated book styling for some woven baskets to hold the books. It’s so much more realistic to keep the books in bins this way, and I will save a lot of time not having to come in to reorganize them every week!
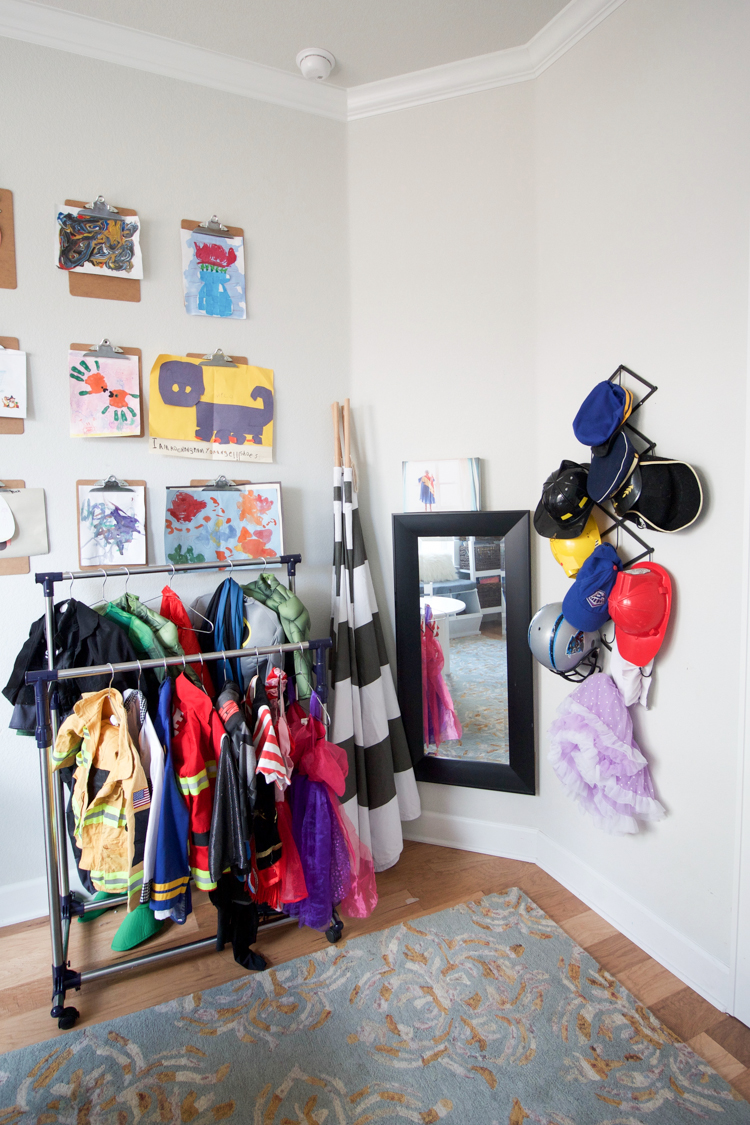 The dress-up corner remained intact. As the years have gone by and the kids have stopped playing on the floor with blocks and cars, they continue to dress up regularly. This setup has been perfect, and I will be sad someday when they grow out of it, too.
The teepee is easily accessible to pull out for imaginative play, when someone needs a hide-out, or for family read-a-thons. The clipboards feel even more useful right next to the crafting area, where we can immediately hang up the kid’s home creations in addition to those they bring home from school.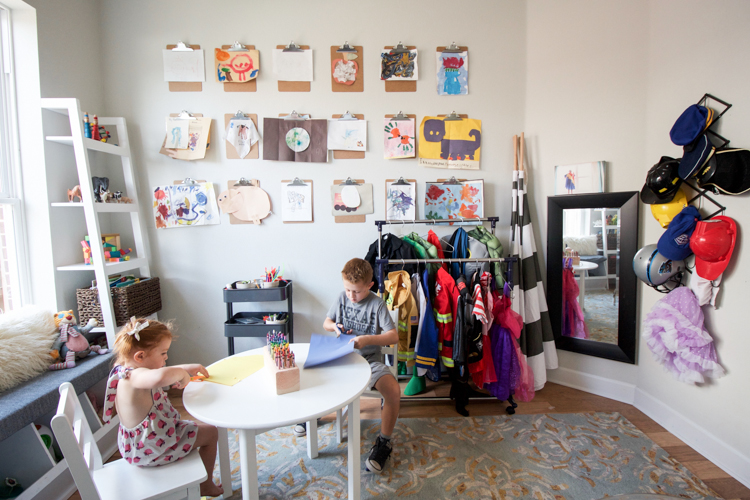
 I’m entirely satisfied with the way the Kid’s Studio feels like a current solution to the needs of my growing kiddos. I can’t wait to gather here to work on schoolwork during the week, with Plum working on her own projects right along with the boys.
The well-used toys and dress ups are still a piece of the room’s role, but we’ve added this additional layer of purpose and intention that feels personal, useful, and beautiful all at once. There is space for the kids to work and play individually, but be all together, and I can’t imagine anything better.
Now here’s a simple back to school DIY for you:
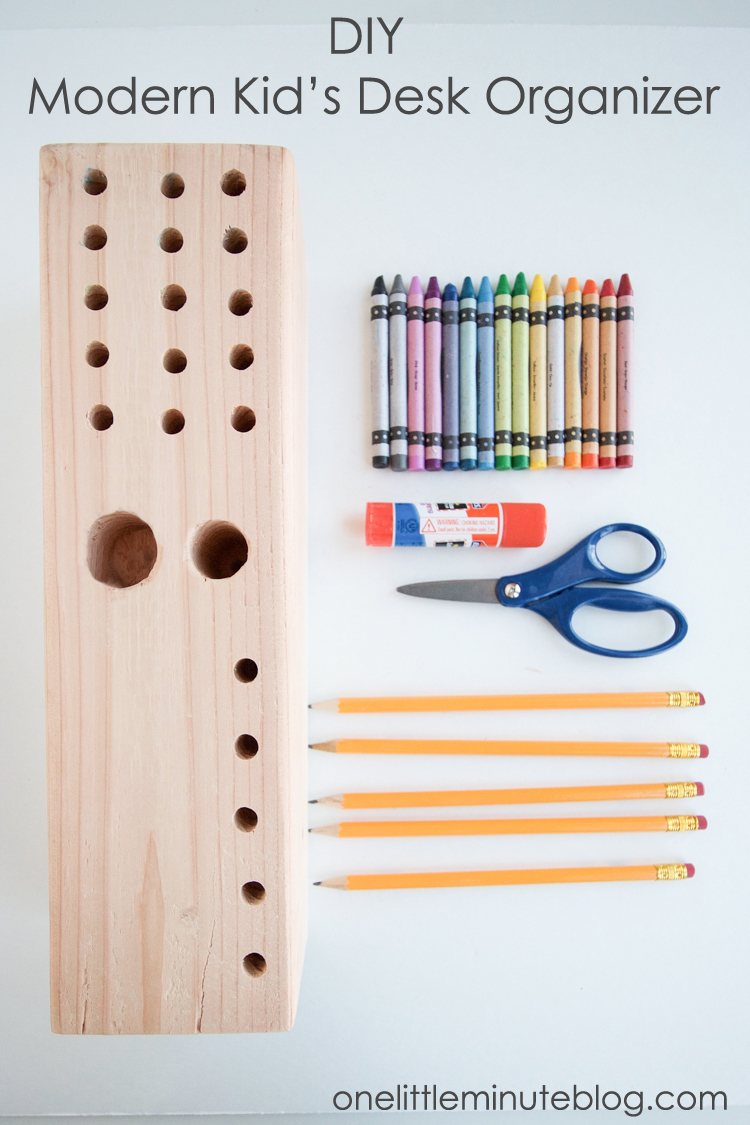
You’ll need:
- 12″ 4×4 (the hardware store will courtesy-cut the wood for you, so to make multiple organizers, have them cut the whole 8′ board into pieces)
- Power sander or sand paper
- Power drill with drill bits: 5/16″ for crayons and pencils, 3/4″ for scissors, and 1″ for glue sticks
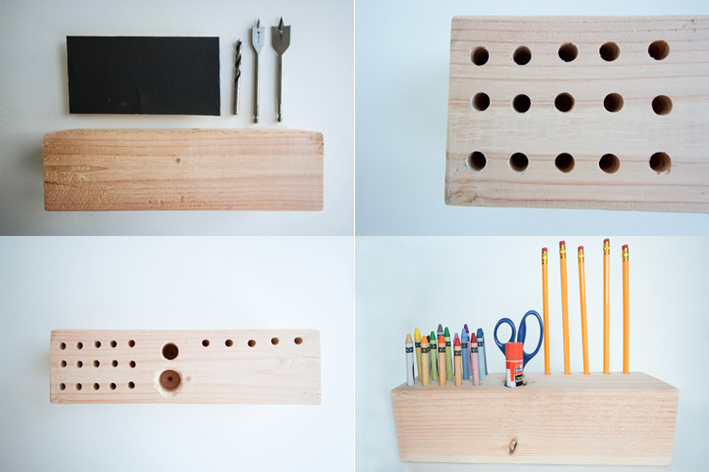
Start by sanding all of the sides and edges of the board. It may be pretty rough straight from the hardware store, so make sure it’s sanded smooth with rounded edges to avoid splinters.
Decide what types of holes you’d like, then use a ruler to measure them out along the top of the wood. For the crayon-only organizer I didn’t measure, rather drilled rows of three then four holes the length of the board for a more random look. For this school supply organizer I lined the crayon holes up in three rows of five, then put the scissors and glue in a row, and finally the pencils in a line along the edge leaving some space for a little toy or treat to sit on the front.
Use the appropriate drill bit for the type of storage you need. Drill straight down from the top around 1″ for the crayons, pencils and glue, and 2″ for scissors–or as deep as you want to go to hide the blades.
Sand the edges of the holes, and along the top of the organizer one last time, then add your supplies! You’re finished!
Optionally seal, paint, or decorate the organizer. I love them simple and wood, but there is lots of potential here for creativity!
Created in partnership with At Home Stores as part of the At Home Inspiration Team. See my other At Home posts: Houseplants 101, Practical Pantry Organization

