Paper Bag Skirt DIY
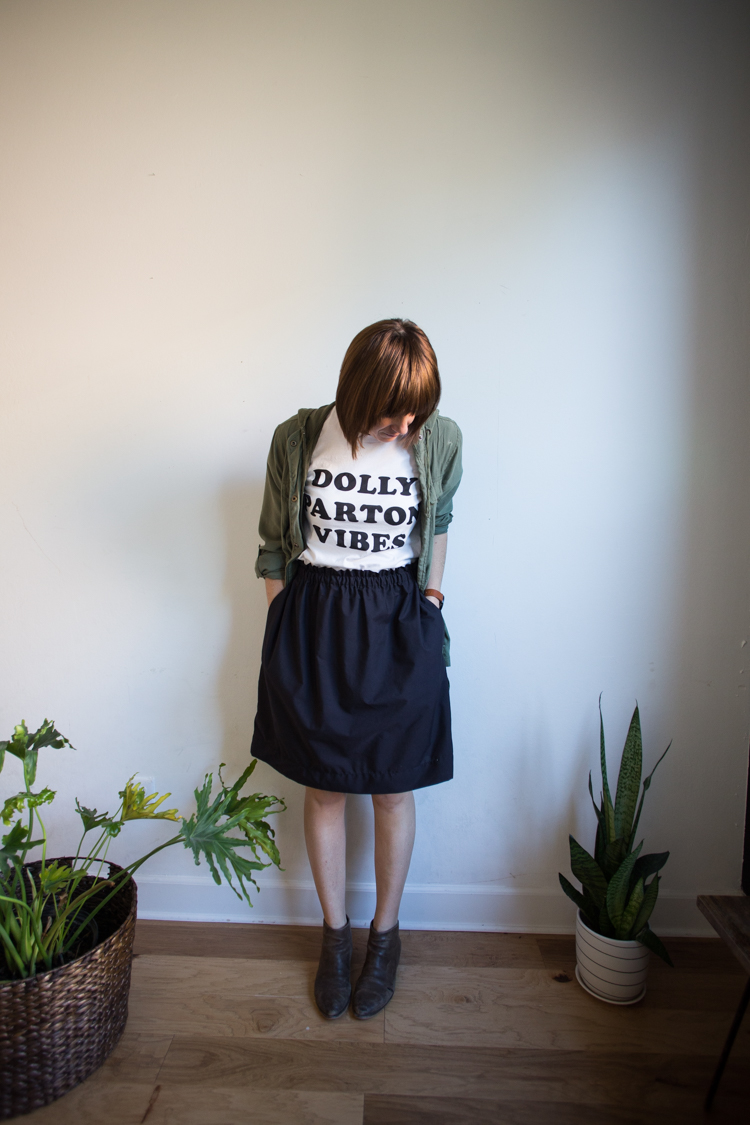
This week I used cotton fabric to make a simple paper bag skirt for myself. This is a beginner project that turns out great every time, so if you’ve been waiting for an nudge to pull out that old machine, it is time.
Dress Up or Down
The paper bag skirt is characterized by the little bit of fabric that sticks up above the elastic casing, giving the look of a paper bag grabbed in the middle. This has been a very popular style for the last several years, finding its way into lookbooks for most major brands and onto runways. I even found an older version super similar to this one I made at my favorite store.
It’s versatile to dress up or down, wear with a belt or without, tucked or untucked. Of course, any way you wear it it is comfortable and with the essential addition of pockets, I’ve made it a skirt you can wear all year round. That type of versatility is exactly what I’m looking for in my capsule wardrobe, and this is a really great addition.
Sewing with Cotton
If I’m totally honest, I don’t normally love using basic cotton for women’s apparel. With so many gorgeous substrate fabrics like lawn, voile, linen, silk de chine, knits. I generally reserve my quilting cotton for sewing little girl’s clothes and wear more casual feeling clothes. This skirt is one place where using a basic quilting cotton works great. It has enough body to not feel too stiff, and the straightforward cut (two rectangles) lends itself well to sewing with cotton.
I had this black cotton on hand from when I made this Little Black Dress last year, so I’m going to call this my Little Black Skirt.

Supplies
Would you like to make one? Here’s what you need:
- 1.5-2 yards of cotton fabric, washed and dried
- a tape measure
- a sewing machine, threaded
- enough 5/8 in elastic to wrap around your waist comfortably
How-To
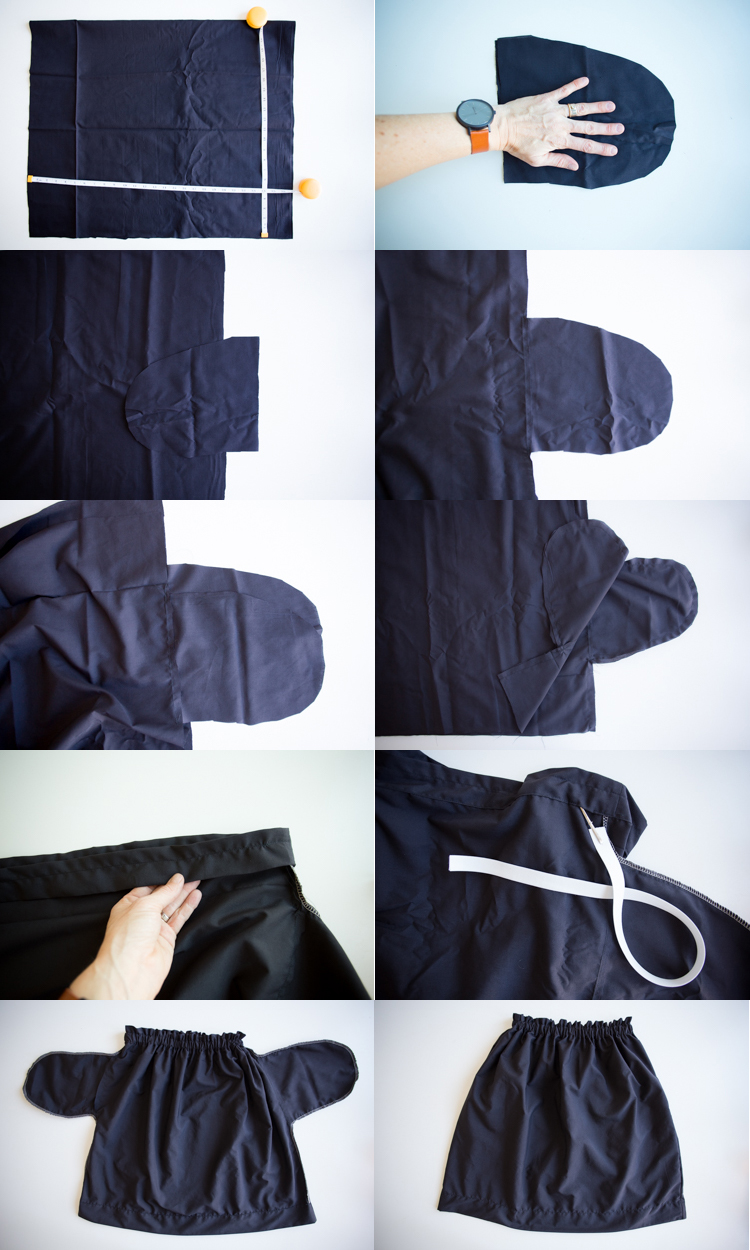
- Measure your waist circumference where you would like the skirt to sit. Write that number down. Measure your skirt length from your waist to the hem you’d like. Write that number down.
- Fold your fabric in half so that you cut two pieces at once. Multiply your waist circumference by 1.5. This will be the width of your fabric. Add 6″ to your length measurement. That will be the length of your fabric. Cut 2. (Example: my waist is 30 in * 1.5 = 45 in. Length is 23 in + 6 in = 29 in. I cut my rectangles 45 in x 29 in)
- Fold your extra fabric into quarters so you have four layers together. Lay your hand flat as shown above and cut around it by 2 inches.
- Measure down 6 in on either side of the first rectangle of fabric and pin one pocket piece with right sides together and the pocket facing toward the middle of the skirt as shown. The six inch mark is the top edge of the pocket. Line up the straight edges and stitch in place with a 1/4 in seam allowance.
- Repeat on the other side of the rectangle, then on the other piece as well.
- Fold each pocket out, so it looks like a wing on the fabric edge, then stitch a topstitch line as close to the seam as possible, catching the seam allowance in underneath. This will keep the pockets from sticking out.
- Lay both winged rectangles right sides together and stitch along either side seam, going straight to the pocket corner, then out around the pocket edge, and then straight again to the end, following the outermost edge of the fabric.
- Fold the top edge of the fabric down 1/2 in and then 1 1/2 inches. This will form both the paper bag edge and the elastic casing. Press folds in place and pin around the edge.
- Stitch around the top folded edge with a 1/2 inch seam allowance, creating the top of the elastic casing.
- Stitch around the bottom folded edge as close to the fold as possible. Leave 2 inches open at the beginning and end to be able to thread the elastic through.
- Cut a piece of 5/8 in elastic the length of your waist circumference minus an inch.
- Using a threading tool or a safety pin thread the elastic through the casing, making sure it says flat. You may want to pin the end in place at the hole so it doesn’t pull through and get lost while you stretch it along.
- Once the elastic is pulled through all the way, stitch the ends of the elastic together with about 1/2 in overlap. Use a zig zag stitch back and forth several times to ensure it holds.
- Stitch up the threading hole, enclosing the elastic completely.
- For the hem, fold the fabric up 1/2 in and then 1 1/2 inches again. this time iron in place and the stitch around the folded edge as close to the fold as possible to stitch the hem in place.
- Press all the seams and enjoy!

