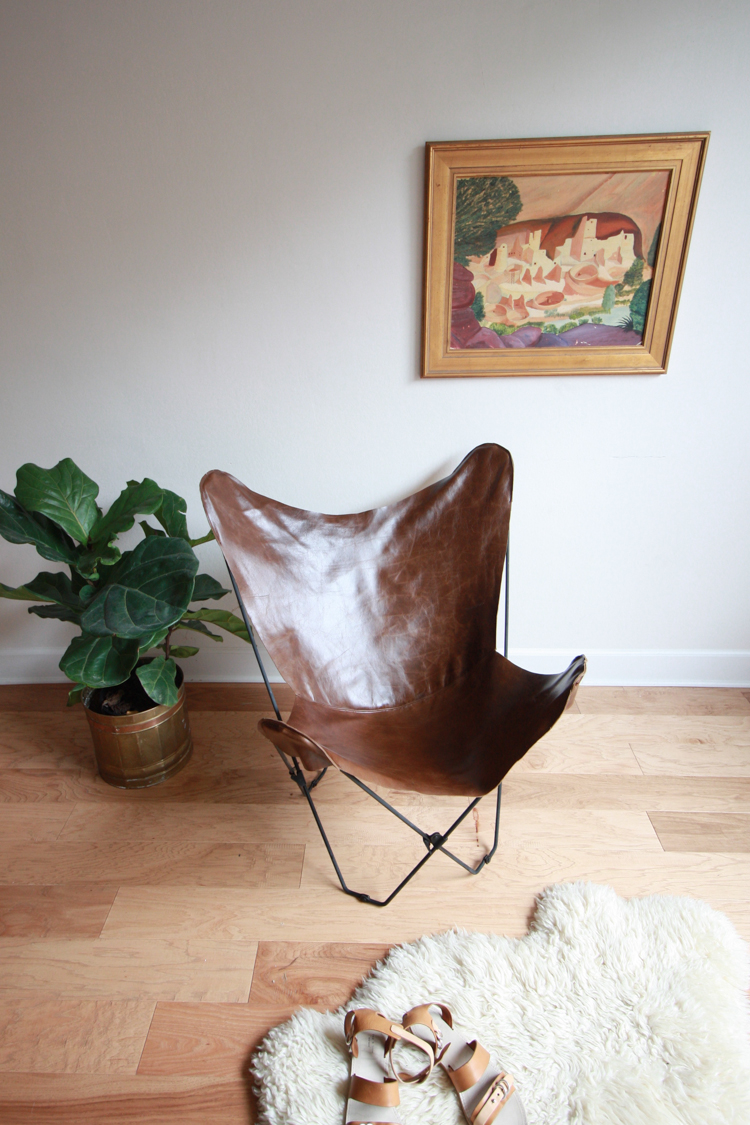
You know when a project ends up being easier than you thought and turning out better than you imagined? This leather butterfly chair cover DIY was just that way. It came together quickly and easily (even wrestling our new puppy in my lap) and turned out beautifully. I can’t wait to share the process and a free pattern for the leather butterfly chair cover today! 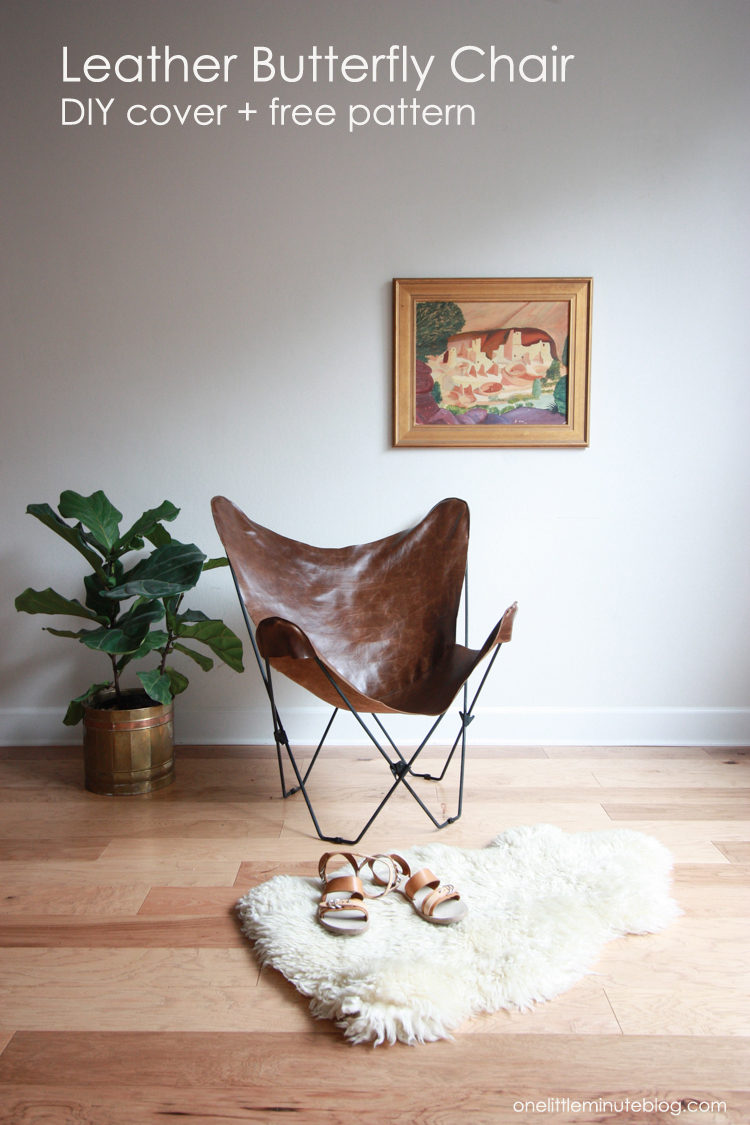 I don’t remember when I first saw a butterfly chair, but for at least the last couple years I’ve been in love with them. The design was originally created in 1938 in Buenos Aires by architect Jorge Ferrari Hardoy, then was made popular in the US with the rise of mid-century modern design. (I sort of love that it was an Argentine design, as I spent 18 months living in Buenos Aires in my 20’s. It feels like home.)
There are a lot of places to find modern reproductions online, but I naturally have trolled Craigslist in search of some at a decent price point. I’ve come up lucky, finding a pair of like-new Circa50 chairs with outdoor covers for half the price. They sit on my front patio and basically make the curb appeal for our home. 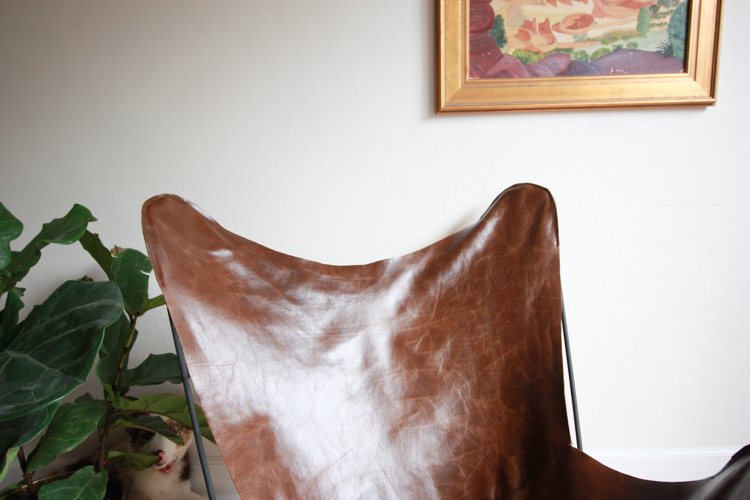
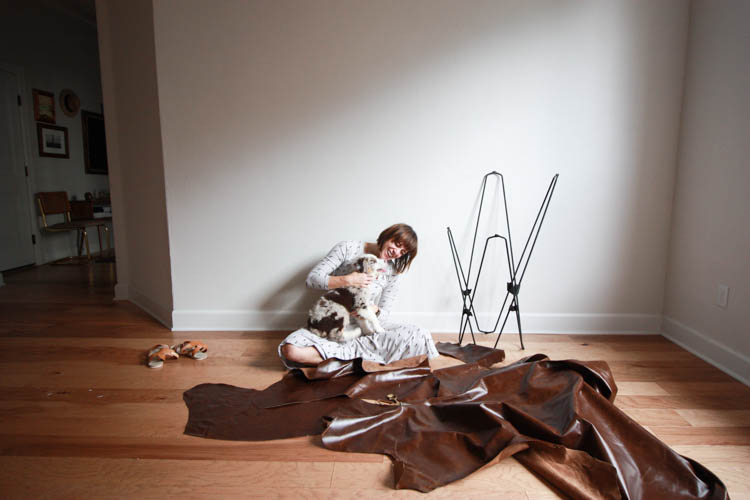
 As I got ready to re-do our bedroom, I thought another butterfly chair would be a perfect addition, and so I hit Craigslist once again and found this vintage, foldable frame for $15. Knowing I could whip out a cover myself, I scooped it up and got to work.
I know, love, and trust the leather from Leather Hide Store, so I was thrilled to partner with them to complete this project. I have sewn with their leather on a lot of different projects in the past, including my handmade leather jacket, and all of the boxes for my leather clutch with The Crafters Box used pieces of their gorgeous hides.
I have a bunch of their sample leather swatches in my sewing room, and settled on this really beautiful Pub Chocolate. It has a little but of a waxy, distressed look, which is a pivot from my recent obsession with camel leather goods, and I really love it.
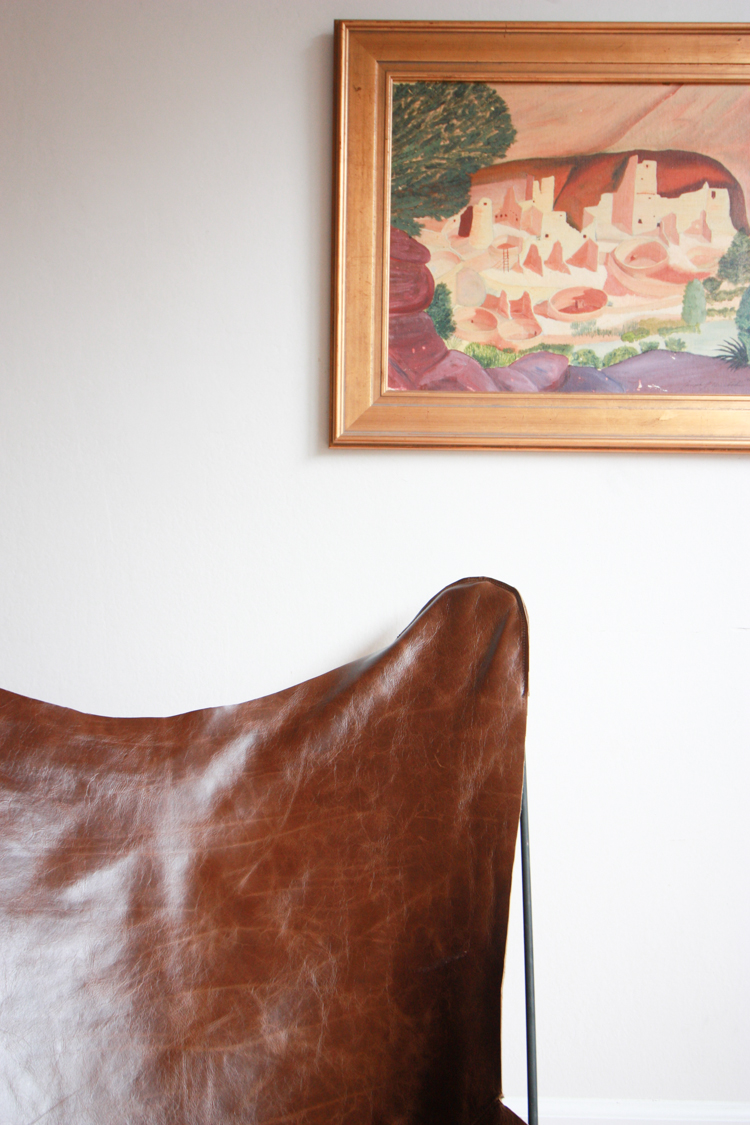
 The leather is full grain, meaning it maintains all of the strength and integrity of the best part of the hide and will get better with age. When Dave came home from work yesterday he asked if he could sit on it or if it would break! This leather cover may be one of the most durable chairs we own now! And prettiest, too.
 Let me share the process and pattern for making the cover.
I rubbed off a pattern from one of the current butterfly chair covers I have, then made some simple modifications for the leather. Sewing with leather is really not as difficult as it is scary. With just a few simple adjustments in your machine and supplies, you can turn any setup into a functional leather-sewing station. Leather Hide Store recently added this page of resources and tips for sewing with leather, which has a ton of great posts. It’s a great place to start.
They also have this resource page for knowing how much leather you’ll need for your project, which is super helpful because nice leather can be expensive. 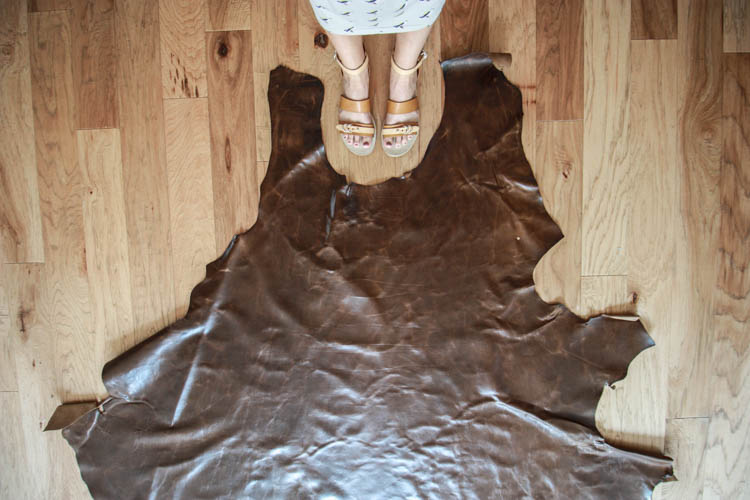 For this Leather Butterfly Chair Cover DIY you’ll need:
Approximately 30 square feet of leather
The FREE Leather Butterfly Chair Cover PDF pattern (click on the link to download)
A leather needle
Heavy upholstery thread
scissors
sewing machine with a walking foot
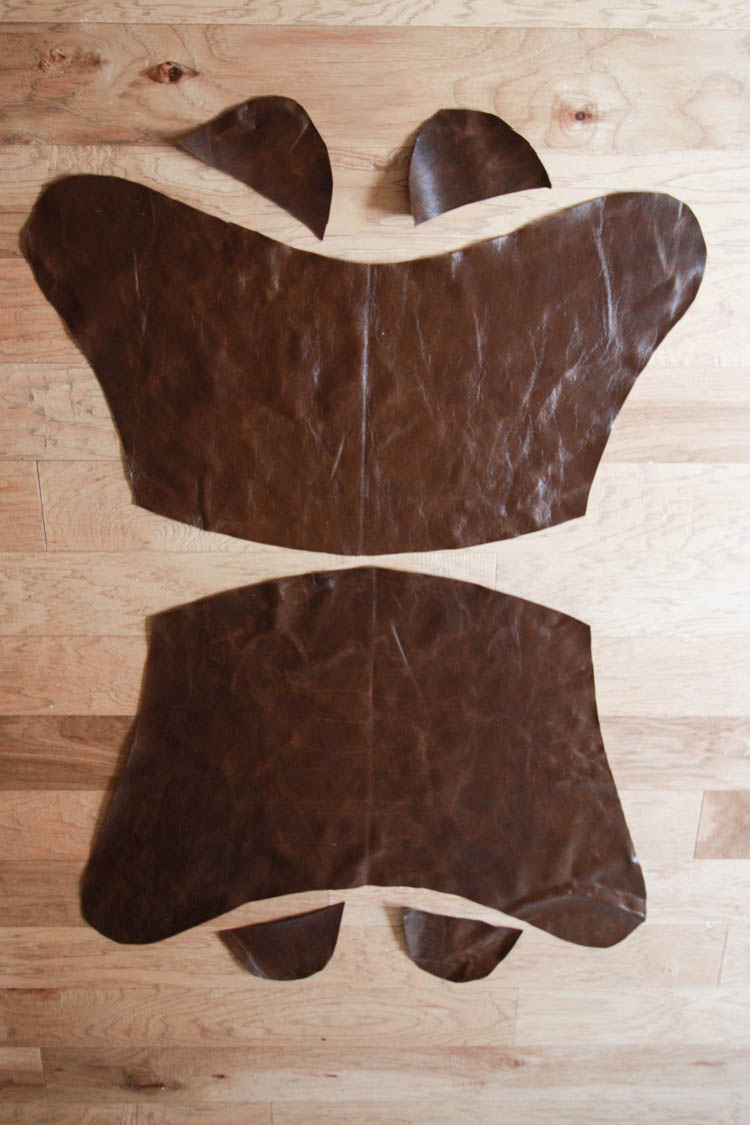 1. Print out your leather butterfly chair pattern, scaled to 100%, and lay on a flat surface to tile. The pattern has 15 pages that overlap by 1/2 inch to create the four pattern pieces. You can tape the pattern together, or do what I’ve been doing recently with PDF patterns and simply lay it out, then trace over the pattern outline on tracing paper. No taping, no mess. (Then I stack the pattern back up and put it in a file for the next time!)
2. Cut out your leather according to the pattern. I trace the outline of the pattern on in chalk, then cut around it. The pattern states to trace on the fold, which you can do with this soft leather. Or simply trace that center line, flip the pattern, and trace the other side. When you’re done you should have six pieces. A top, bottom, and four corner flaps.
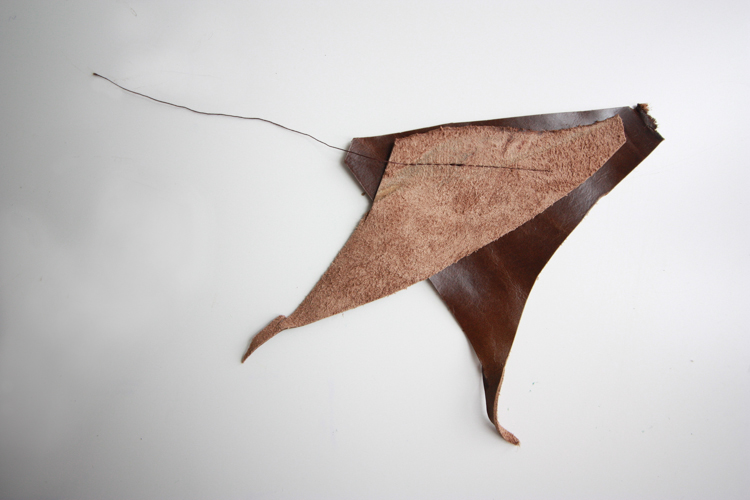 3. Set up your machine with your walking foot, leather needle, and heavy thread. Set the stitch length to 4.5, or about double your normal stitch length. Put two pieces of leather together and do a test run to make sure the stitches are even and nice. Once you sew on leather, the holes are there forever, so you want to make sure things are working smoothly before you go for it!
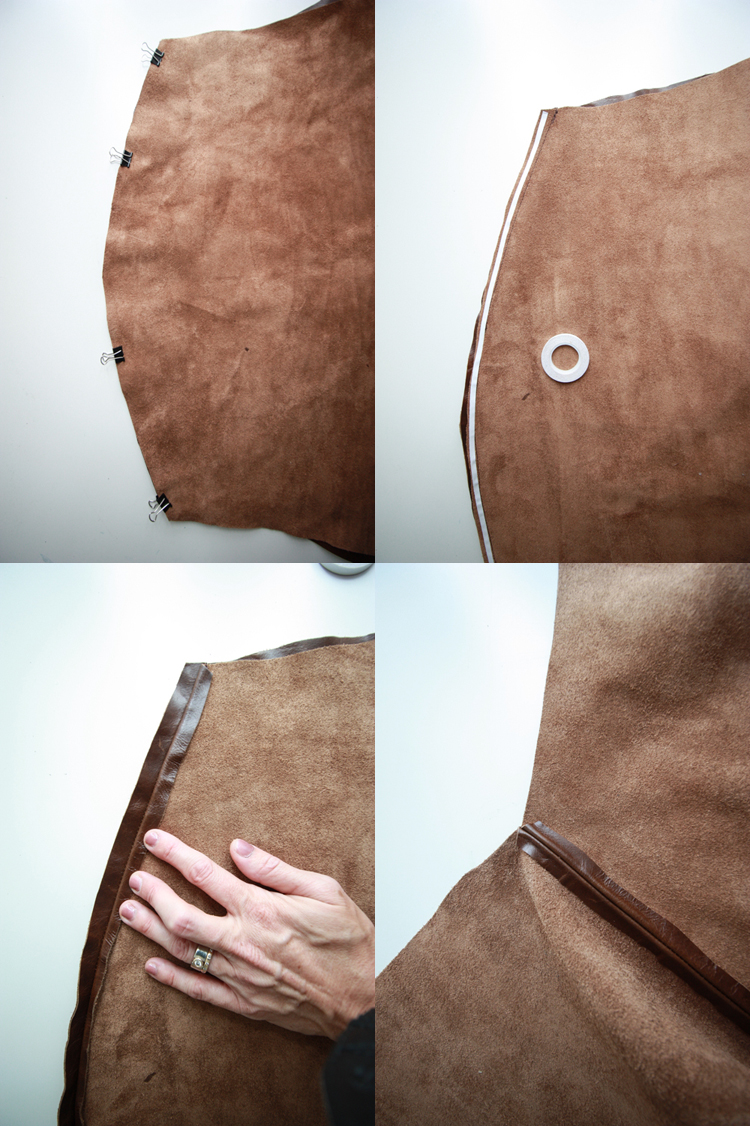 4. With right sides together, align the rounded end of the top and bottom pieces and secure with clips. (pins leave holes in the leather) Stitch with 1/2″ seam allowance along that rounded edge.
5. Lay a piece of double sided leather tape our along the seam allowance, next to the stitches.
6. Peel back the paper backing on the tape, and fold the seam allowance down flat onto the backside of the leather next to the seam.
7. Repeat the process on the other seam allowance on the other side. Now that this seam is laid flat, you’re going to topstitch on either side of the initial seam to secure the seam and add a pretty design detail.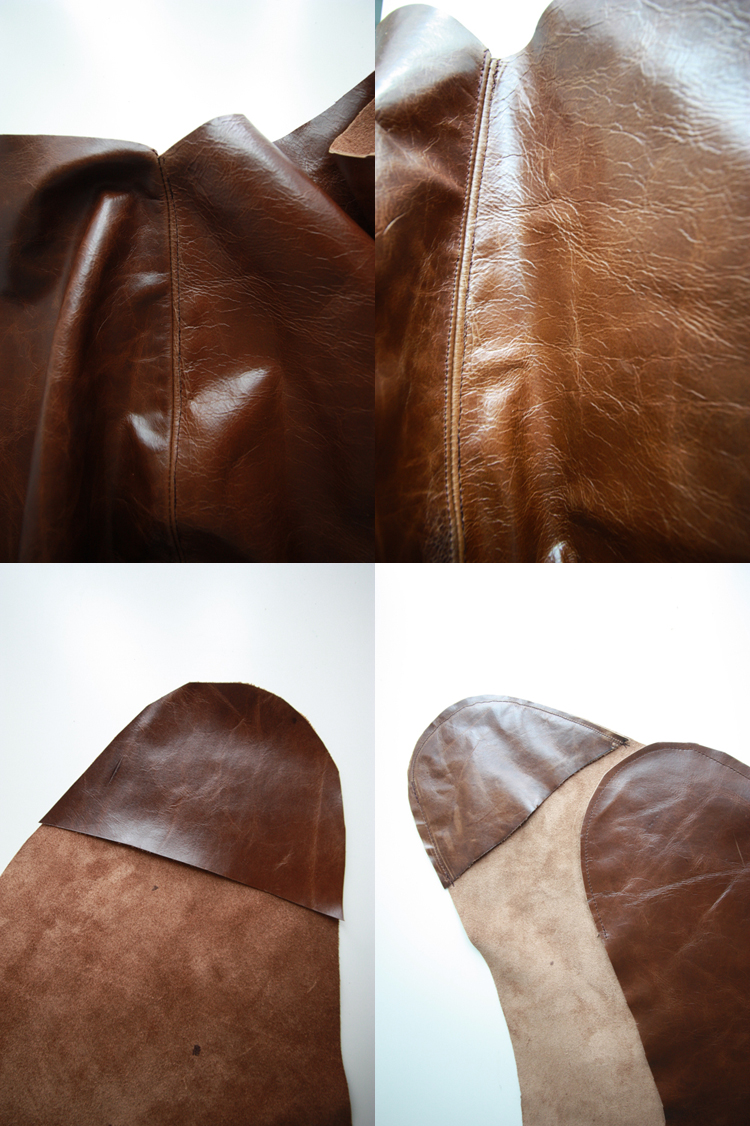 8. Roll up one side of the cover, so that it fits beneath the arm of your machine, and stitch on the top side of the leather just next to the initial seam.
9. Repeat on the other side of the seam. You’ll have a beautiful seam.
10. Lay each corner flap wrong sides together, and clip together with the binder clips.
11. Stitch around the edge of the corner flaps about 1/4″ from the edge of the leather. Trim the rounded edge with sharp scissors so that there are no overlapping pieces of leather on the front side of the cover. (optional: use some leather adhesive to rub along the raw edges of the leather all the way around.)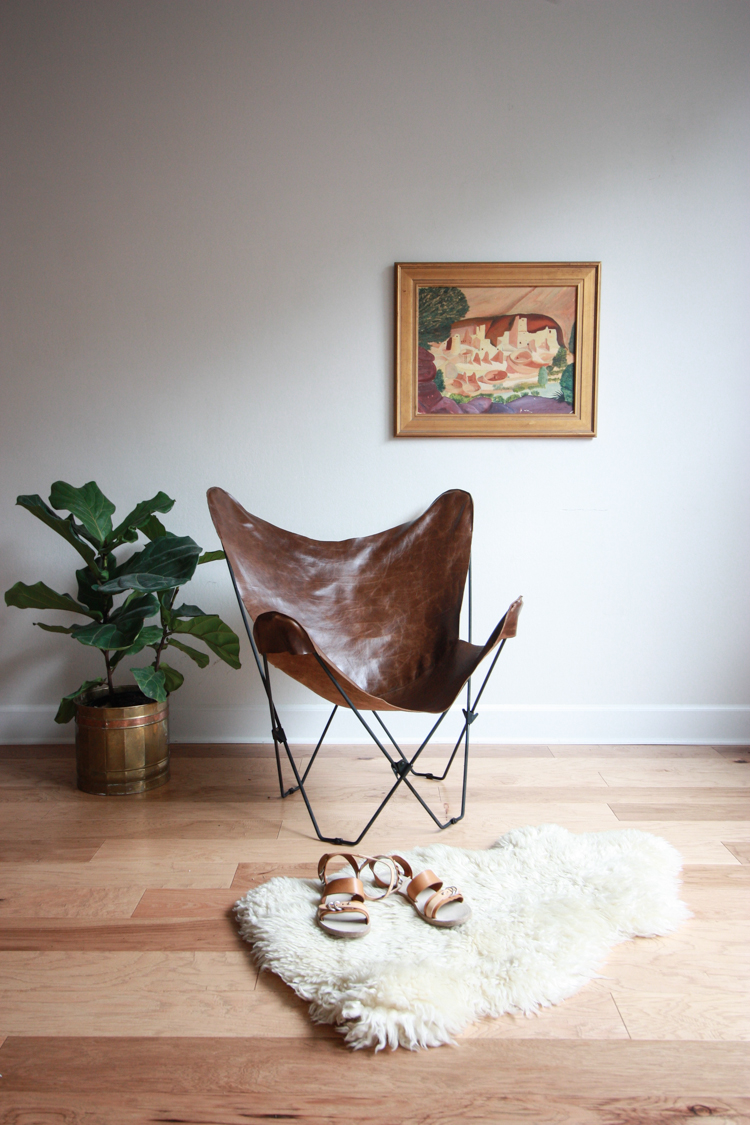 That’s it! You’re done! Slip your beautiful new leather butterfly chair cover onto your frame and admire your handiwork!
(If you need a few projects to make with your leather scraps, check out this easy no-sew leather glasses case, leather planter pot cover, or my favorite leather blanket strap. All super fun and easy projects.)
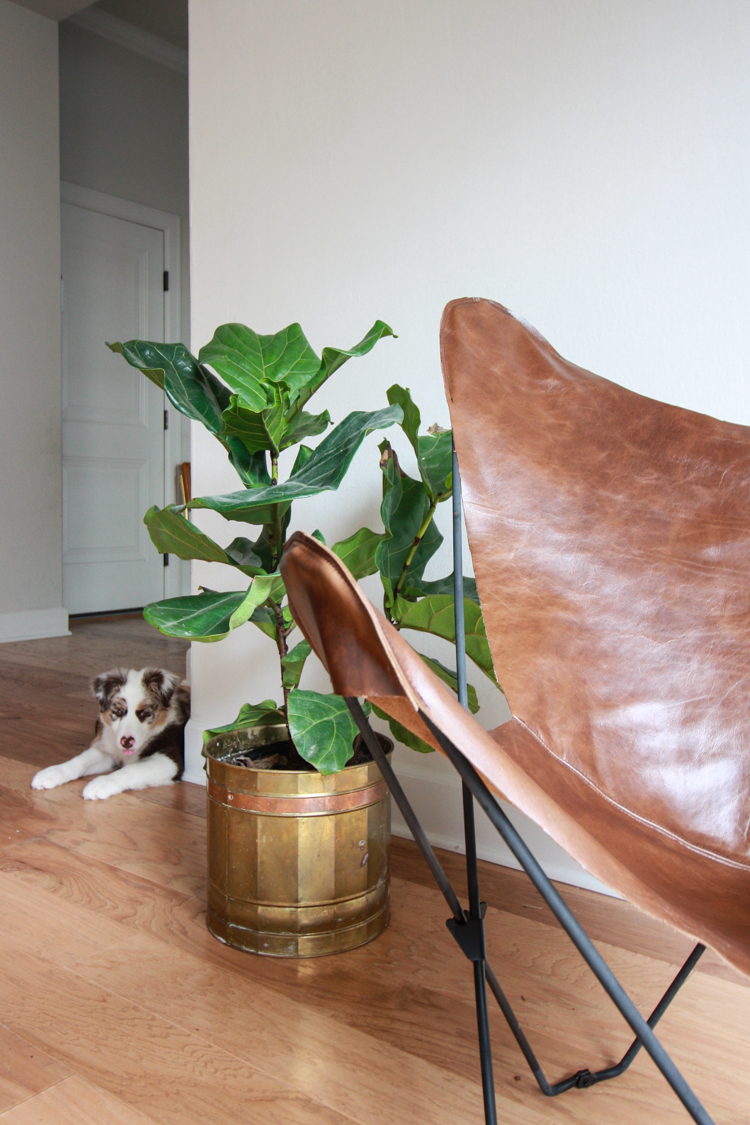
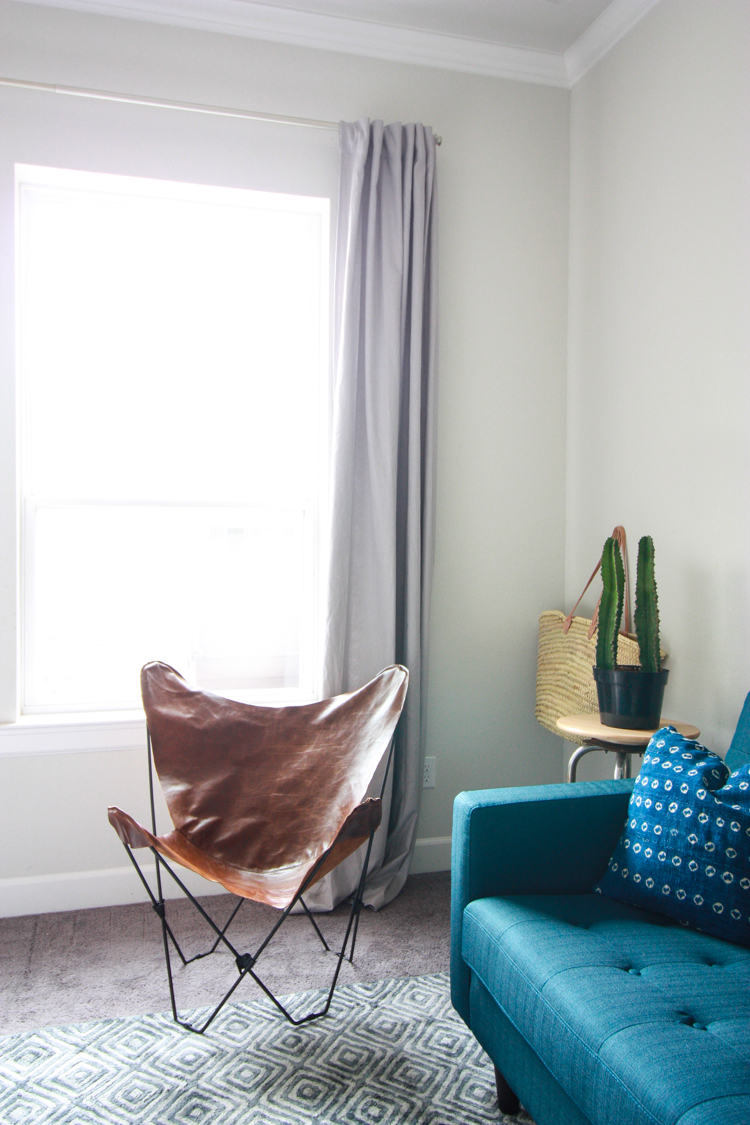
 I sort of keep oohing and ahhing, because I’m so in love with this chair!
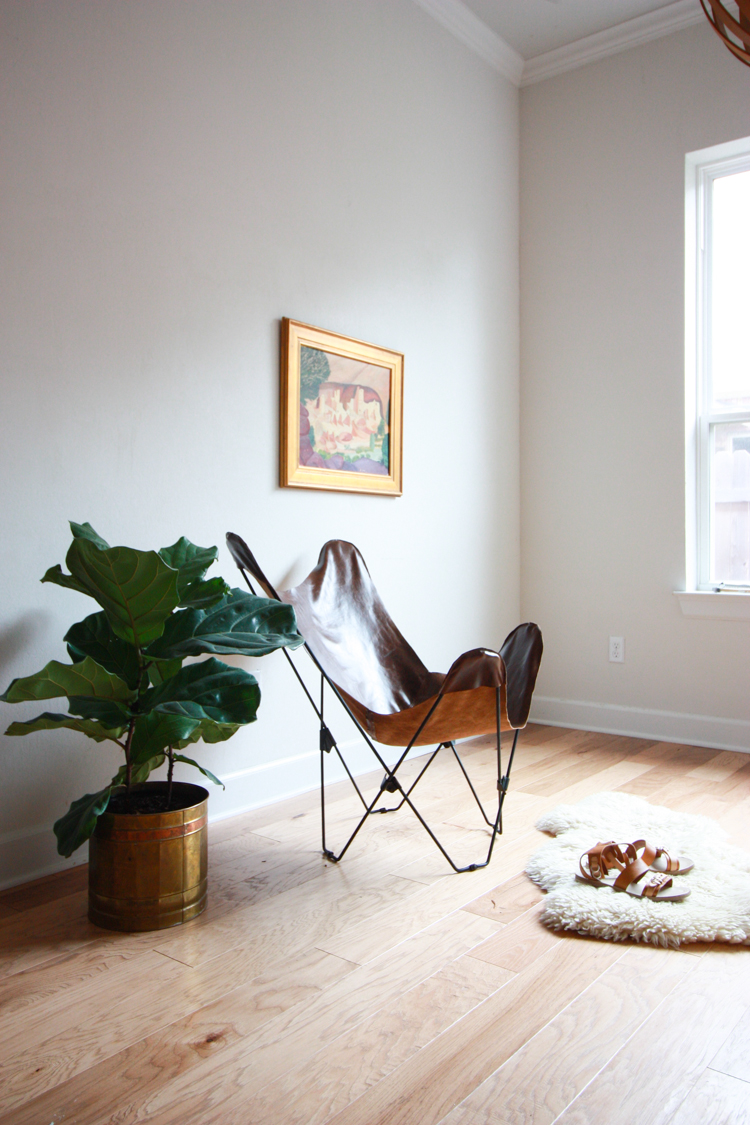
And although I love the look of the leather butterfly chair styled minimally in my (unfinished, waiting to be painted) patio room, I also am thrilled with it in it’s new home in my master bedroom. 
 The rest of this space is just coming together (full post forthcoming) but the earthy leather butterfly chair adds just the right modern bohemian touch to this space. It also reminds me a lot of Marfa, which is most definitely a vibe I’d like to add to my home.
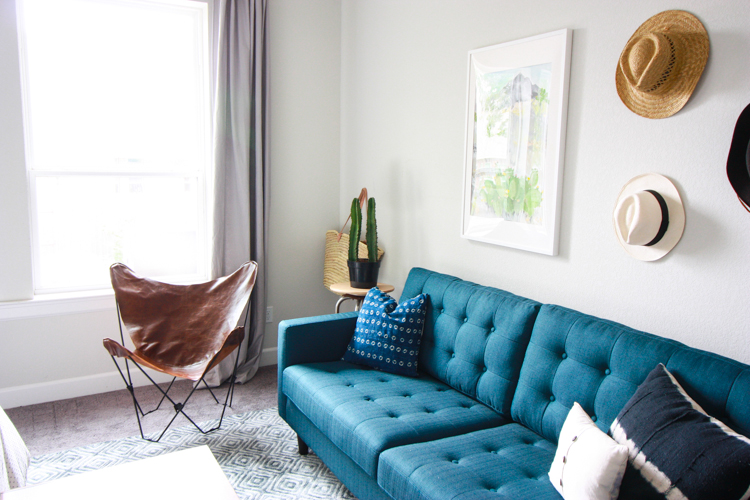 To modify this pattern for a non-leather chair cover, I’d recommend using a heavy duty fabric like canvas, and finishing all of the raw edges with bias tape. 1.Stitch the seat seam, then finish with bias tape. 2. Add bias tape to the straight edges of the corner flaps before sewing them on. 3. Stitch a length of bias tape around the entire cover edge to finish it off. Or for a lined cover version, you can find one for sale over here at my good friend Melissa‘s site.
Good luck! If you use this pattern or tutorial to make a butterfly chair cover of your own, tag me on Instagram in a photo! I’d love to see it!
Created in partnership with Leather Hide Store.

