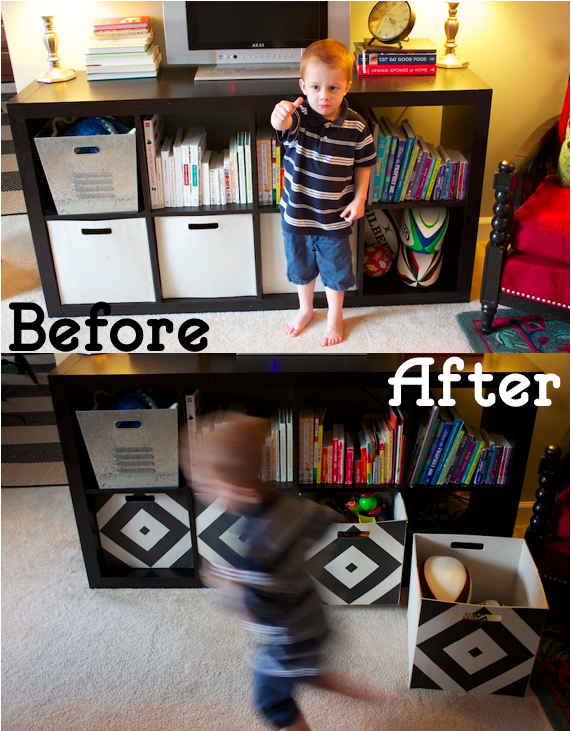
Whoosh! That was the sound of the week passing by. It went about as fast as Milo the “Super Guy” goes running around the house (and park, and mall, and zoo, etc.)
I had a little roller coaster week. High in Philly with the boys, enjoying deliciousness in many forms. Low during a nap time when I tried every single idea I could think of to help Milo sleep to no avail (it’s amazing how nap time can make or break my mood). High again yesterday when I followed my mom’s advice and opted for a no-guilt “movie time” instead of nap time so the toddler and I both could get a much needed break.
He watched Princess and the Frog, and I painted our storage boxes. Win Win.
We’ve had these boxes since we moved into this apartment, over two years ago. They were an inexpensive, easy solution to organizing some belongings in the book case, and fit it perfectly even though they are from Target, not Ikea. As Milo grew into toys, we rearranged a bit so that his playroom shared the living room, and the storage bins became toy bins, for now. They had been begging and pleading for a spray painted geometric design, so I finally obliged. I initially thought I’d do simple stripes, but I am so happy I decided to branch out and create a cool new take on the classic (and oh so trendy) chevron pattern.
Here’s how I did it:Needed: Storage bin (folded flat with the base removed from the inside), 2″ masking tape, ruler, pencil, exacto knife and spray paint.
Measure from the top to the bottom of each side and make a small mark along the edge in the center. These bins are 13×13″ so I marked at 6.5″ on each edge.
Draw a faint pencil line connecting the dots on each diagonal.
Cover the handle hole with masking tape from the inside.
Place strips of tape along the outside edges of your pencil lines, press them on securely.
You should end up with a square of masking tape on the diagonal.
Use your ruler to measure 2″ from the inside edge of the masking tape square (where your pencil line was before) and draw a line.
Repeat along all four sides, creating a square within your square. Don’t worry about pencil marks in the stripe, they will be painted over.
This time add the masking tape to the INSIDE edge of your pencil line, leaving the 2″ border. Use your ruler and exacto knife to trim the edges of the tape into a perfect square.
Now you should have a square within a square of tape, all on the diagonal.
Tape around the edges of the box, so they stay clean when spray painting.
Take outside, or to a well ventilated area and spray paint.
Start with a light coat, and continue adding layers until you are satisfied with the color. Don’t hold the can too close, or you may get paint seeping under the tape (I learned this the hard way:)
Let dry and then peel away the masking tape to reveal your design!
This is the really fun part when your attention to detail measuring and taping pays off with clean lines and accurate geometry.
Looks pretty snazzy, right? Now, do that a few more times, then you get to line them up!
I love how they look side by side along the shelf. I think I’ll have a little easier time picking up and putting away toys (endlessly) now that they live in such cute storage bins! I finished just as the movie was ending. Perfect timing!
I love a start-and-finish-in-90-minutes project. Check the box. Done.
Tonight for date night Dave and I are going to a movie (probably this, but have you seen anything good you’d suggest?) and eating at our hometown favorite Cafe Rio. Tomorrow I hope to make some serious headway in my Easter sewing orders, and finish a new dress for myself, then we’re hosting new friends for dinner. On Sunday we’ll all enjoy going to church and having some down-time as a family. I adore Sundays.
I wish all of you a happy and creative weekend! See you next week!