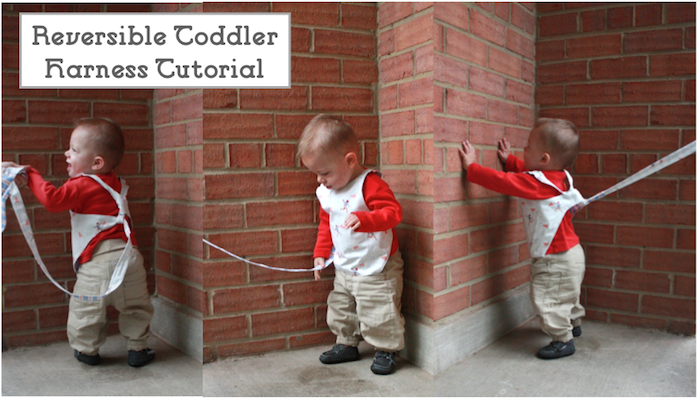
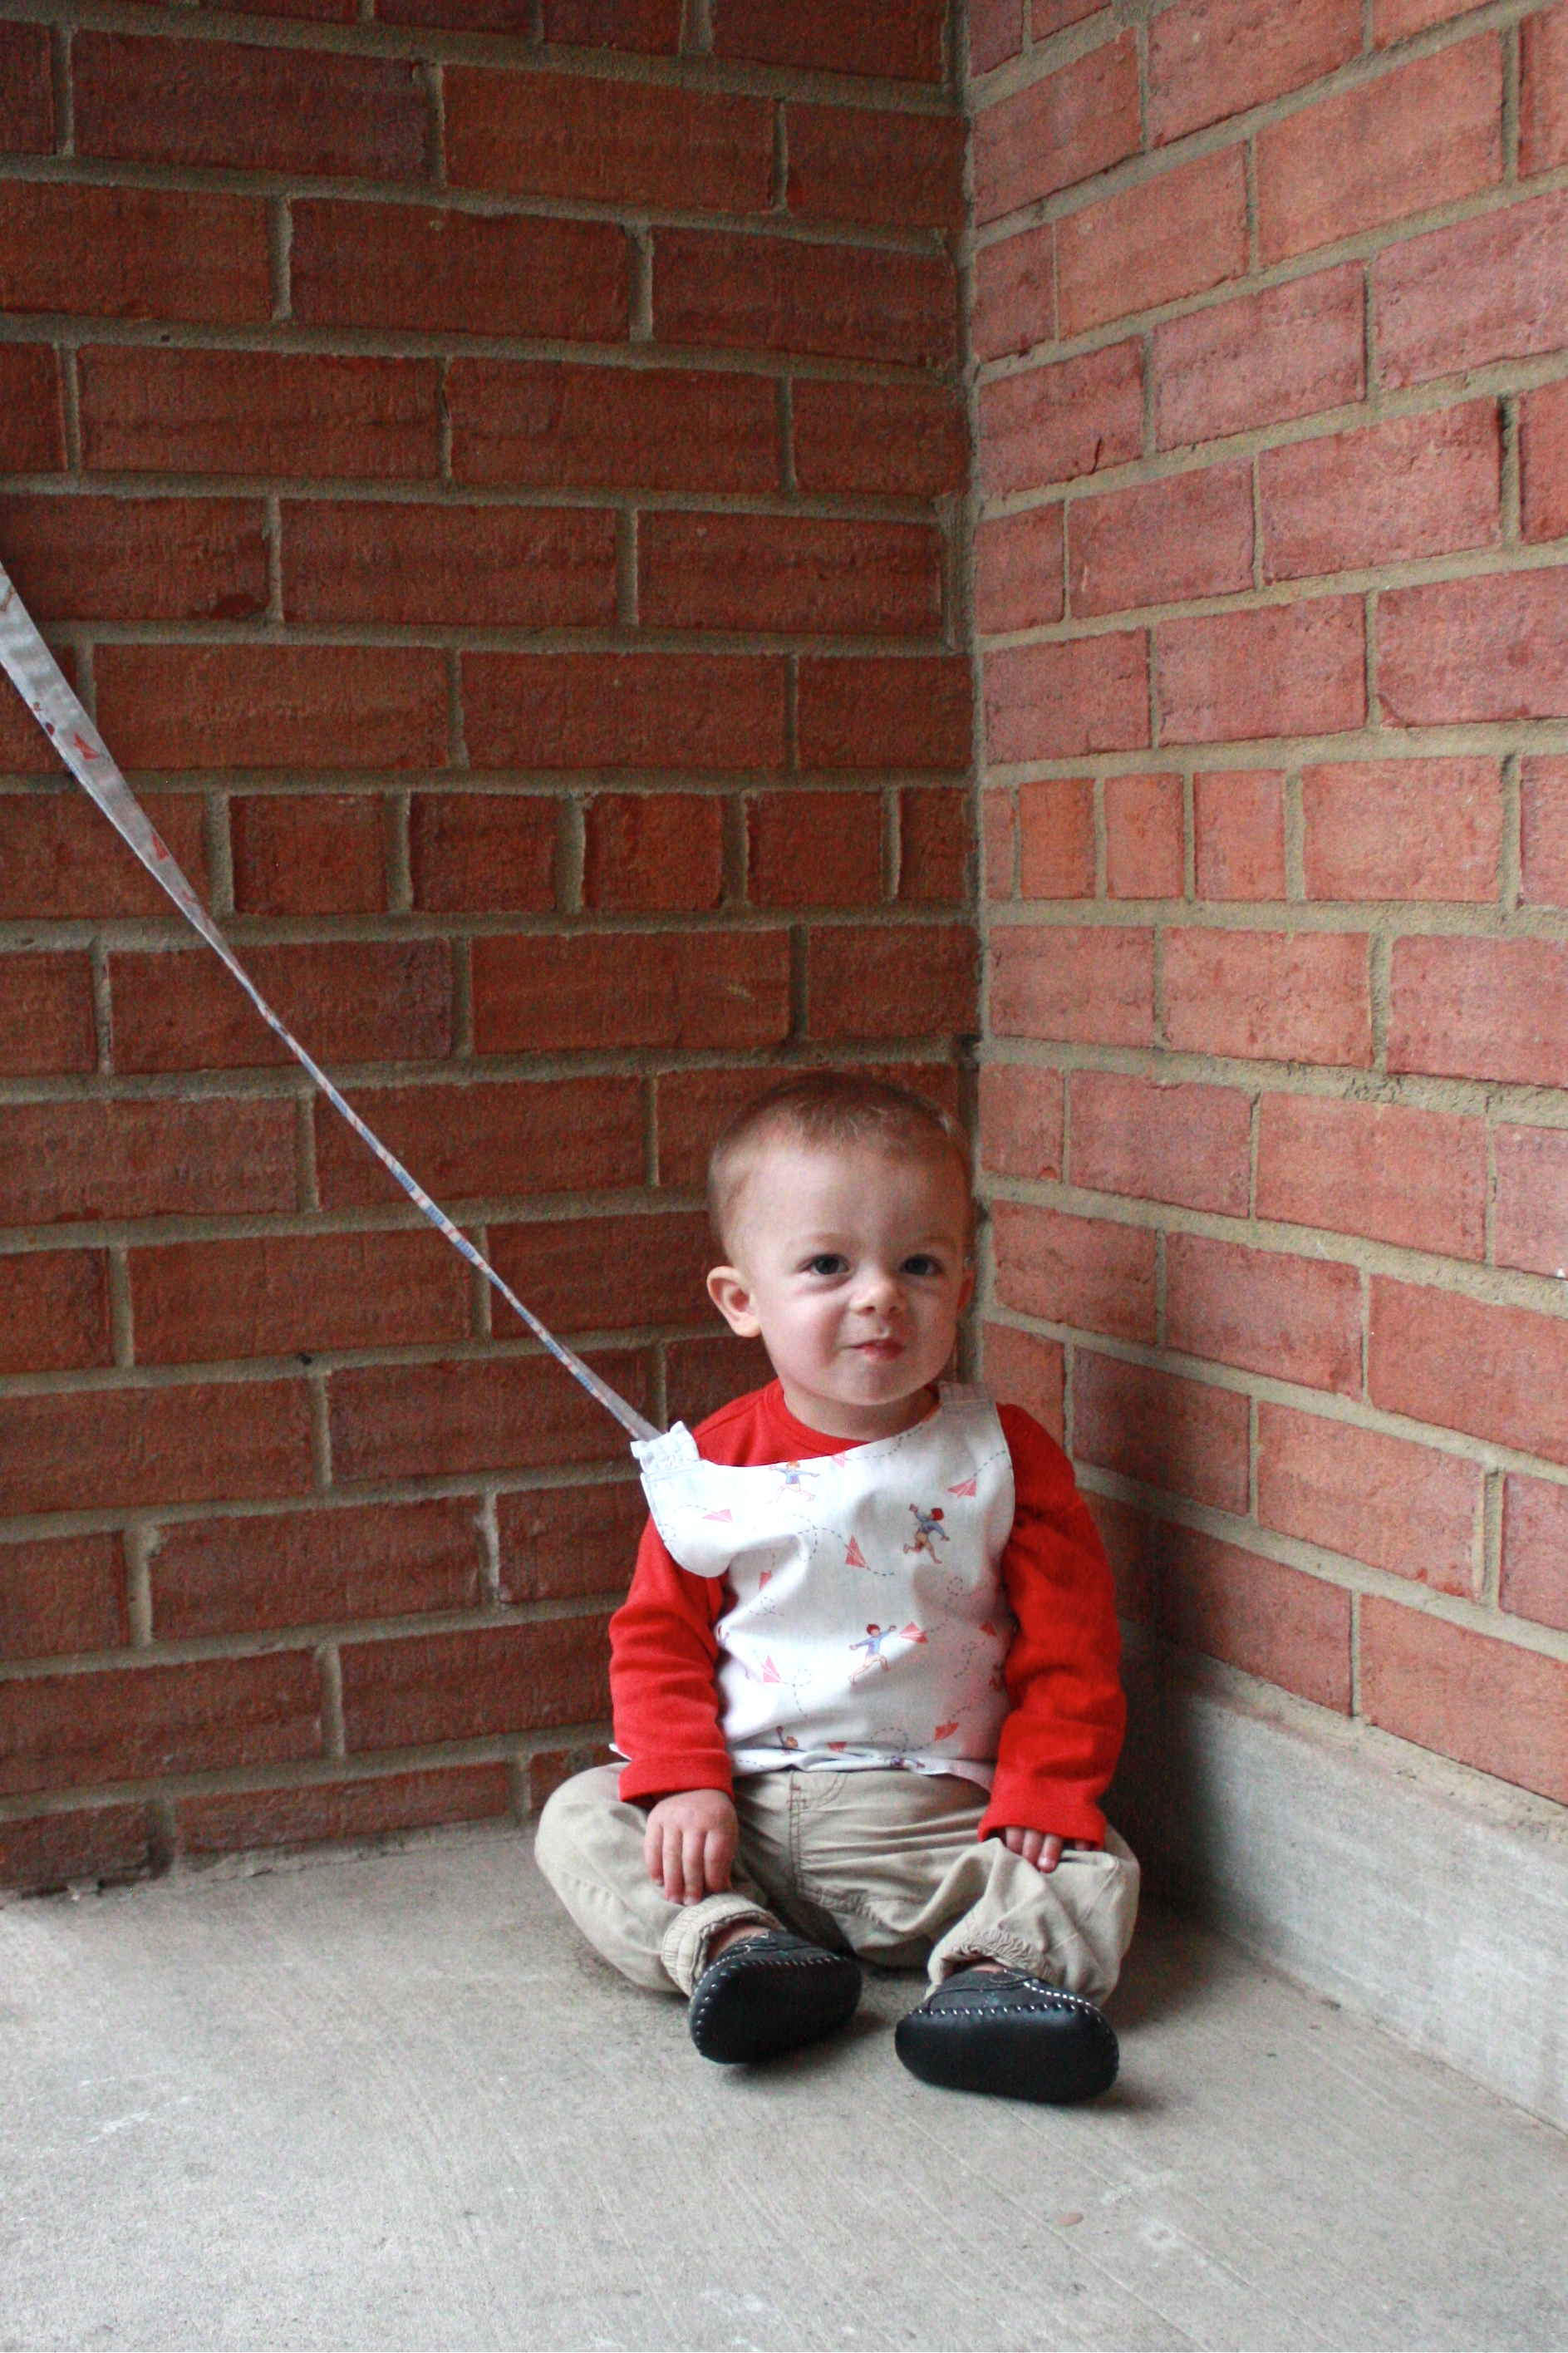
Way back, when Milo had just begun to toddle around, I whipped him up a little toddler harness. I know that they can be controversial, but we loved it! I wanted my new walker to get a chance to practice his skills, while still safely contained (they can be so unpredictable) rather than just sit in the stroller. “Harness” sounds cool, right? Like walking is a new outdoor activity requiring safety gear…which it is! I felt it was simply an extension of hand holding, and there was no way Milo would have let me hold his hand everywhere we walked (he still doesn’t!) I found we used the harness from right after he took steps, at 12 months, until he was just about 20 months, when he began to learn to come when I called him.
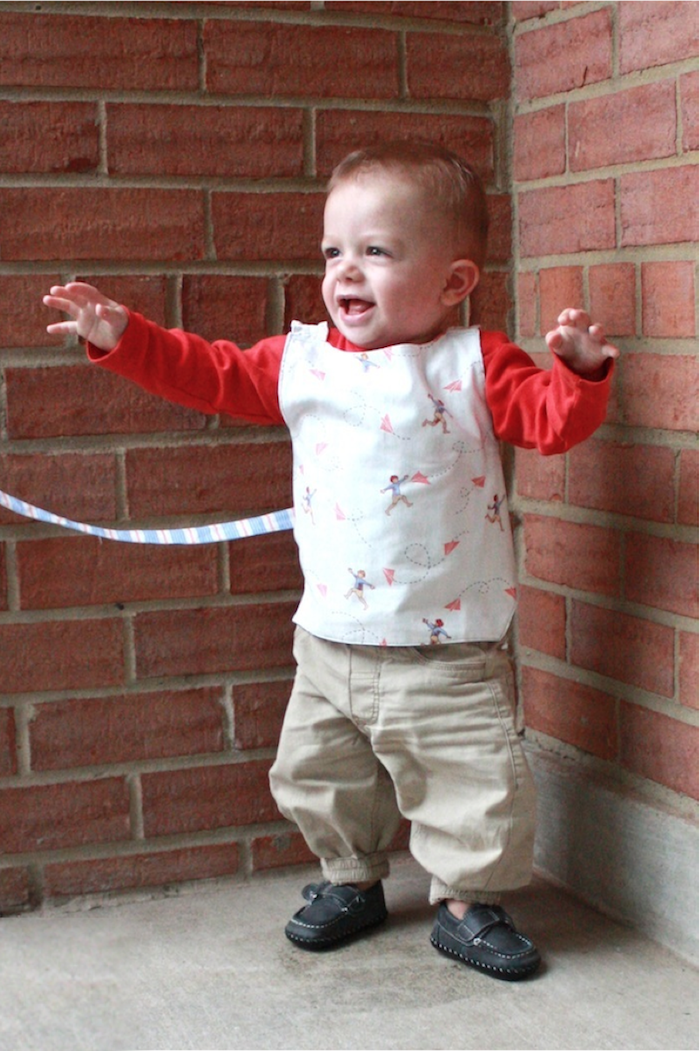
I wanted something that looked more like a vest than a backpack, and needed it to be comfy, easy to pull on and off, and made out of things I had on hand. We used it often and well…and then packed it away somewhere with baby stuff. I’ve no idea where! Now that Eliot is standing freely and beginning to cruise, I figured it was time to make another, and even improve upon the original. This version is completely reversible, so you get to choose two fun fabrics! I used Chasing Airplanes and Racer Stripes from the Children at Play Over the Fence line by Sara Jane for Michael Miller that I picked up at Raspberry Creek Fabric. I thought the “children at play” theme was appropriate. In addition to the cute material, I also added a little stretch in the shoulder straps to keep it comfy and easy to slip over the head.
Want to make one? You’re in luck, because I created a full tutorial. Again, because of the tutorial length, just click through below to check it out.
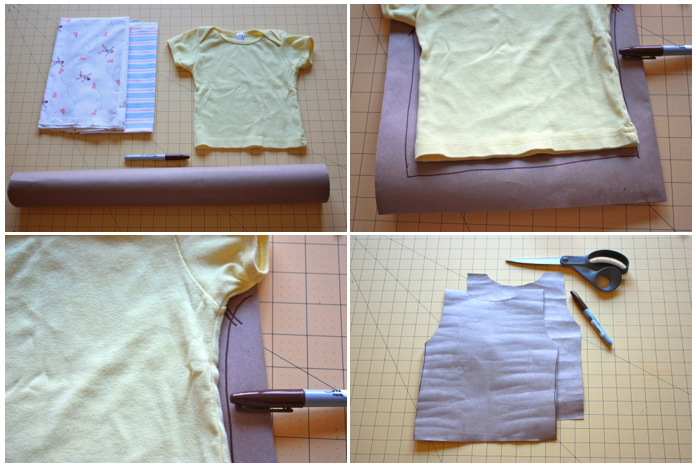
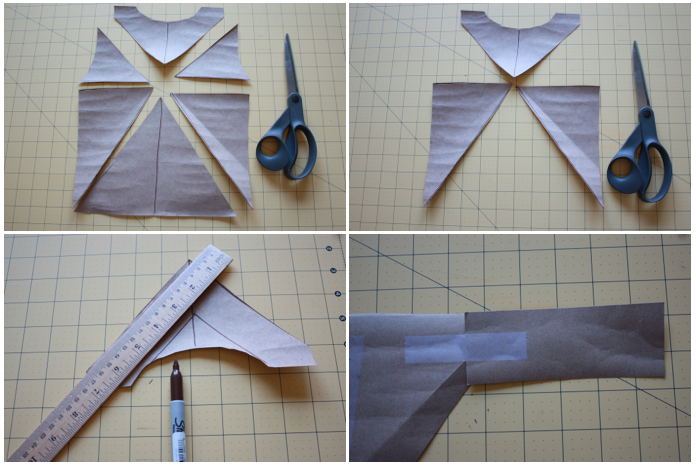
You’ll make your own pattern using one of your toddler’s tees. 1. Grab a tee, some butcher paper (or paper grocery bags) and a sharpie. 2. Fold the paper in half and trace around the tee shirt 3. Mark at the seam of the sleeve on both the shoulder and armpit 4. Round out the lines from shoulder to arm pit and cut around the pattern. You should have two vest-shaped pattern pieces.
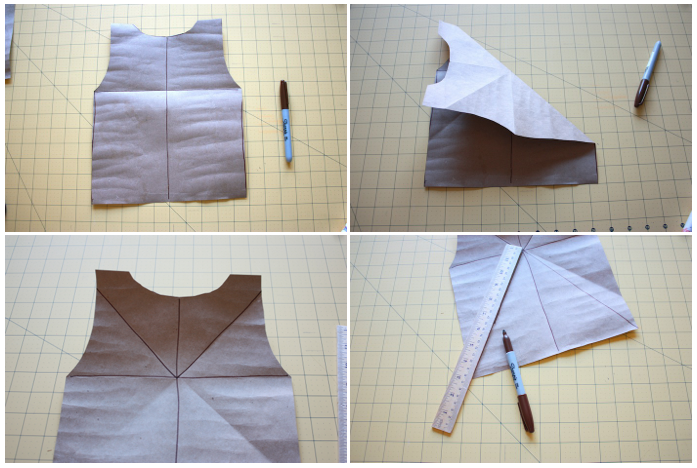
1. Set one of the pieces aside and fold the other in half at the armpit and in half again vertically. Trace a line along the folds 2. Line up the top two lines and fold the pattern on the diagonal 3. Do the same the other direction and trace lines along the folds between the center of the back and the shoulder 4. Use a ruler to make a line from the center back to the bottom corners of the pattern.
1. Cut the pieces along the horizontal and diagonal lines (not the vertical center line) 2. Keep only the top and bottom side pieces, toss the others 3. Use a ruler to make the top piece a V (this will become the neck strap 4. Cut 3 rectangles about 2″ x 4″ and tape onto each corner point, matching the end up at the 2″ width of the point
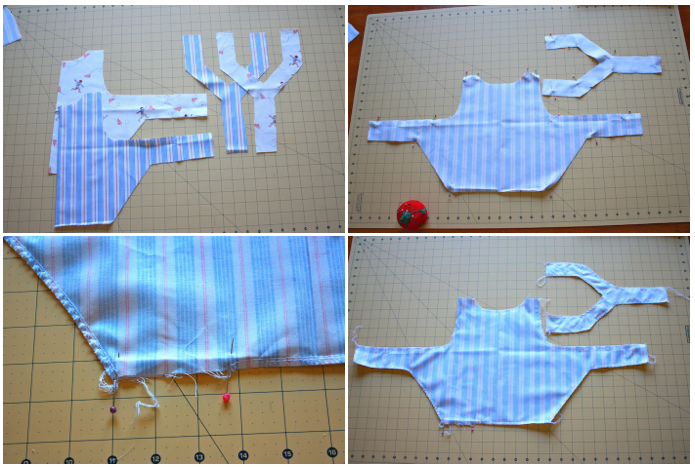
1. Tape the side pieces onto the uncut pattern piece, also cut two additional 2″ rectangles, this time only about 3″ long and tape them to the ends of the neck piece (see photo 4) 2. Mark one of the sides where you will attach the handle 3. Fold (or cut) your vest pattern in half and lay it along the fold of the fabric. I folded both of my two fabrics and cut the pattern pieces out together 4. Lay the neck piece on the fabric and cut one of each fabric.
1. At this point you should have four pattern pieces cut, two of the vest and two of the neck piece 2. Pin right sides together 3. Leave a 2-3″ hole in the bottom of the vest piece so you can turn it right side out easier 4. Stitch around the edges, leaving all of the thin ends and the small hole in the bottom of the vest open
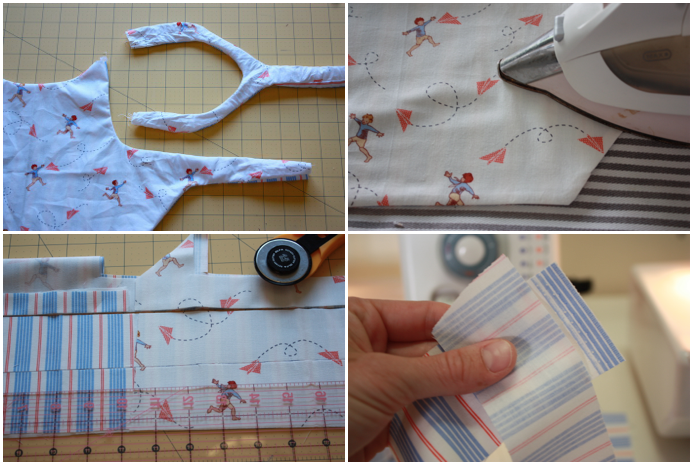
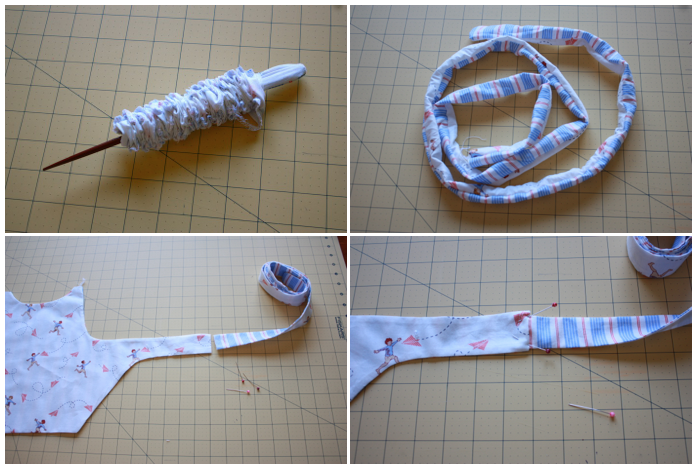
1. Turn the two pieces right side out. You may need to use a chopstick or pen to help 2. Press the pieces flat 3. Using your scraps from the pattern, cut 2″ strips of both materials 4.You’re going to make these scraps into the long handle, so connect them by matching ends up at a 90 degree angle
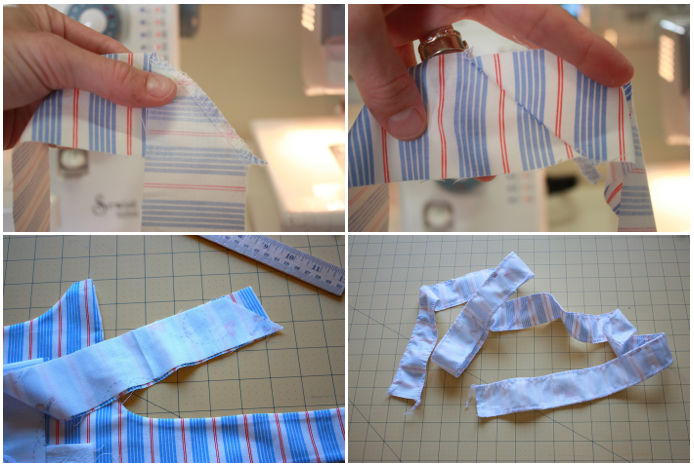
1. Stitch across the end on the diagonal. If you are using a sewing machine, cut the excess fabric off 2. You should be able to unfold it into a strip 3. Once you have a 3-4′ length of each fabric, match right sides together 4. stitch along both lengths of the material, and along one end
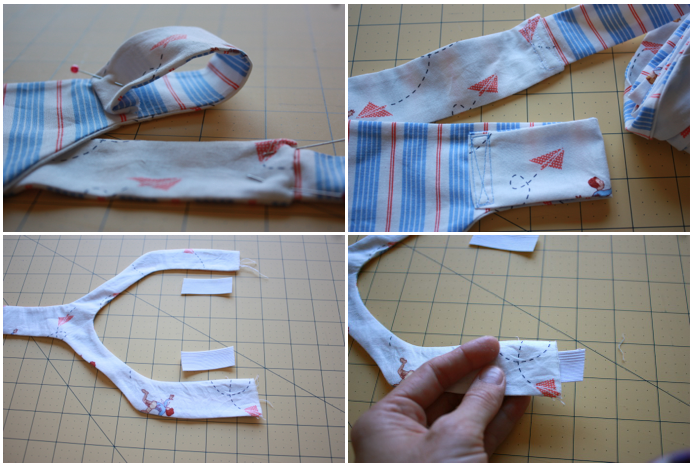
1.Use a pen or chopstick to flip your handle right side out 2. You should have a nice, long, tube. 3. Press the handle flat, then match up to one end of the vest pattern 4. Turn the vest side strap under about 1/2″ and insert the handle inside and pin in place.
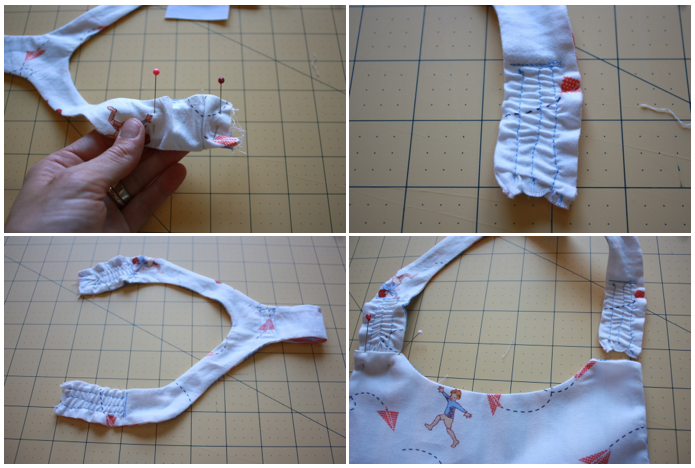
1. Flip the little side strap on the other side of the vest into a loop and pin in place 2. Stitch both the side loop and the side handle into place with a nice rectangle or several rows of stitching 3. Now, cut two 1.5″ lengths of elastic 4. Insert one into each end of the neck piece down to about 3″ from the end.
1. Pin the elastic inside the strap, then pin it to the open end as well. The fabric will look gathered, because the elastic is shorter than the strap 2. Sew along the end, and the length of the elastic, pulling the fabric flat as you go 3. Repeat on the other side. You should have two stretchy shoulder straps. Also, flip the other end of the neck strap under into a loop (like you did on the side) and stitch in place. 4. Fold the top open ends of the vest pattern under about 1/2″ and insert the shoulder straps. Pin and stitch in place.
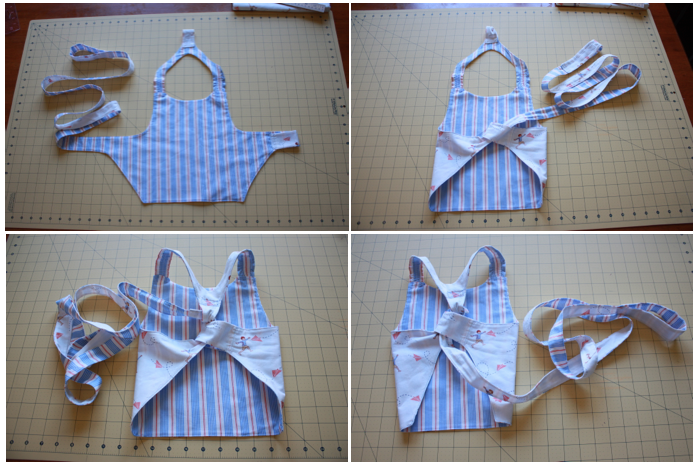
1. You are done! You should have a reversible harness with a loop at the neck, one at the side, and a long handle on the other side 2. To use, thread the strap through the opposite side loop 3. Thread it through the loop at the neck 4. And if you want, thread it back through the loop at the side.
And there you have it! Make one now and you’ll be ready for when your little one actually starts walking!!

