This post is a long time coming. I have kept thinking I need to change/organize/decorate my little closet more before I share it here. Truth be told, it is always a work in progress, so now is as good a time as any, right? (It was originally slated as one of my Home (Away from Home) posts, but I didn’t finish in time to schedule it for while I was away. This is even better!)
Before we moved into our apartment here in the DC area, I had this idea for the perfect sewing space. I was looking at all kinds of entertainment centers with doors and Ikea closets, hoping to see one that would fit my machines and supplies. I needed something with closing doors, so after nap-time I could leave a project half-finished without having to pack up and put things away. If my sewing machine is put away, I won’t use it!
I wanted a little space, but having a third bedroom to use for sewing would be crazy, and add about $1000/month to our rent. When we first saw our apartment, I opened the doors to the coat closet and knew immediately it was the perfect space for me! I mean, one of my children sleeps in the closet, so a closet is good enough for my sewing machine.
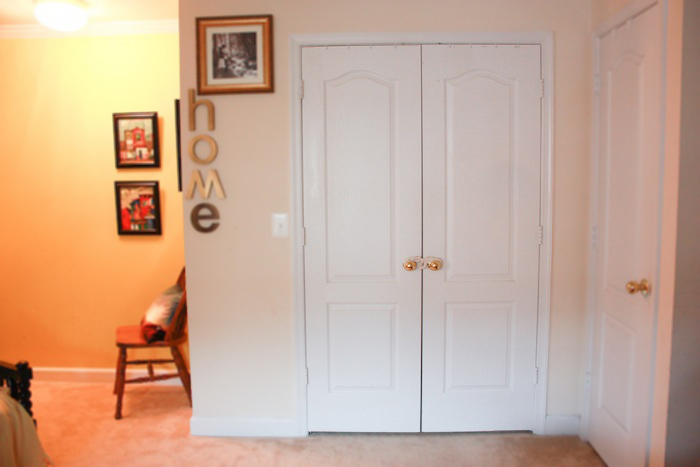
From the outside, it’s just another (oddly locked) coat closet.
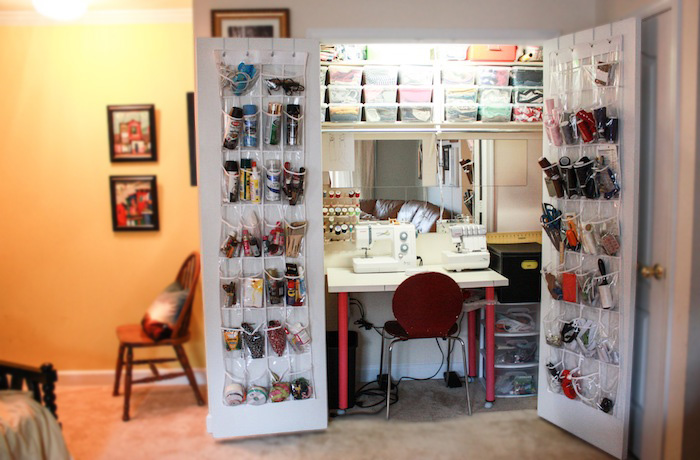
Open those doors and step into my office! Inside you’ll find my sewing and craft mecca. Everything I need and use is tightly packed into 16 square feet. Easy to open, easy to close. Easy to use.
The space is so small and packed, I use clear containers for almost all of the organization. I need to be able to see what is where at a glance.
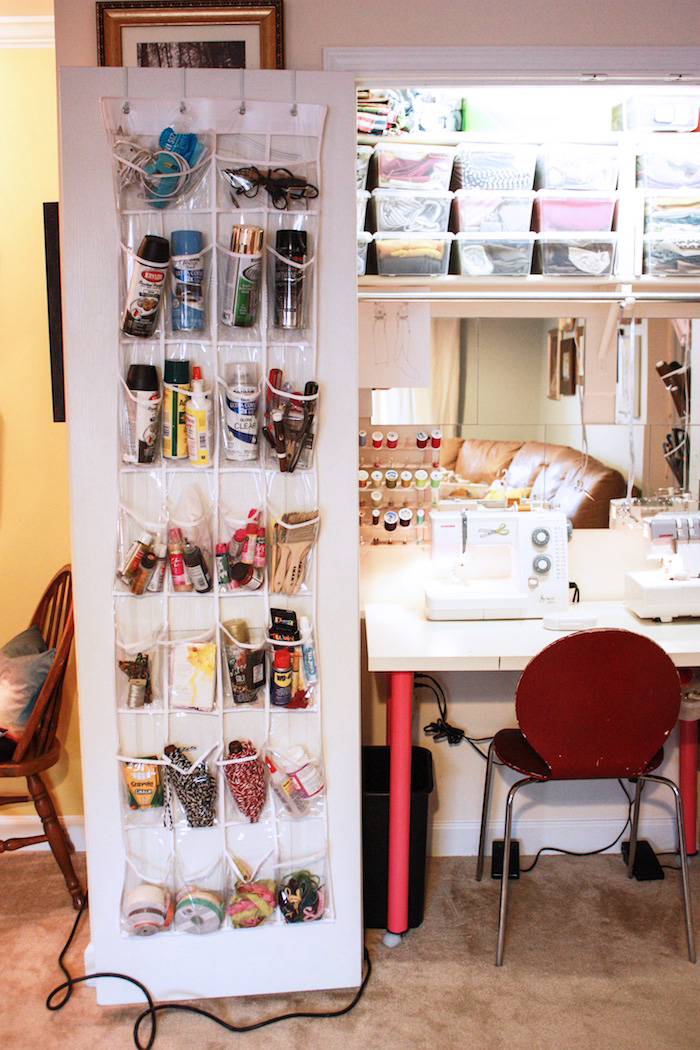
These over-door shoe holders are the most wonderful space-saving organizers. I love this particular brand, because the plastic is totally clear, not frosted like some I’ve seen. On the left closet door hangs most of my craft supplies: hot glue gun, wood burner, all different types of paints and adhesives, basic tools, brushes, wire, twine, spooled ribbon, and even some left over bits of yarn.
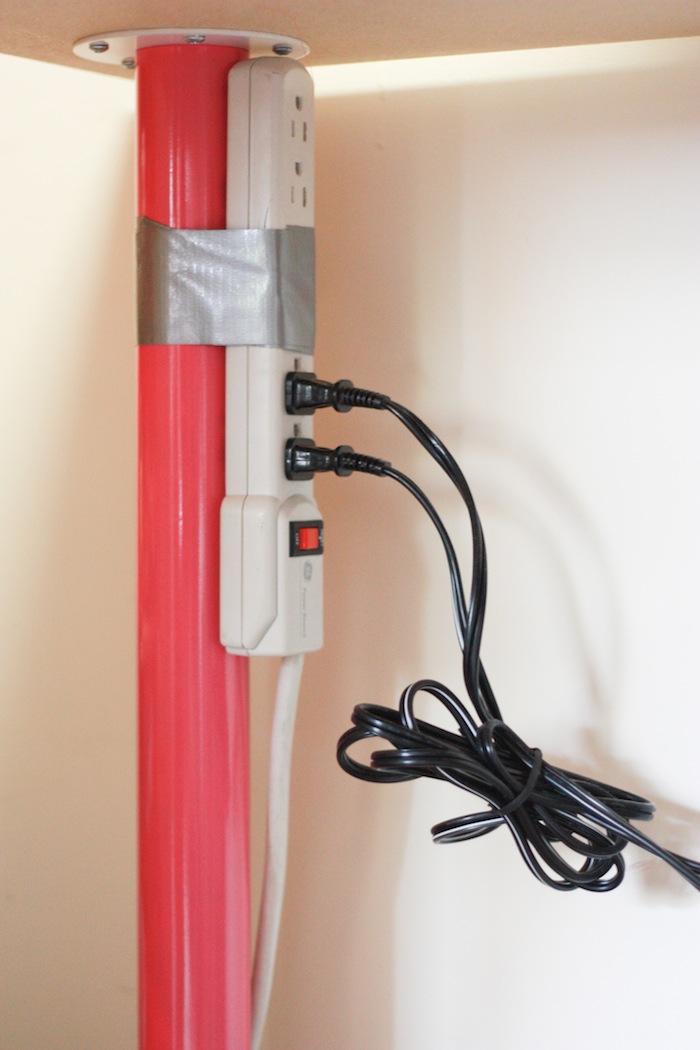
Because there isn’t a power source inside the closet itself, I plug both machines into a power strip, then just pull the extension cord out and plug it into the hallway outlet. Slick, right?
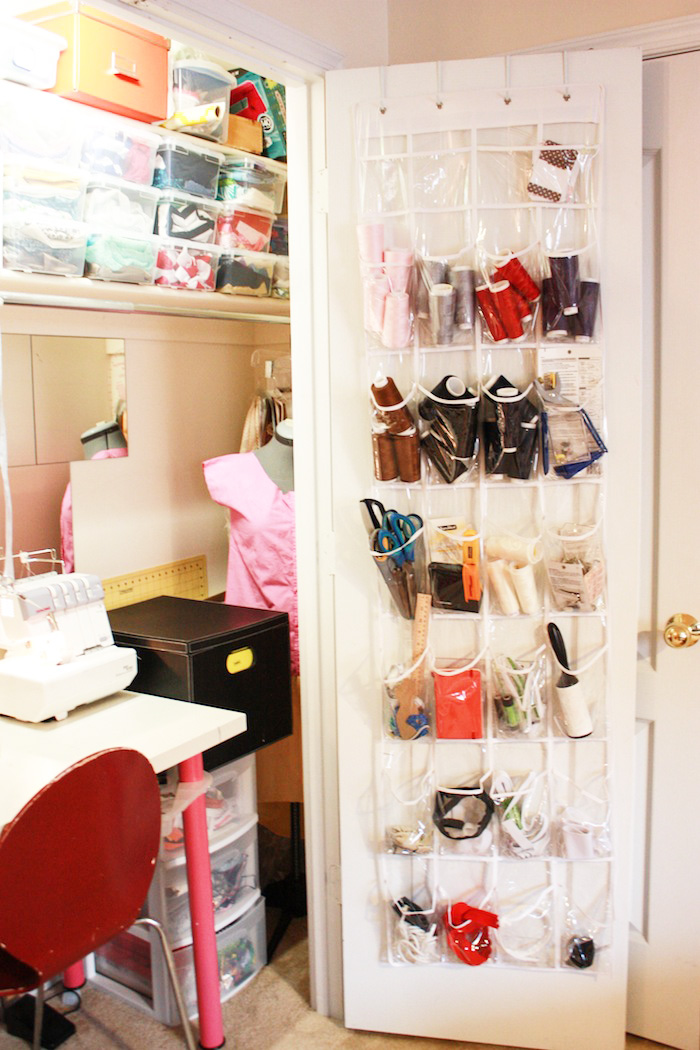
On the right side door I organize my sewing-specific supplies and notions: serger thread, snap setter, lots of scissors, safety pins, quilting pins, straight pins, rulers and measuring tape, sketchbook, elastic thread, lint roller, cording, velcro, bias tape, welting, and boning.
On the floor you can see a small plastic drawer set. That is the overflow for these over-door organizers. The top drawer is full of zippers, the second is full of hair and headband supplies, and the bottom houses all of my stamps and inks.
I love this old chair my mom gave to me. It’s super light and comfortable, but a little haggard. One day I’ll decide how I want to refinish it. For now, it’s perfect.
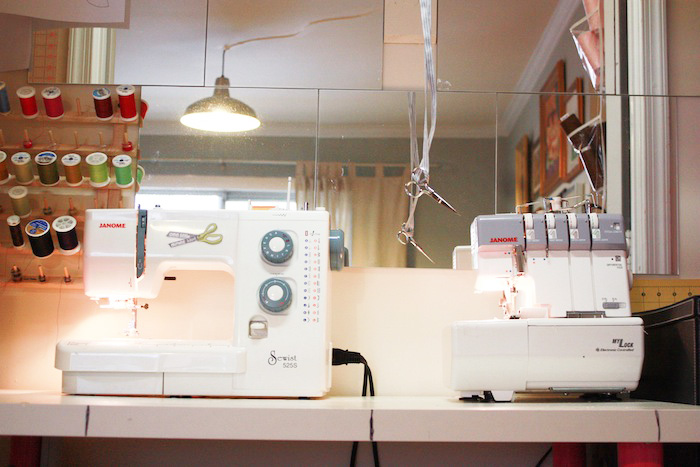
Straight ahead, you’ll see my machines. They were both gifts from Santa. The sewing machine I received in 2006, just after Dave and I were married. The serger came two years later, when we were living in New Hampshire. I’ll venture to say these are my favorite (and most-used) Christmas gifts ever. Now I just need this coverstitch machine to round out my collection (wink wink).
The mirrors on the wall are from Ikea. They help to open up the closet and reflect some light. Sometimes I watch a backwards movie on the mirrors while sewing. But most often, I just catch awkward glances of my serious, concentrating face.
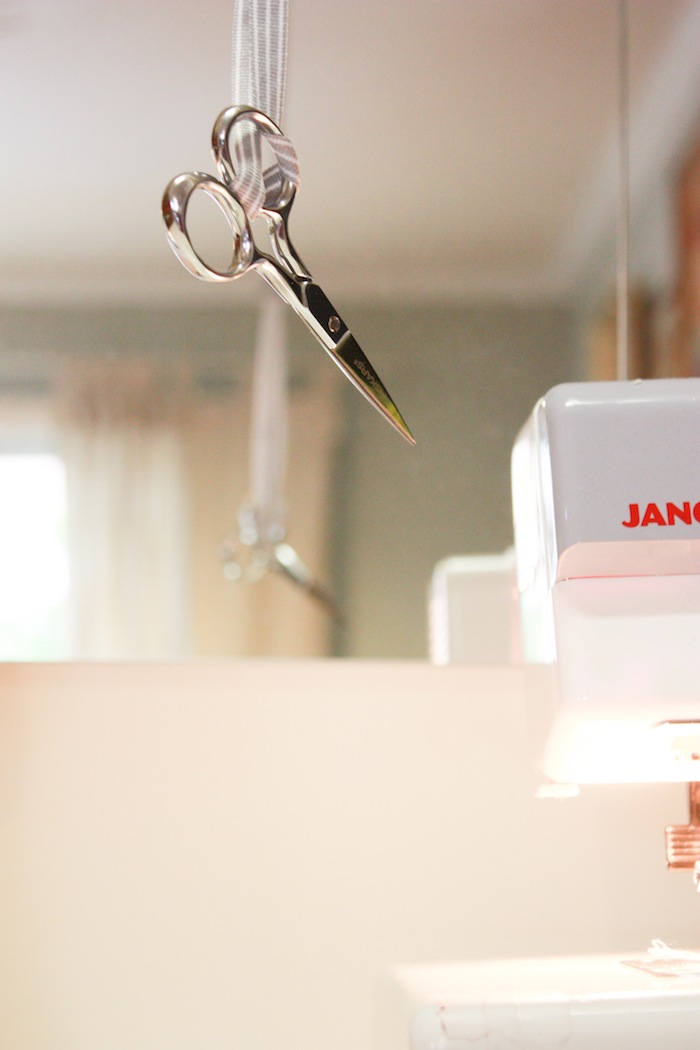
I hang my tiny trimming scissors on a ribbon around my neck while I sew. It’s a practice I began a few months ago, and I really feel like it’s made a difference in my efficiency and details. When I’m not sewing, I hang them on the closet hook so I don’t lose them. Right now I have this basic pair (that works beautifully), but I dream of buying these beautiful ones. Maybe one day.
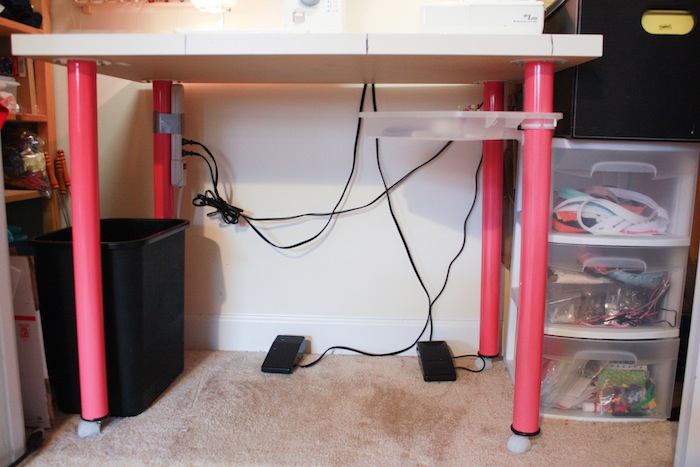
My hot pink table legs were a hand-me-down from Dave’s Aunt Missy, and we just bought whatever inexpensive Ikea tabletop fit in the closet to go on top! I also added casters to the legs so I can move the table easily. The actual work surface of the tabletop is shot after three years of cutting, ironing, and pinning on it. It serves its purpose, though, so I’ll keep it around for a while. I’ve added sharpie lines at 12″ intervals along the side of the table top. I found myself pulling the ruler out all the time, so now they’re just marked on there. What I need to do is nail an actual yardstick onto the side…
The cords are tied together with a twist-tie to keep them from piling on the ground. Not pretty, but better than ugly and tangled!
For a long time the power strip was just on the floor. Then one day, I thought maybe I could secure it up, out of the way. A foot of duct tape later, it was done.
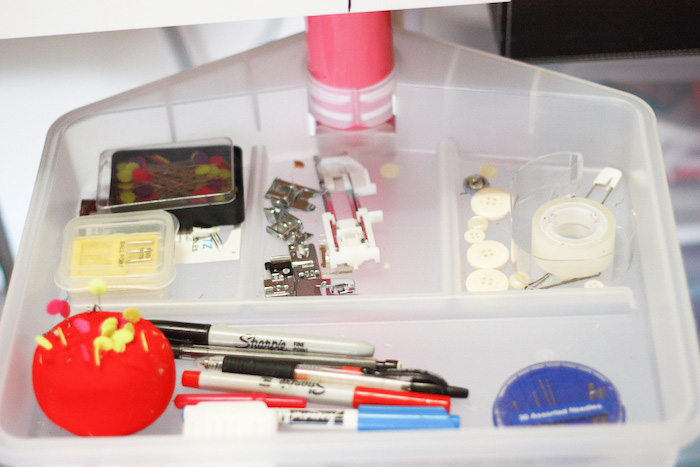
I love this little drawer feature that hooks onto the table leg. I couldn’t find it online, but we bought it with the tabletop at ikea. I use it to store all of the sewing supplies I want within reach: needles, pins, machine feet, buttons, scotch tape, pens, pencil, chalk, and of course, my seam ripper.
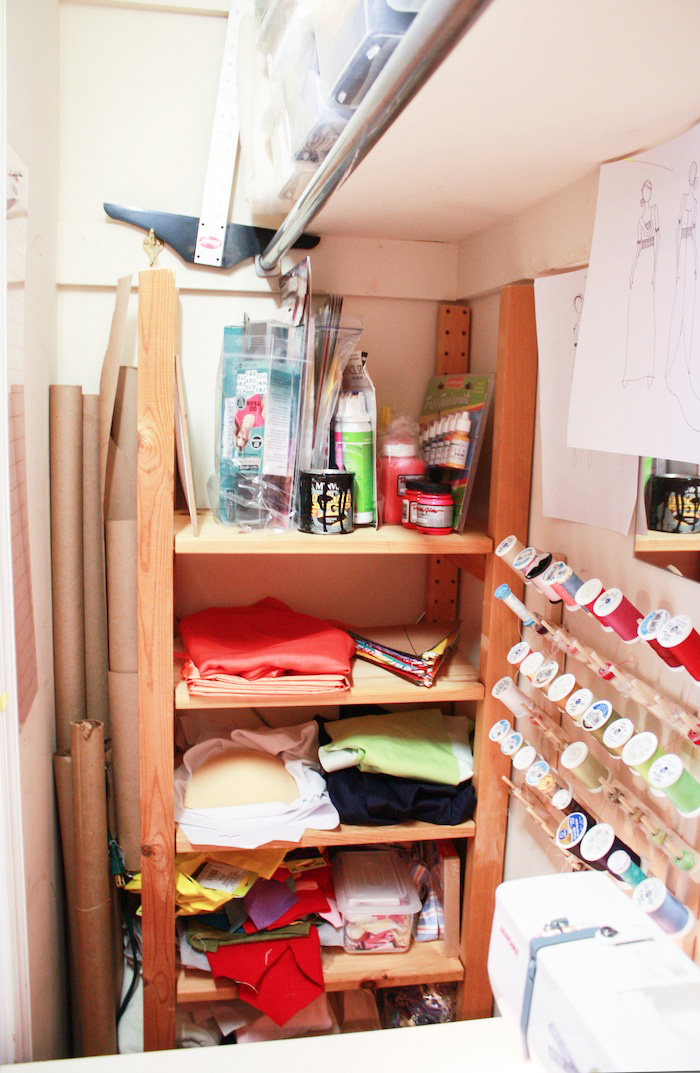
Peek inside the closet to the left, and you’ll find an open shelf that I scored for free from a friend. It was about 4″ too high to fit, until I sawed off the top. Now it fit’s just fine! I store my rolls of kraft paper for patterns to the side, and use the top shelf for storing fun products from sponsors Jacquard and Fashion Art Projects. I’ve got a fun Jacquard iDye DIY coming up this week, in fact!
Below that I store my works in progress. It’s a nice way to prioritize my projects and be able to keep the table clear. The further down the shelves, the further down the priority list things are. Like that quilt for my baby girl I started before I was pregnant with Eliot…that one’s pretty low.
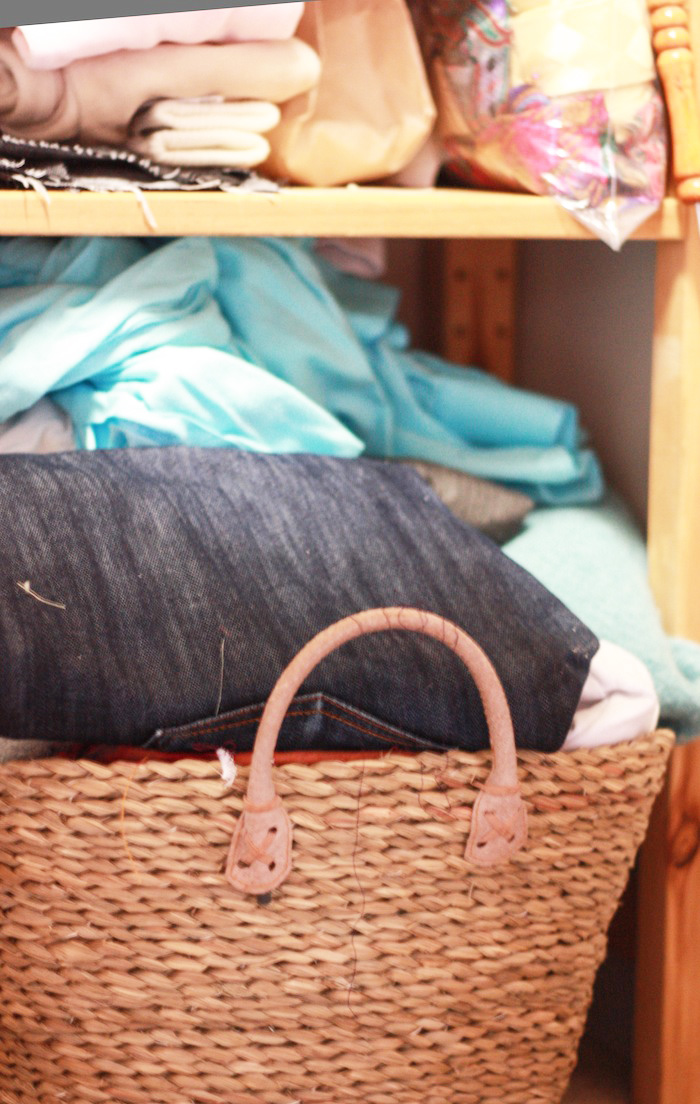
At the very bottom, on the floor, you’ll find my refashion basket. I decided to purge through what used to be a HUGE pile, and keep only what fits in this basket as possible refashions. (Then my friend gave me a bunch of great golf-shirts that I want to use for the boys, so I have a little pile on the closet shelf, too. But when that’s gone, seriously, I’m only keeping what fits in the basket.)
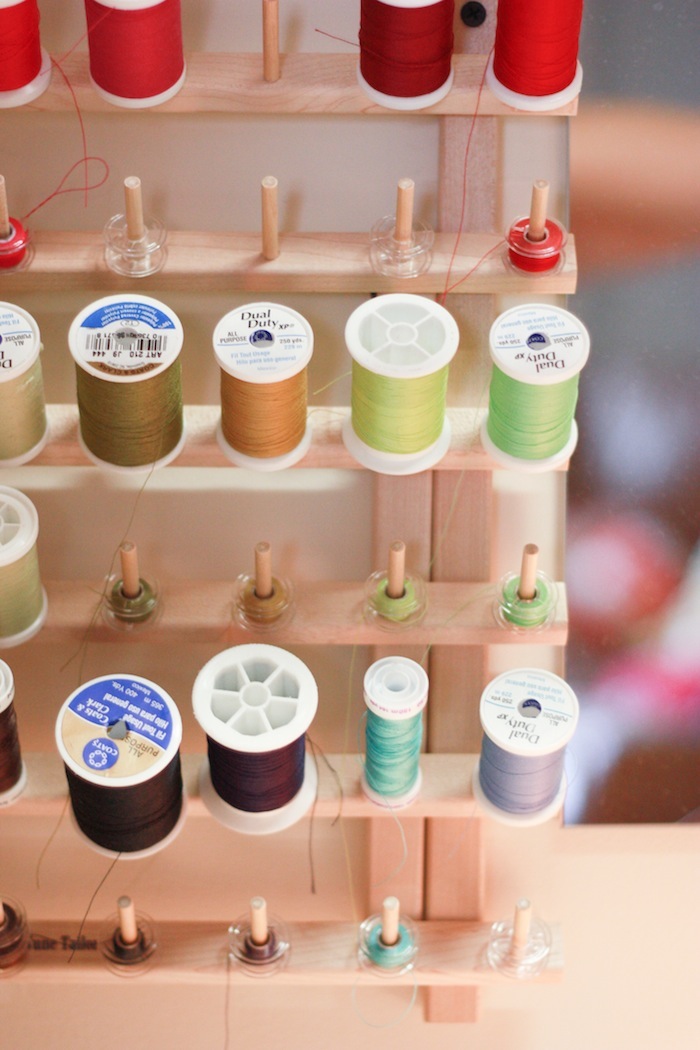
I bought this spool organizer at Wal-mart on a total whim, and it’s the best thing ever. I try to store the bobbins of the same thread just beneath them, so I have both at a moment’s notice. Does anyone else hate winding bobbins? For some reason it feels like such a waste of time to me! Silly, right? I have been known to use totally random bobbin thread just to get through a project without winding another…
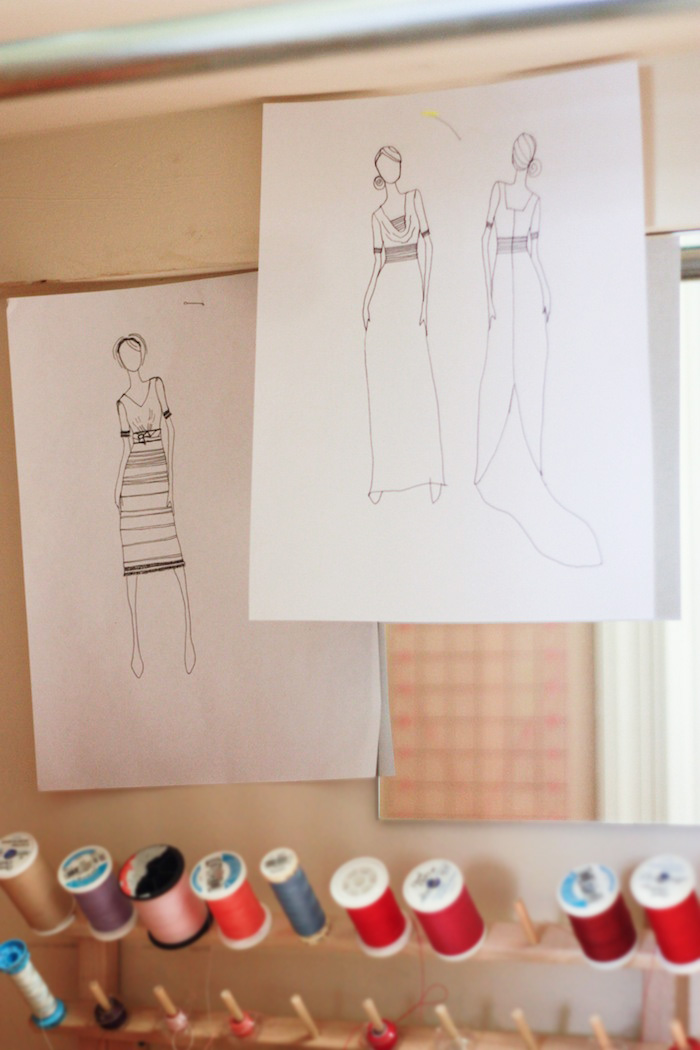
The only “art” I have up in this space are the two wedding dress sketches I’ve done. I’ve only started sketching before sewing very recently, and I think it’s going to hugely improve my outcomes. For big projects, though, like Katie’s wedding dress (and one for Rebecca that is in the draping phase) I designed a lot on paper before finalizing the look and getting the vote of approval from the brides.
I have a stack of cool postcards and some fun quotes I could add in here, too. It would be fun to have a little inspiration wall.
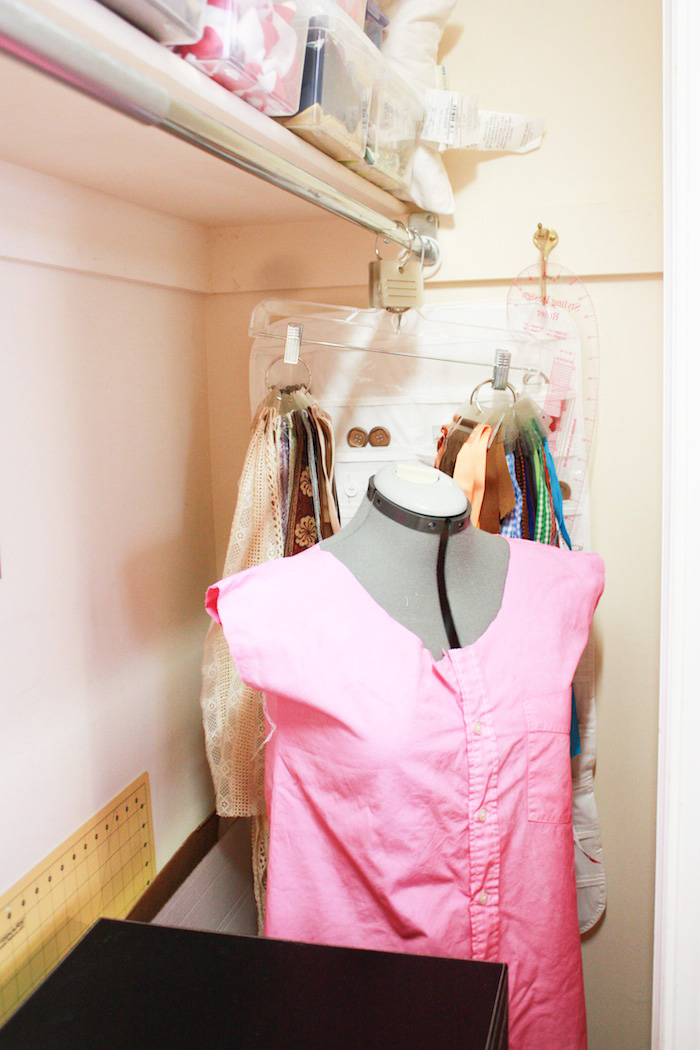
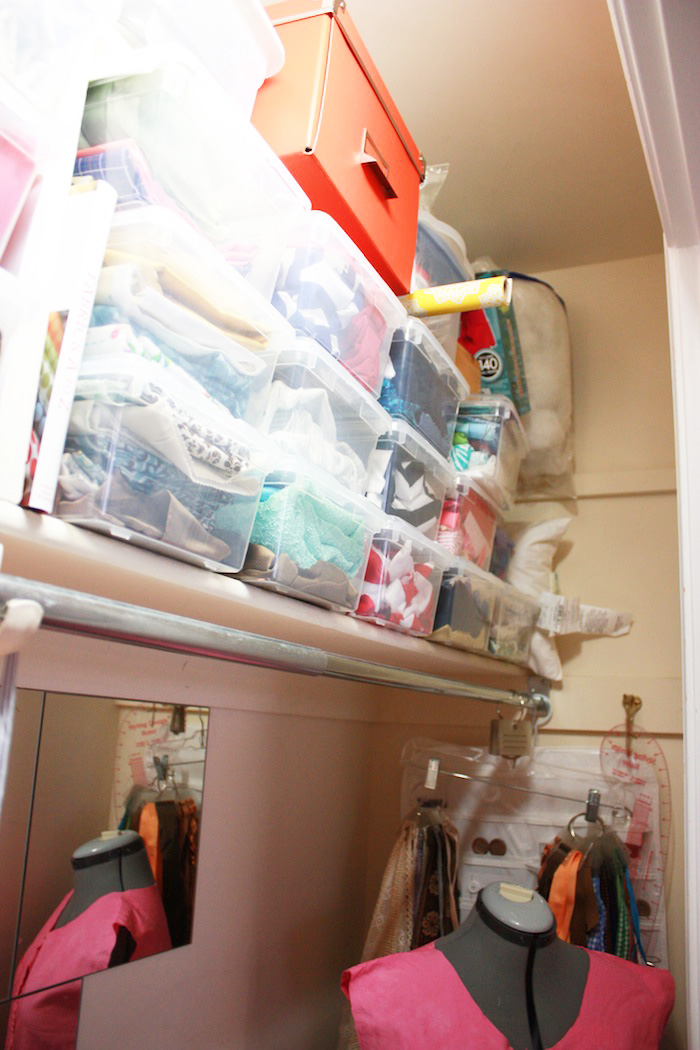
When you peek to the right, you’ll see my dress form (donning above-mentioned dye DIY about half-finished), cutting mat, and some more hanging storage. When I’m in the middle of projects, they hang here, too. The cardboard in front of the cutting mat is my letterpress paper portfolio. I like to have some nice lettra on hand for impulsive letterpress projects, and the huge sheets are much less expensive and much more versatile than buying letter sized.
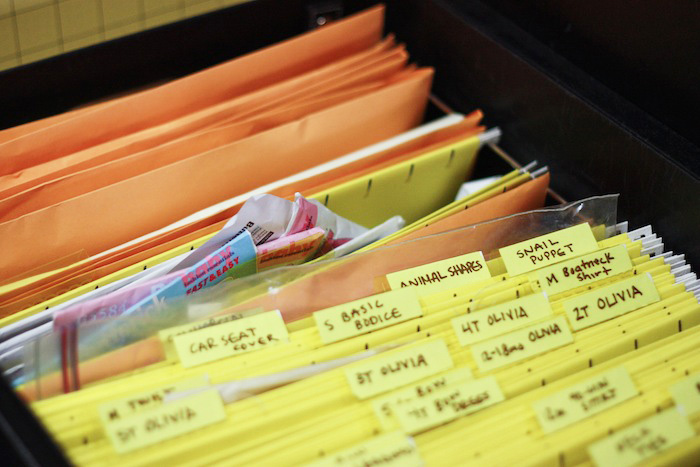
That black leather box is my pattern file. This is where I file all of my self-designed and created patterns. Most of them are in muslin, and simply folded into their own hanging file. Lately, I’ve been drafting on paper, too, and I store those patterns in manila envelopes and label the front of the envelope. I have a handfull of commercial patterns (most of them were bought at those $.99 sales at JoAnn Fabrics and are yet-unused). I’m sure there is a better storage system out there, but this works great for me for now.
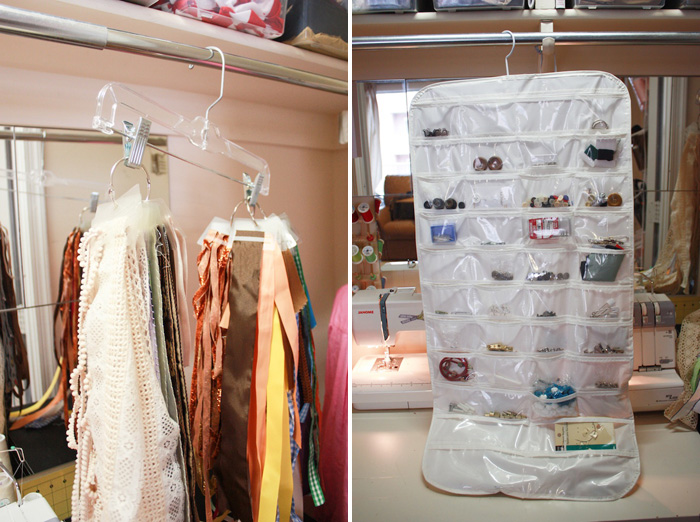
Acceptable ribbon storage completely eluded me until I found a little plastic storage pieces. IThis little product has changed my crafty world. I used to store my bits and lengths of ribbon in a ziplock bag. Now I can have them all right in front of me, judge how long each piece is, and keep them straight. I bought two JUMBO packages and have just enough for my wide array of both sewing trims and crafting ribbons. This word is far overused in social media and online, but this really is genius.
All of the other random odds and ends are tucked into this awesome hanging organizer. It has tiny pockets on both sides, with plenty of room for my hook and eyes, screws, pom poms, upholstery nails, rubber bands, etc.
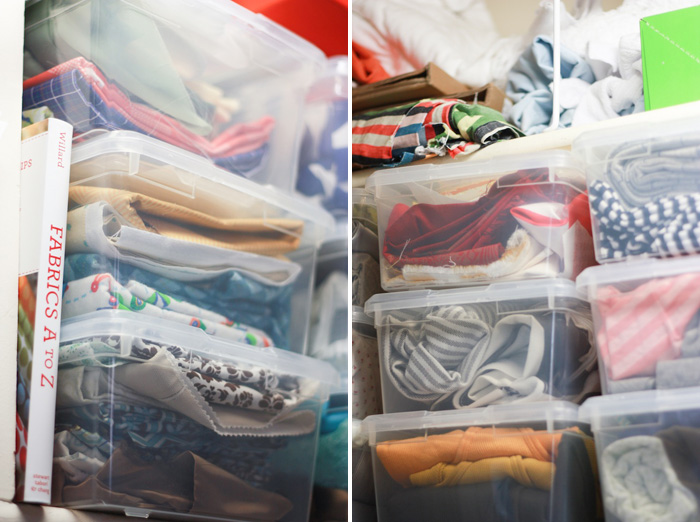
The last place to look in my little closet is up! The very top shelf has a few bolts of often-used fabric, some wrapping paper, random household supplies, and a bag of cotton fill. That orange box stores my small collection of wool felting supplies, and I’ve also got a box of extension cords up there. The first closet shelf is where I keep almost all of my fabric, folded into clear plastic shoeboxes. I bought my boxes at Costco, but these are the same idea.
I love having the fabric divided into small groups by type and pattern. That way when I pull something out I only make a mess of one box. This fabric book by cute Dana of MADE has been a great resource, and I love having it nearby for reference.
Most of my fabric is for sewing apparel, so I have lots of yardage. Very different from a quilters colorful, organized piles of fat quarters! Just like with the refashioning basket, I’ve told myself that in order to buy more fabric, I need to empty a box by using some for a project (or destashing). And then I went to Utah and bought 20+ yards. Oops! I’ve got lots of sewing to do. Luckily, I’ve got a great little closet to sew in.
Maybe some of you have limited space at home, too? I hope my sewing closet gives you some inspiration to carve out a place, however tiny, that you can sew, craft, and create. Good luck!

