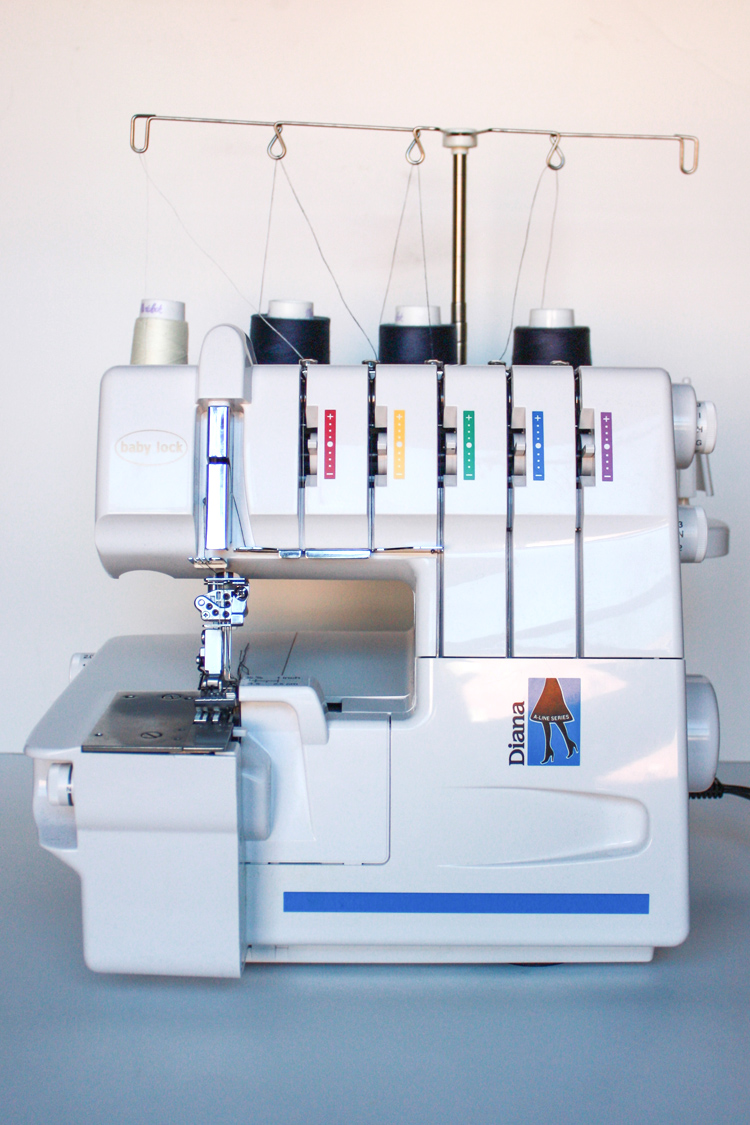
This series is sponsored by Baby Lock. For over 40 years, Baby Lock has been dedicated to the love of sewing by creating machines for sewing, embroidery, quilting and serging – all with ease-of-use, high quality and a touch of elegance.
I am completely fascinated by clothing construction. There is something magical about turning long, flat fabric into the shapely, form-fitting pieces that fill our closets and dress our bodies. Every time I shop for clothes you’ll find me not only gazing at the beautiful designs and fantastic fabrics, but flipping everything inside out and trying to discover just how it was put together. In fact, a few months ago I was rambling on and on explaining about sewing machines and sergers to a friend looking to buy one for his wife. I mentioned some of the differences, noting that even a serger didn’t produce the coverstitch that is used to finish tee shirts (cue blank stare). You better believe that I grabbed the nearest tee-shirt clad person (as both my friend and I were in dress clothes) and asked if I could fold over the hem on her tee to show the stitching (cue confused expression).
I showed him how the seams on the tee were serged, but the hems were finished with a different machine entirely! The coverstitch produced straight stitches on the front of the fabric and looped stitches on the bottom, allowing the hem to stretch. “It’s all really amazing, right?!” Surprisingly, his blank stare lit up into understanding (or entertainment at my enthusiasm), and he told me he had learned something new. So, basically I proselyte sewing wherever I go…
Not too long ago, the industrial machines that manufactured clothing for the masses were not available to home sewists. Then in 1964, a group of middle-management engineers working at an industrial Japanese company had the idea to redesign the big, heavy overlock machines they were working with into compact, lightweight, “baby” machines for home use. They group presented this concept to their company, who rejected it. But, committed to their vision, they left their jobs and started a small company that produced a home overlock machine, called “Baby Lock”.
Since then, Baby Lock has been dedicated to creating the best machines for home sewing. They are recognized worldwide for their advancement in serger technology, and hold several patents for their inovations in the field.
When Miriam and I began brainstorming the Stretch Yourself Series back in July, we knew that we had to highlight sergers, as their use with knits is unparalleled. We also hoped to show off the coverstich, which is not often included as an option on sergers. We are so thrilled to have formed a partnership with Baby Lock, and to be able to use the wonderful Diana Serger machines to teach you all about sewing with knits.
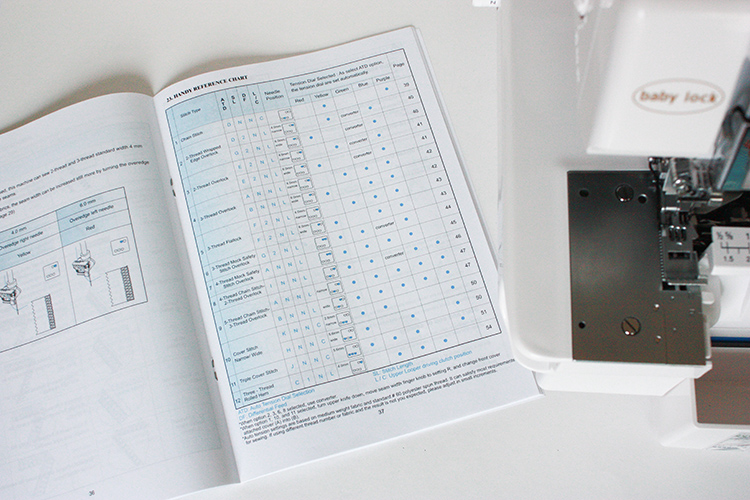
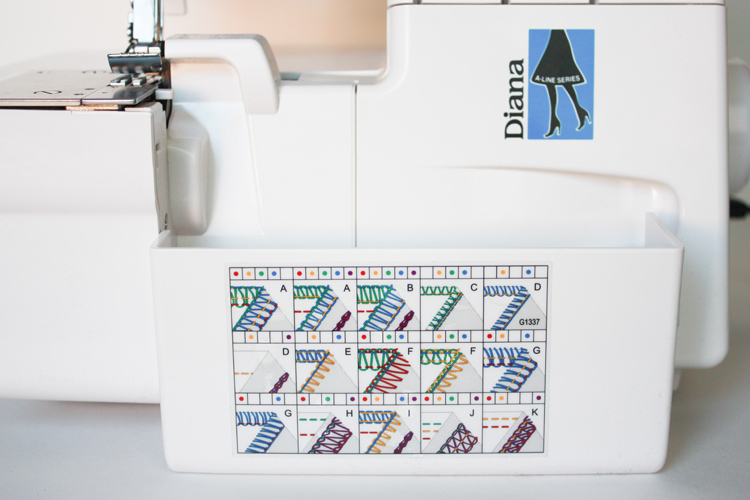
Baby Lock provided Miriam and me each a Diana Serger as part of our Stretch Yourself Series collaboration, and we have both fallen completely in love. Not only is the Diana smooth, consistent, and easy to use, but it offeres incredible versatility. There are twelve stitch configurations offered, including the overlock (regular serging), chain stitch, flatlock stitch, and the magical coverstitch that gives garments that professional finish (I was so excited the first time I used the coverstitch function, I had a stomach ache for a whole day!)
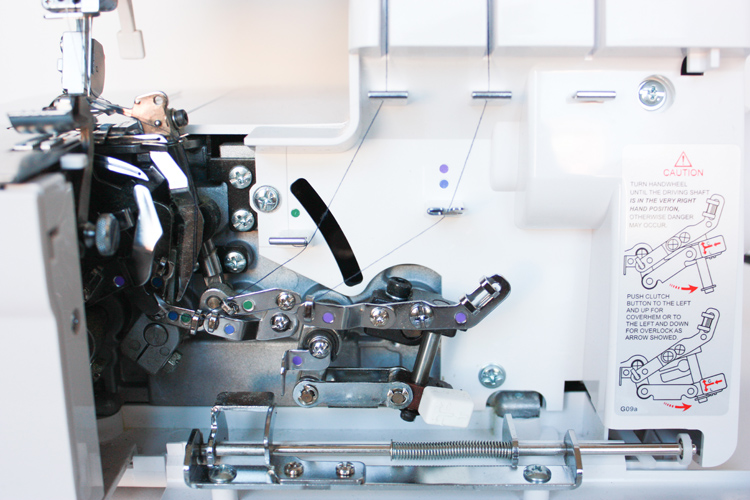
Now, if you haven’t used a serger before, you might wonder what the fuss is all about, and you may even be nervous. Managing three, four, and five threads (all with different loops and hooks to pass through on their way to the needles) can seem scary. (Lucky for you, Miriam is teaching all about setting up and threading her Diana today, so you can get an inside scoop!) Like everything, getting comfortable with using a serger takes a little bit of time, but is definitely worth it, especially if you plan on sewing clothes or anything with knits. There is a reason clothing manufacturers use overlock and coverlock machines. They result in strong, finished, professional seams and hems.
I was lucky to grow up in a home with a sewing machine and a serger in the sewing room. I felt like I had free-reign to experiment with both, even from a young age (which my mother will tell you ended in a few visits to have the serger tensions adjusted back to normal…) For years I have been comforable with basic serger stitches, and even a basic rolled hem. The Diana offers so much more. Stitches that I’ve never even seen, and some (like the blind hem I teach below) that I have noticed on my store-bought clothing and just didn’t know how they were done.
My post today will teach some basic serger techniques that are applicable to use with any type of serger. I’ll also teach some of the stitches that the Diana offers that set it apart from other basic sergers on the market. I probably use my serger twice as often as my sewing machine, and I’ve made a zillion few mistakes over the years, so I hope you are able to learn something that makes your serging, or transition into serging, or thinking about serging, a little bit easier.
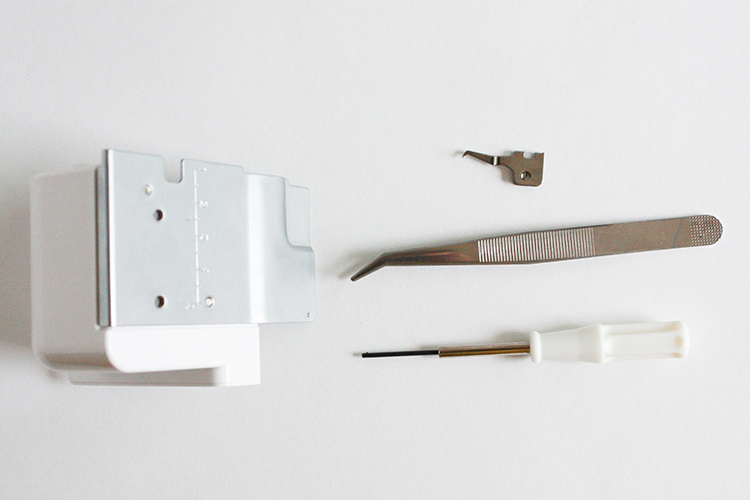
First, let’s talk about tools. All sewing machines and sergers will come with a mini tool set. You will use it. I keep these tools on hand every time I use the machine, and have learned to not roll my eyes every time I have to reach for the tweezers to pull that tiny thread through the lower gears and loopers on the serger. It is, after all, a machine, and will require some adjustments (like unscrewing and screwing the needles in to twelve different postitions!) Embrace the tools.
Also, know that even when you are comfortable with serging, it’s always a good idea to keep a pile of scraps near by to test out each new stitch before serging on your project itself. Sometimes the tensions need tiny bit of tinkering before it looks just right (the manual will tell you all about trouble shooting those tensions!)
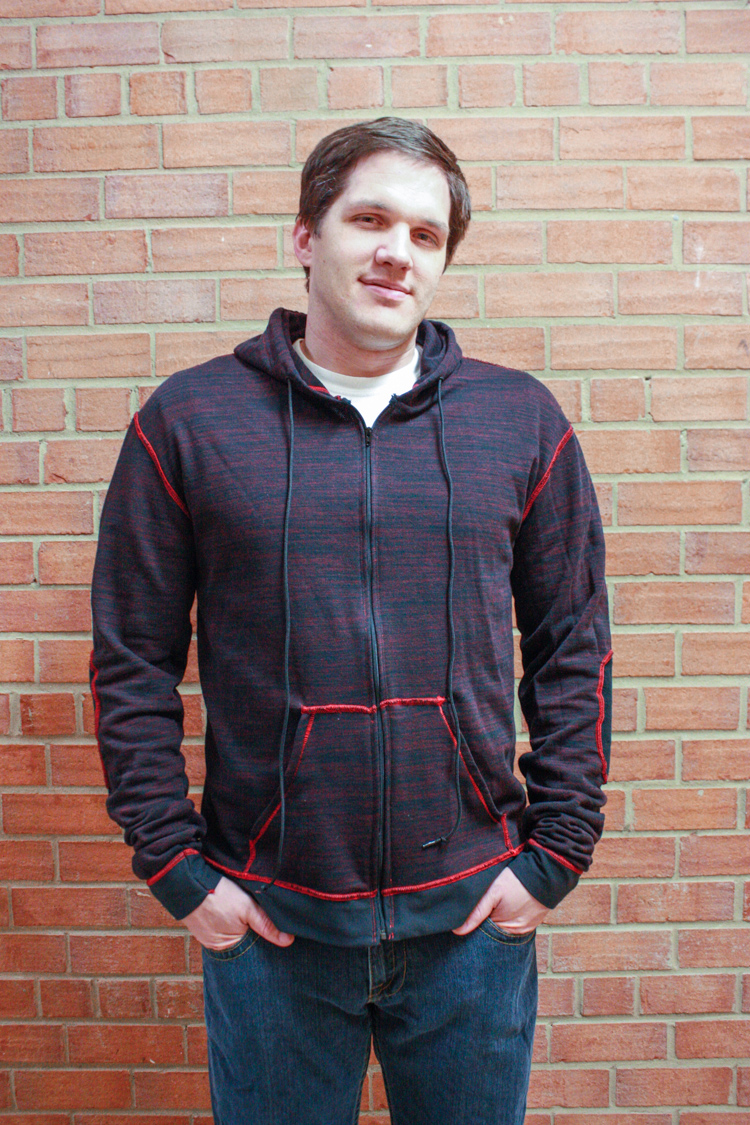
To show off the stitches, I made two different garments using only the Diana and her multiple stitches. For my dress, I used my fitted tee shirt dress variation bodice, and added a gathered maxi like Mim taught. For Dave’s sweatshirt, I used this method to rub off a pattern from his favorite hoodie.
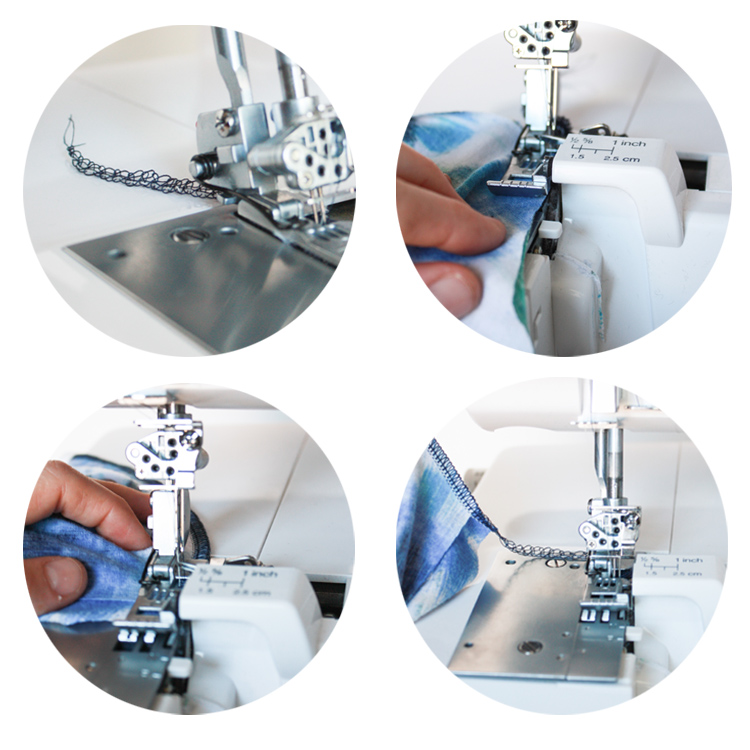
OVERLOCK STITCH: This is the basic serger stitch. It can be sewn with 2-5 threads, but the most basic uses either 3 or 4. It is called an overlock stitch because the threads are cast over the raw edge of the fabric, locking it into a finish that won’t unravel or fray. When using a serger for basic overlocking, you can sew even when there is not fabric under the needles. This is called “chaining”. It makes it really easy, because you can put your foot on the pedal and start serging, feed the fabric through to create your seam, and then chain right off the end.
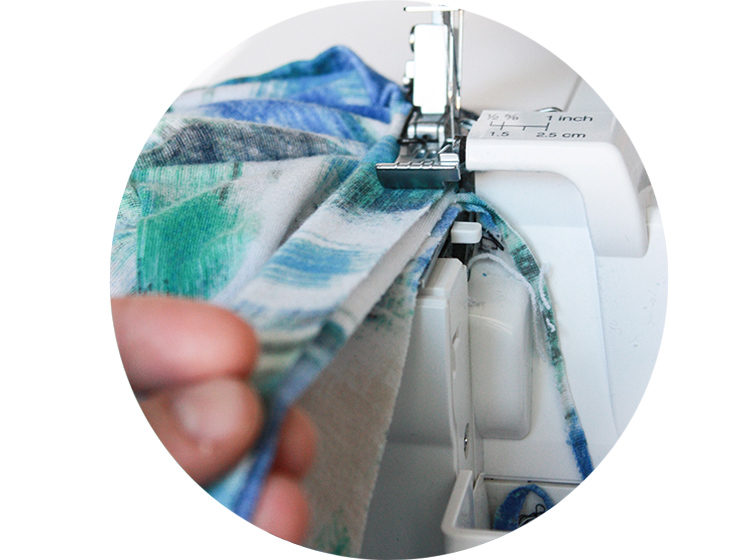
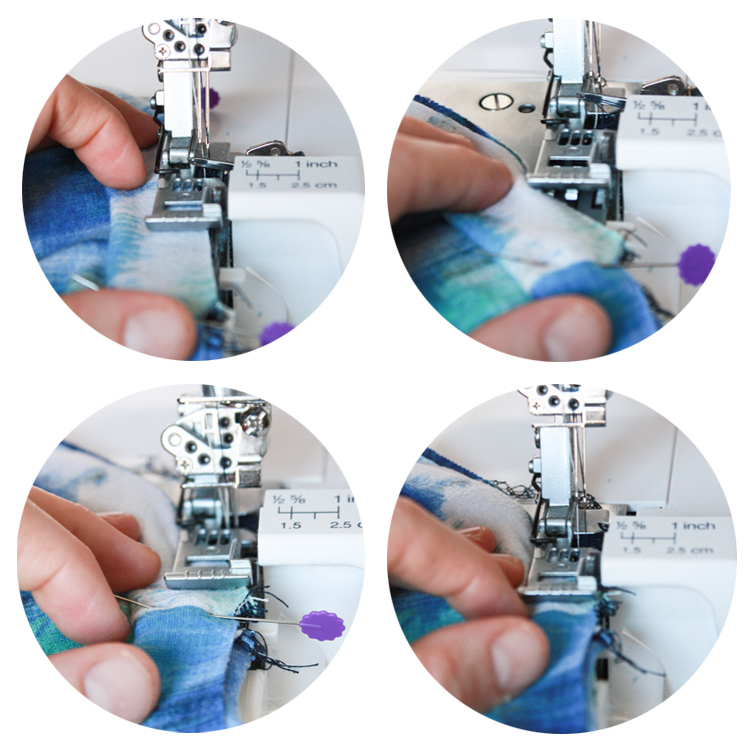
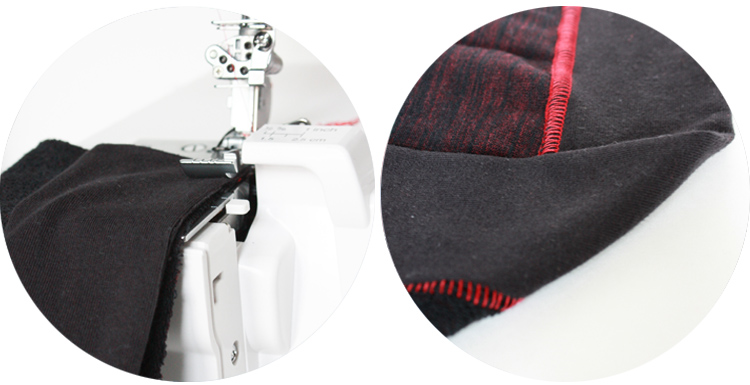
EDGE TRIMMING: When the knife is engaged on the serger, it will trim the edge of the seam, to make it even before casting the threads over it. You’ll want to ensure that you keep the fabrics aligned, so that nothing gets accidentally trimmed off! Also, notice how I layer the fabric from bottom to top. When serging, you always want to be able to see that bottom material, to ensure that it is being caught in the stitch. I can’t tell you how many times I have lost track of that layer and finished a seam to discover a small hole where the material slid out of alignment a bit.
In this photo, I am attaching a neckband. You can see how I am tugging gently on the band piece while I let the machine feed the neckline through. This allows the neckband to rest nicely against the chest.
FEEDING THE FABRIC: The foot on a serger lifts and lowers like a sewing machine (shown in the top left photo), but since you can chain without the machine, for normal serging I begin chaining, then slide the fabric under the presser foot from the left side, straighten it out as it catches under the needles, then chain off the edge when the seam ends. Also, proper pinning for serging includes positioning the pins parallel to the seam, where they can pass by with the foot on the right. However, I still put them in perpendicular to the seam and just pull them out before they are gnawed on by the knife. The proper technique is probably better…
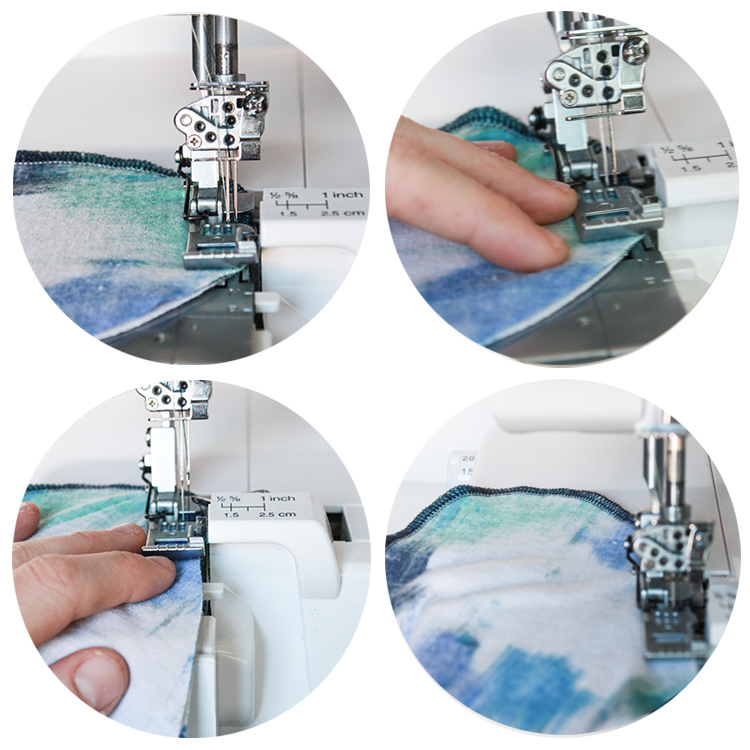
SERGING A CURVE: Because of the linear nature of the serger’s surface, the fabric must always be on the left side of the machine (where in sewing sometimes you can pass things through the right under the arm.) When sewing curves with the serger, it might be tempting to pull and stretch the material out to make sure it aligns properly. To avoid this, I think of the fabric and machine as gears in a watch, only touching each other at one point as they go around. Thinking in this way, I can slowly feed just a bit through at once, while rotating the fabric with my left hand. As long as the small length of fabric edge is flat against the machine when it feeds under the presser foot, the whole curve will turn out well.
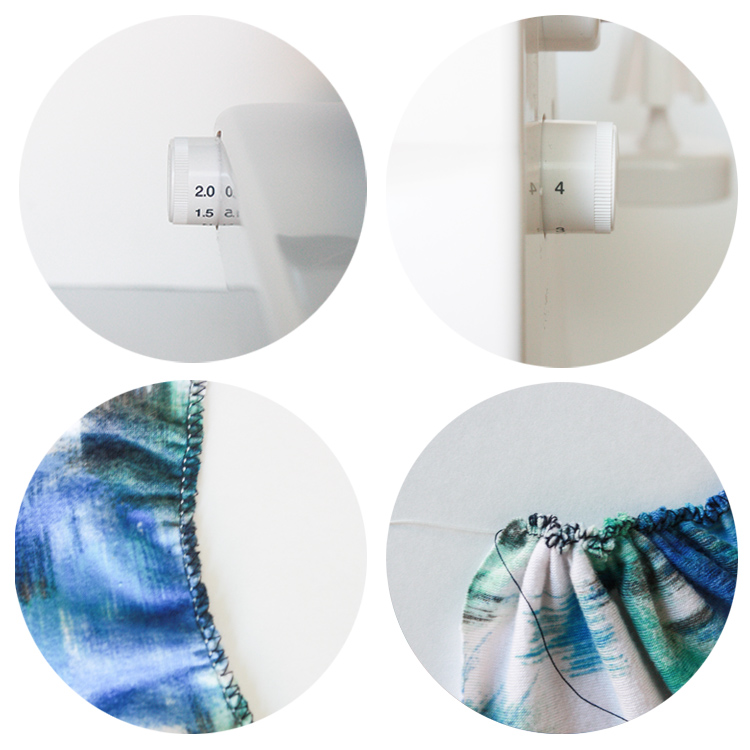
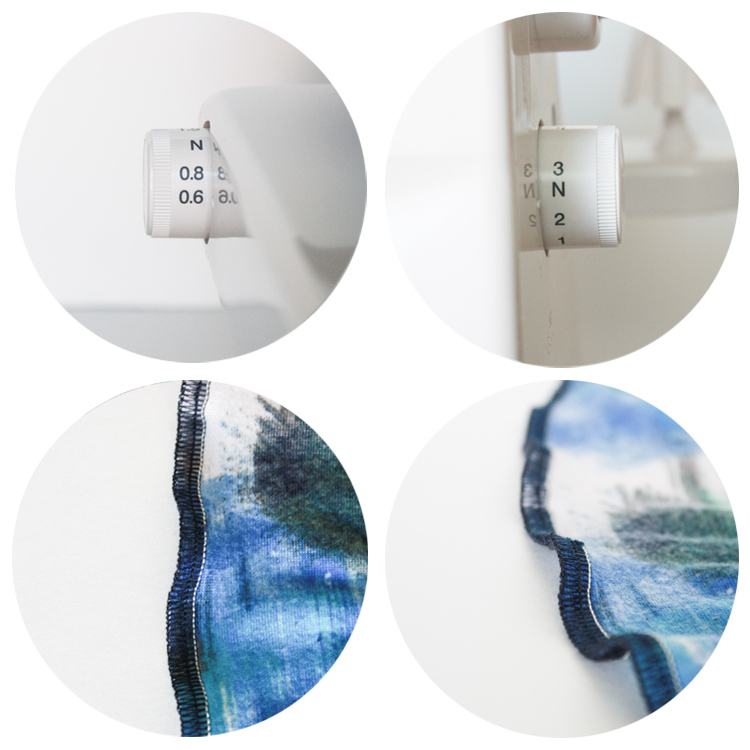
GATHERING WITH THE DIANA SERGER: You can gather on most sergers, but it requires some major tension adjustment, which can be really tricky to return to functioning after it’s changed. On the Diana, there is a setting recommendation for machine gathering. Turning the differential feed up to 2.0 and the stitch length to 4 encourages the fabric to bunch as it’s serged. I found that if the gentle gather wasn’t sufficient, by pulling the outside thread on my 4-thread safety stitch, I could gather the material even a bit more. **Adjusting your differential feed up like this will also help correct the stitches if you find the machine is stretching your fabric as you serge.
Gathering my whole skirt with the serger took far less time than it would have with my sewing machine. I really love a time-saving technique like this!
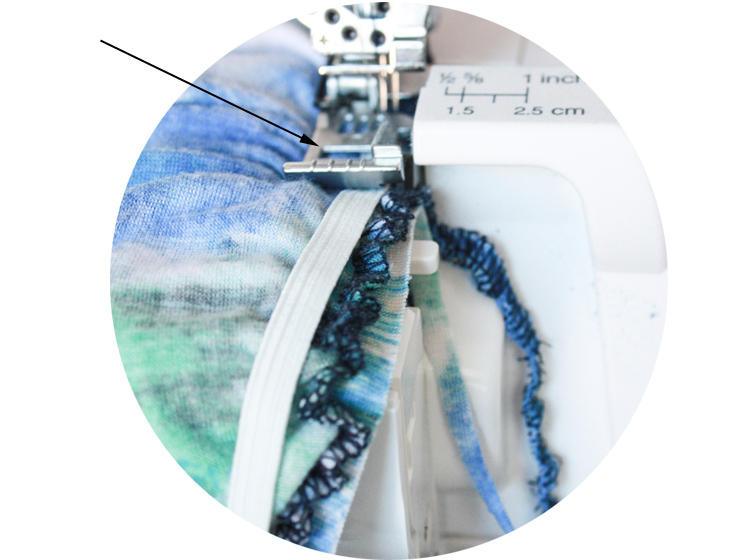
ADDING ELASTIC TO A SEAM: So, after I sandwiched my seam (to show you to make sure the flat fabric is always the closest to the machine, the gathered are next, and any trims, elastic, etc. go on the top) I noticed that the Diana manual mentions that there is a slot right in the presser foot meant for feeding through trims and elastic. Duh. How cool is that? So, I marked it with an arrow for you. Next time I’ll give it a try! Adding the elastic through the top allows you to stretch it out while the fabric feeds through beneath the foot.
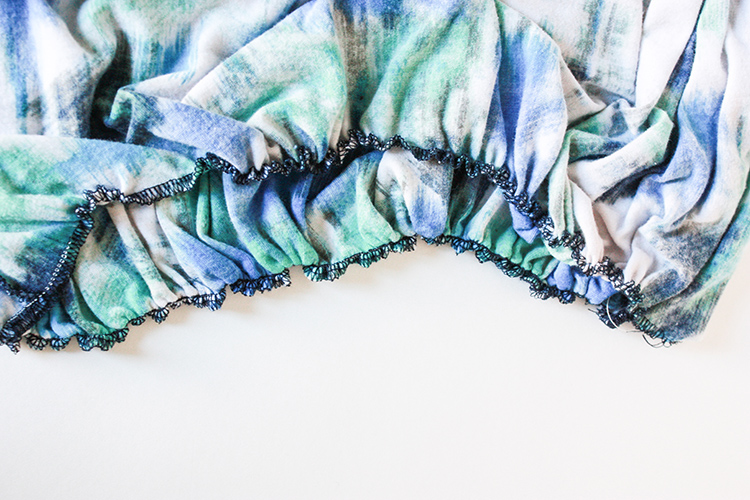
STRETCHING ON THE DIANA: Sometimes it’s fun to add some flair to a project by adding a full, ruffled hem or sleeve. Lowering the differential feed and setting the stitch length back to normal will let the machine stretch out your fabric while you sew will create an even, subtle wavy hem. **Adjusting the differential feed down may also help correct an unintentional slightly gathered seam.
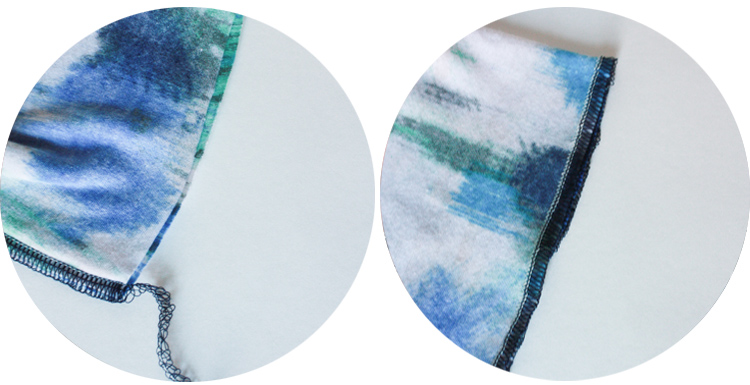
SERGING SLEEVE HEMS: Sometimes, all the hem needs is a basic overlock stitch to finish off the edges.
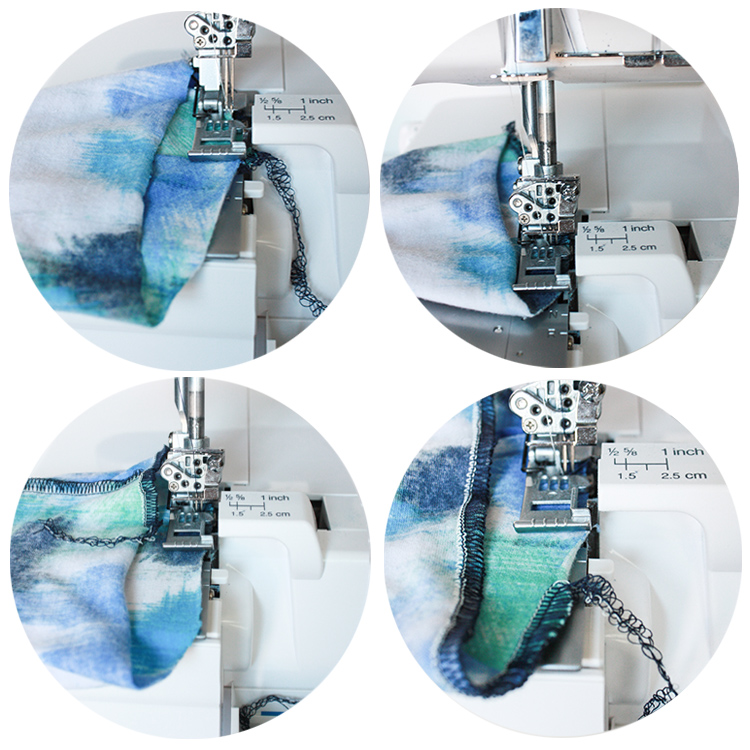
SERGING IN THE ROUND: If you construct your tee as I taught in the Basic Tee Construction post, you’ll need to finish the sleeve hems after they are already tubes. When serging in the round (around a tube) make sure that the extra round of fabric is on TOP where you can see it, rather than BELOW the other fabric, where it can easily be caught in the seam. (I’ve learned this lesson the hard way. Over and over.) This is one time that I do raise the presser foot to position my fabric, then serger the circle, then chain off the edge.
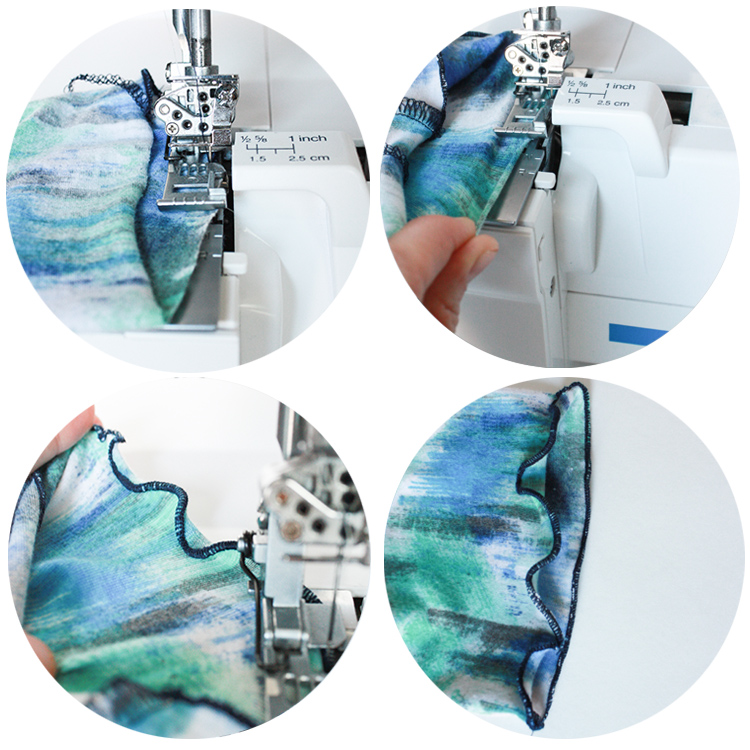
ROLLED AND LETTUCE EDGE HEM: On a rolled hem, the knife is disengaged, so you need to ensure your fabric is trimmed straight before you begin. There is only on needle casting over the edge, so go slowly to be sure the edge of the fabric is being caught. For a lettuce edge, instead of letting the machine feed the fabric through, you will pull gently on the fabric (both in front and behind the presser foot) as you serge. The rolled hem will stitch all along the stretched fabric, holding it wide and creating a beautiful and flirty ruffled hem. For a while, this was my hem of choice on everything I made!
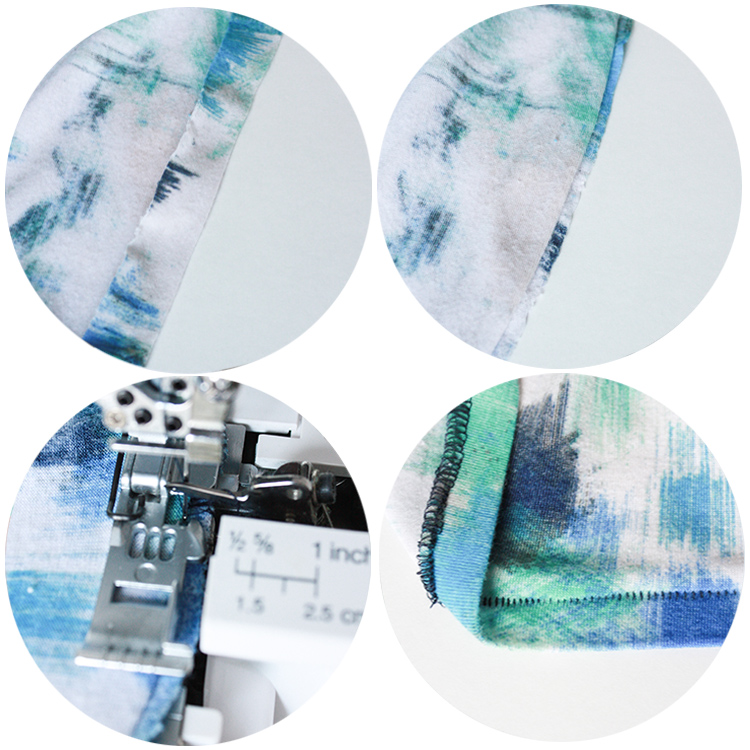
BLIND OVERLOCK HEM: This is one hem that I had noticed on a couple of my J.Crew tee shirts and I had no idea how it was done. The serger is threaded as a 3-thread overlock stitch. The hem is prepared by pressing to the desired length, then folding under so just 1/4″ of the raw edge is visible. The stitch is made by carefully serging along this edge, with the needle just barely catching the fold of the hem. The raw edge is finished while the needle catches little pieces of the fabric body, creating a straight-line pattern on the right side of the fabric. With a longer stitch length and heavier weight fabric, I imagine this hem could actually look “blind”, but every time I’ve seen it used, the hem lines have been used decoratively, sewn with a fun contrasting thread.
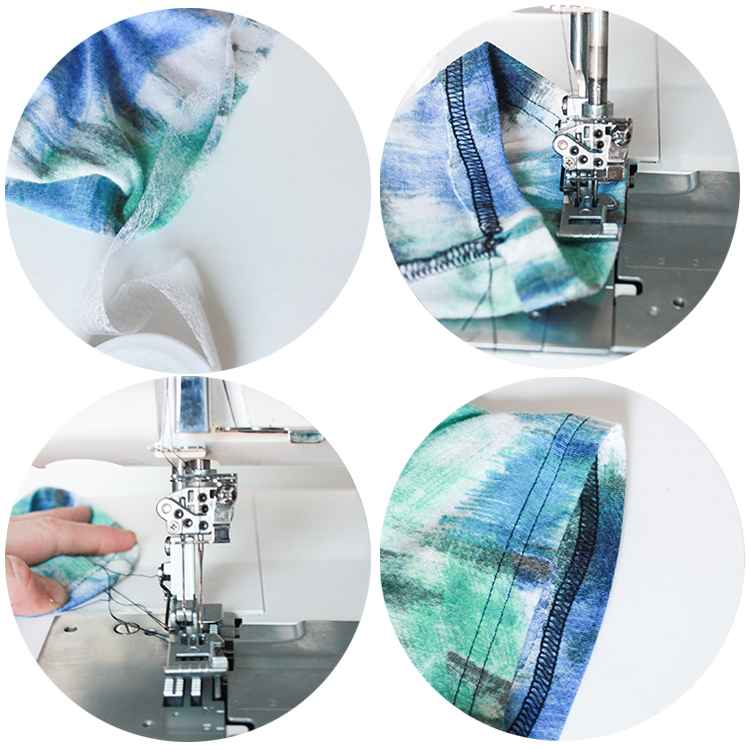
DOUBLE COVERSTITCH: The cover stitch function on the Diana is really amazing. Miriam will show you how to quickly convert the serger to set up for the stitch in her post today. To create a professional looking finish, first reinforce the hem with a lightweight seam stabilizer. This will keep the folded edge nice and clean. Also, because the coverstitch is sewn on the front of the fabric, adding reinforcement to the seam allows it to stay in place even when it’s facing away from you on the machine.
Turn the garment inside out, so that you can sew inside the hem with the extra fabric on the top of the machine. Lift the presser foot and postition the sleeve beneath it, with the hem edge centered beneath the needles. YOU MUST START AND FINISH ON THE FABRIC when sewing a cover stitch, there is no chaining like with the regular serger stitches. Feed the fabric evenly through the machine. When you come back to the beginning, lift the pressure foot, and wind the wheel one full turn towards you, and one full turn away to gently unlock the stitch. Then pull the fabric to the back of the machine and trim the threads. Isn’t that finish just drool-worthy?!
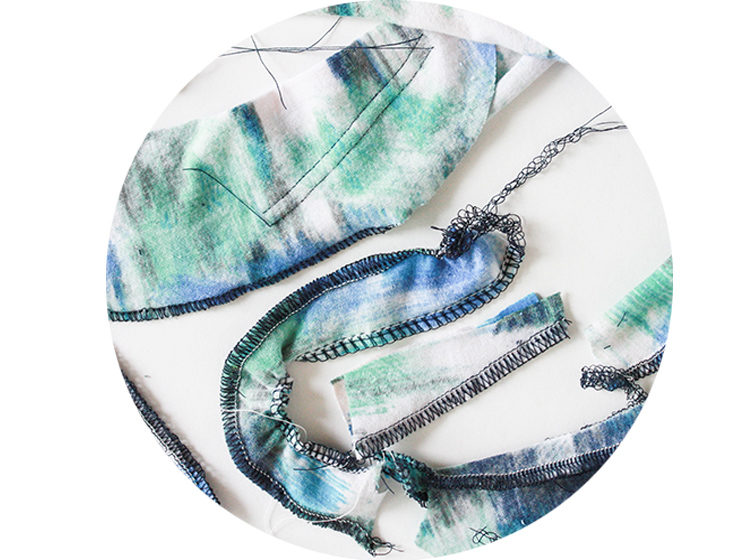
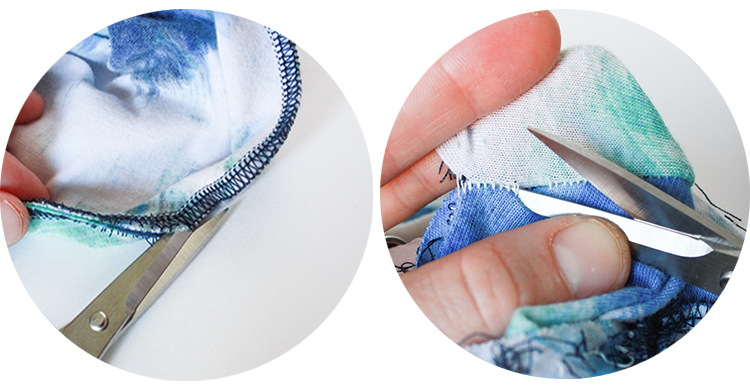
SEAM RIPPING A SERGED SEAM: And because you’re sure to have some not-so-drool-worthy moments, too. Here is how I seam rip a serged seam (I’ve obviously had a lot of practice!) Take a small pair of scissors or seam ripper along the overlocked edge, cutting the thread loops. Next, pull open the fabric on the right side and carefully clip the visible threads. Because the loops are already cut, the seam should come right apart.
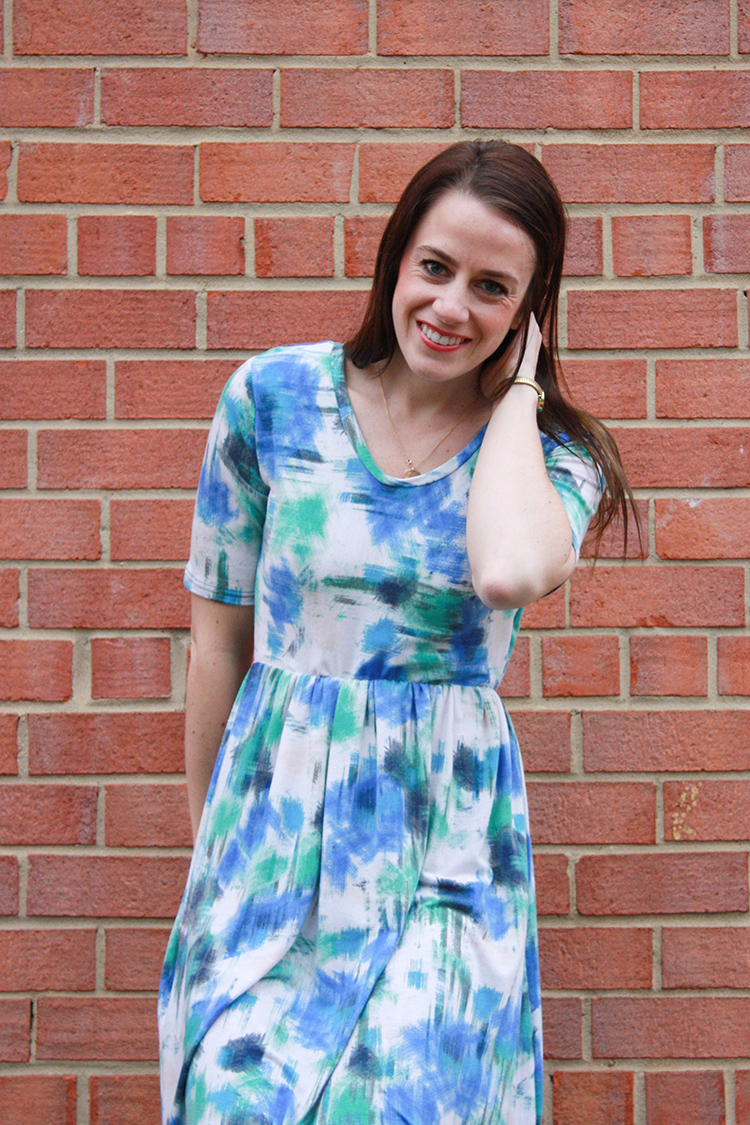
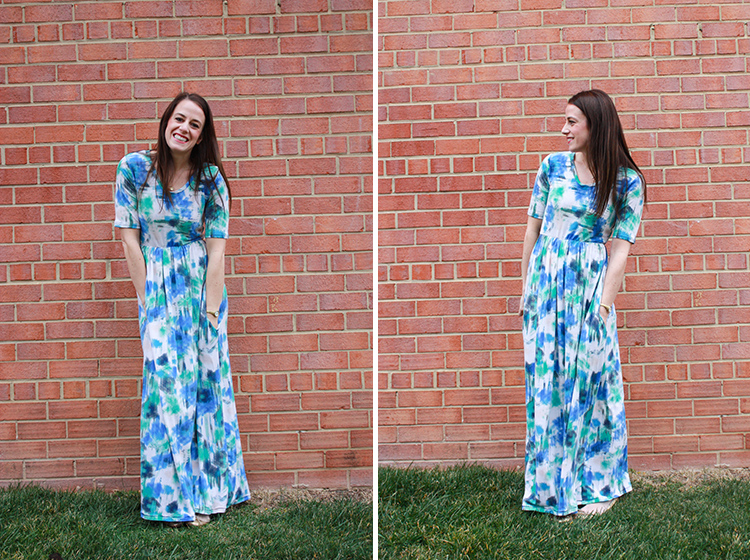
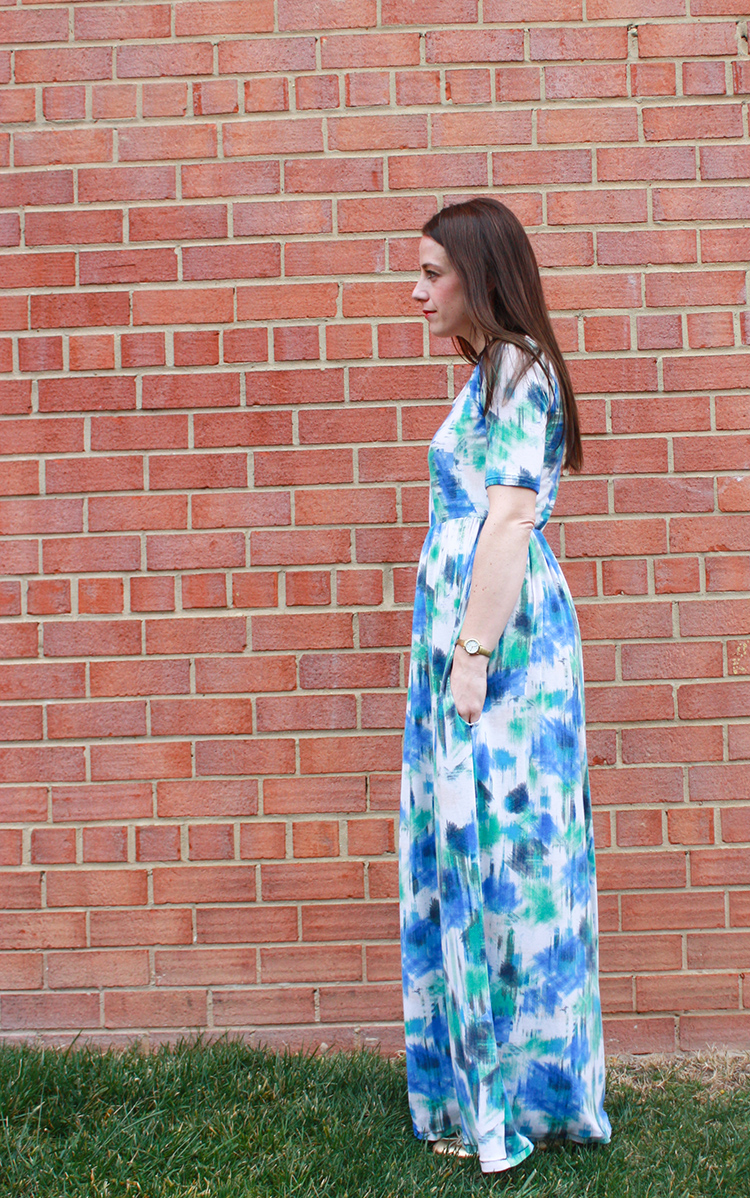
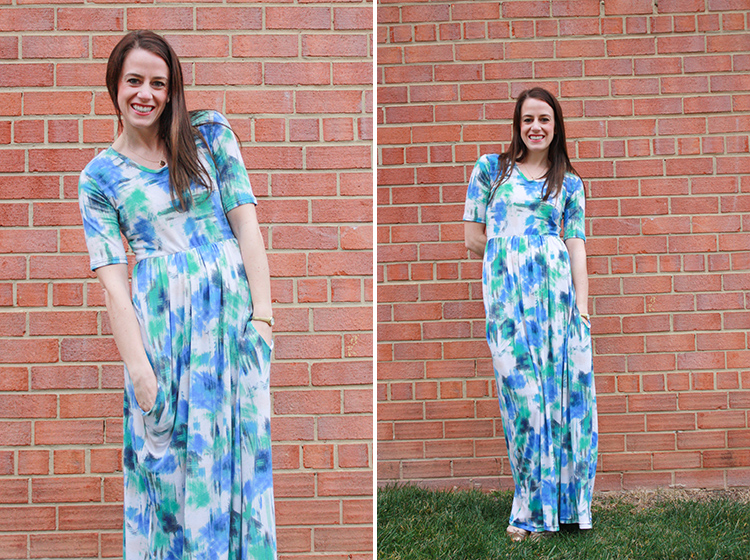
After all that serging and coverstitching with the Diana, what’ve we got? A stretchy, gathered maxi dress. With pockets.
I’m so in love with how this turned out! This post was the perfect excuse to make myself something else new for Alt Summit (in one week!!). It’s one of my favorite things I’ve ever made, and all without a sewing machine! Go figure.
Pattern: Self-Drafted using this tee shirt dress variation and this gathered maxi tutorial.
Fabric: An amazing score I found buried in the $2.97/yd section of my local fabric warehouse. Could it be more beautiful?
Okay, ready for some more stitches? (If not, bookmark or pin this for later reference!) Next, I make the first item of clothing I’ve ever completed for Dave using sporty flatlock stitches.
FLATLOCK CONSTRUCTION: The flatlock stitch is the coolest thing. You serge the edge of the fabric, but with wrong sides together, and then when you’re finished, you pull the fabric flat and the stitches all lay down! It’s commonly used on sportswear for comfortable, non-raised seams. I also love it as a decorative detail. I’m not sure if this stitch can be done with a regular serger, but the Diana makes is super easy with a pre-set tension that automatically adjusts the threads to where they need to be. Easy Peasy.
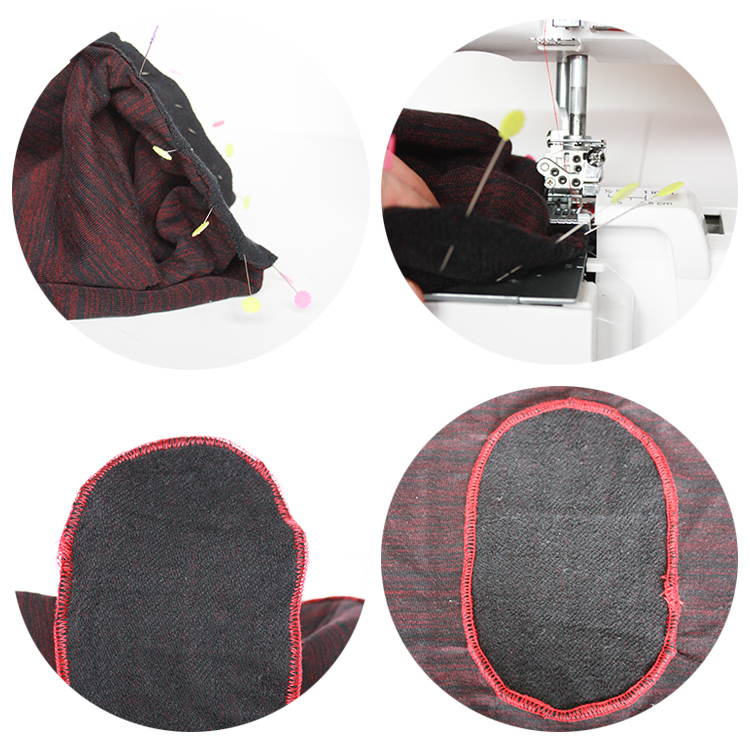
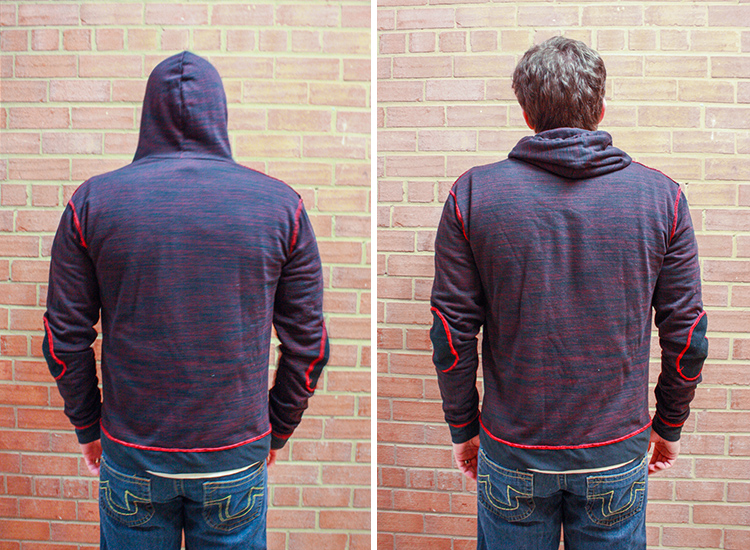
FLATLOCK APPLIQUÉ: I noticed one of Milo’s little shirts has the elbow patches flatlocked in place. I thought it would be fun to replicate that for Dave’s hoodie! To appliqué with a flatlock stitch, you first will need to lay the applique down flat on the right side of the fabric, then work your way around the edge, turning the fabric beneath it under, leaving the tiny fold against the back side of the appliqué. Even though when sewn decoratively, this stitch appears to be floating in the middle of the sleeve, it is created by stitching on the edge of the fabric, just like a regular overlock stitch. Lay the applique flat on the serger, with all of the excess, folded fabric on top, and slowly serge around the patch. When it’s done, it looks like a floating oval, but when you pull the sleeve flat, the patch seams lay down flat! So cool.
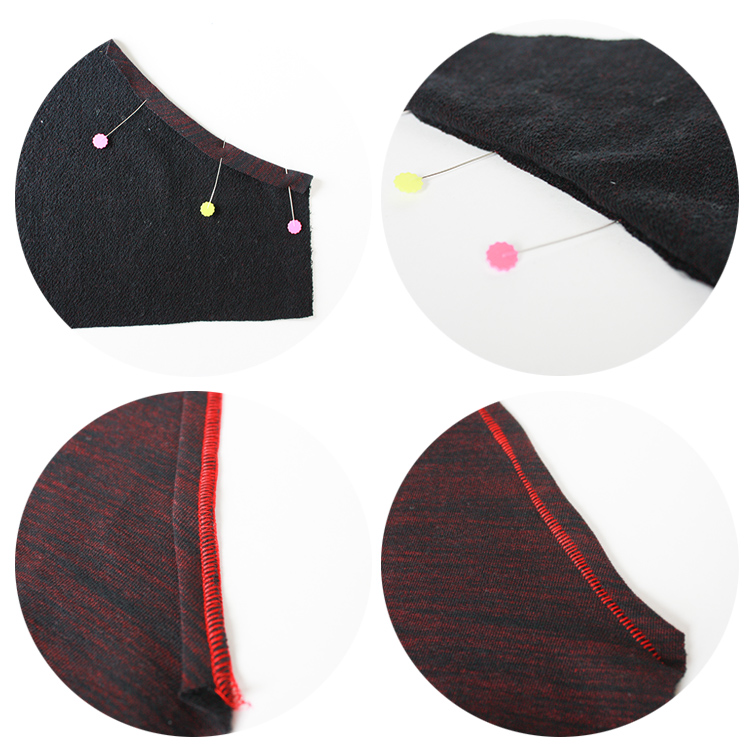
FLATLOCK LADDER STITCH: The reverse of the flatlock stitch is a ladder stitch. It can also be used as construction or decoration. Here, I used it to hem the pocket before attaching it to the front of the hoodie. Again, we need an edge to serge along, so I folded the hem under once, then back on itself again. After serging along the edge, I just had to pull the seam out flat to see the awesome detailed stitching!
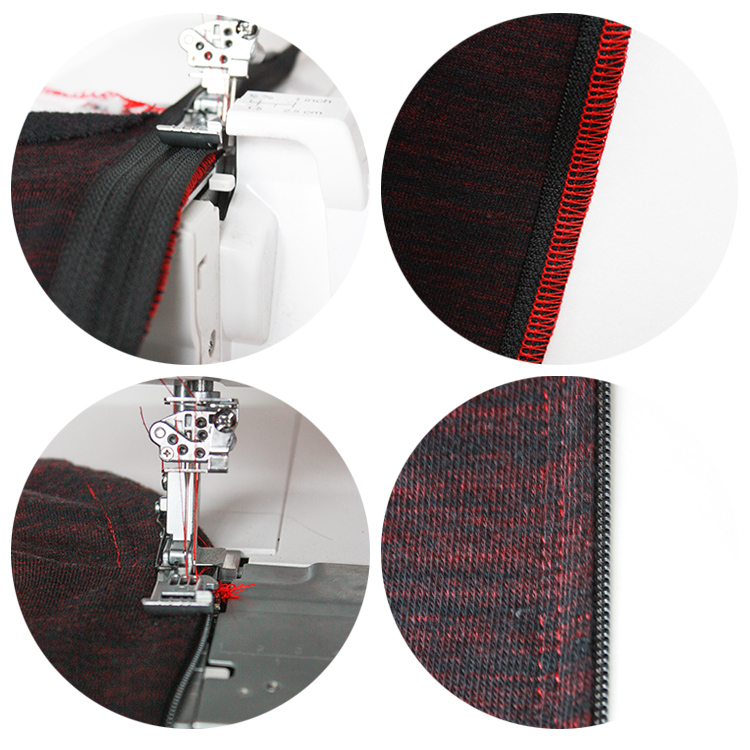
INSERTING A ZIPPER WITH A SERGER: Since I had completed all of both of these projects with the Diana alone, I knew I had to insert the zipper with the serger, too. It was really simple, and I’ll definitely be using this method more often. Lay the zipper right-side down on the edge of the fabric and serge along the edge with a basic overlock stitch, ensuring the teeth are out of the way. Next, flip the zipper under, and use the narrow cover stitch (or a sewing machine) to topstitch the zipper in place! Done and done!
This is the first article of clothing I’ve ever made for my husband. Blasphemy, right? (Especially when you consider the mountains of clothes I create for myself and others.) I have just had a hard time figuring out what to make, since he wears suits to work (and I’m not yet up to tailoring a custom suit) and basic tees and hoodies when we’re hanging out. The additional stitches on the Diana, like the cover and flatlock stitches, have already boosted my confidence in my ability to produce more professional-looking garments than I could before, including basic tees and hoodies for Dave.
I love the fit, fabric, and the contrast stitching. Next time I’ll make the elbow patches slightly smaller and position them on the actual back of the sleeve (rather than directly opposite of the underarm seam, which turns out is only your elbow when your arms are turned way inward…that was weird!) I loved making him this sporty-looking sweatshirt, and I am already excited for the next time he wears it (without me throwing it at him at midnight and ushering him into the hallway for some photos…)!
Pattern: Rubbed-off his favorite sweatshirt using this method.
Fabric: Red and black heathered french terry from Paron Fabrics in NYC.
Well, there you have it! Lots and lots of information about sewing with sergers, particularly the Baby Lock Diana, which has my heart singing. If you’re in the market for a serger, this would be an amazing one to grow into because it has all the functions of a basic serger, plus so much more! I don’t know how I managed sewing garments for so long without the cover stitch option for professionally-finished hems! My sewing can continue to improve as I use all of the many resources available in the Diana. I feel like I’m barely scratching the surface! Make sure you check out Miriam‘s post today about setting up and threading the Diana. She’s shot some videos, so you will get to see the machine in action!
These posts conclude the tutorial portion of Stretch Yourself as taught by Mim and me. Next week, we’re passing the baton to ten awesome guest bloggers (listed here) who will be teaching you some great new techniques and projects for sewing with knits. We are also reviewing and giving away a new pattern each day on our blogs, so be sure not to miss out!


