One of my favorite parts of making things is the ability to solve personal problems with creativity. Take my kids’s bathroom, for example, where on any given day toothbrushes and toothpaste are scattered and smeared onto the countertop (and occasionally the floor–though that one is beyond my understanding.) What they need is a toothbrush holder that is easy and fun to use, off the counter, and still pretty cool. Cue my clay project for this week: an Air Dry Clay Toothbrush Wall Pocket. 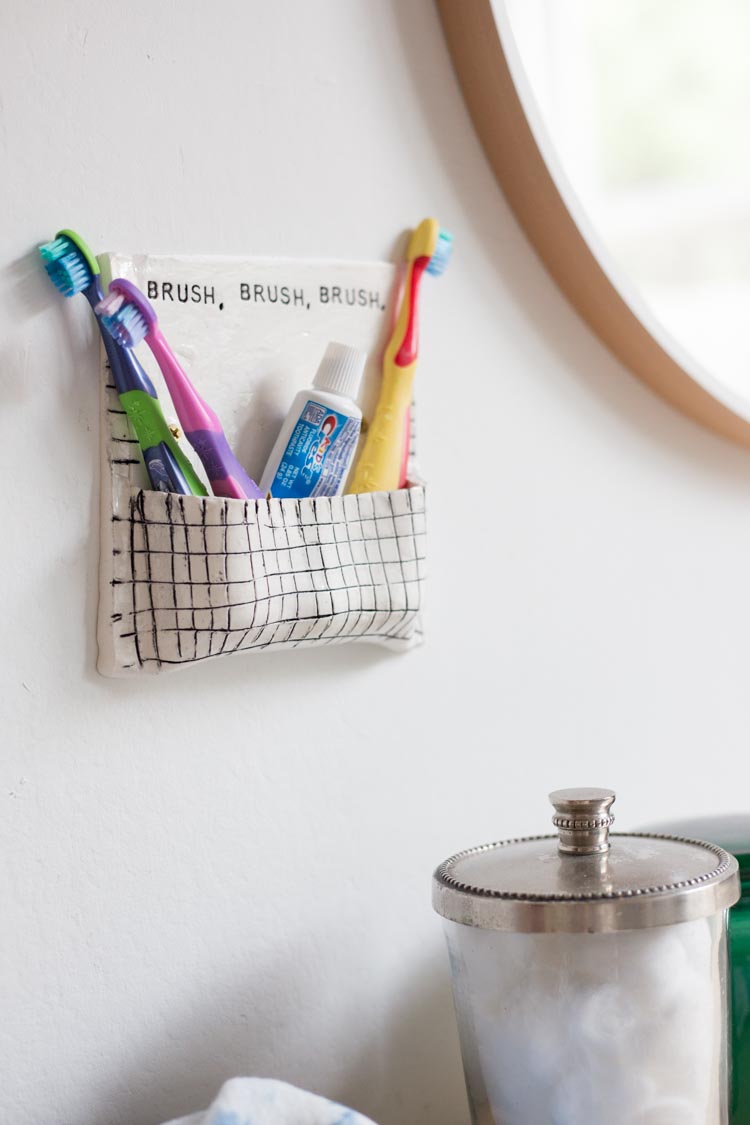
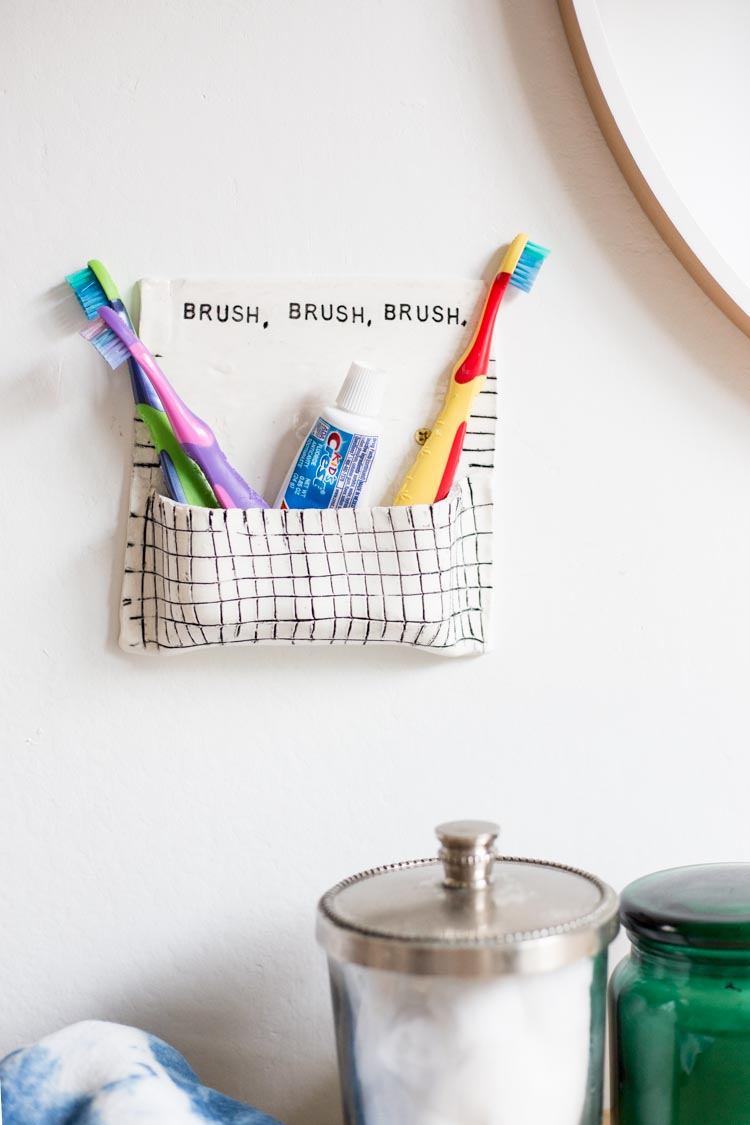 I tested the usefulness of this idea before jumping in. I had some wall pockets that I had been using to hold air plants, and tried one of those in the kids’ bathroom for a couple weeks. For some reason, it is much easier for them to remember, or want, to return their toothbrushes to a specific spot on the wall than to the cup I had previously sitting on the counter. And in the event they’re still left out, I liked the change enough I was happy to return them because the wall pocket was pretty cool.
Once I was sure I wanted a wall pocket toothbrush holder, I grabbed my air dry clay and went to work. Initially, I had thought it would be really cute to form it into some sort of cute animal. A bunny with long ears up the wall? A whale because people put whales in bathrooms? Then I spotted some small, stamped ring dishes and thought I’d use the same technique to stamp a brushing message into the pocket. I was super creative and came up with “Brush, brush, brush.” Ha!
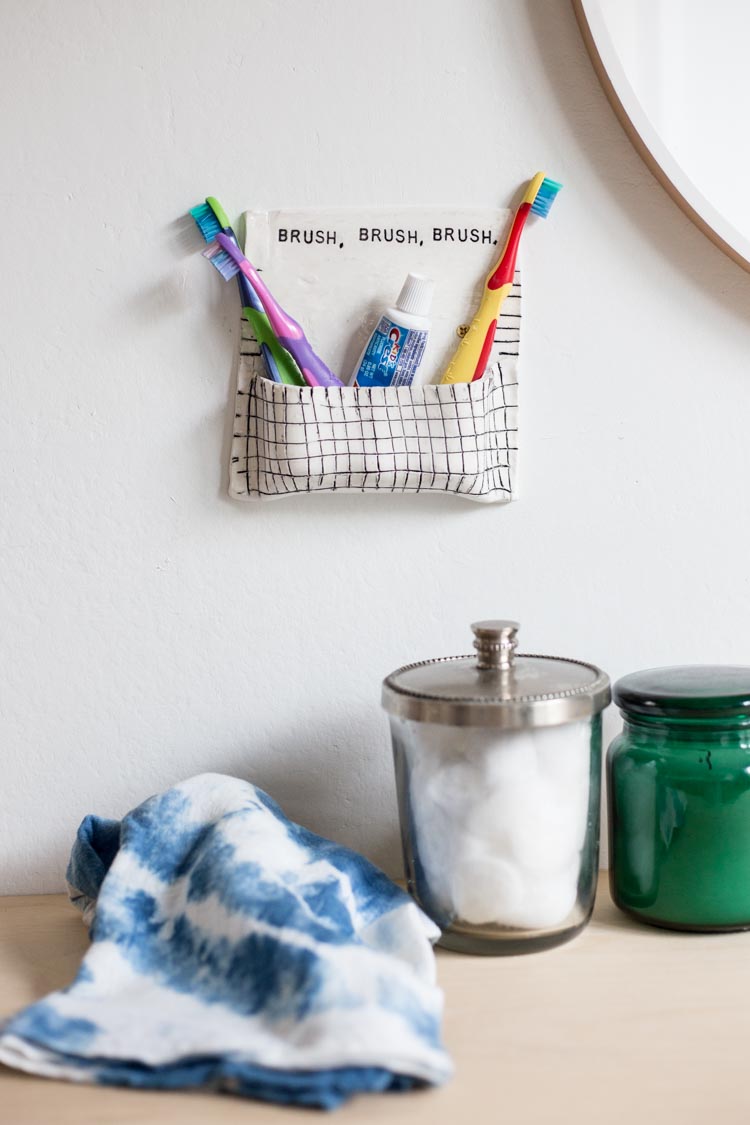 Actually executing the project I had in my mind was harder than I expected. The air dry clay was a little trickier to work with as a flat piece. I had to be careful to not tear it as I folded it into the pocket shape. Then, even after 24-hours it wasn’t completely dry. It may have been because I had it laying on a silicone mat. I turned it over, then popped it into the oven because I was crunched for time. 15 minutes at 250 (like regular polyform clay) did the trick.
After drying it completely, I sealed the whole thing with a spray acrylic sealer. My hope was that by sealing the clay, I could paint on top of the glossy finish, then wipe off the excess, leaving the black paint just in the deep cracks. That was true if I worked quickly, and with lots of wipes. I ended up smearing a lot more paint onto the white finish than I wanted. One happy discovery was that I could gently sand the top layer of gloss and clay and it came off nicely. After cleaning up the piece, I resealed it completely, waited for it to dry, then hung it up.
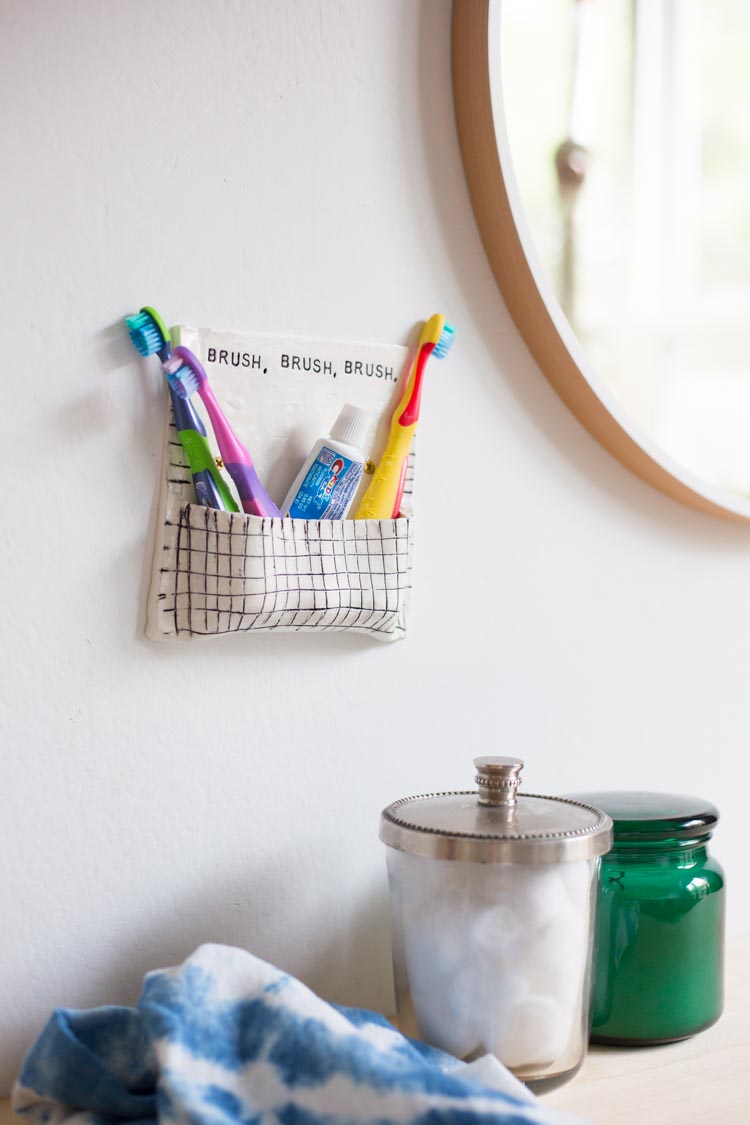 Despite the small headache of making it work, I love the way it turned out! I think if I hadn’t been on a deadline to finish it up for this Friday post, I might have had more luck at each stage because the drying time would have been more sufficient. With a few tips and tricks you will be able to make your own more easily than mine. That’s part of the fun of this monthly DIY Friday project for me: being able to work with and learn about different mediums each month. Clay is more new, and I’m learning a lot!
To make your own air dry clay toothbrush wall pocket, here’s what you’ll need:
air dry clay
clay tools
stamping letters
bottles to hold the form
rolling pin
acrylic sealer
black paint pen or paint
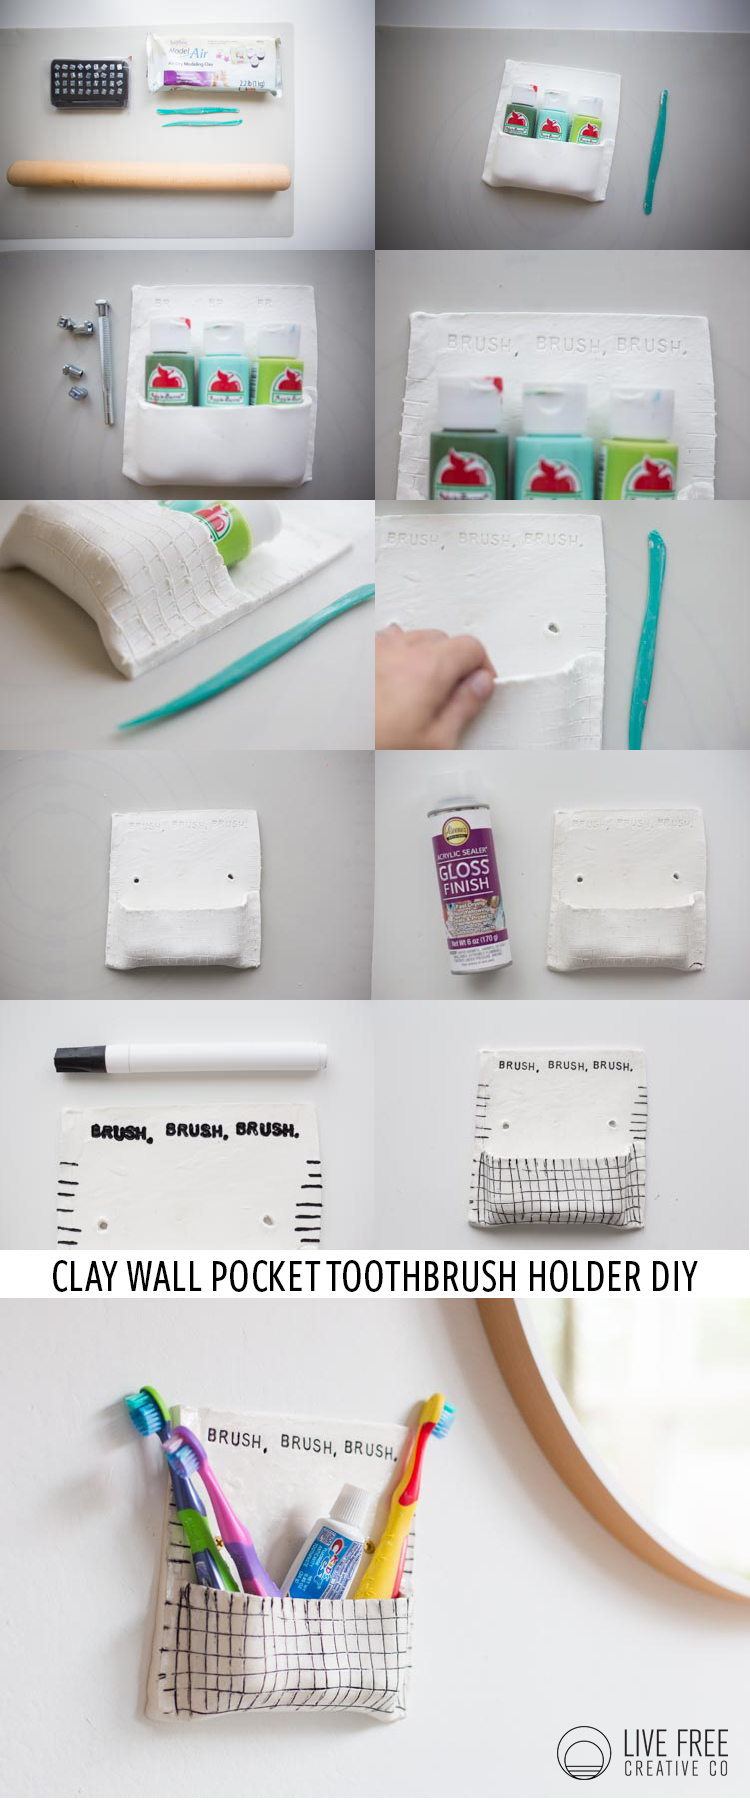
- Gather your tools onto a clean, dry, flat surface. I used a silicone baking mat.
- Separate the air dry clay into two pieces. Put one into a plastic bag for later use. Roll the other half into a ball.
- Using the rolling pin, flatten the ball out to about 1/4″ thick.
- Lay your bottles in a row, and measure 5″ from the bottoms.
- Cut the bottom edge of the clay off so the edge is flat.
- Fold the bottom edge up around the bottles and gently press firmly on either side so that the sides seal shut.
- Cut around the sealed pocket, leaving at least 1.5″ at the top for stamping. You could leave a little more if you’re going to be storing adult toothbrushes.
- Use your letters to gently press your message into the top edge of the wall pocket.
- Use the clay tools to create any other patterns you would like in your pocket. I did a grid pattern.
- Create two small holes just above the pocket edge, one on either side. These will be for the screws to hold the pocket to the wall.
- Let the clay dry for 24-hours, or bake it in the oven for 15 minutes at 250. Let cool.
- Spray three light coats of acrylic sealer onto the clay wall pocket and let dry.
- Fill in the stamped letters and other designs with a paint pen. Wait 2-3 minutes, then wipe the extra paint off with a baby wipe.
- Keep painting and wiping until the letters are all filled in, and the outer clay is clean. You can gently sand an area if you need to, then reseal it.
- Spray the entire project with another 2-3 coats of acrylic sealer and let dry.
- Screw into the wall with 2 anchored screws, add toothbrushes, and enjoy!
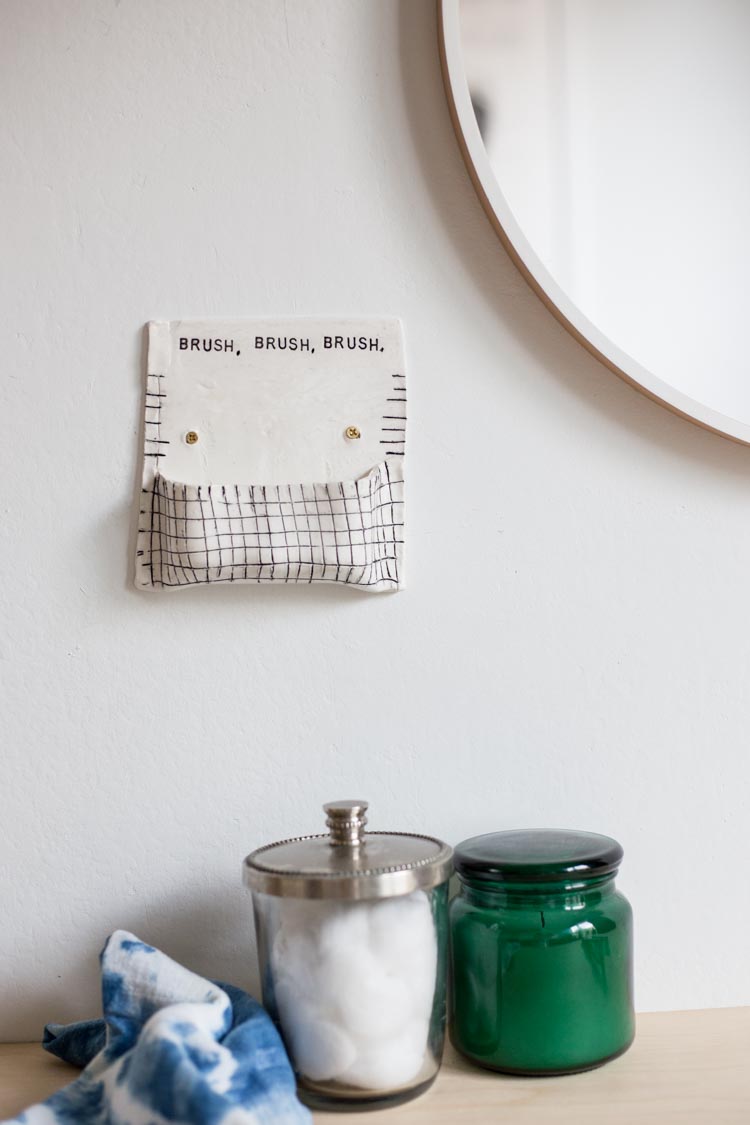 Even though it was a lot of work, I love the way this little air dry clay toothbrush wall pocket turned out. It is a huge improvement on the previous mess, and I am motivated to keep the rest of the bathroom looking just as cool.
Each Friday in 2017 I am sharing a DIY, and every month I’m working with a different medium! We’ve done cotton, paper, wood, and this month are working with clay. For all of the posts, visit the DIY archives!