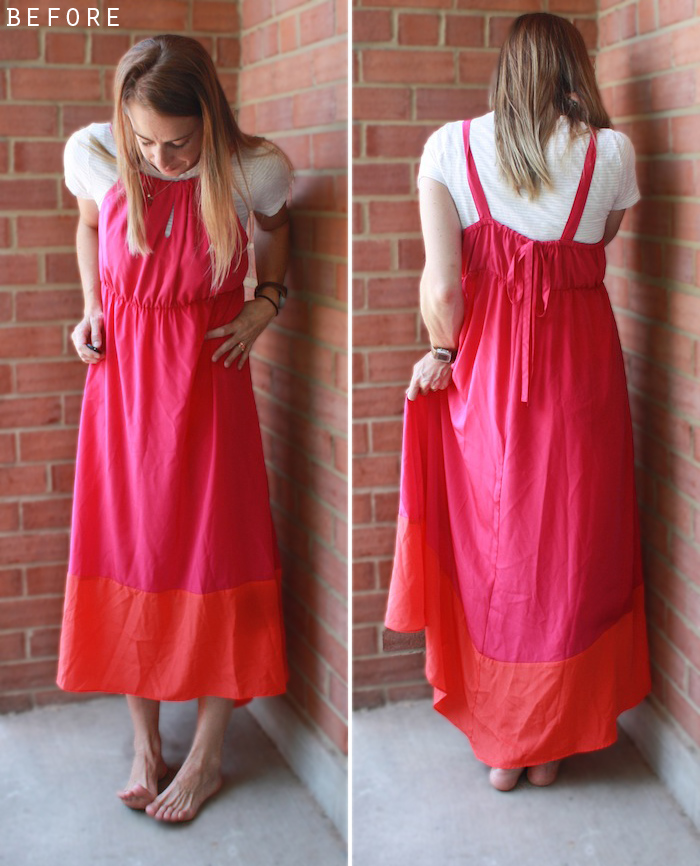
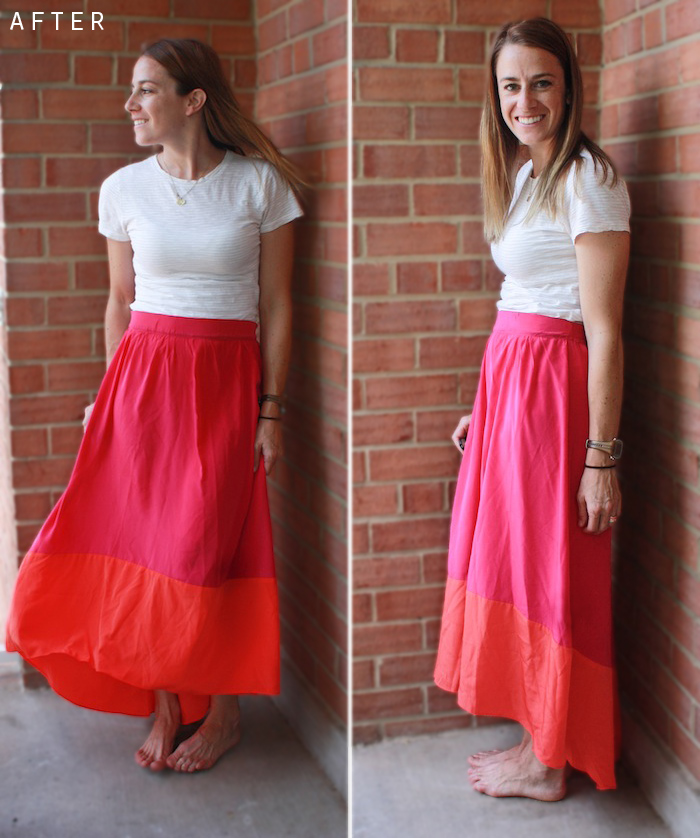
Happy Friday! I am excited for another weekend. Can you believe it’s one of the last of the season?! I hope to get a long bike ride in with Dave, spend a day at the beach with the boys, and skype with our family back west. Whatever I am doing, you can bet I’ll be donning this color-blocked refashioned skirt.
There are a few trends I have really fallen in love with this summer: color blocking, maxi, and high-low hemlines. I was thrilled when I spotted this dress on the Old Navy clearance rack for $12.00 that combined all three! Not to mention it is made of the most wonderful, silky, lightweight fabric. The strappy, keyhole bodice was far from my taste, but immediately saw it’s potential as a fabulous skirt, and took it home with me to make the easy change. Luckily, both boys napped that afternoon, so I was left alone to refashion this baby immediately. I finished right as Eliot was waking up (I think he sat on my lap for the final rows of stitching.)
It isn’t exaggerating to say I wear this skirt every week. I do. Sometimes more than once. I love it to pieces and wish I would have bought the other colorway of this dress when I saw it (now sold out!). The refashion was pretty straightforward, but I did a couple things to make it nicer looking than just a plain elastic waistband. I kept the front flat, and added iron-in interfacing to add some structure to the waistband. I also added several rows of stitching across the gathered elastic waistband in the back, to keep it sleek.
I took photos for a step-by-step tutorial, and they will apply for turning any loose-fitting dress into a gathered skirt. Read on to make your own!
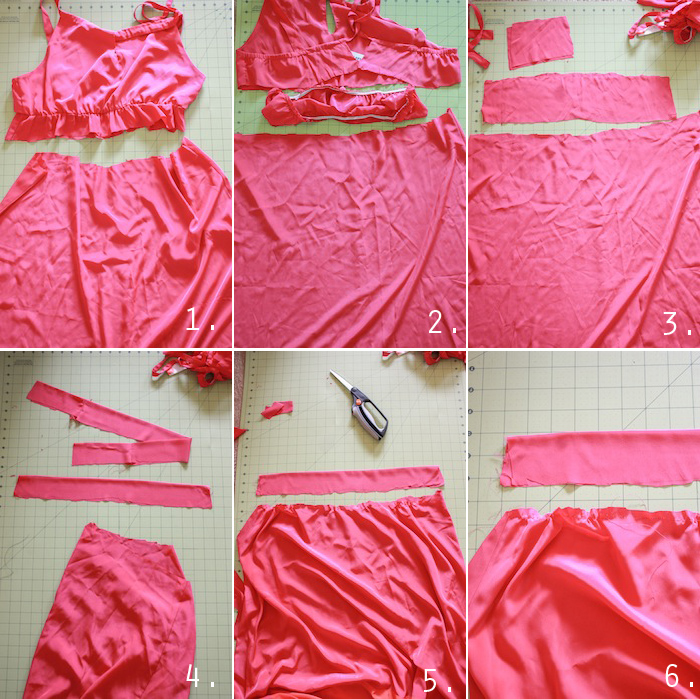
1. Cut the bodice off of the skirt
2. Cut out any elastic at the waist
3. Using the bodice fabric, cut one rectangle 1/2 the width of the skirt’s waistband (for the gathered back), and another 1/2 of your waist circumference (for the flat front). Both pieces double the width you want the finished waistband.
4. Fold the rectangles in half lengthwise and press, then stitch the short ends with right sides together to make one long circle
5. Gently gather the front of the skirt to the measured waist size
6. Align the skirt front with the flat front waistband piece
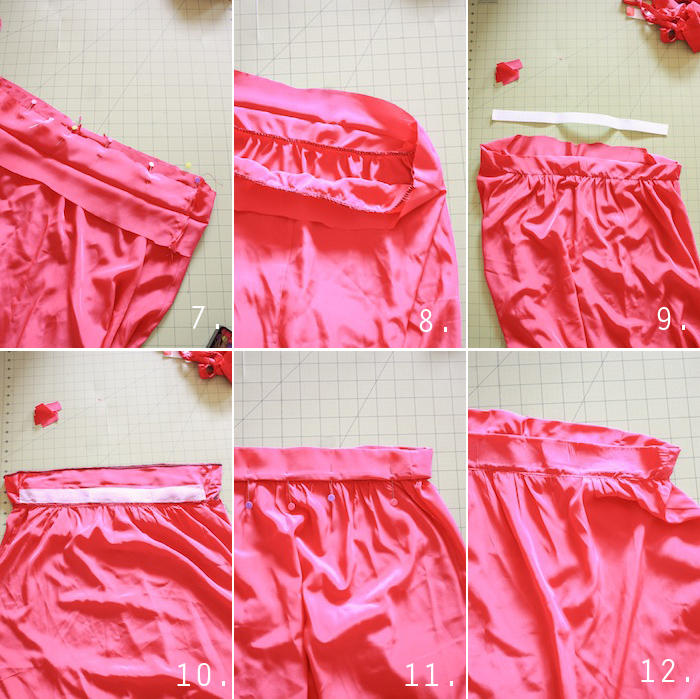
7. Align the side seams of the waistband, and pin it to the skirt, RST
8. Stitch around the top edge
9. Measure and cut a piece of fusible interfacing the length and width of the flat-front waistband
10. Iron the interfacing into the waistband between the seam and the fold
11. Fold over the entire waistband and turn raw edge under. Pin in place and topstitch around the circumference of the waist, leaving 1″ open along a side seam for the elastic
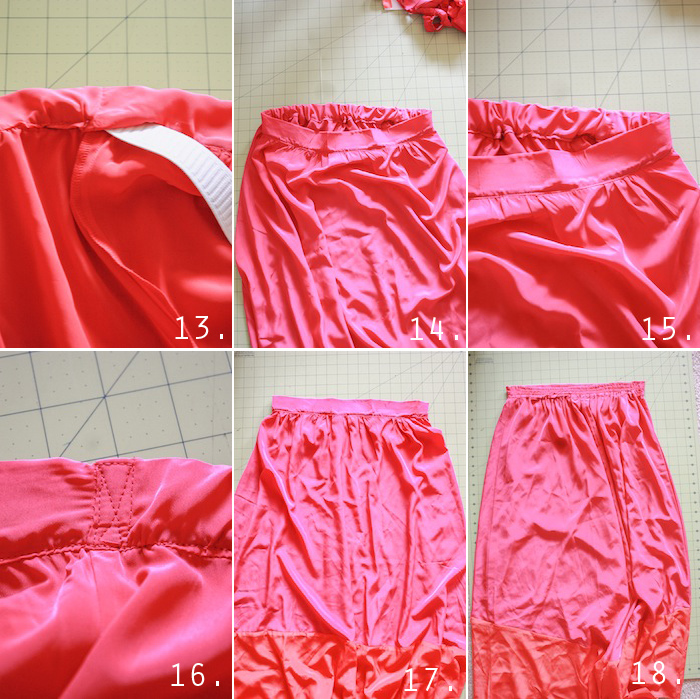
13. Cut a piece of elastic 1″ smaller than 1/2 your waist circumference and thread it into the back of the waistband.
14. Pin the elastic in place
15. You should have a flat front, and a very gathered back on the waistband
16. Stitch the edges of the elastic into the waistband with a secure stitch
17. The front of the waistband is flat and nice
18. Stitch several rows through the elastic back, while pulling the elastic tight. This will secure the fabric down and keep it looking sleek.
Don your new skirt and enjoy!

