Yesterday (which is actually still today for me, since it’s the wee hours of the morning and I’m not in bed, yet.) was a really long day for us. Eliot barely napped and just wanted to be held most of the day. I think he’s getting some more teeth. It was too hot to play outside, and Milo and I were both stir crazy. We did manage to make it to Costco for a pizza lunch (I’m seeing a pattern here…) and then spent the rest of the day with our good neighbors, trying to keep all of the kids happy and playing. And today LET’S SEW SOME BOX PLEATS!!
Really though, it was one of those days where I remember how much my kids need me to just be there for them. Just me, mom. Not seamstress mom, or party-planning mom, or creative chef mom…sometimes they just need regular old mom to sit and built towers of matchbox cars for them to knock down. And I need that, too.
Making Perfect Box Pleats
Let’s dive right into a 24 step tutorial for a skirt with perfect box pleats! Haha, put’s things in perspective, right? Above all, I love being a wife and a mom. And I also like this crafty stuff too. So, seriously now, let’s get on with it.
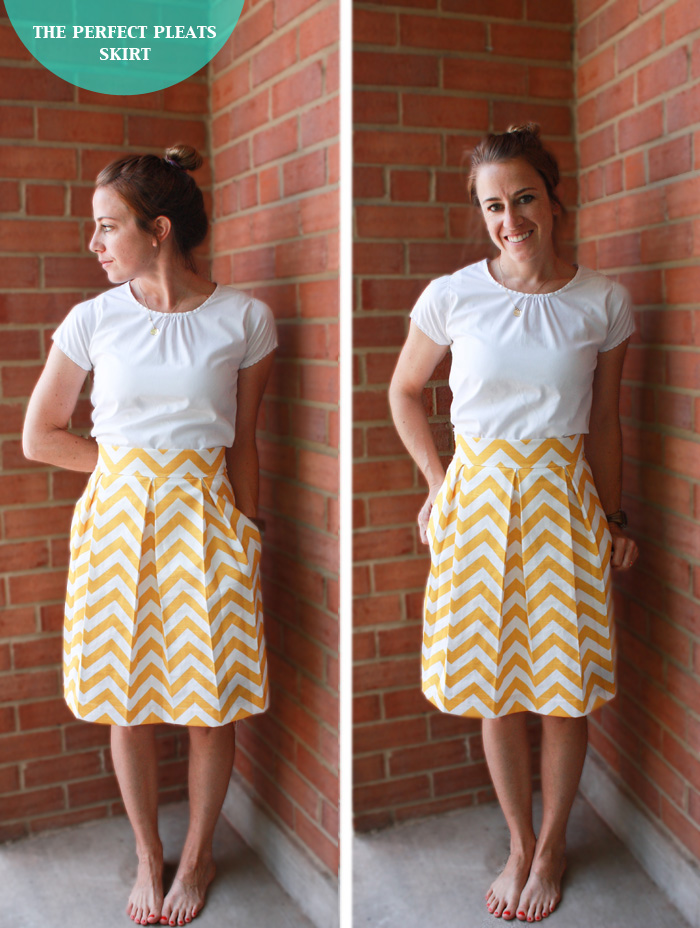
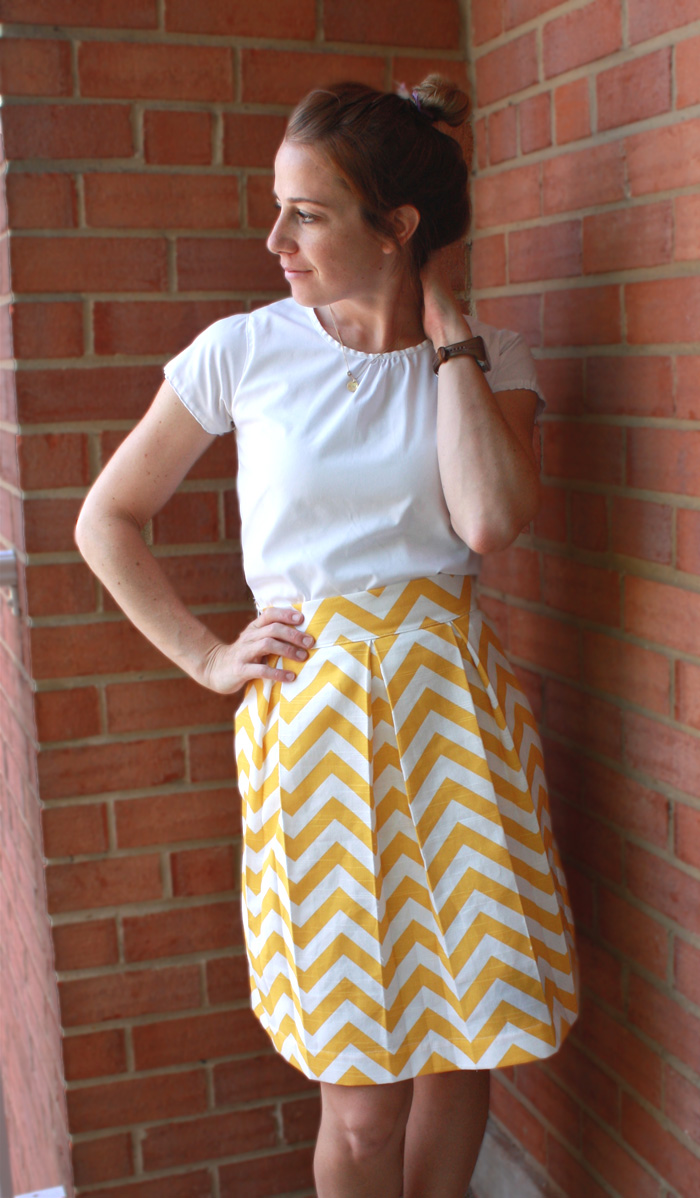
I adore box pleats. I think they are just so classic and flattering. I’ve used them often when sewing for myself (like on this maternity skirt, this Easter dress, and this awning stripe dress) and have come up with a simple way to keep my pleats even. Last week as I was preparing to sew up this pleated skirt in a summery chevron print for my friend, I thought I’d take advantage of the chance to take some photos and share the way I make a skirt with perfect box pleats.
There are a lot of steps, and I’d say this project is for people who are pretty comfortable sewing, though if you’re a real beginner, there’s no better way to learn than by taking on a big project! Okay, are you ready? Let’s do it.
What you’ll need:
1-1.5 yards of fabric
a 9-12″ invisible zipper
contrasting fabric for pockets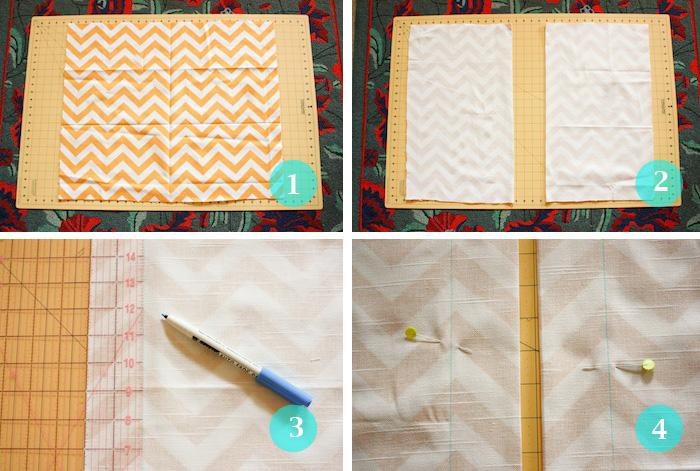
1. Measure your natural waist. Add 1.5″ to that measurement (for ease and seam allowance) then divide by 2, because we’re making a front and a back. Add 12″ for pleats to that number and cut two rectangles of your skirt fabric to that width, and the height of your natural waist-knee measurement+2″ for hem.
2. fold each panel in half width-wise
3. measure two inches from the fold and mark with disappearing ink or chalk the whole length of the fold
4. Pin so the fold doesn’t slip
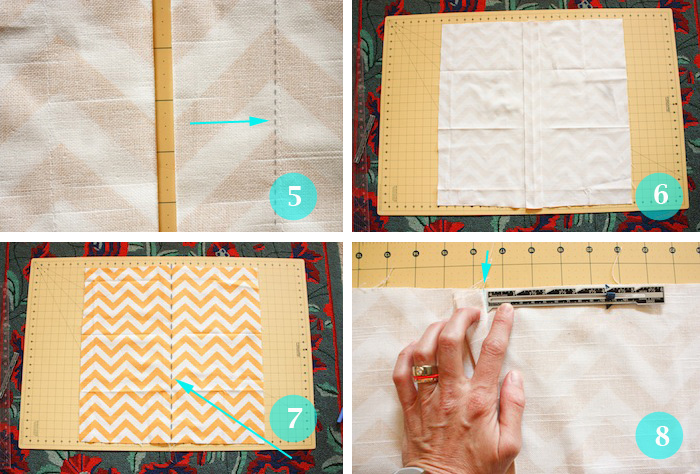
5. stitch down your lines with a very wide basting stitch (you’ll unpick this later, so keep it wide!)
6. open up the folded seam and lay it flat. Press with an iron
7. if you flip your fabric over, you should have a straight seam down the center
8. Measuring from the seam (not the folded edge of the pleat) mark at 4″ and draw a line the whole length of the fabric using a clear ruler
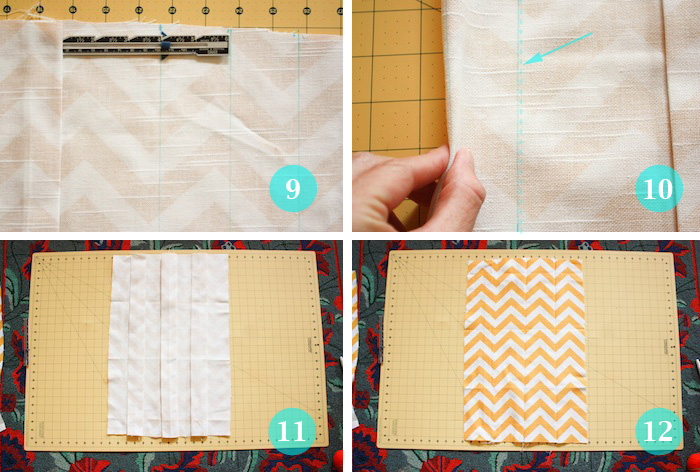
9. Measuring from that line (a), make another mark at 2″ (b) and one at 4″ (c) (this first 4″ will be the face of the pleat, and the second will be the inside of the second pleat)
10. Fold the fabric with RST so lines (a) and (c) meet and line (b) runs the length of the fabric on the fold, pin and stitch a basting line along line (a)
11. Repeat steps 8-10 on the other side of the center seam
12. When you flip your fabric, you should have three seams (or two nice box pleats:) Repeat steps 3-12 on the second piece of fabric. Now the pleats are perfectly straight, and run the length of the skirt. We’ll continue finishing up the construction before unpicking to make sure the pleats stay nice and perfect!
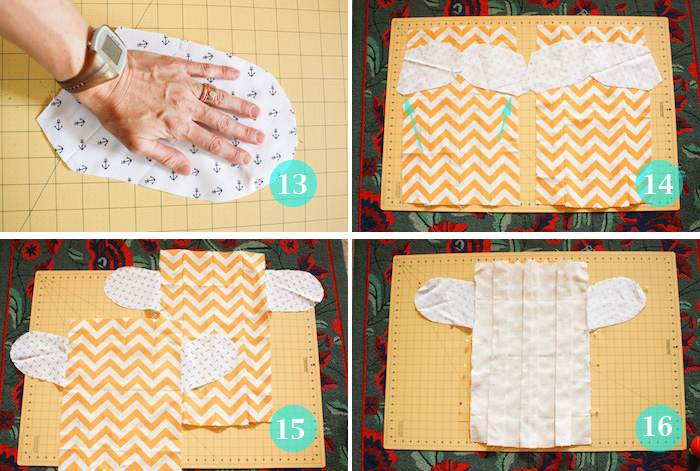
13. Pockets are totally optional, but I’m addicted. If you want to add some, fold your contrast fabric in half and cut around your hand with about 1-2″ of room. Use that as a pattern to cut another 2 pieces
14. lay the pockets RST onto the skirt panels, one on each side, about 3″ from the top of the skirt
15. Stitch along the edge to secure the pockets. You should be able to flip them right-side-out (they’ll look like wings:)
16. Lay both skirt pieces RST and stitch from top to bottom, around the pockets
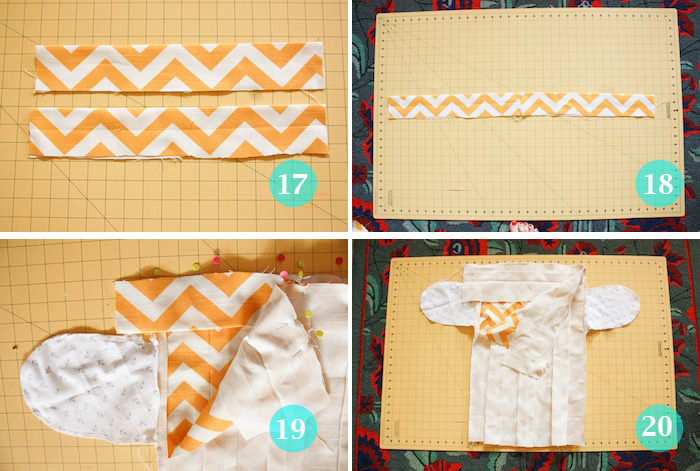
17. Cut two waist band pieces to the length of your natural waist+1″/2 and about 4.5″ wide
18. Stitch them RST end to end to make one long piece. Fold in half lengthwise and press with an iron
19. Match up the seam on the waist band to one of the side seams on the skirt, and pin ONE of the edges down (leave the opposite edge free to use as a facing inside the skirt)
20. To put the zipper in the side seam, with the pocket in place, you’ll cut down the side of the skirt, about 3/4″ from the intact pocket and side seam. Totally unconventional (aka I made this up:) But it works! Trust me. Now stitch the pinned edge of the skirt and the waist band
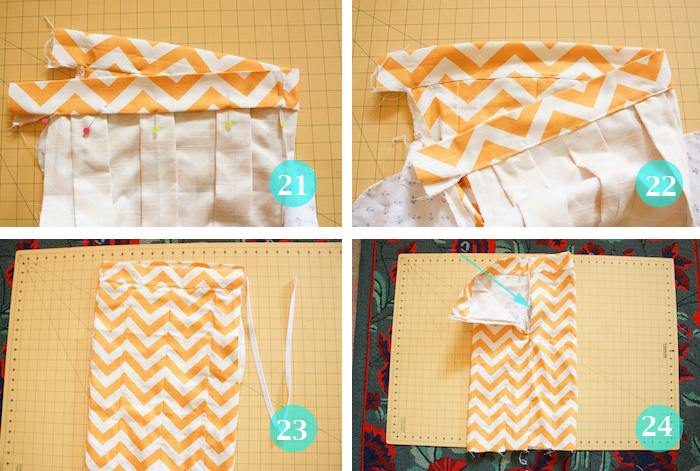
21. Fold the waist band back along the pressed center, and turn the edge under just 1/4″ on the inside of the skirt and pin in place. This fold should just barely cover the seam you just finished.
22. Top-stitch the edge of the waistband, as close to the seam as possible, ensuring you are securing the facing fold as well
23. Press your invisible zipper and place in the open side seam (here’s a great zip tut, if you need one. I’ve been meaning to create my own…) You’ll be sewing the zipper onto the 3/4″ of fabric on the back of the zipper side seam, so be careful of the pocket.
24. Yay! You have a zipper AND a pocket in the side of the skirt!
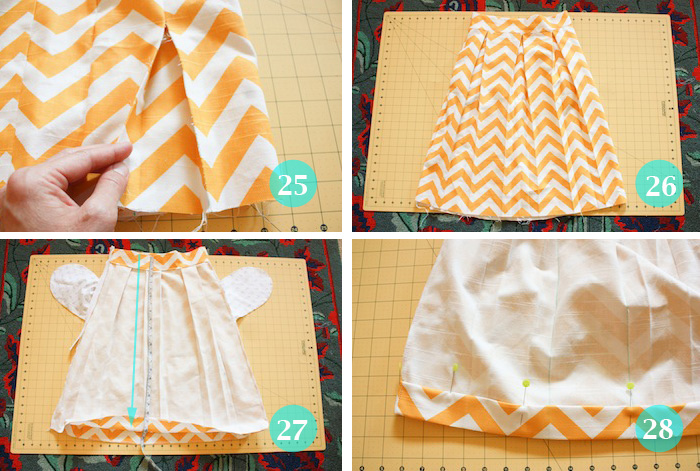
25. NOW you get to unpick those six basting seams that are holding your perfect pleats in place! Take care to not rip through your fabric, or the waist band at the top
26. Your skirt should be looking mighty fine about now! All that’s left is the hem
27. Measure from the top of the waistband to the desired hem length and fold the fabric up and pin
28. Fold the raw edge of the fabric under to create the desired hem width, and stitch as close to the top edge as possible. You’re done!

