• ABOUT
  • PODCAST
  • BLOG
    • MINIMALISM
    • HOME DESIGN AND RENOVATION
    • DIY
    • SEW
    • EAT
    • TRAVEL
  • BOOK
  • CONTACT
  • SUMMER CAMP
  • CREATIVE CAMP
  • NOVIOS RETREAT
  • <iframe frameborder="0" src="https://playlist.megaphone.fm?p=CTL9280674595&light=true" width="100%" height="482"></iframe>
  • ABOUT
  • PODCAST
  • BLOG
    • MINIMALISM
    • HOME DESIGN AND RENOVATION
    • DIY
    • SEW
    • EAT
    • TRAVEL
  • BOOK
  • CONTACT
  • SUMMER CAMP
  • CREATIVE CAMP
  • NOVIOS RETREAT
Folk Art Paper Cut DIY with Printable Spring Pattern
February 17, 2017

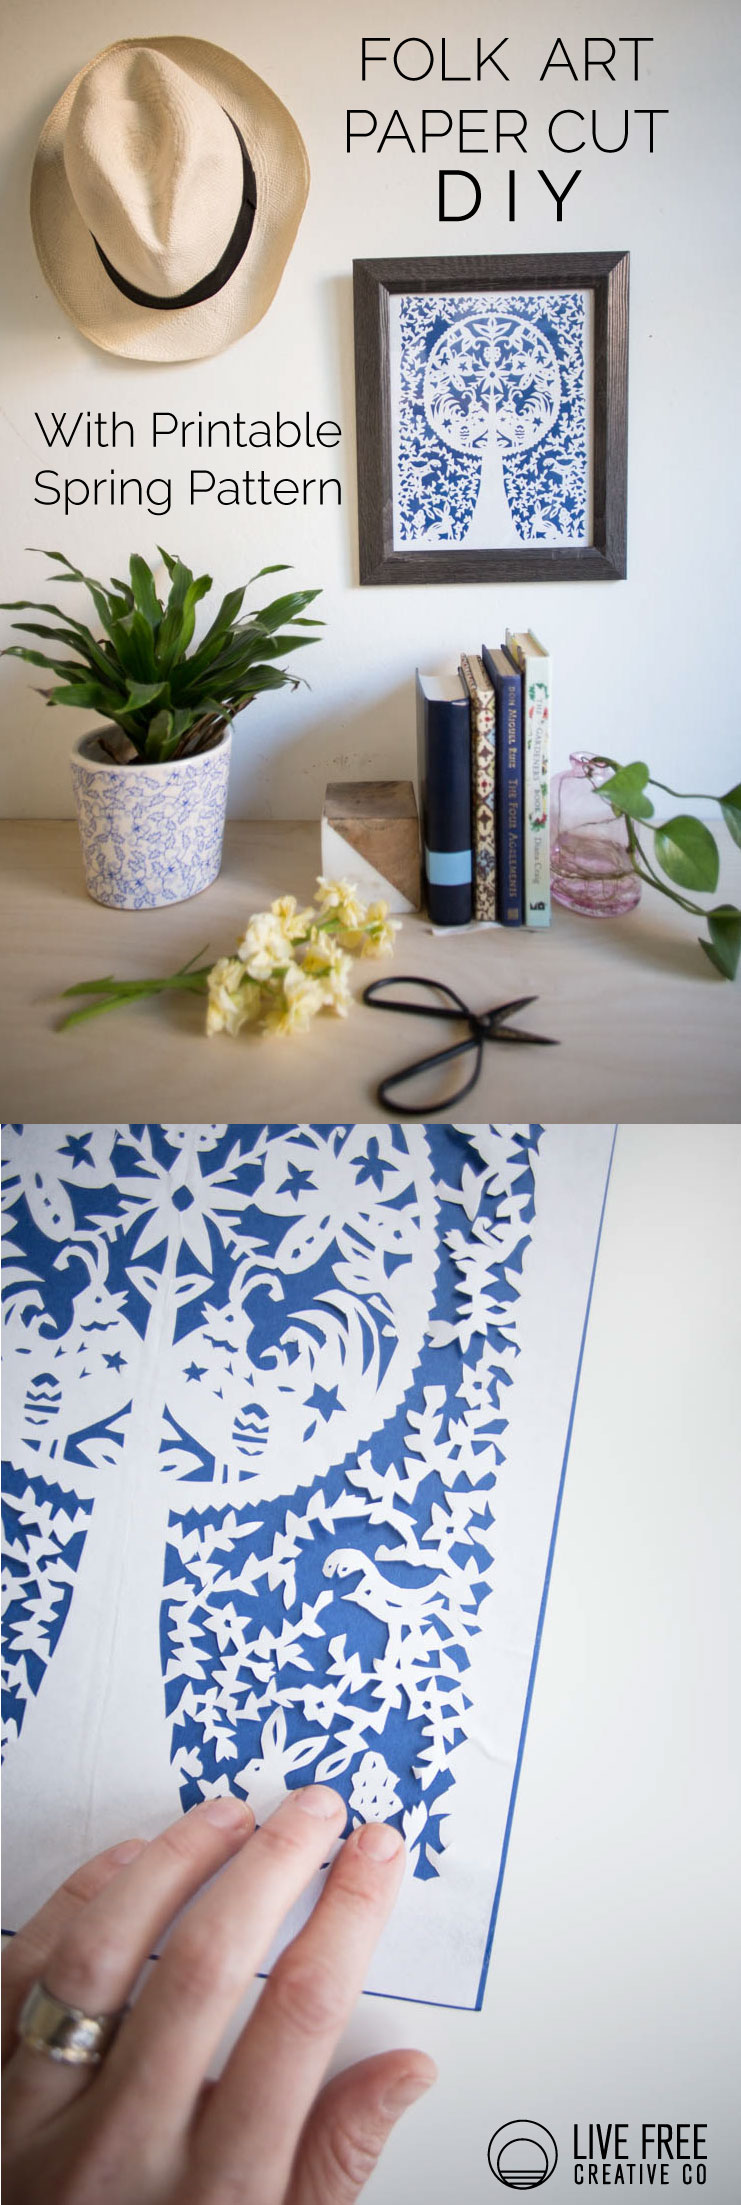
I’ve been loving this month’s DIY Friday medium of paper. It is such a commonplace material that can be used for some really gorgeous art, like this Folk Art Paper Cut we’re making today. A simple piece of printer paper transforms into an intricate design with only a craft knife.

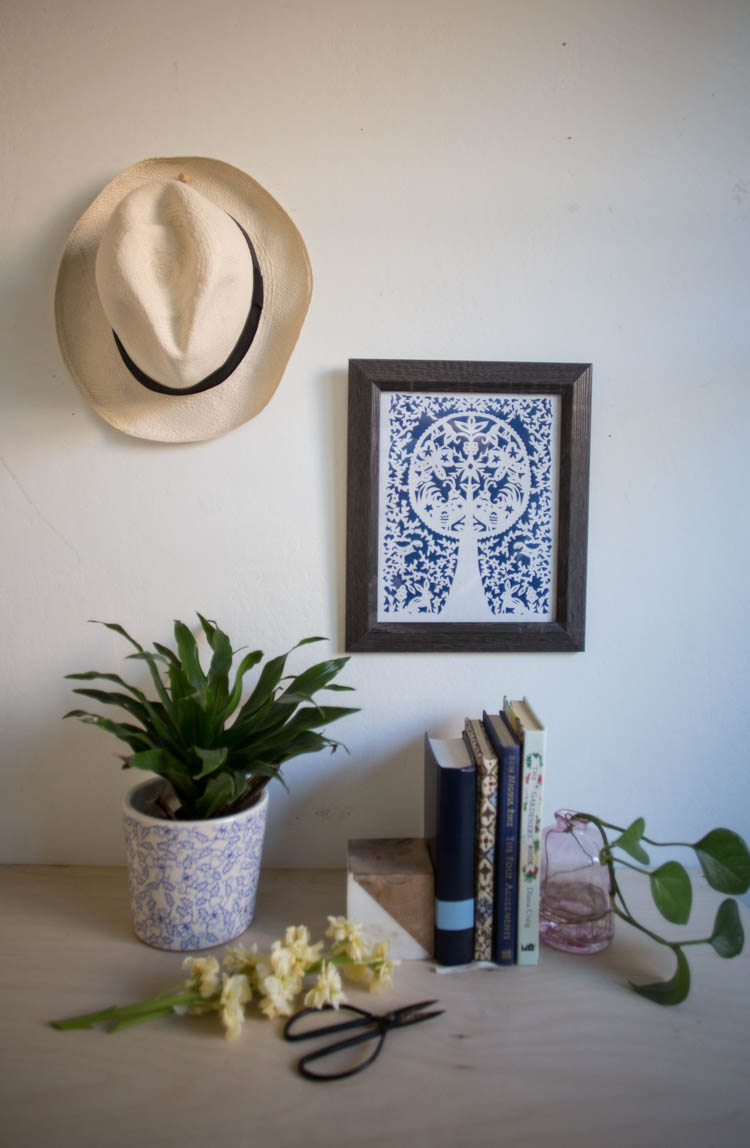
Paper cuts are pretty magical, and also a bit time consuming. I felt like the process was therapeutic and totally worthy of a couple hours of focus. I smile each time I pass this new framed art in the hallway. There is something really special about making things you love.  
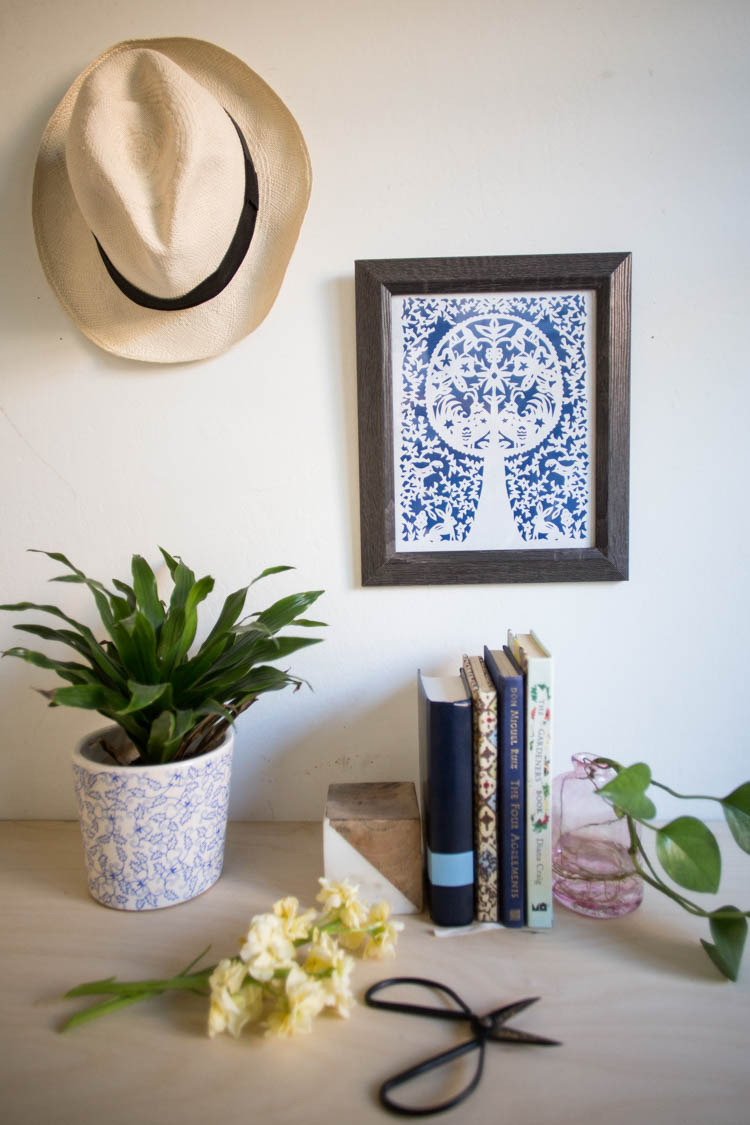
This week I drew inspiration from some old paper cuts that my mom created. They hung in my childhood home, and I as a kid I was always fascinated by the intricate details and the reflective design.

I didn’t realize then that paper cutting has been around for thousands of years and permeates most global cultures. There are Chinese paper cut lanterns, Mexican Picada flags, Jewish marriage displays are often surrounded by intricate paper cut prayers. This art has been long-lived and widely used.

In preparation for creating an original design myself, I spent a little time looking at the myriad designs online. I was most inspired by the classic folk art paper cuts featuring florals, trees, and animals.

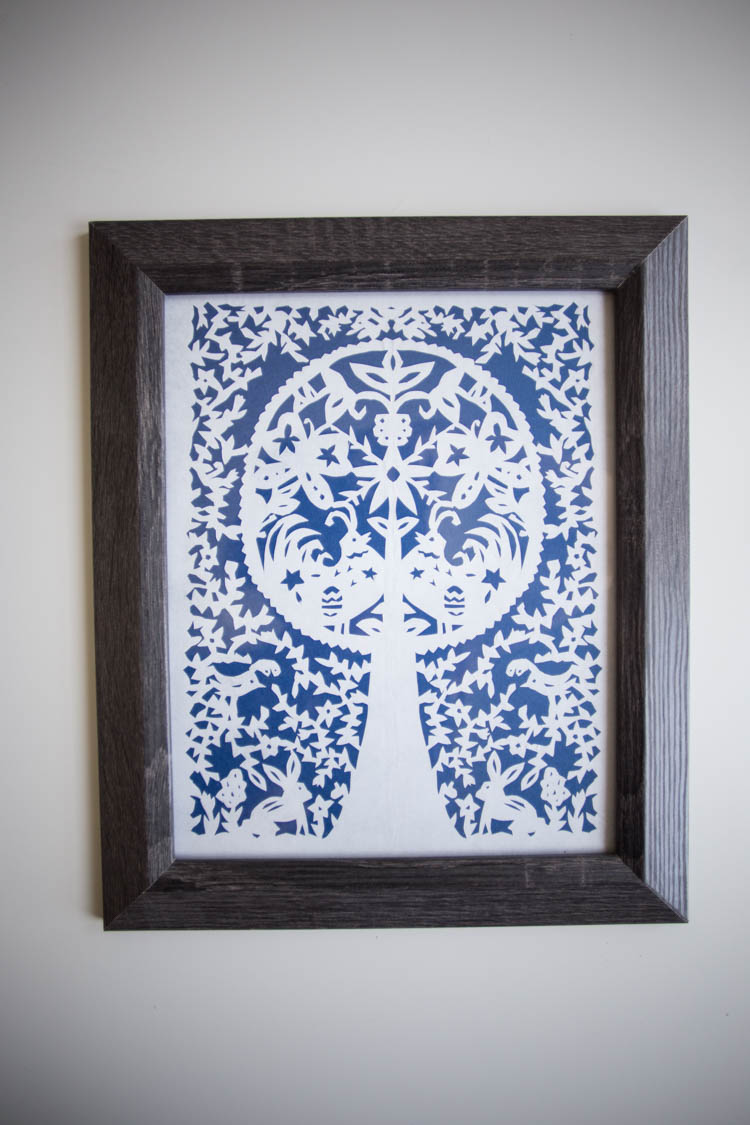
With spring right around the corner, I wanted the design to feel springy. I made sure to add tulips and flowers tucked among the vines on the edges, put a bird on the edge, a bunny on the ground, a mama chicken (with an egg in her belly) perched in the tree, and a butterfly for good measure.
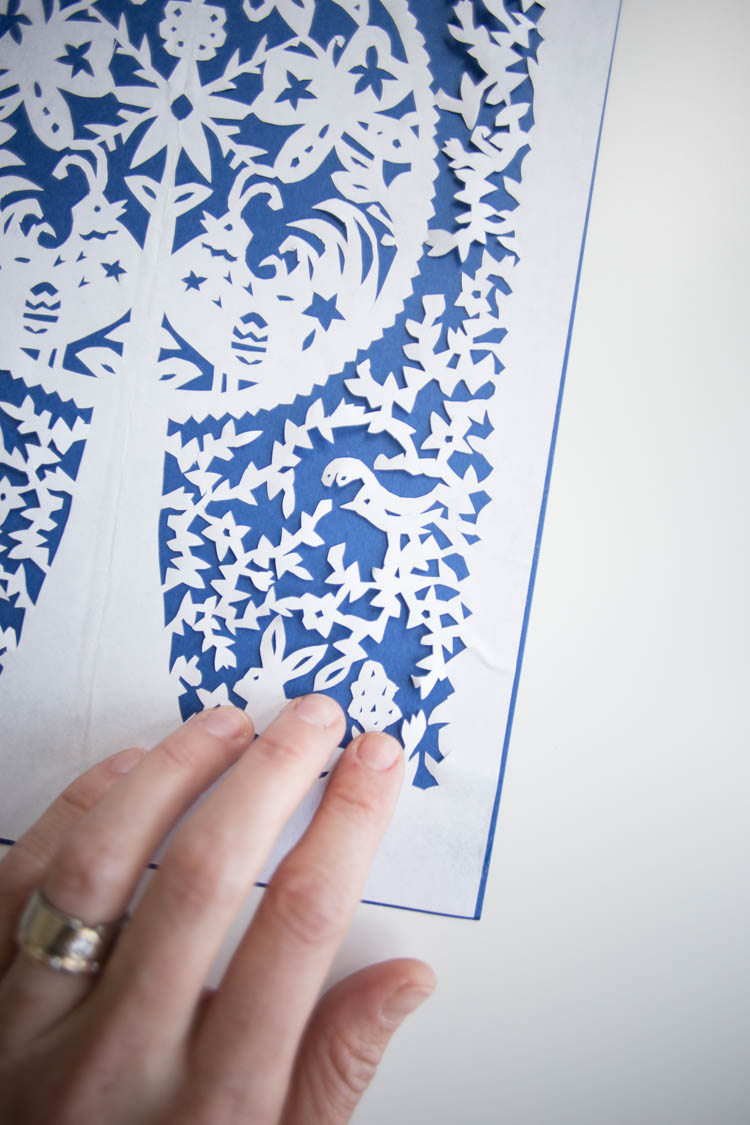
The design process itself could be a whole post. I needed to remember which areas were paper and which would be cut out. I also made sure to keep a few pieces hooked together continuously across the page, so the entire design would end up one piece, without floating pieces within it.

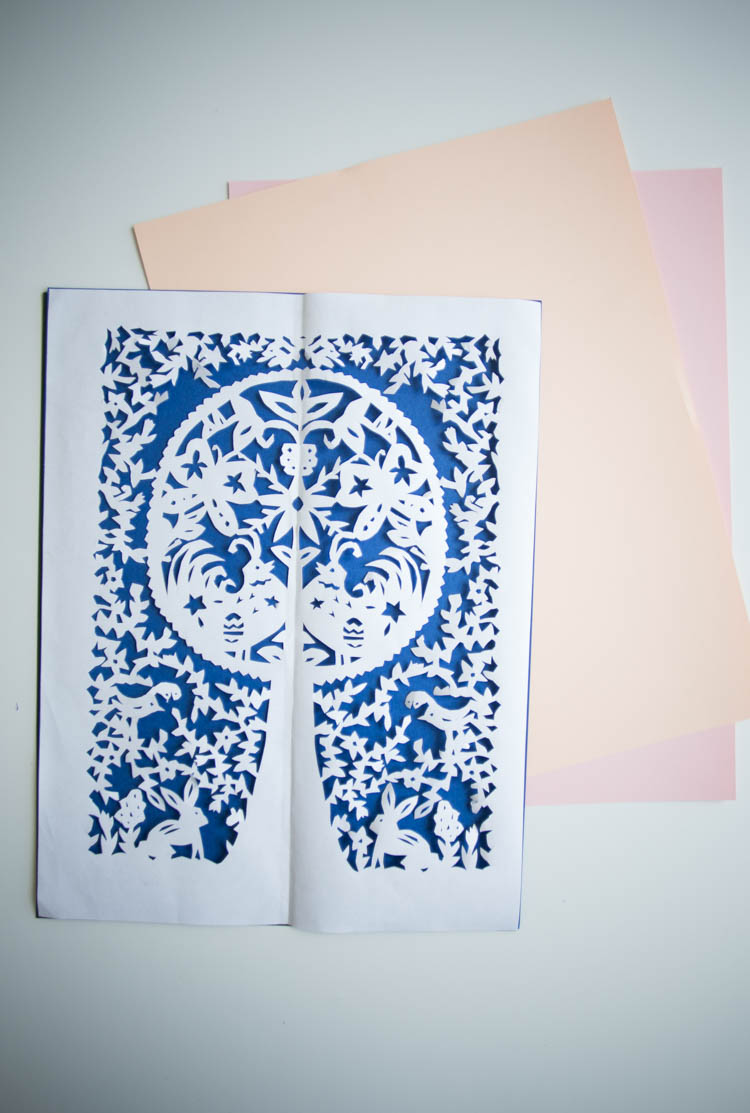
Once I drew and filled in my design, I scanned it into the computer and used Adobe Illustrator to vectorize the image into a black and white file. I had to make some small adjustments and clean it up a little bit. Then, I moved it into Photoshop to invert the design so that I could create a printable file for you where the grey areas are what is cut away. You can find that free printable pattern HERE.

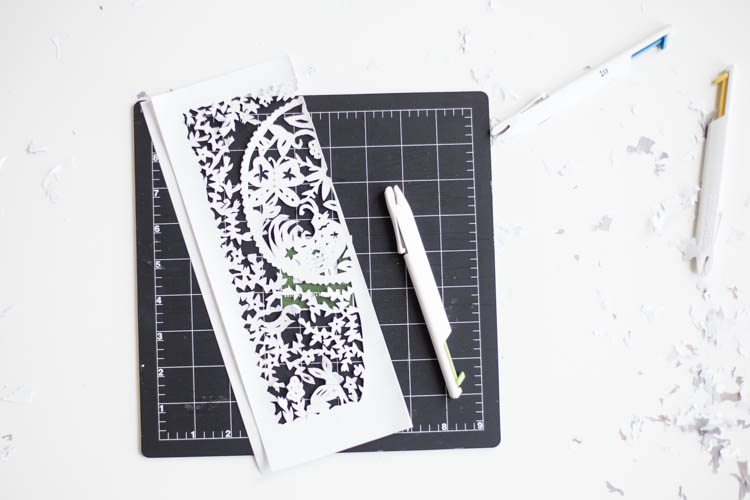
Once the file is printed, all you need is a craft knife and cutting surface in order to get started.

My neighbor loaned me a new craft knife tool called the Penblade, and it was really amazing to work with. The blade retracts into the handle, like a pen (hence the name) and it comes in a variety of sizes.

I started with the smallest size (15) for the smallest cuts, and continued to use it for the whole piece. It slices super easily, and I wasn’t worried about the blade coming lose or wiggling around. I’m a new fan, and just might have to borrow these things long-term. 
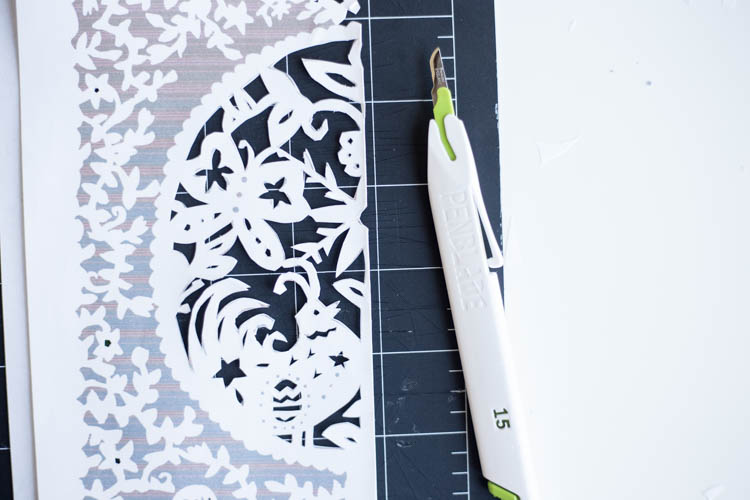
Once you print and cut your design, the size is perfect for trimming down to a standard 8×10 frame. I had one in my closet, so I was able to finish my folk art paper cut and get it on the wall within a day.

Are you ready to get started? Like I mentioned in the beginning, this is not the quickest and easiest project I’ve ever shared, but it is really fun and turns out really beautifully.

Here’s what you’ll need for your Spring Folk Art Paper Cut:

This Folk Art Paper Cut Design printed on a piece of standard printer paper
A cutting surface
A craft knife (the Penblades are awesome!)
Some spray adhesive
Your choice of colored card stock for backing the design
An 8×10 frame

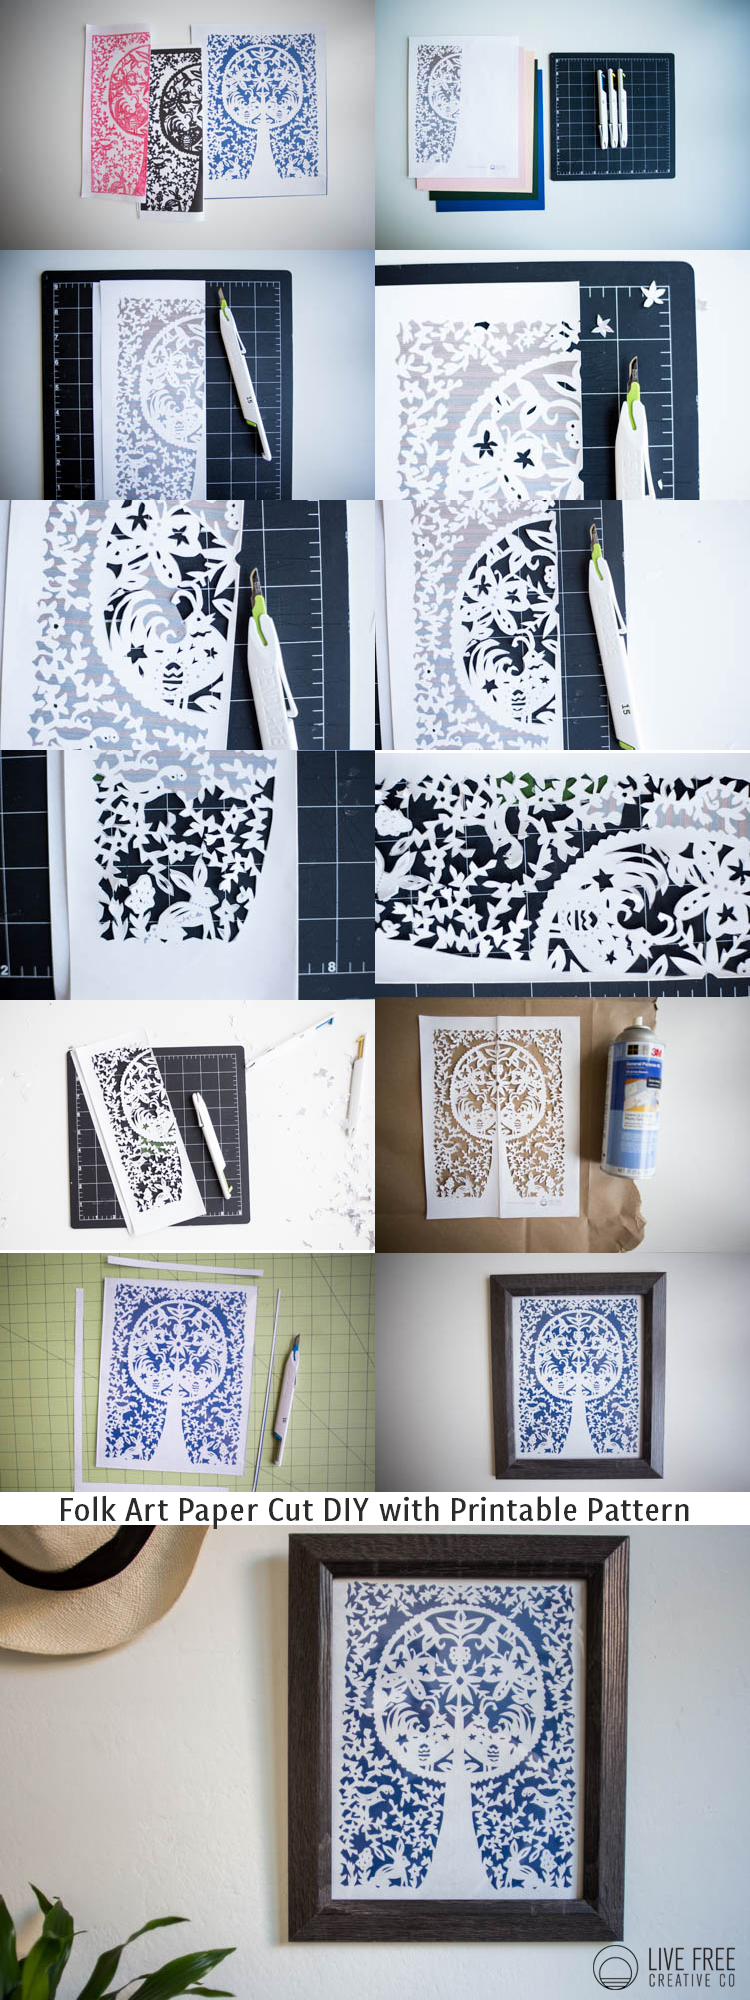
  1. Gather your supplies.
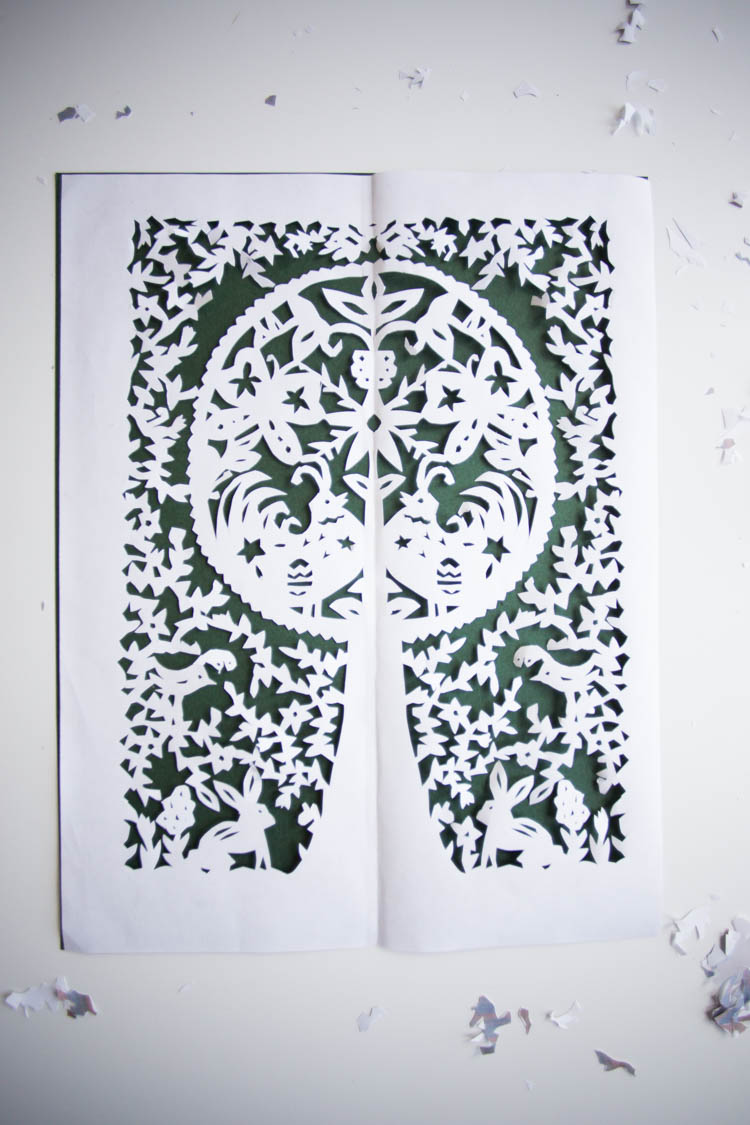
  2. Print the folk art paper cut design onto a piece of standard printer paper and fold in half along the center line of the design. Depending on your printer settings, the center of the design might not be the exact center of the paper. So, fold along the design center, not the paper center.
  3. Place your paper onto your cutting surface with the design showing. With your craft knife, begin carefully cutting the smallest pieces of the design away first.
  4. When cutting the small circles, make five to six short cuts around the outside of the circle, rather than trying to do one round cut. Cutting short straight lines works much easier, and you won’t notice the tiny extra slices in the paper when you’re finished.
  5. Adjust the paper so you are always cutting comfortably. Most of the time, when cutting, you are instructed to cut away from yourself. I find that with this art, cutting short lines toward myself felt most in control.
  6. Remember that the grey area will all be cut away eventually, so don’t be shy about making cuts right across it as you work. There are a lot of places where it will be easier to cut small chunks of grey away at a time, rather than trying to pull those pieces out intact.
  7. Try to always cut away from the white. For example, when cutting leaves on the vine, position the blade to begin at the vine, and cut towards the grey. That way, if you accidentally over cut a bit, you’re into a safe area.
  8. Finish cutting all of the smallest areas first. If a piece seems too small for you to safely cut away, feel free to modify or leave it there. (I didn’t cut the tulip within the rabbit, or the tiniest dots in the chicken.)
  9. Once the smaller pieces are cut out, you can start working on the larger areas. Remember to cut them into smaller pieces as you go, rather than trying to cut out whole pieces.
  10. On the corners, make a small over cut each direction, so the corners come out cleanly.
  11. When you finish all of the cutting, take a break and give yourself a pat on the back!
  12. Next, carefully unfold and flatten the paper. Smooth the center fold line as well as you can, bending it slightly the other direction to flatten it out.
  13. Try several different pieces of colored card stock beneath the paper cut to see which color you prefer.
  14. Lay out a piece of scrap paper, newsprint, or another barrier and spray adhesive onto the side of the design that you cut (with the logo).
  15. Carefully place the adhesive side down onto your chosen card stock. Use your fingers, and maybe a pair of tweezers if needed, to straighten all of the tiny ends so they lay flat and smooth.
  16. Using the glass from your 8×10 frame as a guide, trim the edges from the finished art.
  17. Frame, display, and enjoy!

The other paper projects done this month so far are:

These gorgeous huge paper flowers

This cool paper mache armadillo piñata 

Check back next Friday for our last paper project this month!

alt description.
Share

Craft DIY  / DIY

  • ABOUT

    Welcome! I’m Miranda, the maker mama behind Live Free Creative Company.

  • More Than Enough Book


    Have you ever felt like you were running a race you couldn’t win in life? Like there was always something more to buy or to achieve in order for you to feel like you had “made it”?In this book, I share how my heart changed and I began to find real, lasting peace, abundance, and joy through focusing on what matters most and disregarding the rest.

    Find out more here.

  • ConvertKit Form

    Five Days to Freedom: Tips for Choosing Less Stuff and More Adventure in your Daily Life

    Five lessons with practical tips and exercises to help you feel more in control of your life!

    Success!

    There was an error submitting your subscription. Please try again.

    We won't send you spam. Unsubscribe at any time. Powered by ConvertKit
  • Recent on Instagram

    livefreemiranda

    The final episode this year of Live Free Creative The final episode this year of Live Free Creative Podcast dropped this morning: a look back at 2022 and an invitation to reflect. 

Often, it is in the remembering and retelling of our own stories where meaning is made. With a little distance, we can usually see more clearly how our experiences have changed us. This self-awareness is a beautiful place from where we can step into the future with added clarity and hopefully a measure of compassion and peace. 

Tune in on your favorite podcast app. 💛 #livefreecreativepodcast
    This last week of the year is talked about like a This last week of the year is talked about like a Bermuda Triangle of time warp— I think it is the *perfect* time for reflection. Not hustle, goal-setting, or even planning (though I love a good plan😉). 

This is the time to look back with clear and honest eyes on the challenges, joys, disappointments, and fulfillments of the last year and make some meaning of it all. Accepting who and where we are now with grace and love can help us proceed into the next right step with compassion and clarity. 

2022 was one of my personal toughest. It was simultaneously filled with light and laughter. A beautiful mess. 💛

What was one of your favorite moments of the last year? Feel free to share below. I’d love to hear!
    I’ve spent a long time curious about optimism- w I’ve spent a long time curious about optimism- what it really looks like and how it is evidenced in real life. 

Learning about explanatory styles helped clarify some of the nuances of optimistic people acknowledging and accepting negative events and emotions without being taken down by them. 

Optimism is not toxic positivity, it is the perspective that although negative things occur, they are usually temporary, impersonal and specific. 

These illustrations can help you clarify the difference between how an optimist and a pessimist may describe positive and negative events— and listening to episode 217 of Live Free Creative Podcast can help with some practical ideas for building your optimism muscle. 💪😃

#livefreecreativepodcast
    One semester down of the Master of Applied Positiv One semester down of the Master of Applied Positive Psychology program at @uofpenn 🙌. 

After over two decades of interest in and self-study of the ideas of happiness, progress, and what makes life worth living, it has been a dream come true to dive even deeper with the guidance of great professors, guest lecturers, and classmates. It is a ton of work, and also reminds me that most truly worthwhile things are. ❤️

Cheers to lifelong learning, growing, and flourishing! 🌱🌲 

(These are a small sample of the hundreds of pages of books, journal articles, and essays I’ve dug into this semester. All of these are easily accessible, and fun to read. Highly recommend!)

#positivepsychology #selfdevelopmentbooks
#pennpov
    Let’s talk about OPTIMISM! 😊 Many people (fa Let’s talk about OPTIMISM! 😊

Many people (falsely) assume that optimism means ignoring negative events or emotions. Instead, optimism is the perspective with which one views negative emotions and events: as temporary, changeable, and impersonal. 

For (very simple) example, when an optimistic person stubs her toe, she might think “Ouch! That hurts! That step came out of nowhere… I’ll look out for it next time.” 

In contrast, a pessimist might stub her toe and think “Ouch! That hurts! Why do I always get hurt? I’m such a klutz.”

Optimistic people tend to see negative events as occasional, and positive events as the norm. They tune their attention to things that do or could go right, rather than giving all the weight to things that do or could go wrong. 

Additionally, optimism can be LEARNED and PRACTICED, with amazing and beneficial outcomes on life satisfaction, relationships, and overall well-being. 

Do you consider yourself more of an optimist or a pessimist?

Listen to #livefreecreativepodcast this week for a deep dive into Optimism! 🌤️
    Paper Person for LIFE ✌️ I write plans, lists Paper Person for LIFE ✌️

I write plans, lists, to-do’s, outlines, notes, dreams, memories, and stories on good old fashioned paper (preferably 80# cotton mohawk paper with a .3 muji pen 😉).

Did you know research shows that writing by hand (versus typing) activates different parts of the brain and can increase understanding, perception, memory, motor skills, and even creativity? While typing and tech definitely have their benefits, writing by hand, on paper, is still an important, valid, and (in my personal experience) cathartic experience.

If you’ve been around a while, you know @golden.coil is my favorite, (sister-owned) customizable planner and notebook company. 📒

Who else has a paper brain like me? 🙋🏻‍♀️
    What expectations do you have for the holidays? Or What expectations do you have for the holidays? Or for the New Year?

I’d love to hear about them. And invite you to consider how developing appreciate (instead of/alongside) expectation can build your well-being and positive emotions. 

Listen to Episode 216 of #livefreecreativepodcast for a more in-depth discussion. 💚
    Expectations are normal— but are they helpful? Expectations are normal— but are they helpful?

Unmet expectations lead to disappointment on the one end of the spectrum and resentment or even anger on the other. 

In contrast, appreciation increases positivity, motivation, and resilience. 

Neither expectations nor appreciation cost us anything… so which do we want to intentionally invite into our lives? 💛

Listen to Episode 216 for more insights. #livefreecreativepodcast
    One wall, one quart of green paint, three hours of One wall, one quart of green paint, three hours of procrastinating folding laundry: a gorgeous new office space. 💚💁🏻‍♀️

Sometimes we need to JUST GO FOR IT when the urge to improve strikes, even if it doesn’t make sense. Pausing a hundred small to-do’s so you can accomplish one with long-lasting impact feels amazing. 

(I think picking up this incredible @thicketdesign serpent and butterfly painting from @frameofmindrva was the push I needed to make it happen. 😍) 

What small home project would make the biggest positive impact for you right now?

#livefreeabode
    The halls are decked, there’s a log on the fire, The halls are decked, there’s a log on the fire, and a cozy holiday playlist of podcast favorites for the season on the speaker. 🔥👉

Swipe for a list of Holiday Season episodes that will invite some intention, creativity, joy, and magic into your life this season. 🎙️🎁

Find a link to the full Spotify Playlist in the story highlight (after the last couple weeks I KNOW how many of you love Spotify 🤭)

What holiday-themed episode do you want to hear next? Drop ideas in the comments! 

#livefreecreativepodcast #livefreeabode
    Connection builds resilience, reduces stress, and Connection builds resilience, reduces stress, and makes us happier! ✨

While this last year (um…2-3 years? 🫠) has been difficult on many levels, it has also felt very connective. Weird how challenges can do that: build meaning and strengthen relationships. 

Our family has leaned on simple habits routines to deepen our connection: nightly family dinner, walking to school together, weekly dates for Dave and me, family vacation and weekend getaways to leave it all behind and simply have fun together! 

What are you doing to intentionally build/maintain your connection to those who matter most to you? 

(Thank you @mollyhunterphotography for capturing our family so beautifully!)
    Inviting the hygge of the season into this new hom Inviting the hygge of the season into this new home. 🎄

In a lot of ways, 2022 has been one of the toughest years we’ve experienced. From health challenges, family tragedies, and heartbreak to difficult personal growth, we have been just barely keeping our heads above water.

This Christmastime, I am grateful for the hope and peace of accepting and integrating what is, exercising non-judgement and optimism in the face of obstacles, and the power of close friendships and relationships to ease the load. 💛

Sending love and light to you this season, whether hope-filled or heart-wrenching or a little of both. ✨

#livefreeabode
    Load More... Follow @livefreemiranda on Instagram
  • FAVORITE CATEGORIES

    • DIY
    • SEW
    • DECORATE
    • EAT
    • LIFE
    • TRAVEL


© Copyright 2021 Live Free Creative Co | View our Privacy Policy