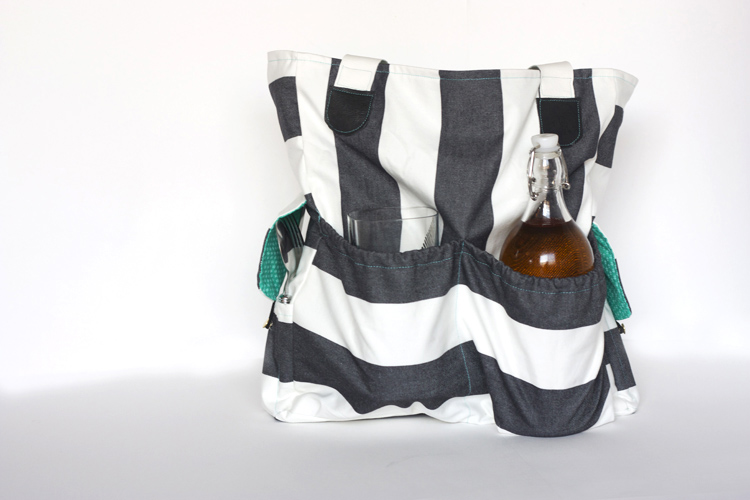
I’m thrilled to be a part of the awesome A Very Go To Christmas series hosted by cute Andrea from The Train to Crazy. (It was so fun to meet her at Sewing Summit this year!) Each day over the next week you will be able to see reviews of some of the patterns in her Go To Patterns shop, written by some fantastic bloggers. I chose to review the Mary Jane Oversized Tote by Handmade Therapy, and guys, I am in love with this pattern! It creates a bag that is roomy, versatile, and has so much potential for personal variation!
I love tote bags, but with all of the reusables out there, sometimes I feel like they are coming out of my ears! I was really excited about the Mary Jane Tote because of the wide outer pockets, side pockets, and roomy interior with more pockets, making it a much more organized and versatile bag than a typical oversized tote.
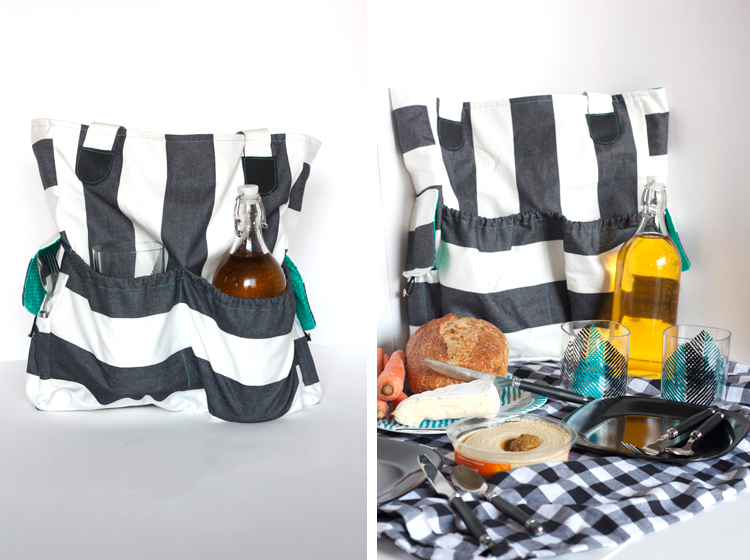
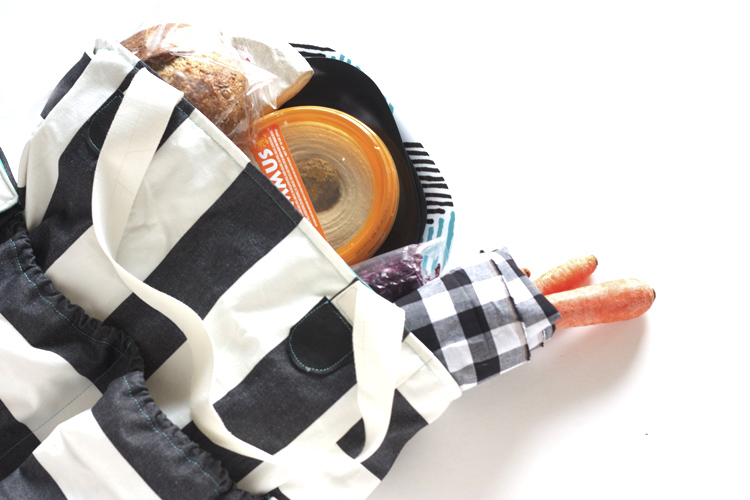
Since it is the Christmas Season, and I’m going for a totally handmade Christmas this year, I decided to personalize this tote into a picnic bag as one of my gifts. I had on hand the melamine dishes, cups and cutlery that I was planning on gifting, so all I had to do was choose what to put where! Once finished, the tote fit all of the picnic accoutrements, along with plenty of leftover room to fill with a picnic blanket and food (and the wallet, phone, keys of a normal person + diapers/wipes, sippy cups, fruit snacks, and spiderman action figure that travel everywhere with this mama!)
I started and finished this project in one evening after bedtime and used all materials I had on hand. It was a great stash buster, but also made for a sentimental journey! I used my favorite canvas stripe for the outer of the bag. It was from one of three cushion covers that I dug out of the clearance bin at Ikea years ago and bought for .99 cents! I have been very particular about where I’ve used this material. If you are a seamstress, you’ll understand the craziness of hoarding fabric for the perfect project! The first cushion cover made my duffle bag, the second became Milo’s backpack, and the third has now been used on this great bag!
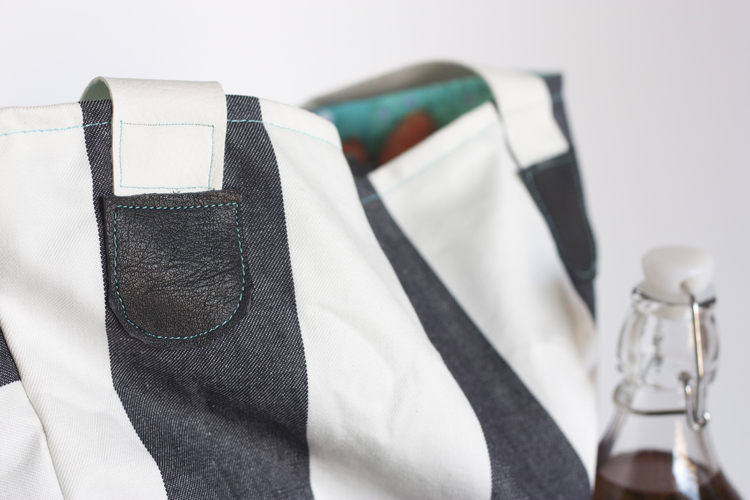
I cut the handles from the white vinyl I used on my favorite armchair (mainly because I didn’t have quite enough canvas for the straps!) and then added some real leather detail (gifted to me by Melissa) in place of the buttons. I love the polished look of the striped canvas, white vinyl, and black leather.
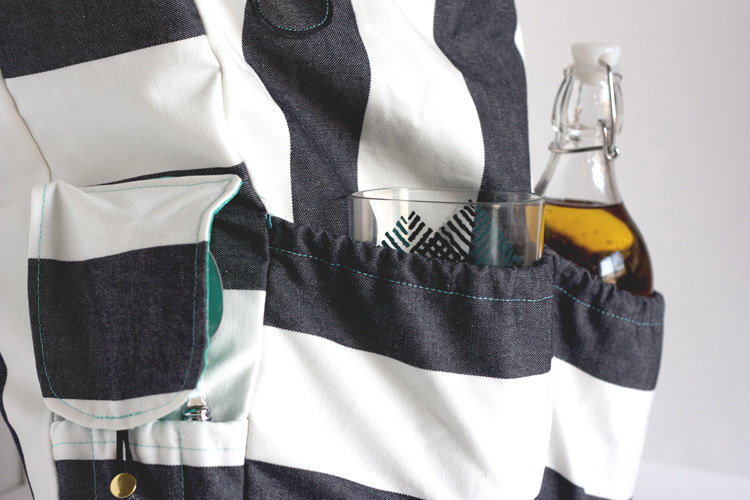
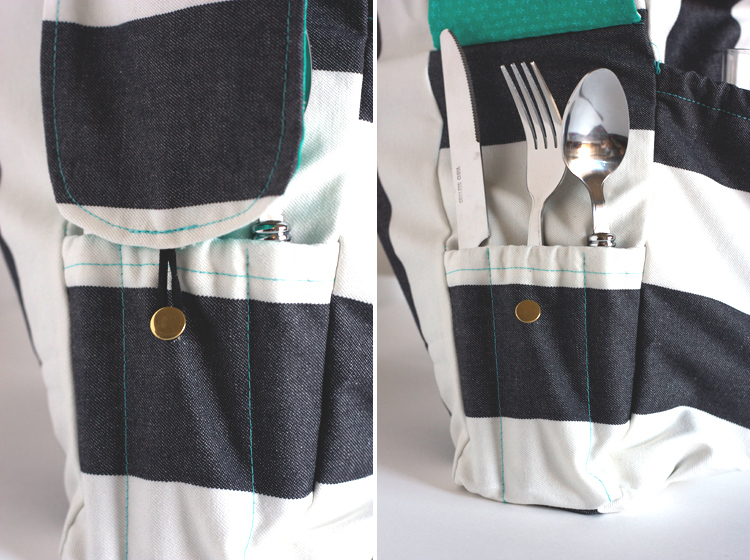
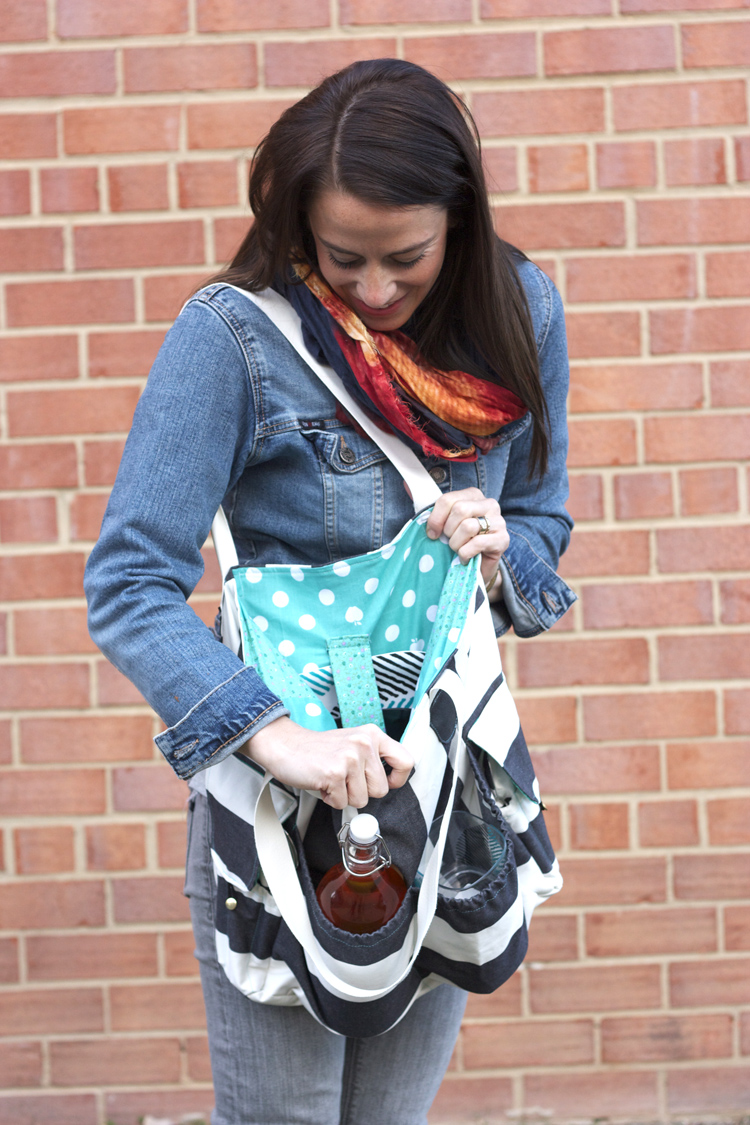
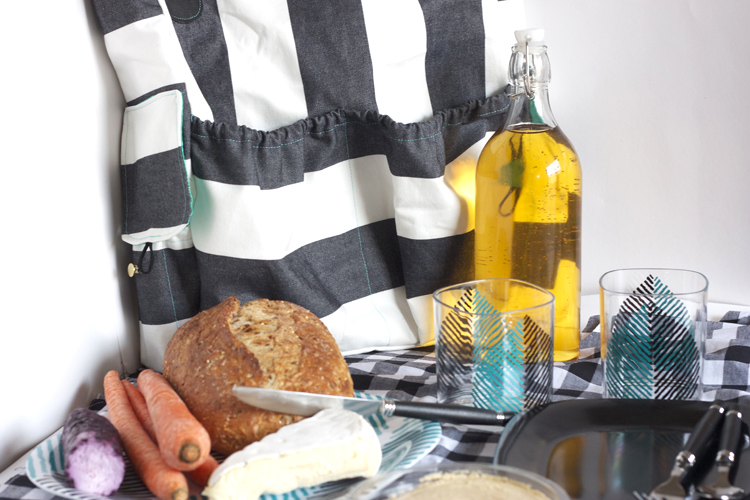
The two outer front pockets are a great size! I was able to slip two stacked picnic cups into one pocket, and a big bottle of apple juice in the other. Because of the pleated bottom, and the elastic top, the pockets can hold a load without anything falling out, which is so important. I wanted to put the cutlery into the side pockets, so I used the same instructions for dividing the front pocket in half to divide each side pocket into thirds: for the knife, fork and spoon. (Who takes a spoon on a picnic? I don’t know, but it’ll be an option!)
The knife and fork looked sort of precarious sticking out of the side of the bag, so I whipped up a little flap to cover them up for safety. I attached it at the same time as the pocket piece and it fit right into the construction. Instead of using a velcro closure (my flaps turned out an inch shorter than planned, of course) I added a leather loop and brass button. Don’t you just love happy accidents? This little button detail is now one of my favorite elements of my tote!
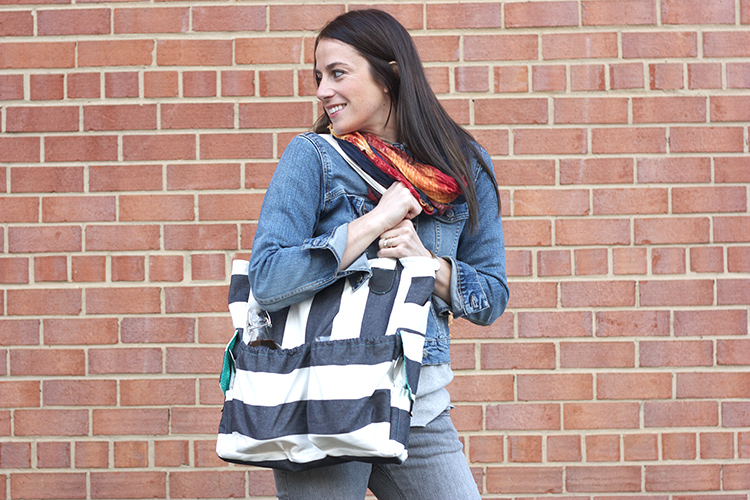
I’m usually all for as many pockets as possible, but I really love that this tote only has the outer pockets on the front and sides, leaving the back flat and comfy against your body. Between the outside and inside pockets, there is plenty of room for organization.
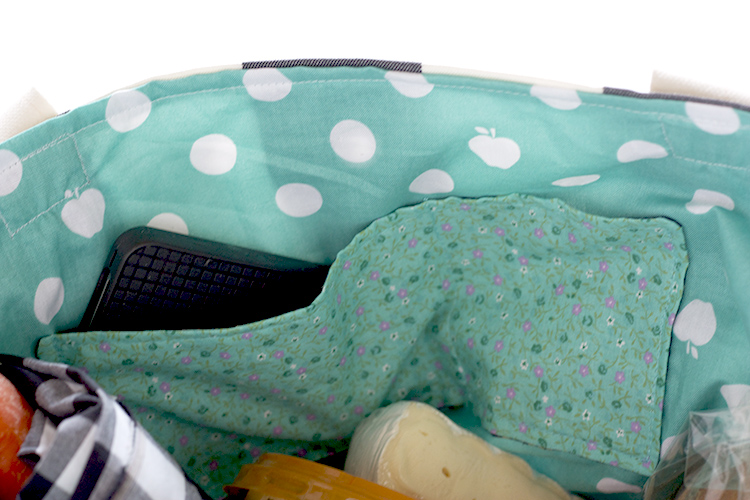
Welcome inside the tote, where I had to use no less than three lining fabrics because I kept running out of inches! I ended up really loving the scrappy look, luckily.
I sized the interior pockets to meet specific needs. This side, which is on the front interior, is measured to hold an iphone + keys or chapstick. I placed it a little higher on the bag to make for really easy access (gotta instagram that happy picnic moment, ya know?)
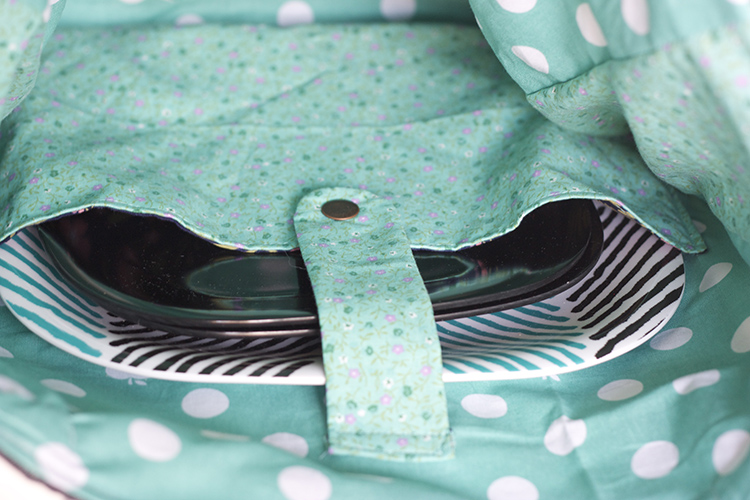
The interior back pocket fits the little stack of melamine plates. I was a little worried about them sliding out, so I added a little snap flap. The order of construction on bags is pretty important because you have to build the outside layer and lining layer completely before joining them together. I knew that if I added the the snap-flap closure at the same time as the pocket before joining the two layers, I wouldn’t throw anything off and have to stitch through the whole bag unnecessarily (not that I’ve had to do that before…ahem.)
I am so excited about the Mary Jane Oversized Tote pattern, and I can’t wait to make more. The pattern is really easy to understand, and the order of construction (that wouldn’t be intuitive, like I mentioned) is really great. Even with all of the details in the pattern, I was able to put it together easily by closely following the instructions. The bottom is reinforced with interfacing, which helps it stay upright, and the finishing technique creates a really professional look. Also, the bag and handles are just the right size for comfortable toting. It is fun when a base pattern is so great, and leaves opportunity for variations, like the ones I made for this picnic tote.
It was so fun to be a part of the A Very Go To Christmas! Make sure to check out the rest of the series all next week at the following blogs: (and don’t forget about Reindeer Week starting Monday!!)
Nov 29th–Handmade Therapy
Nov 29th–A Pretty Cool Life
Nov 30th– Sew Much Ado
Dec 1st–One Little Minute
Dec 1st–Simple Simon & Co
Dec 2nd–The Cottage Home
Dec 2nd–Sew Country Chic
Dec 3rd–Naptime Crafters
Dec 3rd–A Little Gray
Dec 4th–Skirt as Top
Dec 5th–You & Mie
Dec 5th–Boy, Oh Boy, Oh Boy
Dec 6th–Me Sew Crazy
Dec 6th–See Kate Sew
Dec 7th–Delia Creates
Dec 7th–The Southern Institute

