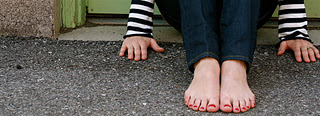
There is nothing more luxurious than a pedicure. Unfortunately, there are many other things that demand that $30-and-up per trip to the spa. This quandary led me to the place that I usually arrive when I want something that I feel like I can’t afford-I’ll Do It Myself!
I admit, a piece of the glamor and relaxation is omitted when one does her own pampering. There is also a sense of empowerment. The feeling that we’re worth it, even if we can’t (or simply choose not to) pay for it often! I figured I would pay out once for the equipment what one trip to the salon would cost.
So, here are the tools that you should already have:
Your favorite scented moisturizer (I use this)
Nail Clippers ($3-15)
Nail File ($1-10)
Polish Remover ($1-5)
And those you’ll probably have to buy:
A cuticle trimmer. [$20] (Bed Bath & Beyond carries this one, and you can use that handy 20% off coupon that comes in the mail every couple weeks!)
OPI polish [$9] and worth every penny. It lasts longer and brighter than 9 bottles of $1 polish!
Sit in a comfortable spot, loose the shoes and socks and begin to moisturize. Pay close attention to the cuticles- you’ll want them supple to ease the trimming. You can give yourself a deep foot and calf massage if needed.
Trim toenails to the desired length. I’m an all-the-way-off girl.
File across the tip of the nail, leaving the squared edges to avoid in-grown nails.
Next nip the cuticles. Be aware of the back of the nippers, because they may catch some live skin if you’re not! Start at one edge of the nail and nip a little at a time until the whole dead cuticle comes up.
Rub the nail dry, or apply a little bit of remover to dry it out before you polish.
Apply polish from the base to the tip of each nail (I do 2 coats). It’s alright if you get a little extra, you can use either your fingernail to scrape it off, or wait until it’s dry and use some remover on a q-tip. Make sure that the polish looks smooth, because it will roughen up a tiny bit in the drying process.
Now, sit still for 5-10 minutes until the polish is dry.
To finish off the experience I moisturize once more, leaving the tops of the nails shiny and glossy.
Now that I’ve armed myself with the tools, I’ll be able to do my own pedi whenever I want!


