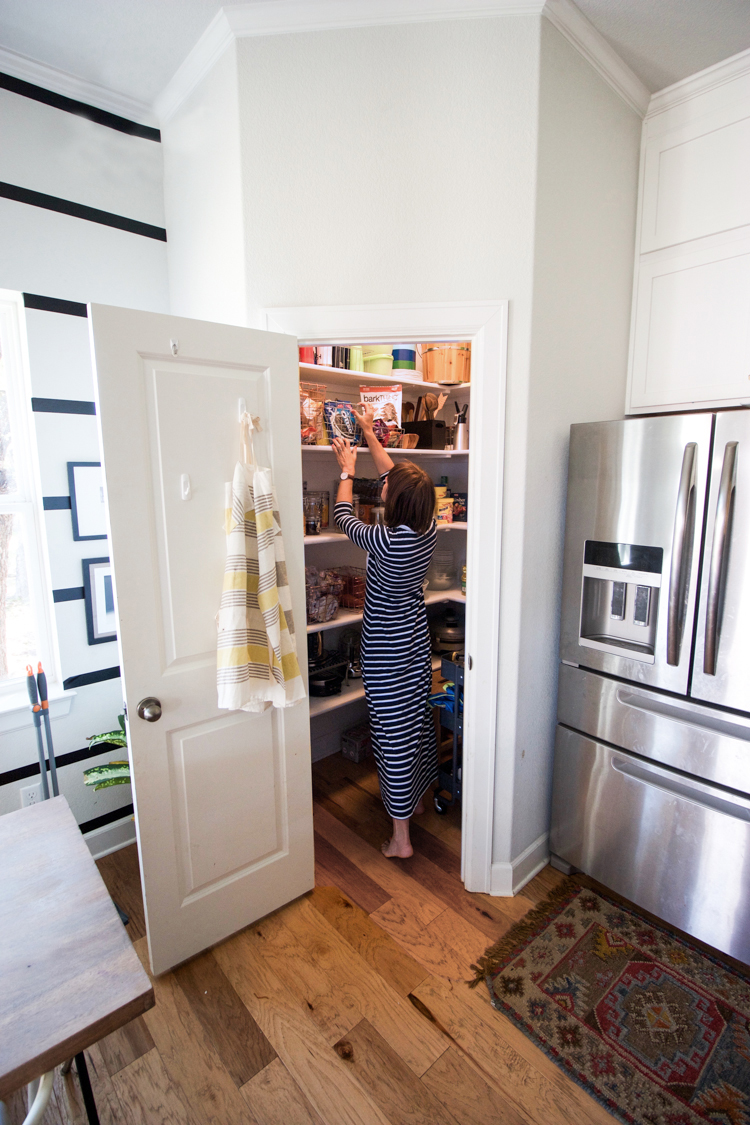
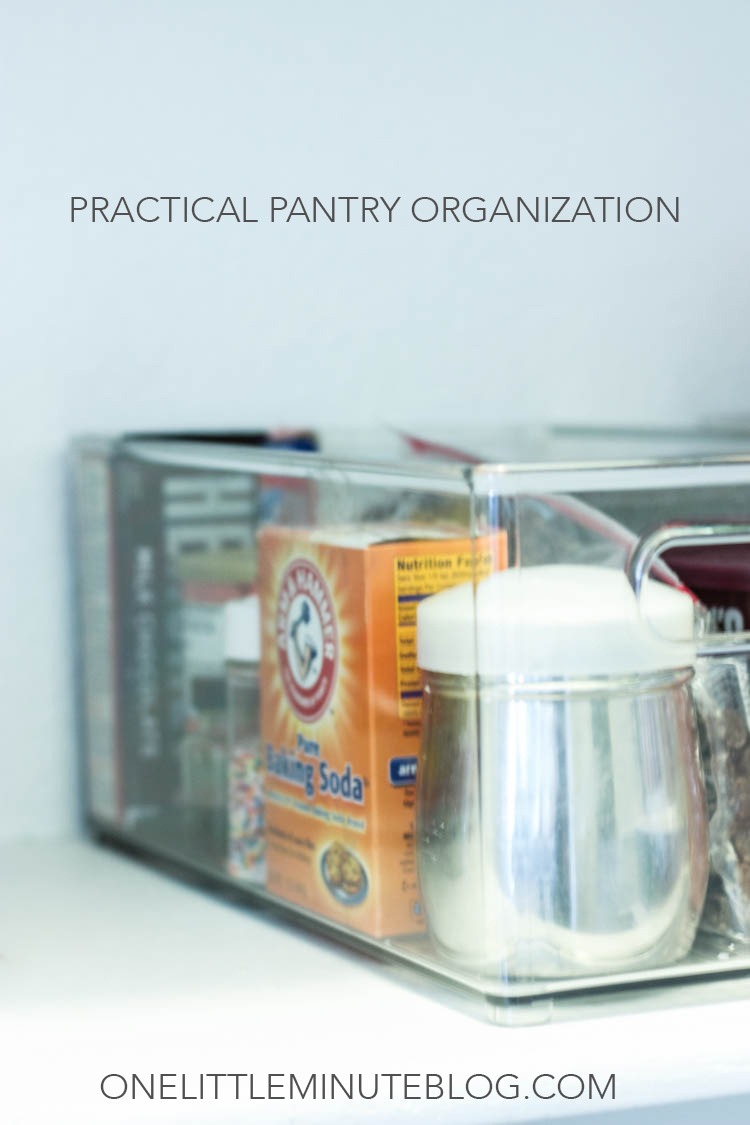
If your home is anything like ours, the kitchen is the center of activity. From breakfast first thing in the morning to dinner right before bed, and homework, art projects, snack time, endless glasses of water, and everything in between, we end up hanging out here a lot. The pantry, where most of the food and appliances are stored, is by far the most used closet-type space in our house. Last week as I was choosing a project for this month’s partnership with At Home, I decided to tackle practical pantry organization and transform ours from bottom to top. Pantry organization can be daunting, but with the right set of tools and some practical tips, it makes daily living much easier and more enjoyable. Let me share a few ideas I have after whipping ours into shape.
 I began the day by heading to my local At Home store to collect organization supplies. I had spotted some when I was there a few weeks ago picking up these planters, and knew they would have everything I needed. And boy did they! I wandered the several pantry organization aisles, taking it all in. With a hand-drawn map of my pantry (made last-minute in the store) I started to think about how we use the space currently, what works, and what doesn’t. I knew it wouldn’t be realistic for me to have everything out of packages in rows and rows of labeled containers because I don’t always buy the exact same items, so I’m not always refilling staple dry goods that way. So, I filled my cart with a variety of bins, baskets, jars, and tiered can-organizers, and went home to figure it out.
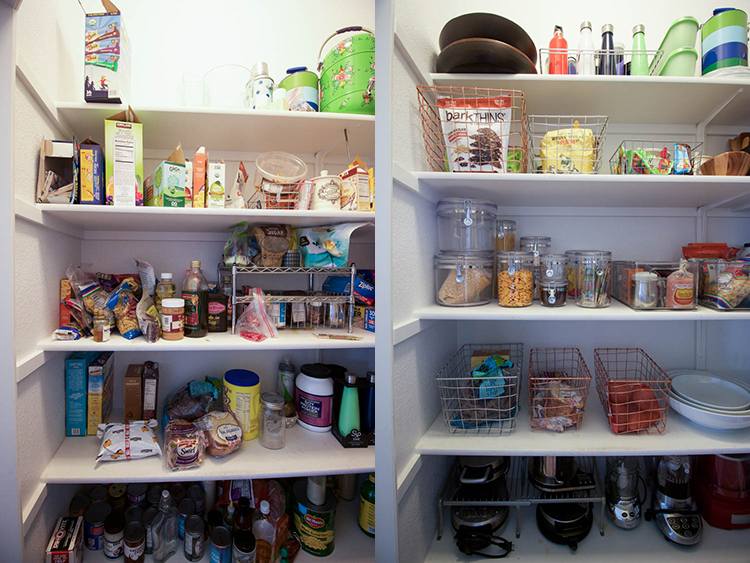
These next couple shots show the before and after of our little pantry. In the organization process I did throw away a handful of items, but about 98% of what is in the first photos is also in the second. The only difference is the organization.
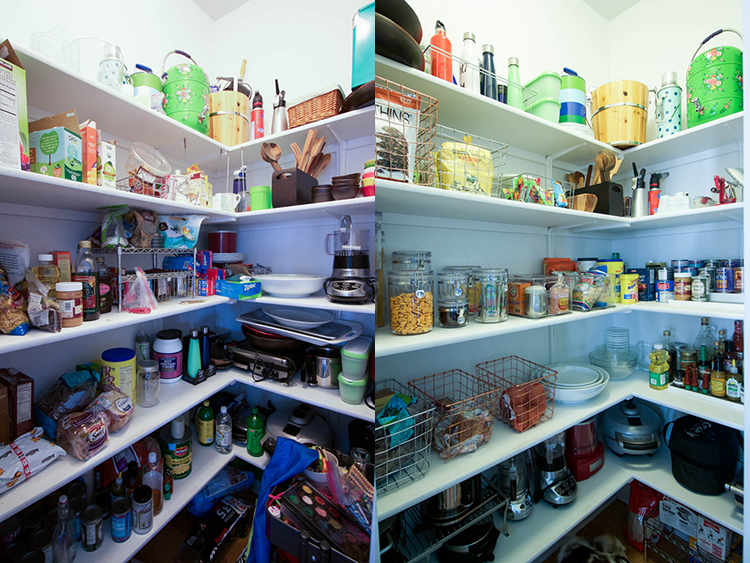 Before: I had things separated by type and somewhat organized along the shelves, but there were no clear divisions. The serving dishes were stacked in piles, the appliances in one general area but interspersed with “other”. The cans were all in a row on the bottom shelf so they were never seen. It was not terrible, but not pretty either.
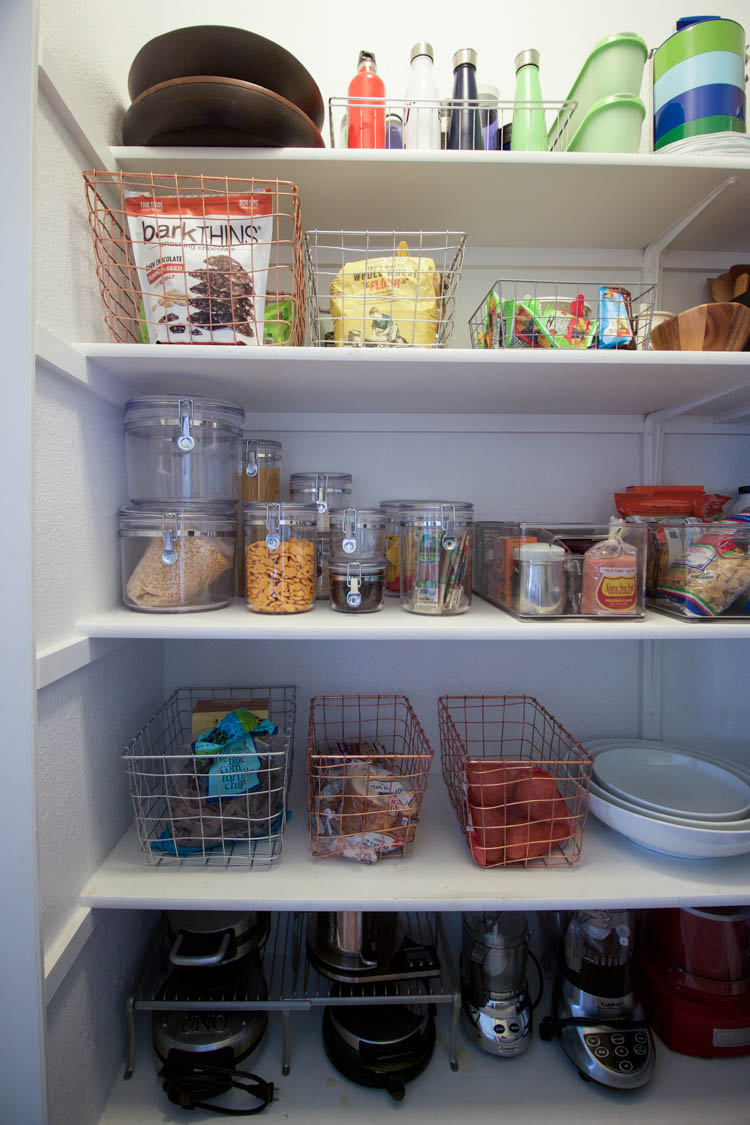
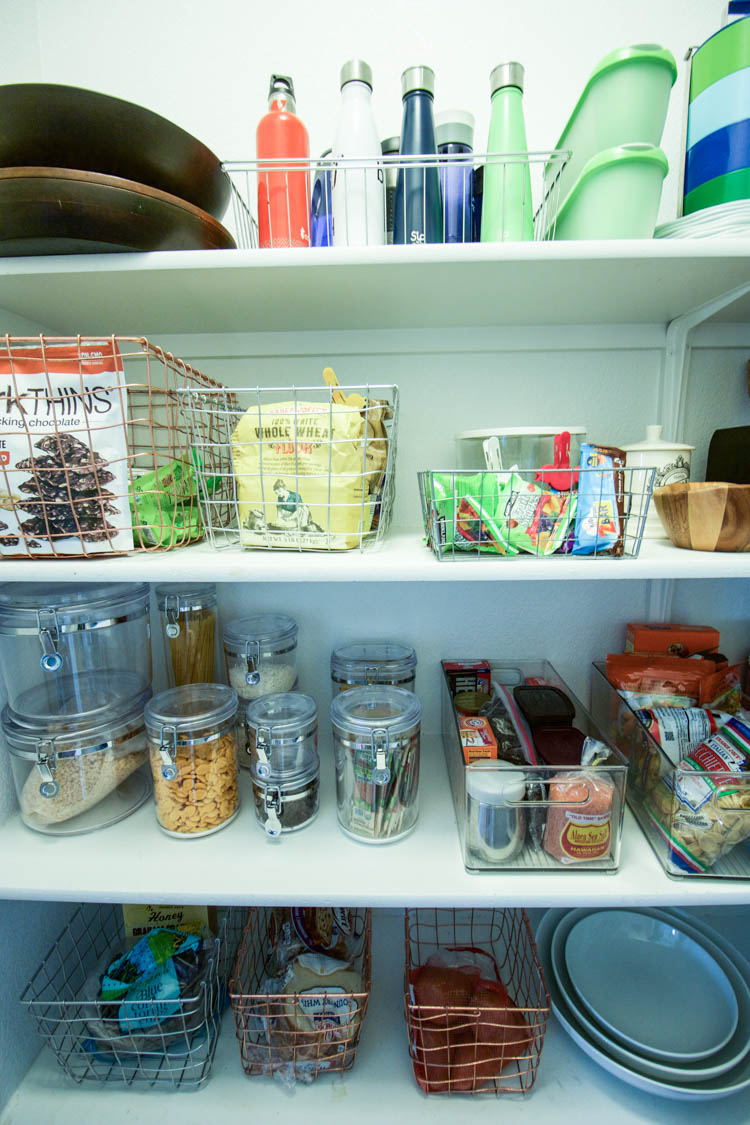
After: Everything has a place. There is some room to breath between the baskets of items, and the space feels more light and airy. Everything can be seen at a glance, from the tiered cans and bottles to the items within wire baskets. The appliances are all on the same shelf. Serving plates, which aren’t visible here, are all upright and easy to get to.
I know even this “after” shot is not as glamorous as a subway-tiled, brass-fixtured, naturally-lit dreamy Pinterest pantry, filled with glass containers and perrier, but the difference some practical organization makes is striking none the less.
 As I stood in the aisle of the store, I didn’t know exactly how I was going to organize everything, but I did know a couple plastic bins would be fun for things we use often enough, and to break up some of the basket-storage that I had planned for most of the other items.
I decided on some clear plastic containers with metal closing tabs because I love the look, and they felt sturdy and industrial. For small loose items I went with long, clear storage bins where I could still see everything that was inside easily. I reserved one for baking items, and another for cooking packages like small bags of pasta and breadcrumbs. For larger loose items I decided on some really cool metal baskets to serve as general containers separating items by class. I have a chip basket, a bread basket, a snack basket, a baking basket for larger baking items like flours and cornmeal, and a root vegetable basket.
Lets take a look at what I was starting with one more time.
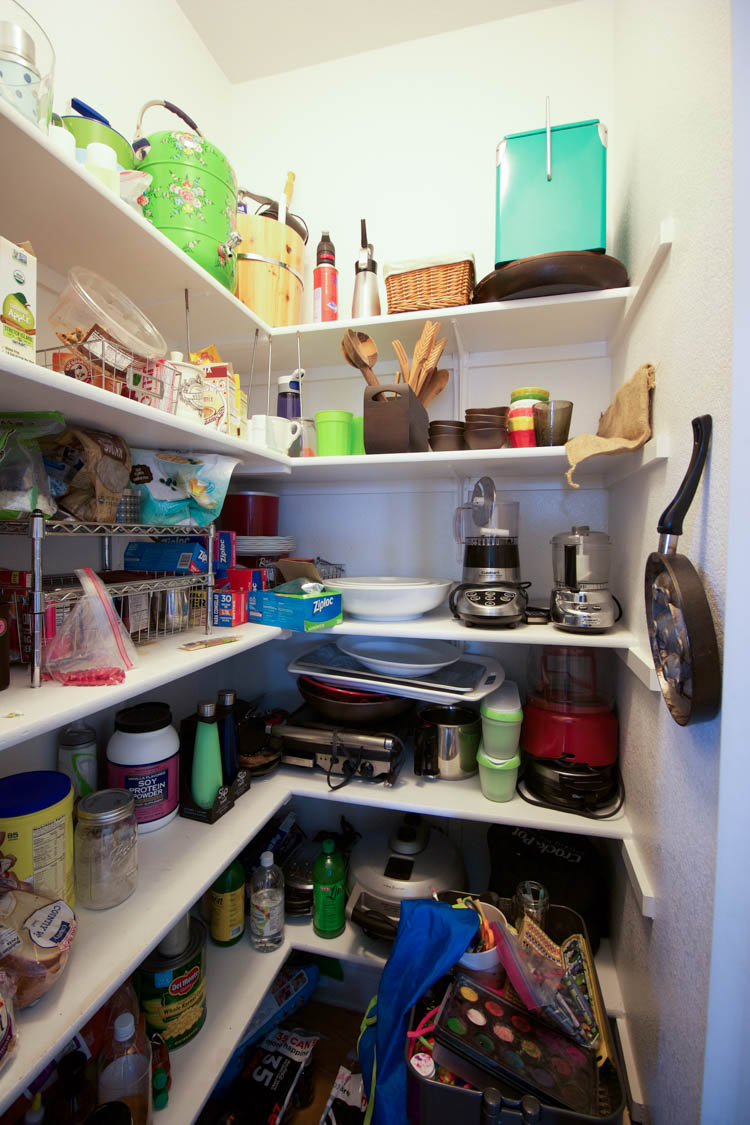 My favorite part of taking these “before” photos is that I felt like the pantry was relatively organized! I was using a general system and putting some things back where they went sometimes… I think the main problem was that nothing was clear. When I got hold of something that I wasn’t exactly sure about, I would just set it somewhere. That’s not really organization at it’s best.
After doing all of the work, here are my Ten Tips for Practical Pantry Organization:
 Tip 1: Remove Everything from the Pantry when Organizing
It is a lot of work, but worth it to ensure you get a really clear idea of what you actually are storing in there. Once everything is out, you can clean the shelves, visualize a little better, and have room to play around as you’re putting things back to make sure they go in the perfect place. 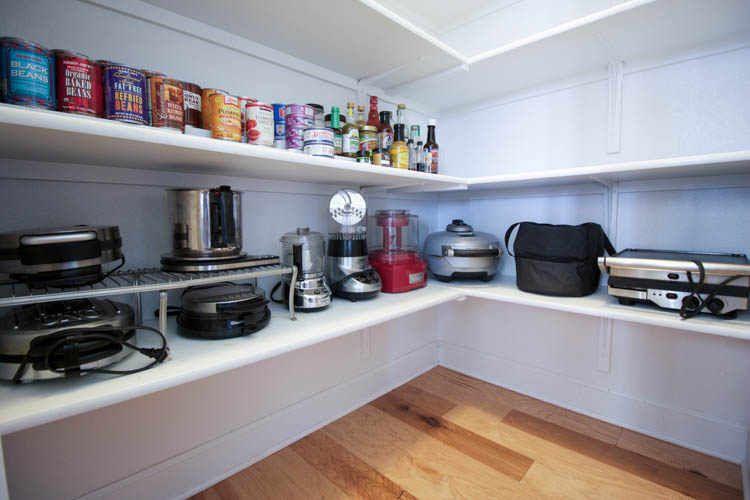
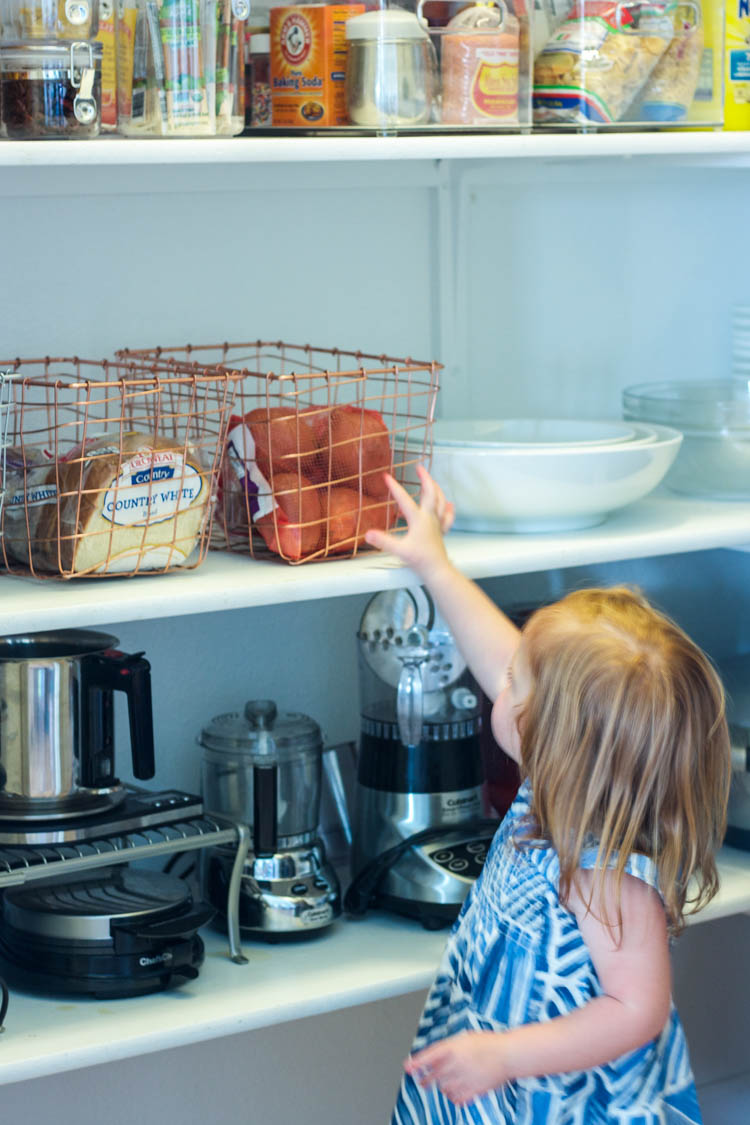 Tip 2. Put Things the Kids Don’t Want on the Bottom
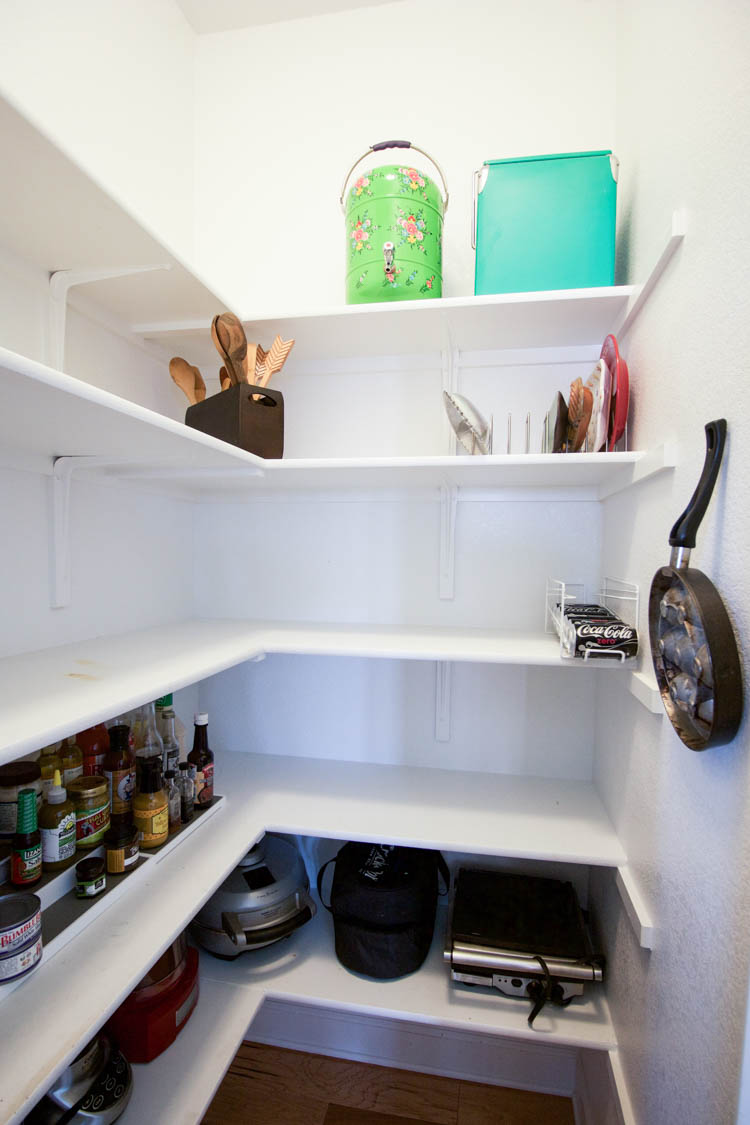
I wanted to keep the appliances all together on one shelf, making it clear that this was not a food shelf. The best place for them ended up being the very bottom, because my kids don’t want to get into the waffle maker. They do, however, want to eat all of the Cheetos in one sitting, so those go at the very top where I can regulate their consumption.
 Tip 3. Put Little Used Items on the Top
I love our old fashioned ice cream maker, and my hand-painted water dispenser, but they aren’t part of our daily life. Up there on the top shelf they can be reached when they are needed, and look pretty the rest of the time. 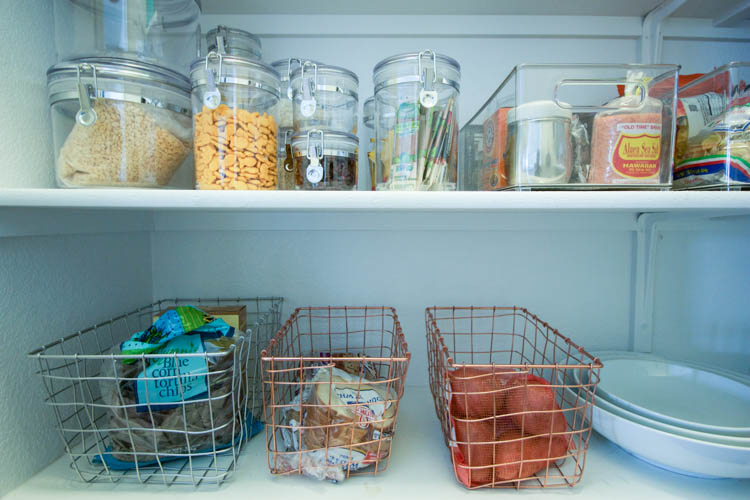
 Tip 4. Think About Your Own Family’s Habits
When choosing where to put things, and how to organize, you have to consider your own family. Be realistic. It worked best for me to maintain a lot of the same general layout I had previously, and simply add baskets and bins for organization than to re-think the entire flow of the space. When I open the door during the day I am most often reading for bread or snacks, so those things are the easiest to get to. Breads and rolls in one basket, chips and crackers in another (couple) baskets. 
 Tip 5. Experiment As You Organize to See What Works
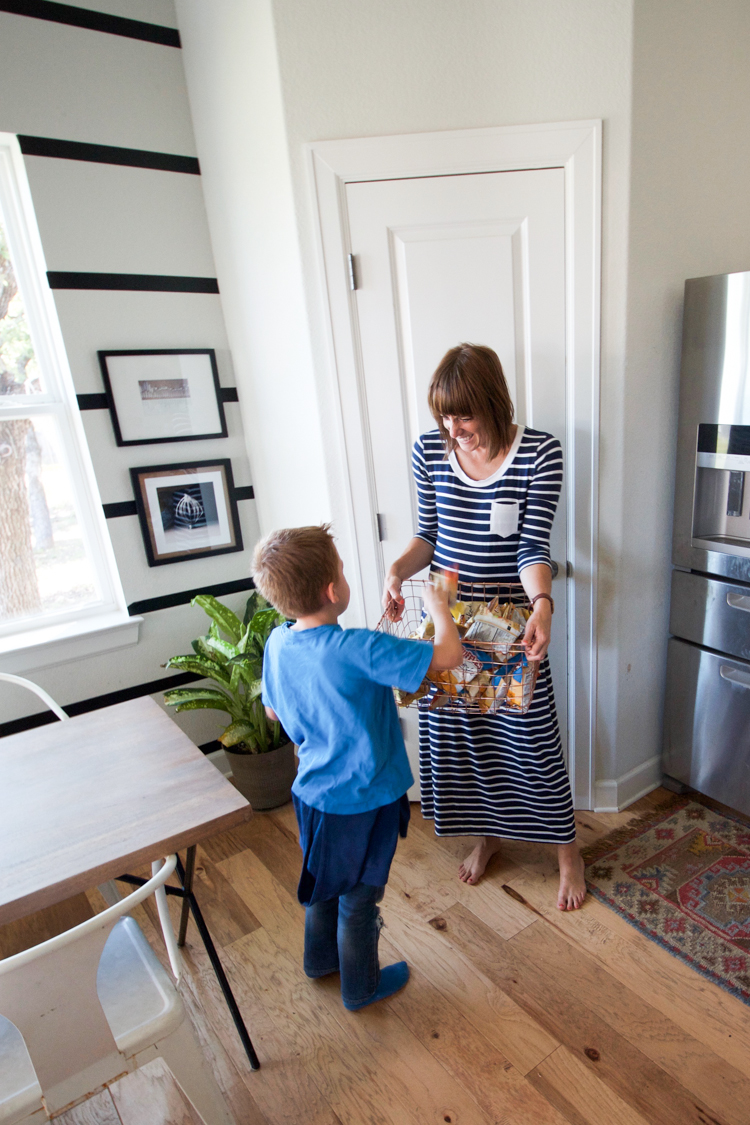
The few items I did want in these darling plastic containers got a trial run first, as you can see with my cereal bag. I wanted to see how things fit, and what worked for us. It has been nice to be able to grab that whole jar of goldfish to put out on the counter for snack time, and also to be able to grab a quick handful easily from inside the pantry (usually as I’m making another meal. Why am I always so hungry when I’m cooking?) The long spaghetti is one type of pasta that we always have on hand, so that made sense in this container. But my other, small bags of varying pastas ended up in a bin still in their packages because I don’t buy the same shape enough to warrant an open-package jar. 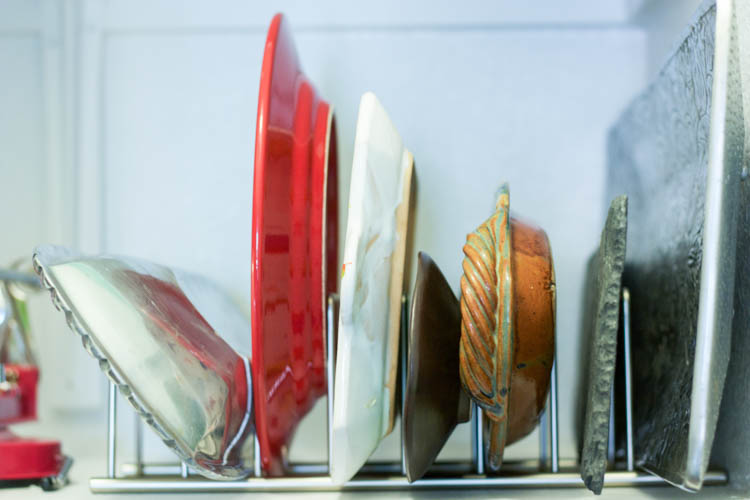 Tip 6. Avoid Stacking Things in Piles
If you have to stack and unstack a pile of dishes, or pans, or boxes of food every time you want to use just one, you’ll either never use them at all or go totally crazy. I tried hard to have nothing in the pantry stacked higher than two-of-a-kind. This stainless steel dish rack doesn’t take up any larger of a footprint than the stack of serving plates did before, but now I can grab just the one I need and the other stay put! It’s amazing.
 Tip 7. Separate by Type (aka Make a Baking Bin)
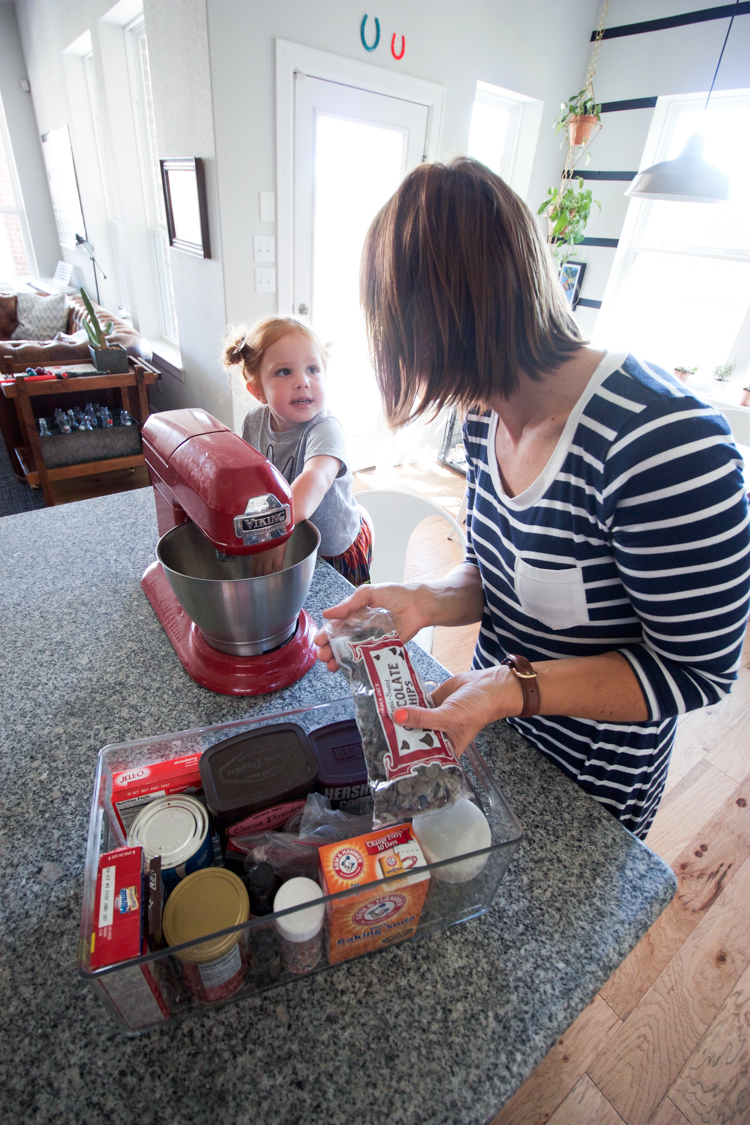
Things you use often and together should stick together. Rather than separating out the different ingredients used in basic baking into different parts of the pantry, I keep them all together in one plastic bin. I’ve always done this for baking ingredients, although this plastic bin is an upgrade from the wire drawer I was using before. I love being able to pull the entire thing out onto the counter, have everything I need from the pantry in one place as I put mix up a batch of our favorite cookies, then easily slide it back into place!
 Tip 8. Use Levels To See Everything At Once
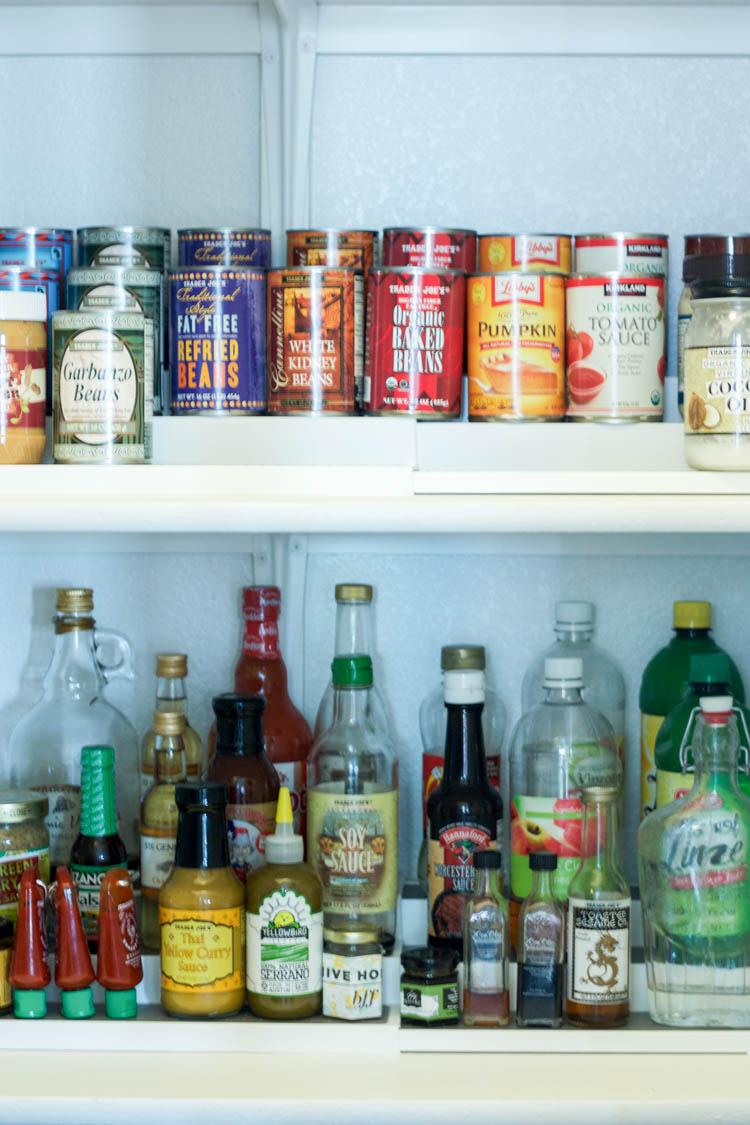
Putting something behind something else in a pantry is sure death by forgetting. Use tiered can shelves to separate your cans and bottles into visible layers. This has already made such a difference for me because I would actually forget about items I had tucked away, and I’ve been able to use them again! I had been thinking I needed shelf-risers, and these three-tiered tools extendable, so they fill a whole shelf, keeping things looking and feeling sharp. 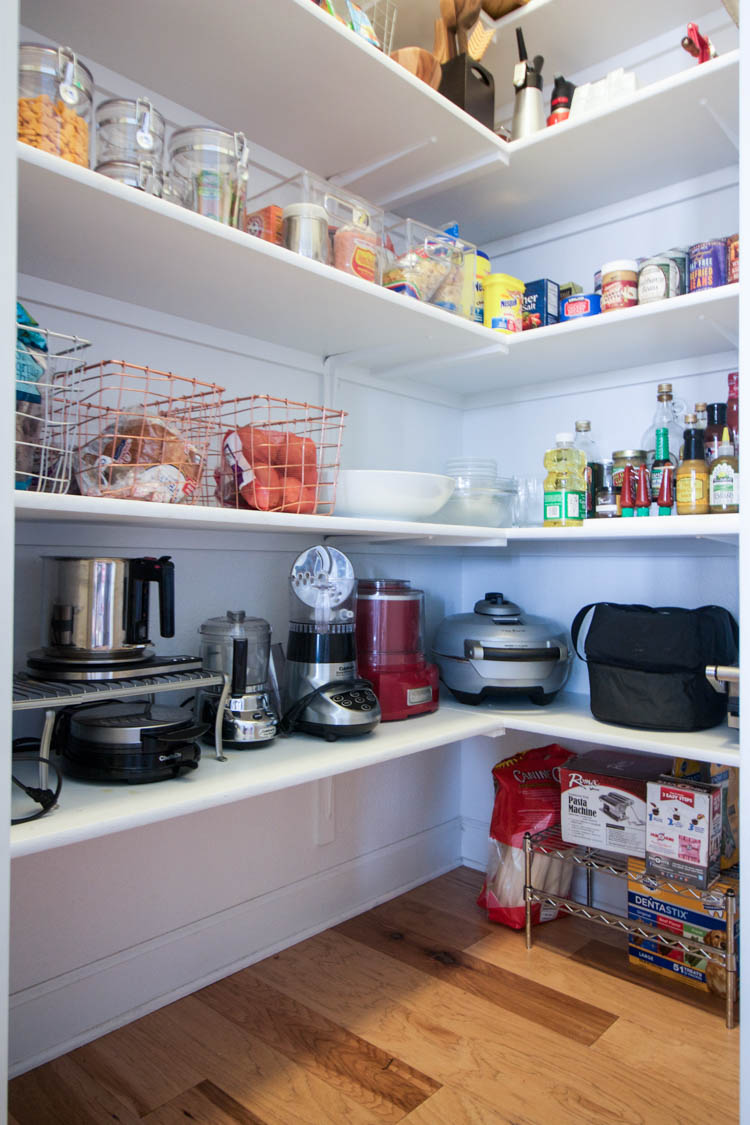 Tip 9. Create the Illusion of Space
This might not be the most important piece of practical pantry organization, but it is definitely the part that makes the biggest visual impact. By using bins, jars, baskets, and tiers to organize things into specifically contained areas, you give space for some in-between that helps the eye to rest and the energy in the room to be lighter. Some white or glass serving bowls on a shelf or two also help create visual space while serving as practical storage. Even a pantry with limited actual square footage needs separation to look and feel organized.  Tip 10. Maintain the Organization by Putting Things Where They Go
This is one thing I learned from Marie Kondo that seems so common sense, but can be so hard to do. After you go to all that work of clearing out the pantry, putting things back one-by-one in intentional baskets, and jars and on tiered shelves, and with clear purpose, make sure you keep up with your system. If you find that it’s too difficult to keep up, it probably means that the system you created isn’t actually very practical for your family, and it’s time to experiment with something different.
I plan to keep mine up, and maybe continue to tweak something here or there. Overall, it has been really awesome to go in and out of a pantry with purposeful and practical organization. I feel better, my kids know where things go (and what they’re allowed to get for themselves) and even Dave said he couldn’t be happier with having such a clean and intentional space. Now that I’ve caught the organization bug, maybe I can tackle the garage next…
This post was created in partnership with At Home as part of the At Home Inspiration Team

