I joke sometimes that I have a Latin heart. I grew up vacationing and doing humanitarian service with my family in Mexico. I also have traveled to Bolivia and Peru, as well as spending extended time during college living in Costa Rica, Argentina, and Puerto Rico. I speak Spanish fluently, know how to dance a mean salsa, and adore a fiesta with a piñata. Now having young kids, breaking a piñata can not only take forever, but feel a little reckless. So, I came up with a super simple way to turn any piñata into a simple pull-string variety, making the candy easily and quickly accessible so you can get right to the fun! 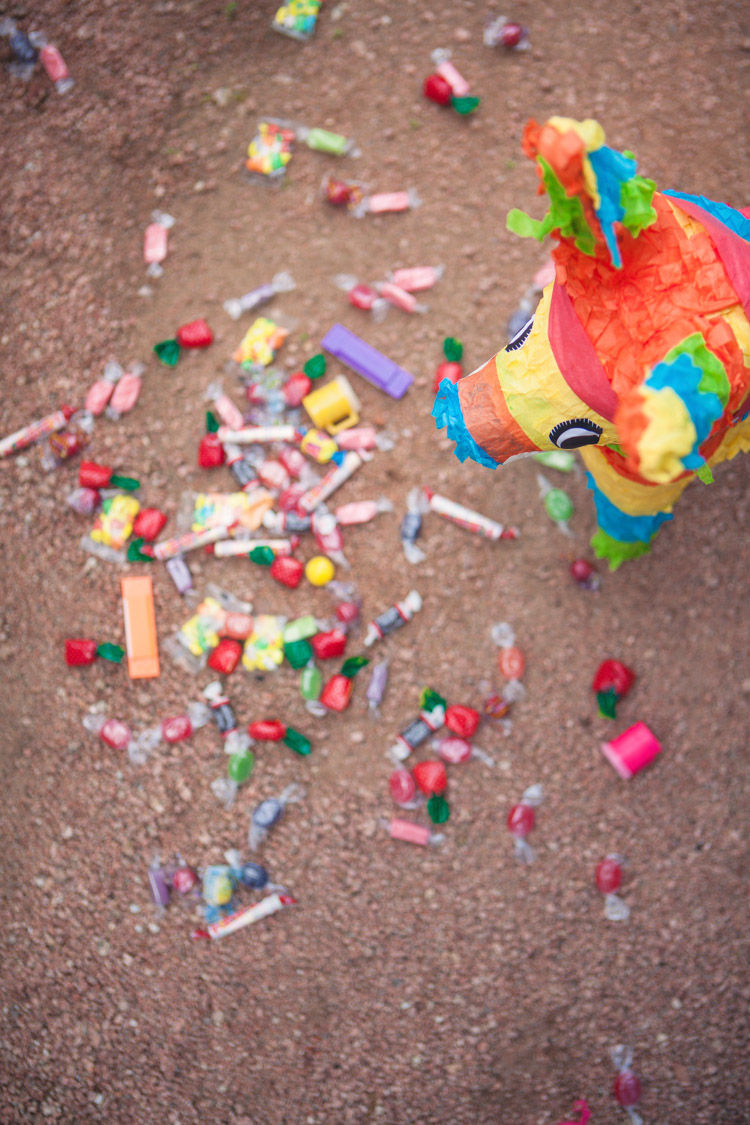
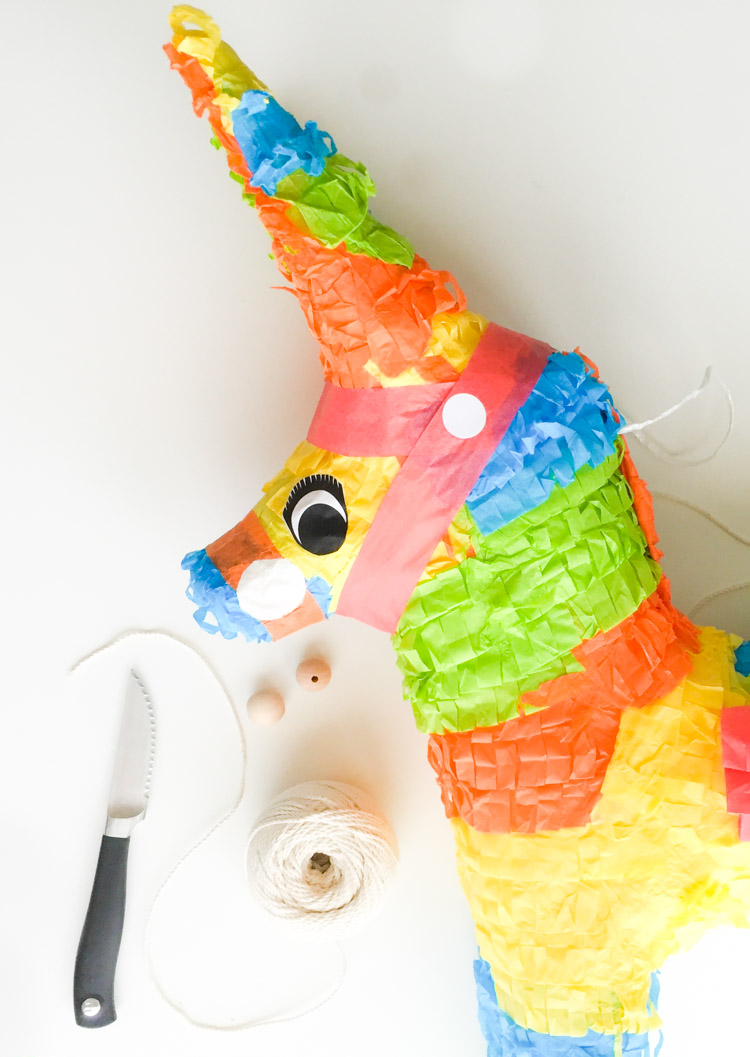 In addition to a piñata, you’ll need:
a sharp knife
string
2 wooden beads
tape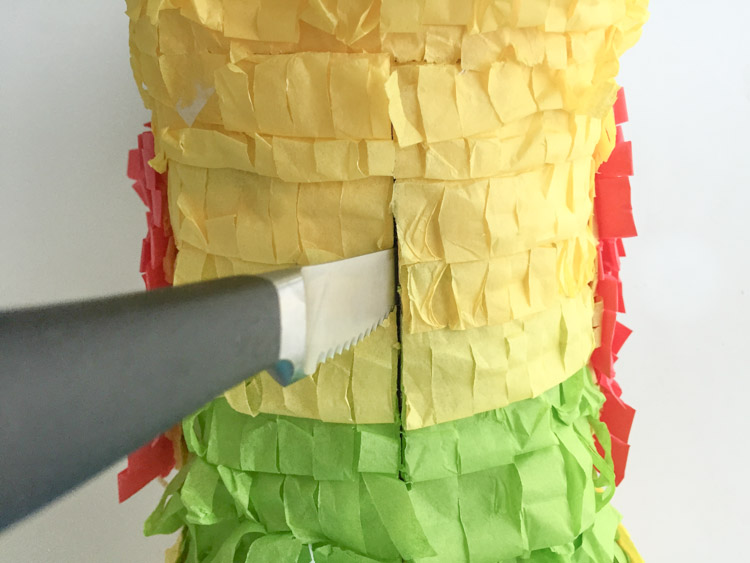 1) Cut a straight line somewhere along the bottom of the piñata. They are all shaped differently, but choose a place where candy will naturally settle.
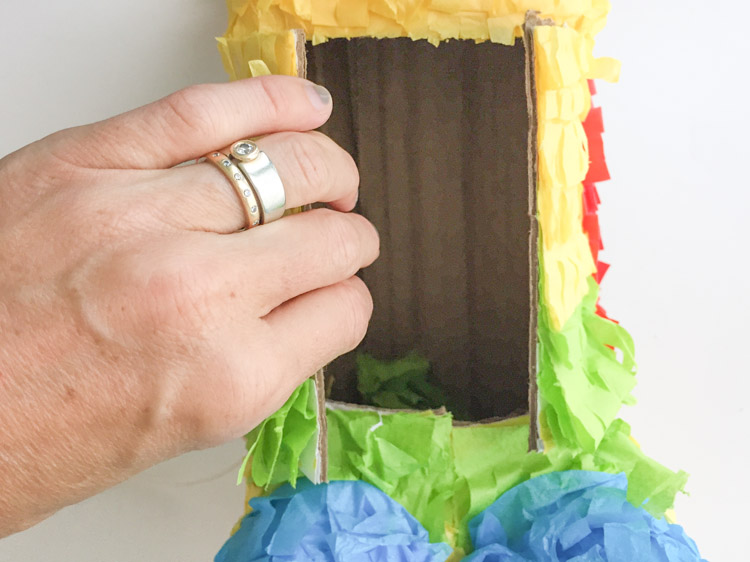 2) Cut perpendicular lines along each end of the center line, then fold the flaps back like doors opening.
 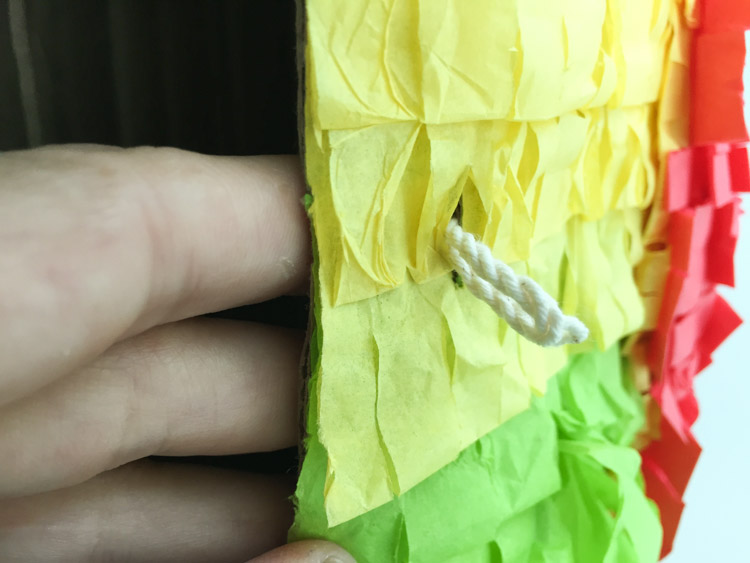 3) Make a small hole in the center of each “door” you’ve made. Thread a long length of string through each hole, leaving a couple inches on the inside of the piñata, and the rest on the outside to serve as the pull-string.
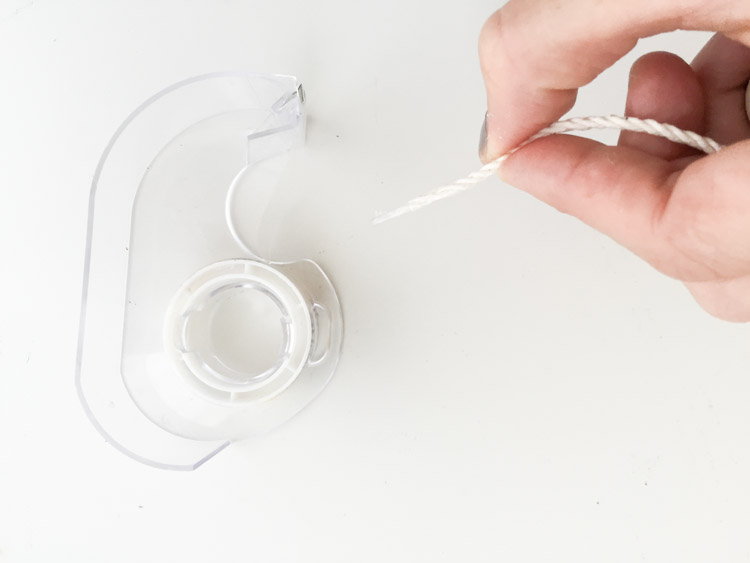 4) You’re going to thread one wooden bead onto the inside end of each string, and I found it’s easiest to do that if you first tape the string into a tight sort of needle.
 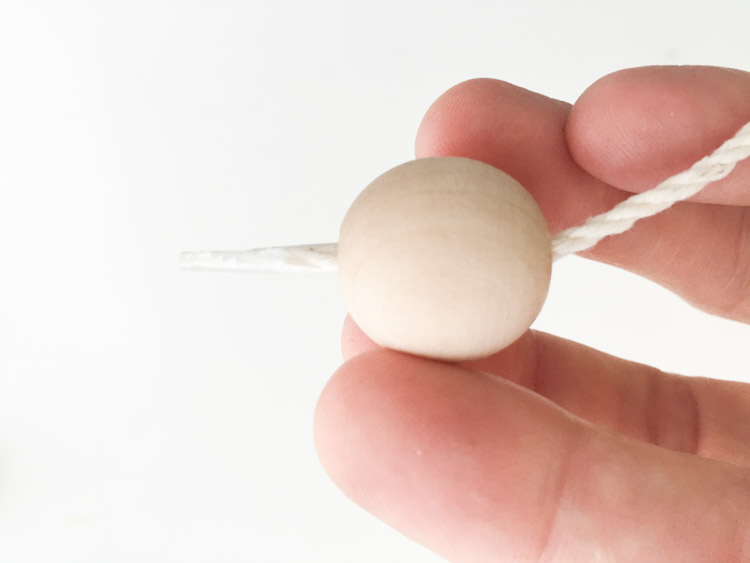 5) Thread the string through a wooden bead, and tie the end into a knot to secure it in place.
 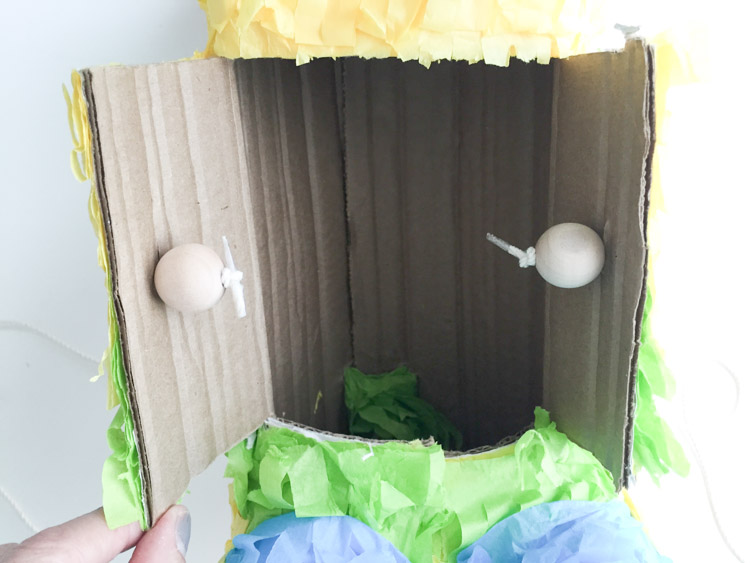 6) These beads will keep the string from pulling straight through the holes when the kids go for the candy.
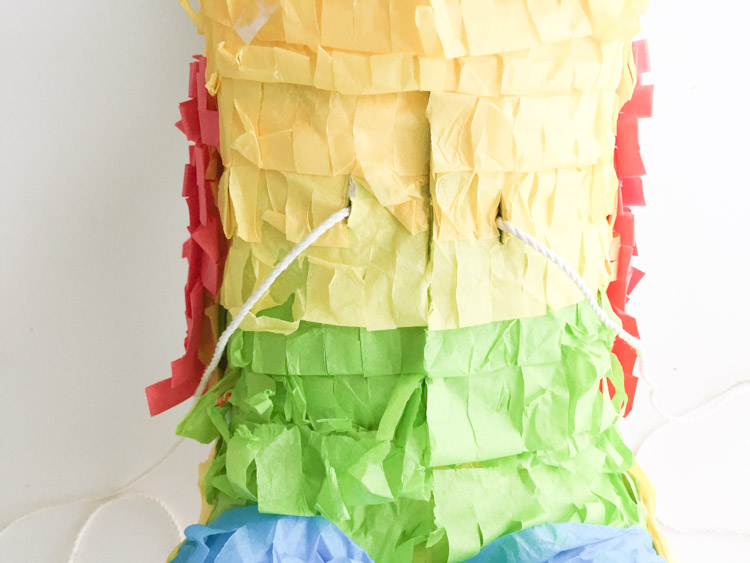 7) The doors should fold right back into place, and you can keep them closed with a couple pieces of tape. The cardboard is a little stiff, and will naturally stay in place pretty well, until it’s time to pull!
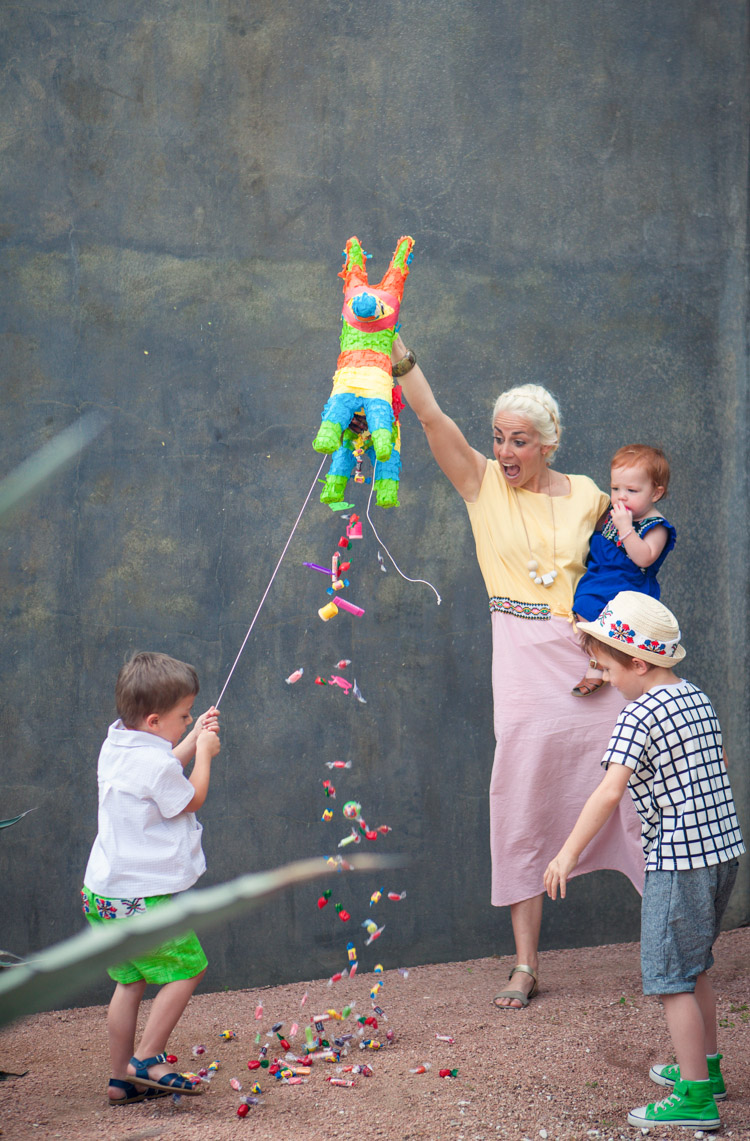 Hooray! It’s raining candy! And no one got hit with a stick!
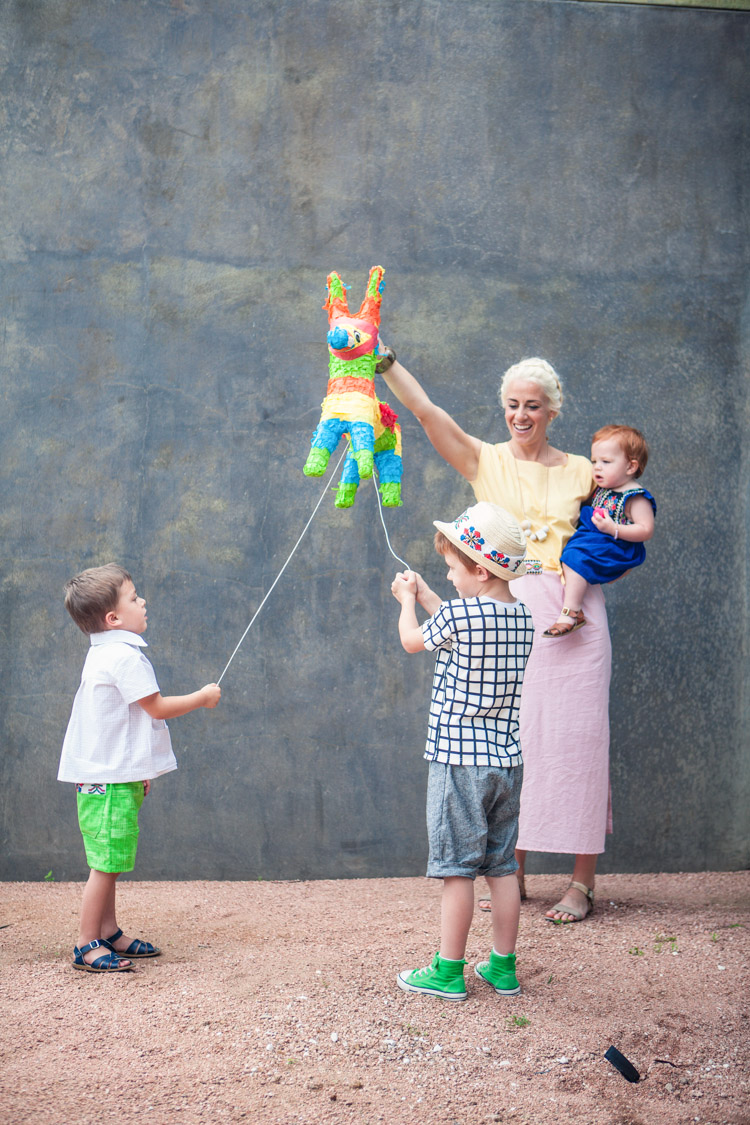
For a party with a bunch of kids, you can easily add more strings through the holes, so that everyone will have a string to hold and pull. And one of my favorite parts, after the candy is out, this pull-string piñata can be stored for the next event and used all over again! So there’s no reason not to break out your pull-string piñata at every party!
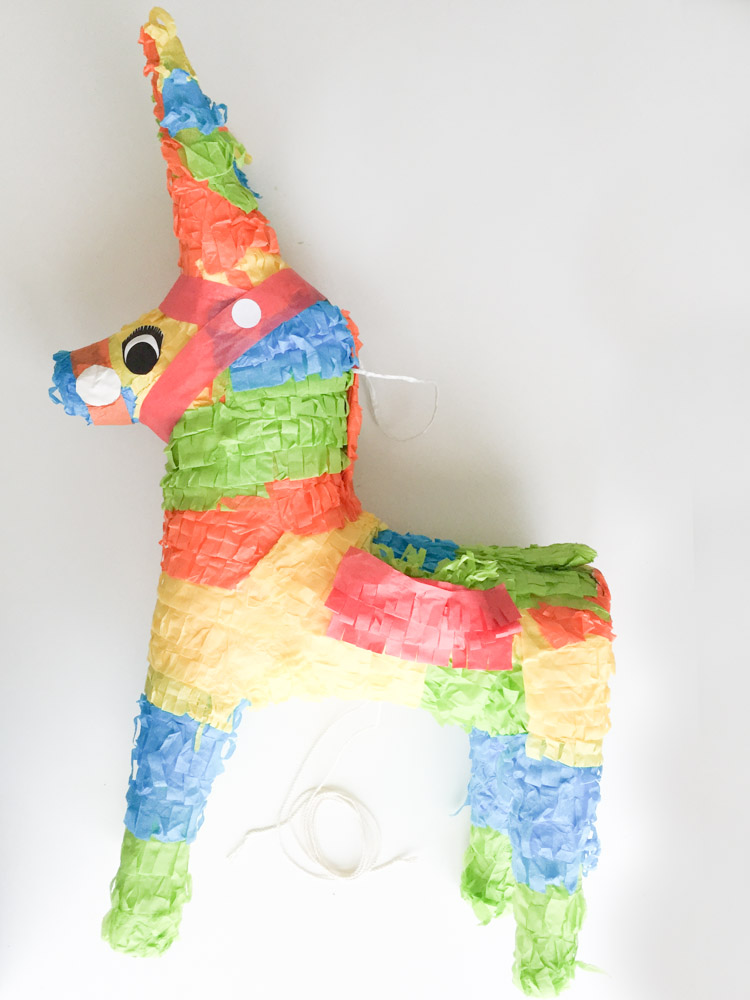
Styled piñata photos from my editorial spread in Stylo Magazine 04.

