It’s Halloween day and the only thing I have on my schedule this afternoon is doing laundry and preparing donut dough to fry for our first ever trick-or-treaters tonight!! The boys are at school and Plum is taking an afternoon nap and I feel like dusting off the old keyboard and sharing a simple ruffle caplet diy here on the blog. So, here I am!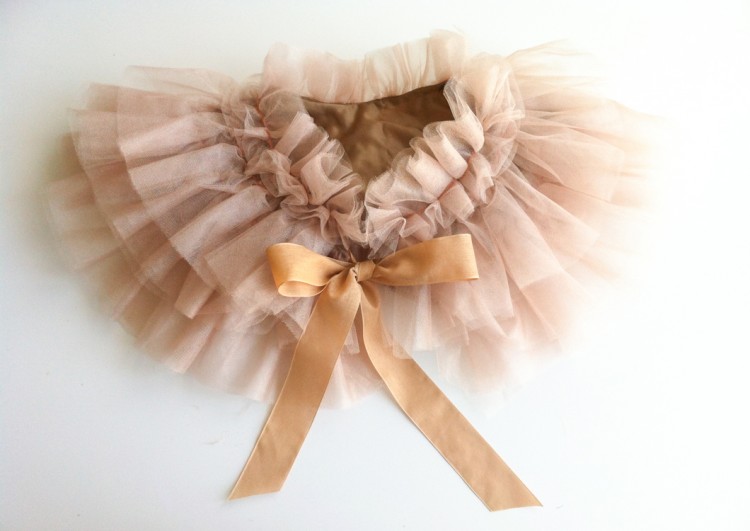 I have actually made about a dozen custom Halloween costumes this season, including several Peaches, an Orphan Annie, some Olivia ears, a (new and improved) Fireman Sam, and three little Austin Bats, complete with the South Congress Bridge–for my own kiddos. This ruffled caplet was made for a photographer friend, Amanda of Pie in the Sky Photography as partial trade for a family portrait session that I am so excited about. She sent me a link to this little caplet, hoping for something similar in nude for photo sessions. After searching briefly online and not finding much guidance, I winged it. As you can see, the results are darling, with the little tulle ruffled caplet I made looking just like the original photo. Want to make one, too? I’ll show you how. You will need about 1/2 yard of woven fabric, 3 yards of tulle, 1.5 yards of coordinating ribbon.
 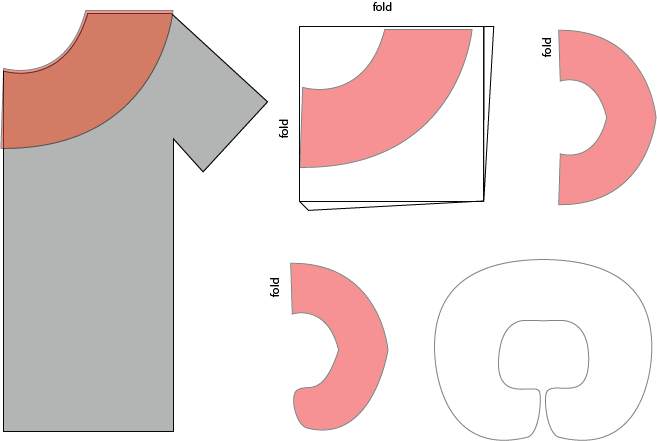 To make the caplet pattern: (1) fold in half a tee shirt of the little (or big) one the caplet will be used for. If you want a versatile size, I’d stick with a basic women’s small tee. The finished caplet is pretty forgiving, on an adult a small one will look like a collar, on a child a bigger one will just be a little longer. (2) using some tracing paper (or a paper bag, or printer paper) trace around the collar, out to the shoulder seam, and complete the 1/4 circle. (3) fold your fabric in half and in half again so that when you cut you will end up with a full circle. (4) Lay the pattern onto your fabric and unfold half way. (5) Round out the bottom edge. (6) unfold, and repeat as you will need two of the same piece.
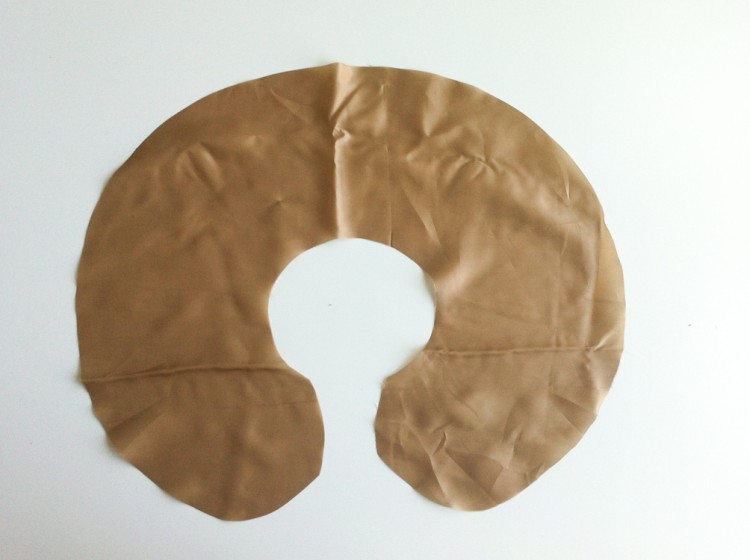 Your finished pattern pieces should look something like this.
 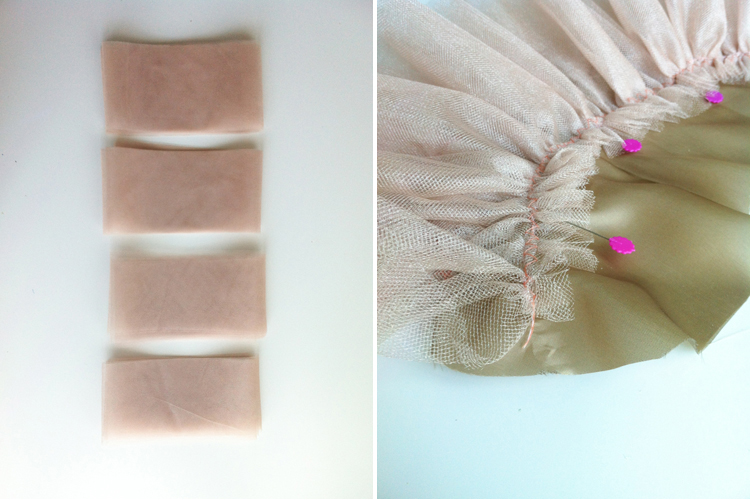 Cut the tulle into 3″ strips. I used 4 layers of tulle for the bottom two ruffles, and one layer for the top two ruffles. Using whatever method you prefer, gather the tulle strips about 1 inch from one of the edges. Pin the first layer of ruffled tulle about 1.5″ from the outer edge of the caplet, pinning every so often to ensure even distribution. Use a small zig-zag stitch to secure in place right along the gathering stitch.
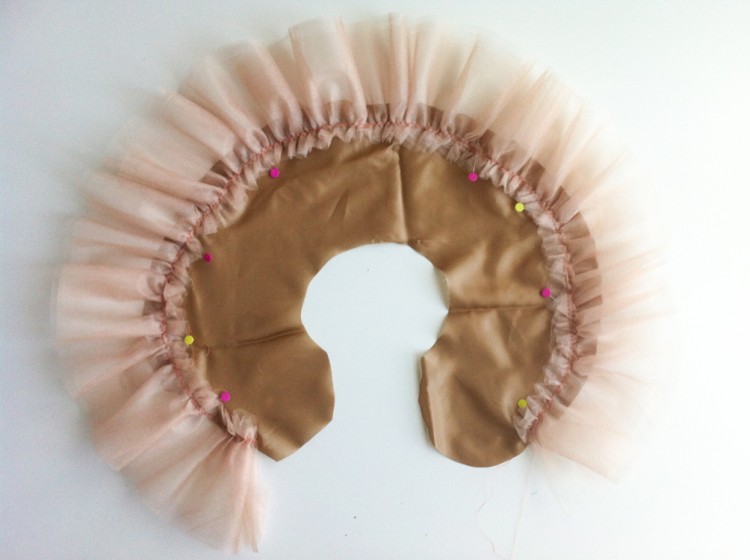
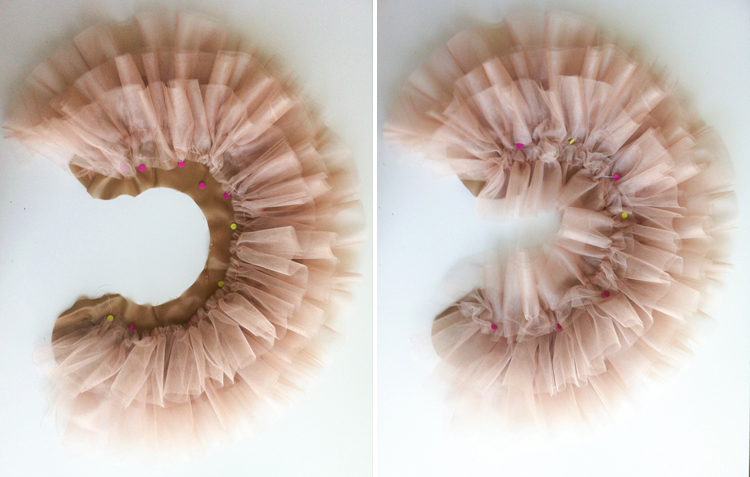 Repeat that step for the second, and third layers of ruffled tulle. For the fourth layer, flip the tulle upside down so the longer edge of the ruffle is poking in towards the neckline. Secure in place with zig-zag stitching.
 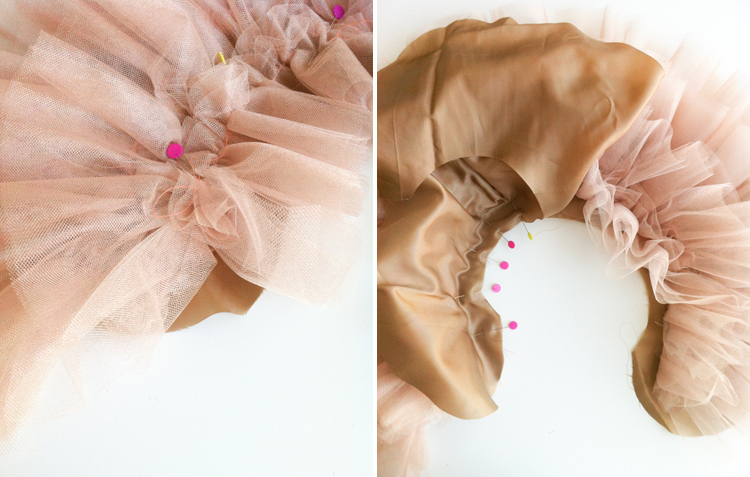 Fold back the neckline ruffles and place the second caplet pattern piece on top, lining up the neckline. Pin around the neckline and stitch as close to the bulge of tulle as you can. Clip the neckline curve.
 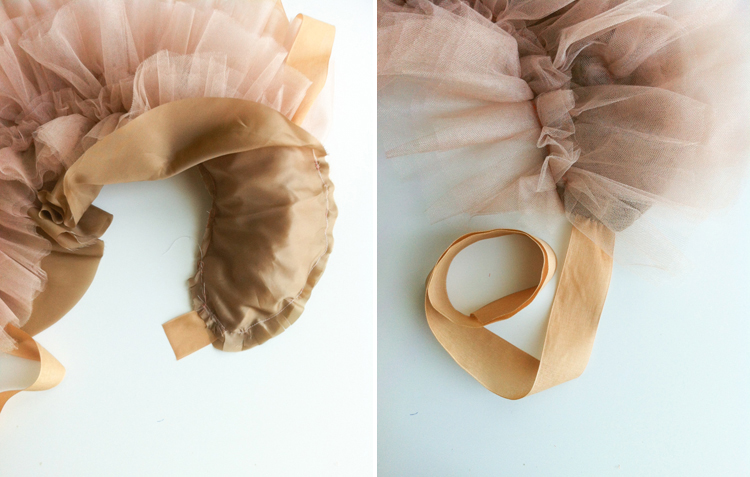 Cut the ribbon in half so you have two even pieces. Lay one piece inside the rounded edge of the caplet, with about a one inch tail hanging out. The length of the ribbon should be tucked in among the ruffles so you can avoid stitching over it as you sew up this edge. Stitch around the bend, backing over the ribbon several times to ensure it’s well secured in place. When you turn the bend right side out, you should have the long ribbon length neatly sewn between the caplet layers. Repeat on the other side.
  Next you’re going to sew around the outer edge of the caplet piece, with all of the tulle and both ribbons inside. Leave about 4″ open so you can turn the caplet right-side out.
 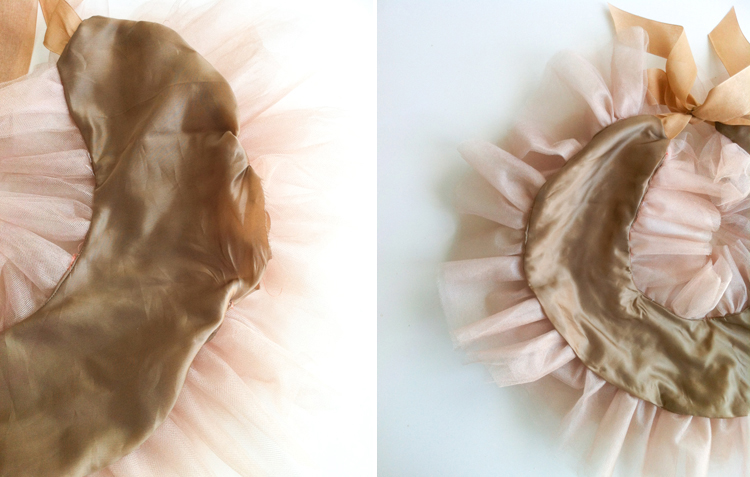 Turn the caplet right side out, and hand stitch the hole closed. Now all of your stitching is neatly sewn inside the caplet, and you have a finished-looking piece! If the neck ruffles or ribbon ends seem a little long, trim them to the desired lengths and you’re done!!
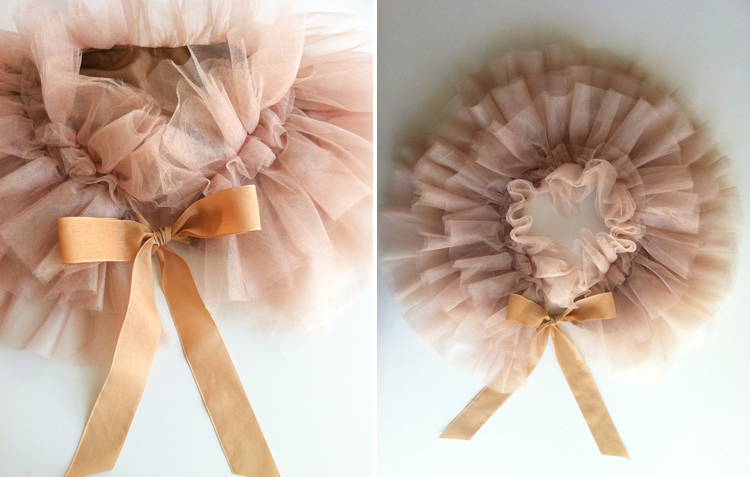
ABOUT

Welcome! I’m Miranda, the maker mama behind Live Free Creative Company.
More Than Enough Book

Have you ever felt like you were running a race you couldn’t win in life? Like there was always something more to buy or to achieve in order for you to feel like you had “made it”?In this book, I share how my heart changed and I began to find real, lasting peace, abundance, and joy through focusing on what matters most and disregarding the rest.

