So you know when something just sticks in your head? That’s what happened to me with this black leather jacket last year. I tried it on during my thirtieth birthday trip to Seattle, and haven’t stopped thinking about it since. When I posted about the jacket on Instagram (and how I wasn’t going to bring it home due to the $3300 price tag), most of the responses went something like, “Well, MAKE ONE!” That sounded like a good idea in theory, but I wasn’t sure I knew how to sew a leather jacket! Would it be like sewing costumes, clothes, or wedding dresses? I feel confident in my pattern making, fitting, and basic sewing techniques, and generally have a “make it work” attitude about projects, but in order to make this work I would need time, patience, and the perfect black leather.
Fast forward to October when my friend Merrick posted about the leather dress she made in partnership with Leather Hide Store. Not only is the dress darling, but it reminded me that I should be on the hunt for some buttery soft leather for the jacket of my dreams. I was thrilled when Leather Hide Store agreed to team up with me for this leather jacket project (dubbed #onelittleleatherjacket on my Instagram feed where I posted updates during the making). I had them send me a few different swatches to get a feel for the leathers, and one black piece was just perfect. Soft and a tiny bit stretchy. Thin enough to have a little drape, but heavy enough to be warm and feel durable as well. So, they sent me half a hide, and I went to work. I want to share a whole pile of fun photos of the finished jacket that my friend Dana shot for me, then I’ll give some insight into the making process and a couple things I learned. Also, Leather Hide Store is so generous and will be giving away a beautiful ruby red hide to one of my readers, so be sure to enter the giveaway at the bottom! 
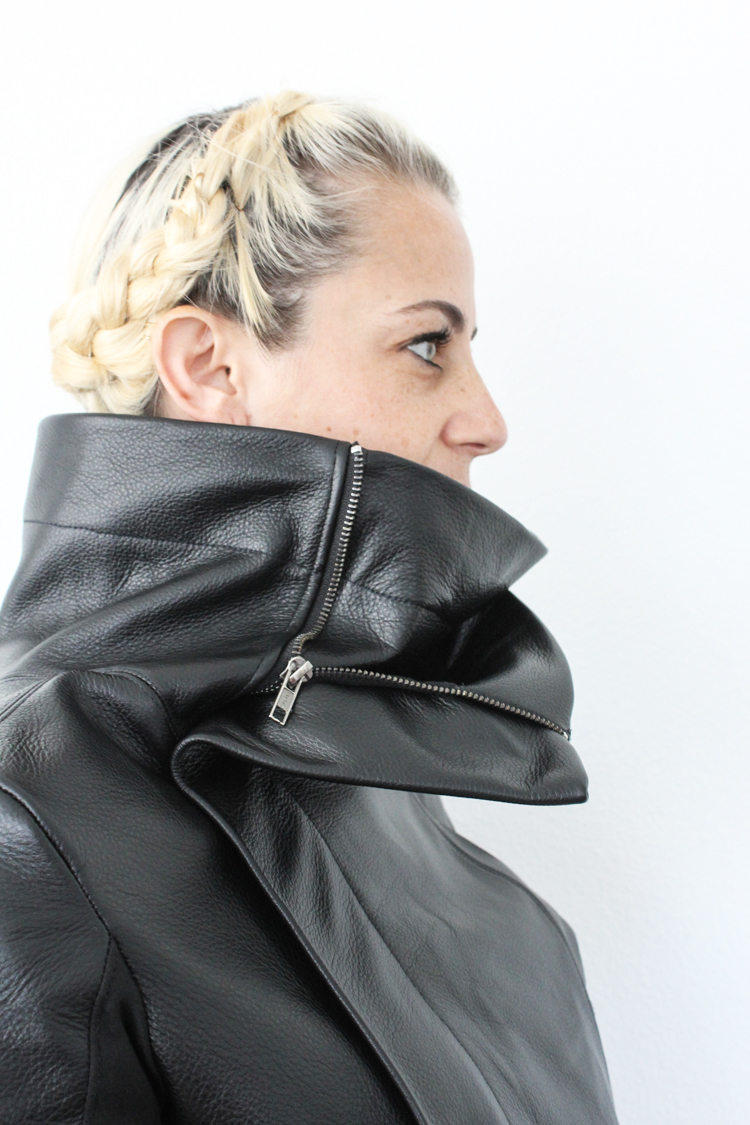
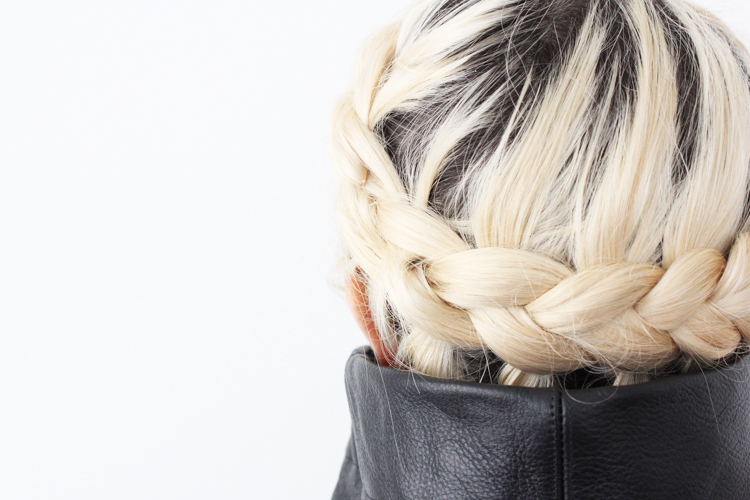
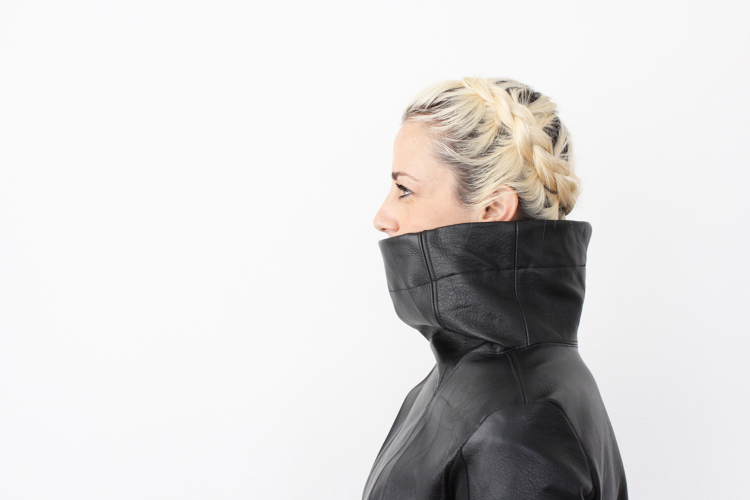
 When I was cutting out the pattern pieces on the hide, I realized that I didn’t quite have enough to lay them all out flat without making an extra seam concession somewhere. This is where it ended up. One of the two back collar pieces had to be cut in two separate pieces, then pieced back together. It was one of those happy accident moments, because I actually love the addition of the one off center seam along the collar. Because each of the seams is sewn together, then top-stitched on both sides to tack down the seam allowance and reduce bulk, every seam really adds to the architectural detail of the jacket.
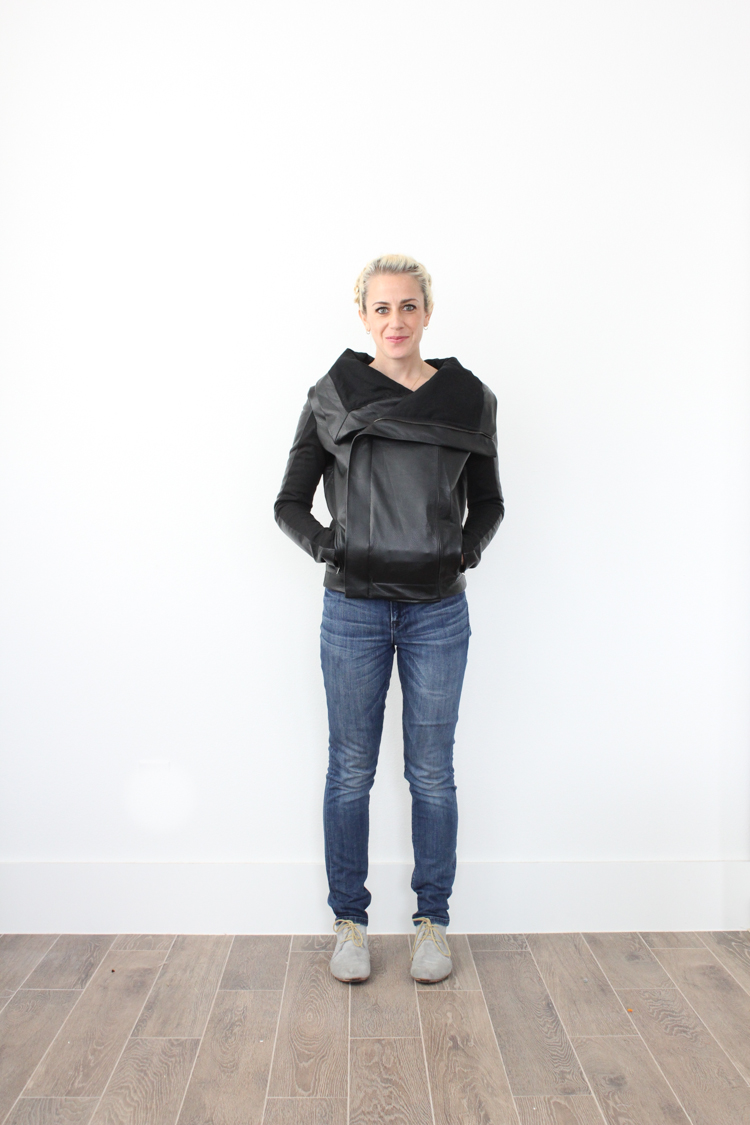
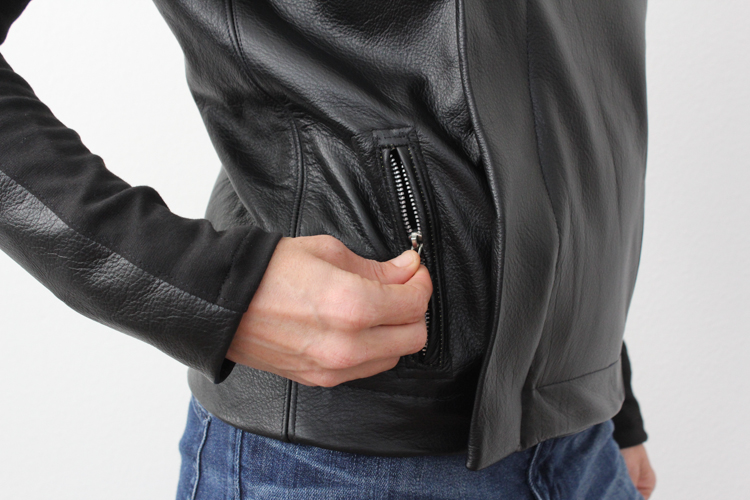 The double-welt pockets were the most nerve-wracking part of the whole sewing experience. I didn’t add any to the pattern, or on either of the two muslins that I made. So when it came time to add them to the final jacket I was slightly terrified. Luckily, with a practice pocket in leather under my belt, they both turned out just fine. The standard pocket zipper that I bought is 5″, which I actually think is just a touch too short. My hand fits in there, but just barely. I’d add an inch or two if I were to do it again.
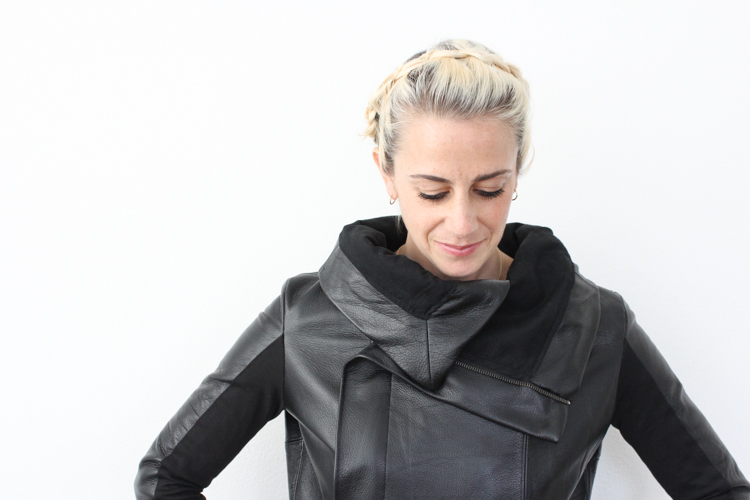
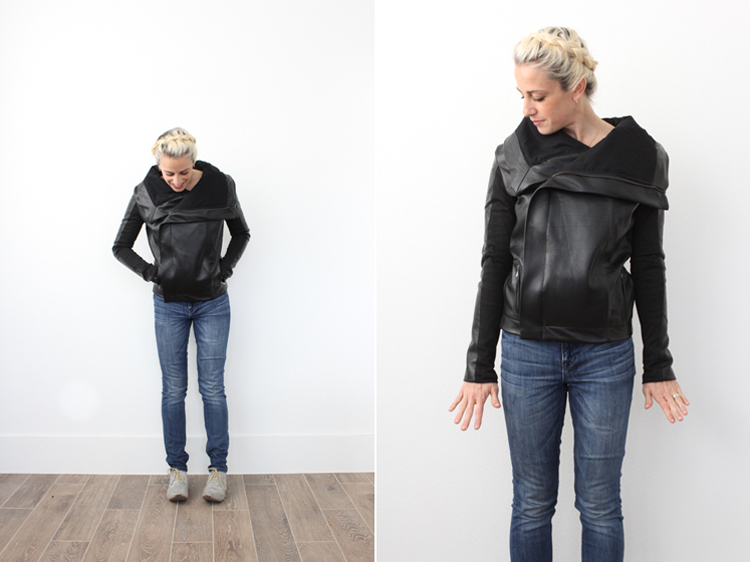
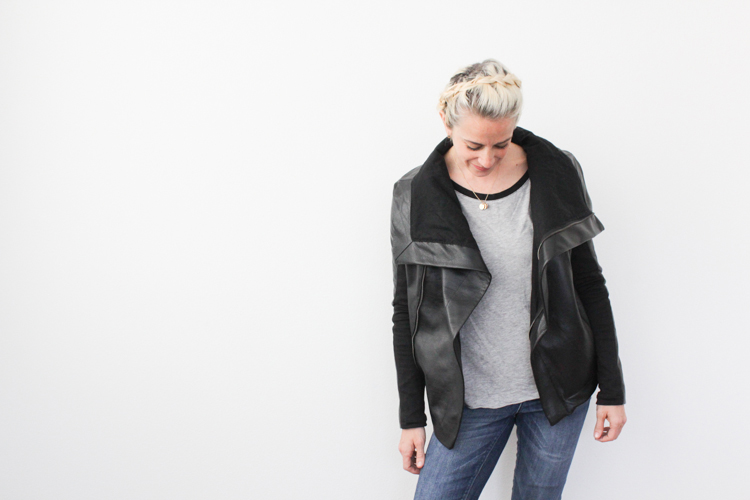
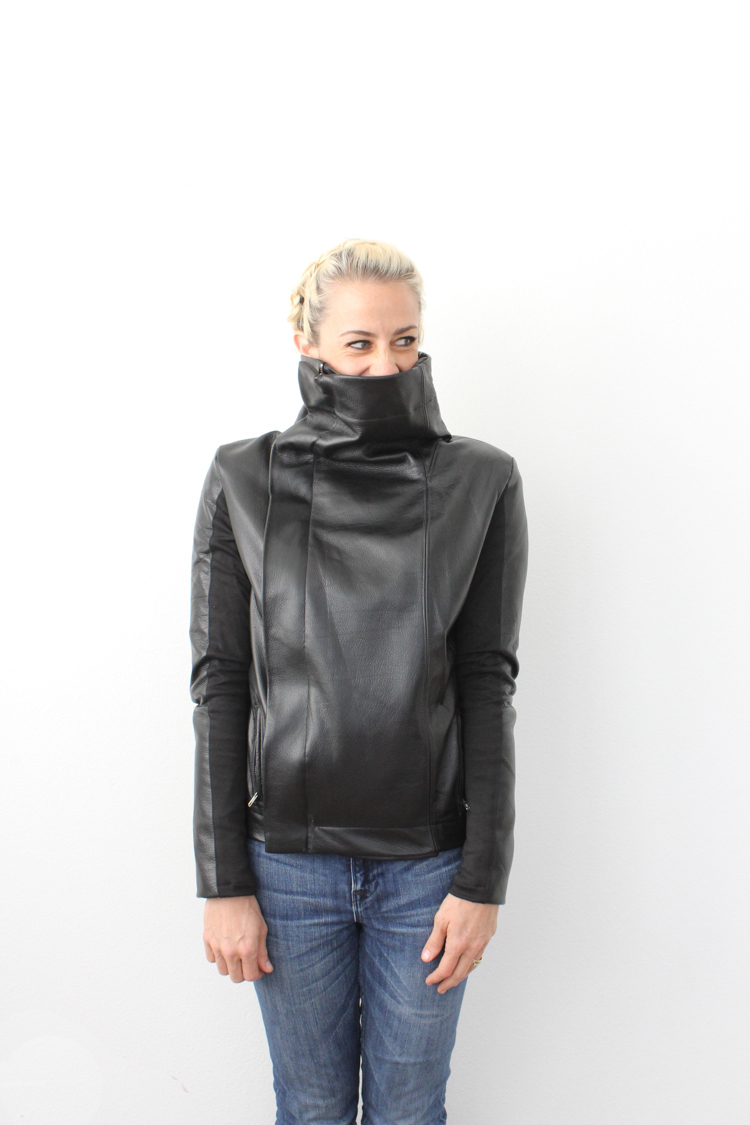
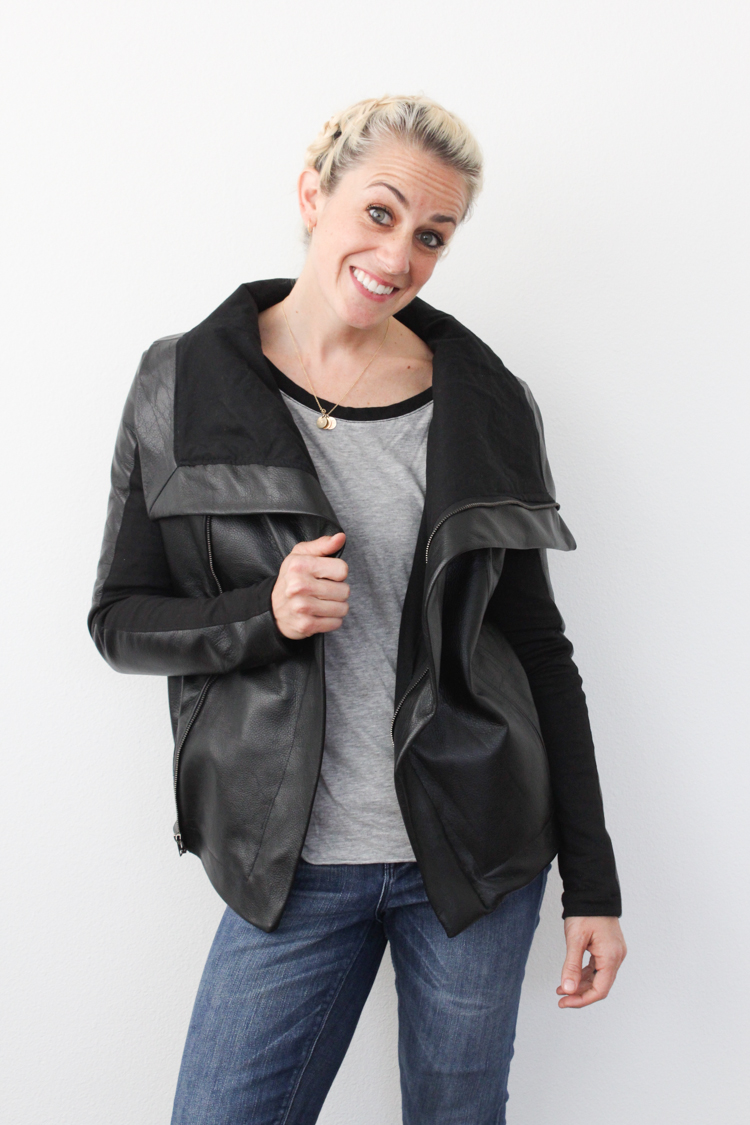
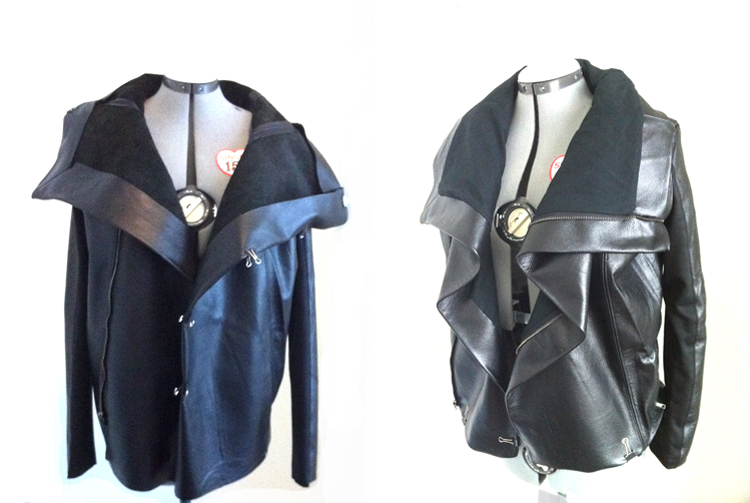
I draped the pattern for the jacket on my dress form and it was so fun to discover the symmetry of the asymmetrical design. Although the zipper is far off center, all of the front pieces of the jacket are the same, allowing the each stage of the unzipping to have a little different look as the wide, square collar folds down little by little. This jacket is obviously primarily inspired by the one I tried on last year, which was designed by Rick Owens. As I worked on this project I enjoyed doing a little research on him, and loved some of his ideas about design–like that on a good jacket the shoulders are narrow, and the sleeves tight and long to flatter the wearer. That’s where adding ponte knit to the sleeves comes into play, rather than having them solid leather. The ponte allows the sleeves to be tight fitting without being restrictive. The result is a jacket that looks less puffy and more sleek. I also had to laugh a little bit at the Rick Owens Quote “Working out is modern couture. No outfit is going to make you look or feel as good as having a fit body. Buy less clothing and go to the gym instead.” Well said. I’ll go to the gym so I can keep fitting into my tight leather sleeves!
Read on for more photos, pieces of the process, and the red hide giveaway!
 Oh, the zipper. Did you know a 30″ metal separating zipper is virtually impossible to come by in a local store? I considered ordering one, but thought I’d just pick one up locally when I needed it so I could see the weight and quality. Well, when it was time to zipper shop, I could only find 24″ zippers! I had a deadline for the finished jacket and blog post, so I thought I’d call some local seamsters to see if anyone had one on hand that I could buy from them. The Austin local custom sewing team at Mr. and Mrs. Sew It All told me they did indeed have one, and I was welcome to pick it up. The shop was like walking into my dream studio: huge cutting tables, industrial machines, patterns being made and projects being stitched up. The owner, Chris, was kind enough to shorten the 36″ zipper they had to the 30″ that I needed. And his wife and co-owner, Amanda, gave me the single most important tip that I needed for this project to be a success, leather seam tape! She showed me how to add the thin, double-sided tape to adhere the seam allowances down, and that it could be used to hold pieces together before sewing. I bought some on the way home from their shop, and used it every single step of the way.
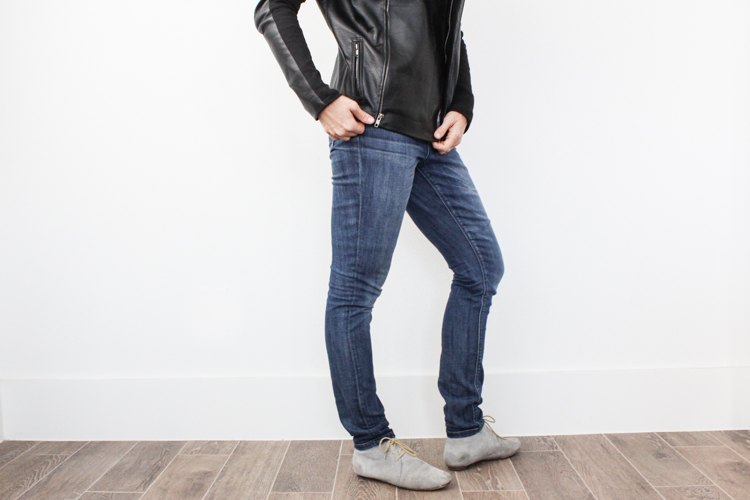
 I know that was a lot of photos. But I am so proud of this project! Taking an idea from a loose photo or sketch to a draped pattern, then flat pattern, then muslin, then wearable muslin, then finished product is such a wonderful, creative, learning process. With this jacket I feel like I got to give myself a personal sewing course (with the help of the internet), and I learned so much. So, let me walk you though the process a little bit, if you’re interested.
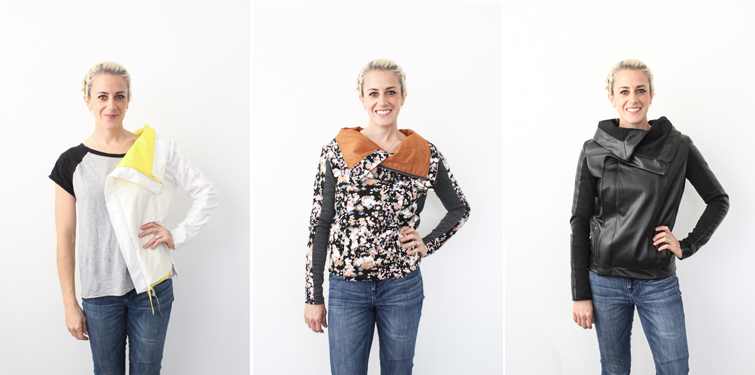
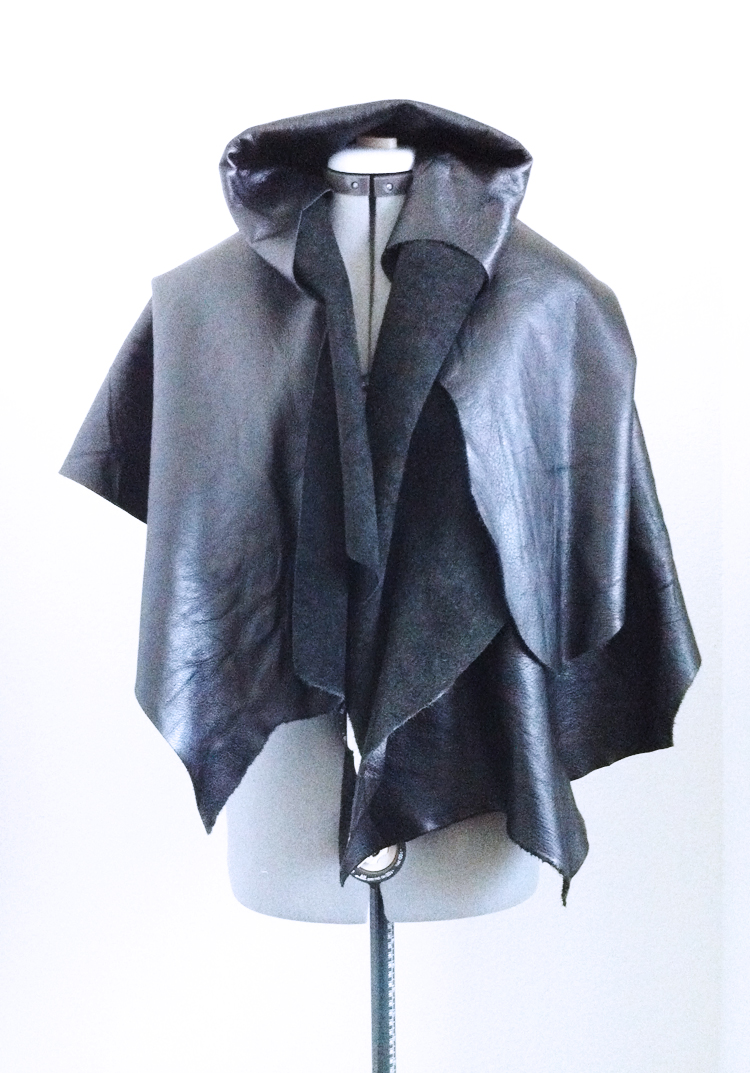
As soon as I received my leather hide from Leather Hide Store, I hung it on the dress form to get an idea of it’s drape. You can see it’s just beautiful. The high quality of the leather gave me the confidence I needed, and the determination to take care that this jacket ended up well made.
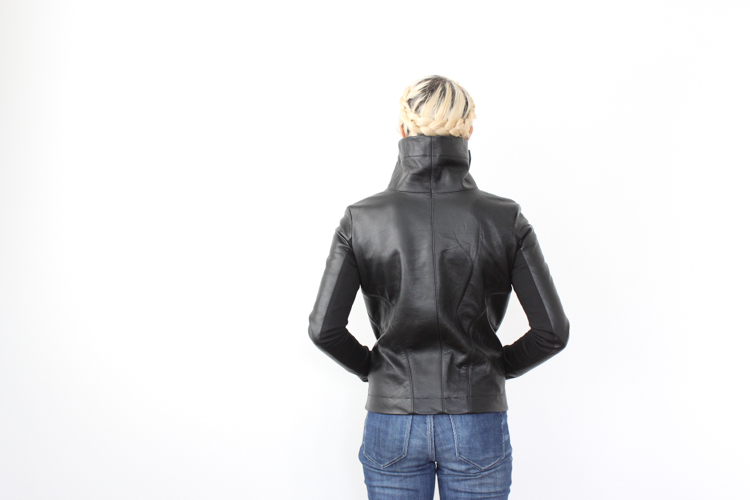
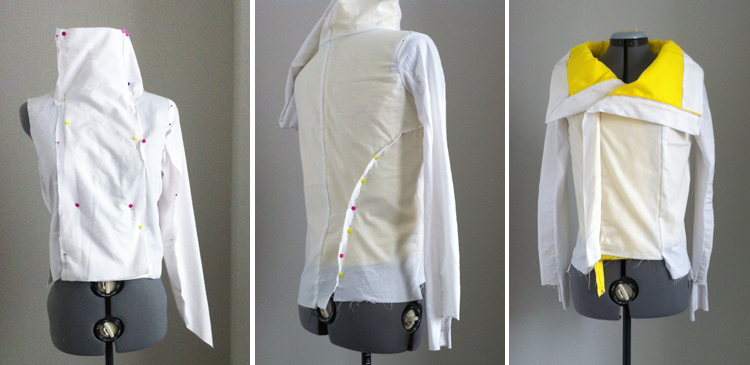 My first step was creating a pattern that would fit me well and have the style I hoped for. When I drape, I start with rectangles of muslin and simply begin pinning them in place on the dress form the way I want them to look. I take care to keep the grain line of the fabric vertical, and make the side seams straight along the sides, etc., but other than that it’s free game to make the design look and feel the way I want. When pinning on this pattern I realized in order for the wide collar to be even when unzipped, the right panel would need to be just as wide as the left, even though it is invisible when the jacket is zipped to the top. That meant the zipper would be inserted between two layers of leather, and the lining would be flat on the inside. On the left panel, the zipper would be inserted between the folded leather fabric and the lining. I have a pretty sway back, so adding back darts is usually a bad idea because they have to be so dramatic. I decided to add this rounded detail on the back to adjust for my back while adding a fun design detail.
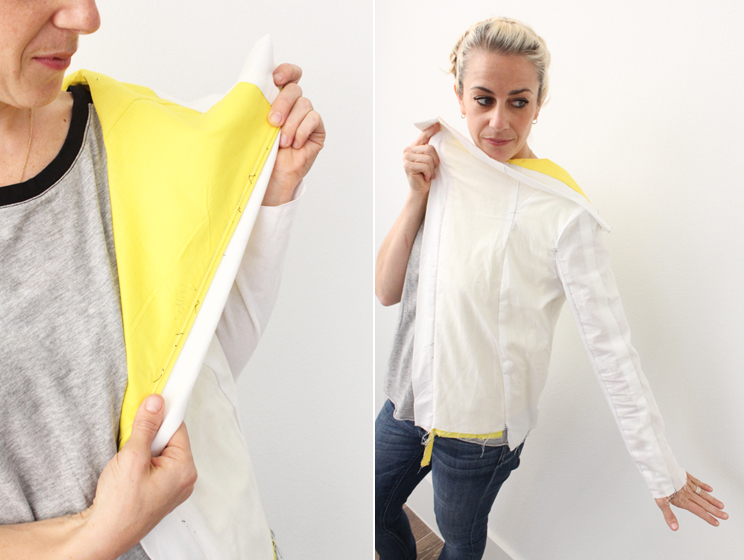
After the first design is draped, I remove all of the pieces from the dress form and trace them onto flat pattern paper. At that point I add seam allowances, true up the corners, and check my measurements. Then I use the flat pattern to cut a fit muslin. This If you look closely you can barely see some of the pattern markings that I make on my muslin. I sew the fit muslin together and use a marker to make notes right onto the fabric. Which direction the zipper goes, where the seams meet, and so forth. After making the fit muslin for this jacket, I took only half of it apart and used it as the pattern for the wearable muslin. The other half I left intact (just because it would have been more work to unpick it all!) and it’s fun to show the progression.
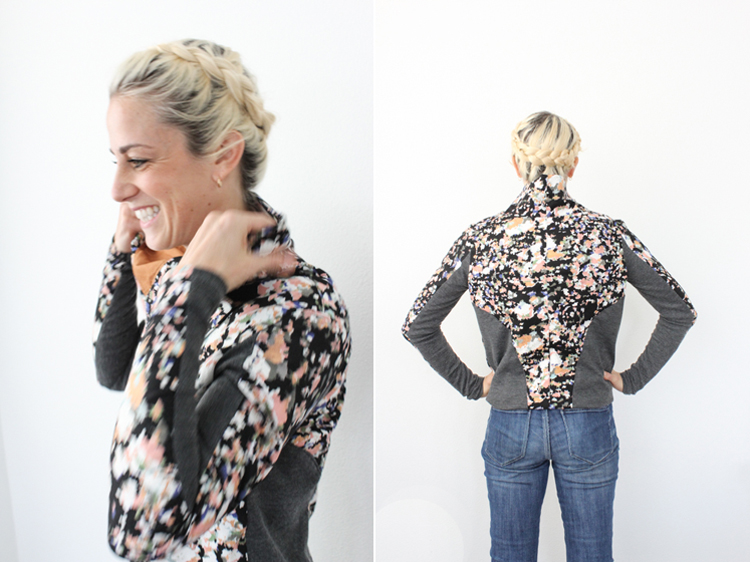 Normally, after a fit muslin, I feel comfortable and ready to go ahead with the project at hand. In this case, however, I wanted to make darn sure that I knew what I was doing before I cut into the leather. Because it’s not as easily replaced as fabric, and not nearly as forgiving. Once a hole is poked, it’s there forever. I used the pattern to make a wearable muslin from this fun floral canvas, and some grey ponte knit, and copper colored voile that I had in my stash. I didn’t have quite enough floral for the back sides, so (happy accident!) I ended up using some extra pieces of the knit. It turned out to be a great design detail to show off those back seams. I totally fell in love with this jacket and am so happy it was part of the process because I already wear it all the time! After making it, I made a couple small adjustments to the pattern, like lengthening the hem an inch, and raising the collar an inch. Then I was ready for the real deal.
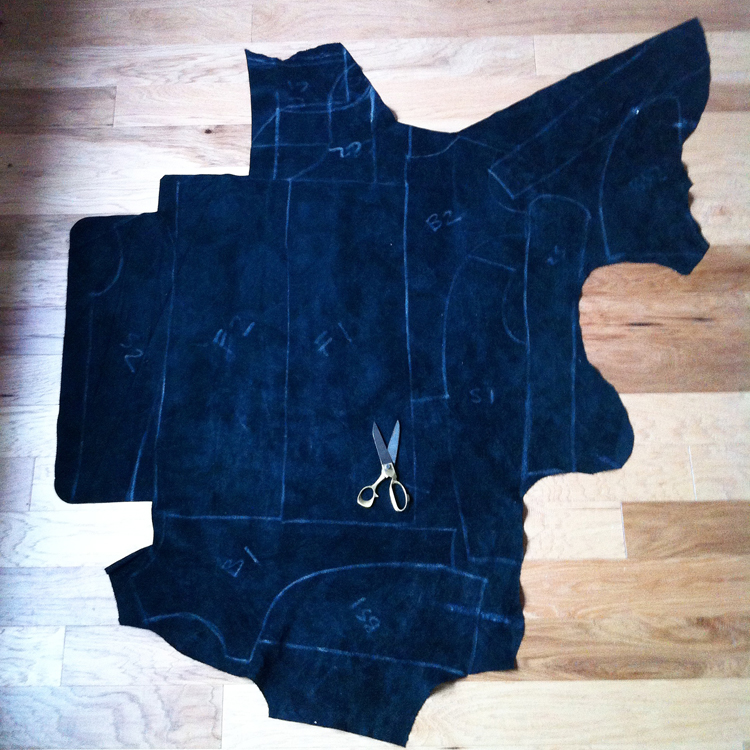
I should have thought to lay out the pattern pieces on the hide earlier, to make sure I would have enough. It was a seriously tight squeeze, but I got all 12 pieces on there with only having to piece together the one collar panel that I mentioned above. I didn’t take into account how irregular the hide shape would be, but it played in my favor because I had all sorts of little nooks to tuck pieces into.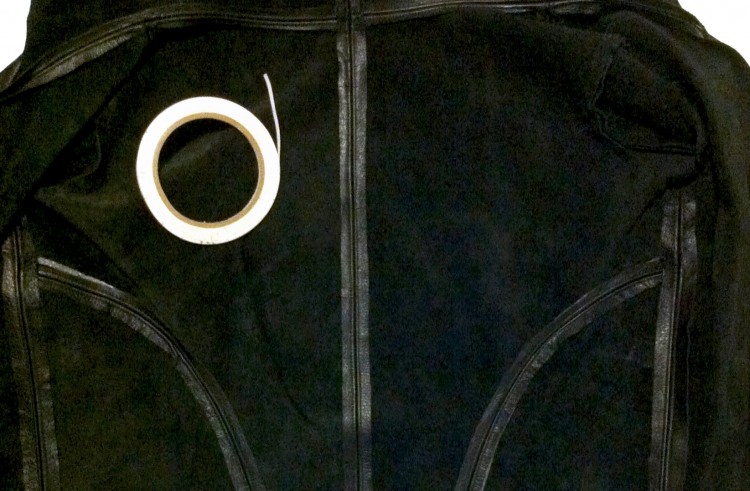
After having sewn this pattern together twice already, the initial construction was a breeze. I used a walking foot, and a new package of leather needles, nice polyester thread, and a stitch length of 3-4 for most of the construction. Every seam on the leather got three rounds of stitches. First, the seam construction, then a row of topstitching along each side to help the seam allowances lay flat. This is where that leather tape came in really handy. I have used normal double-stick tape on other leather projects, but this is so much nicer and easier to use because it’s ultra-thin, so it disappears in the seam allowance. Also, it comes stuck to a white backing paper, so you can lay down a row and position it easily before pulling off the paper and revealing the other sticky side. I stuck down all my seams, then used it along all of the hem edges to keep them crisp when folded, since leather can’t be pressed for nice, neat seams. 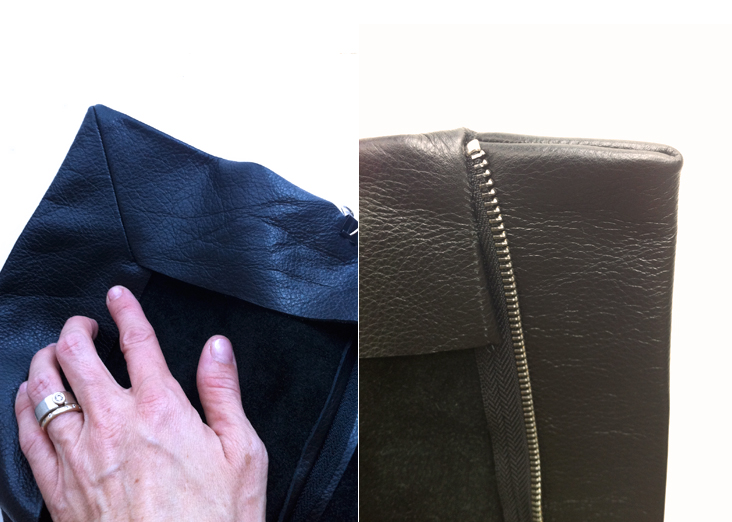
The corners of this jacket were for sure the most tricky part. I needed them to be perfectly crisp and flat, even though the material is so thick. I took care and after sewing the seams cut out all of the extra bulk before adding the leather tape to stick the nice corners together. 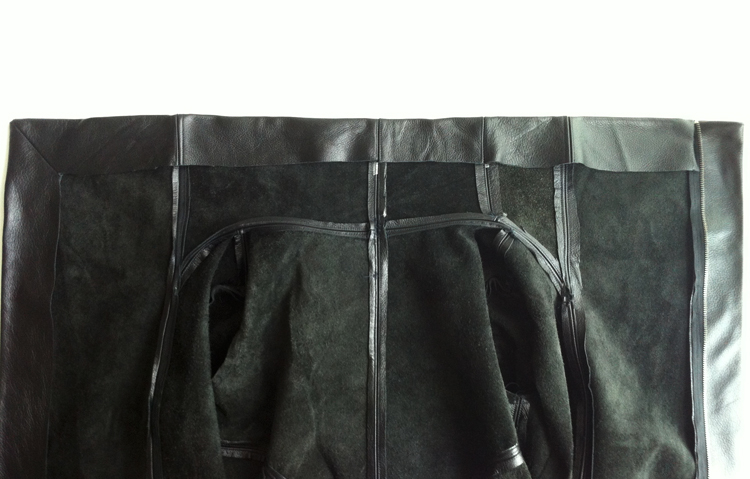 At this point, with the seams constructed and the corners finished, I remember feeling on top of the world! The inside of the jacket looked so pretty I almost didn’t want to add the lining because I would cover up all of my careful, beautiful handiwork!
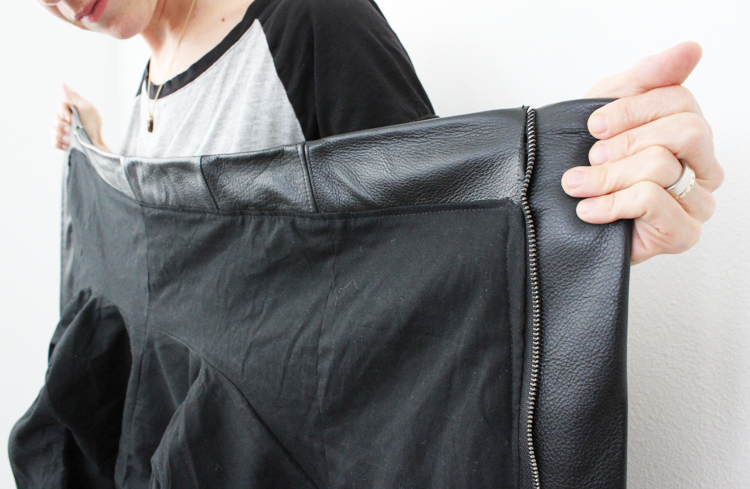
The scariest moment of the whole process was right as I was preparing to begin sewing the lining in place and I realized I needed to add pockets! I couldn’t sew a leather jacket without pockets! I had lazily omitted them from both of my muslins because I was more concerned about the fit. And then here I was needing to cut into my almost finished project with tricky double-welt zipper pockets made from leather! Before I began I scanned a great welt pocket tutorial to refresh my memory, and then I made a practice pocket.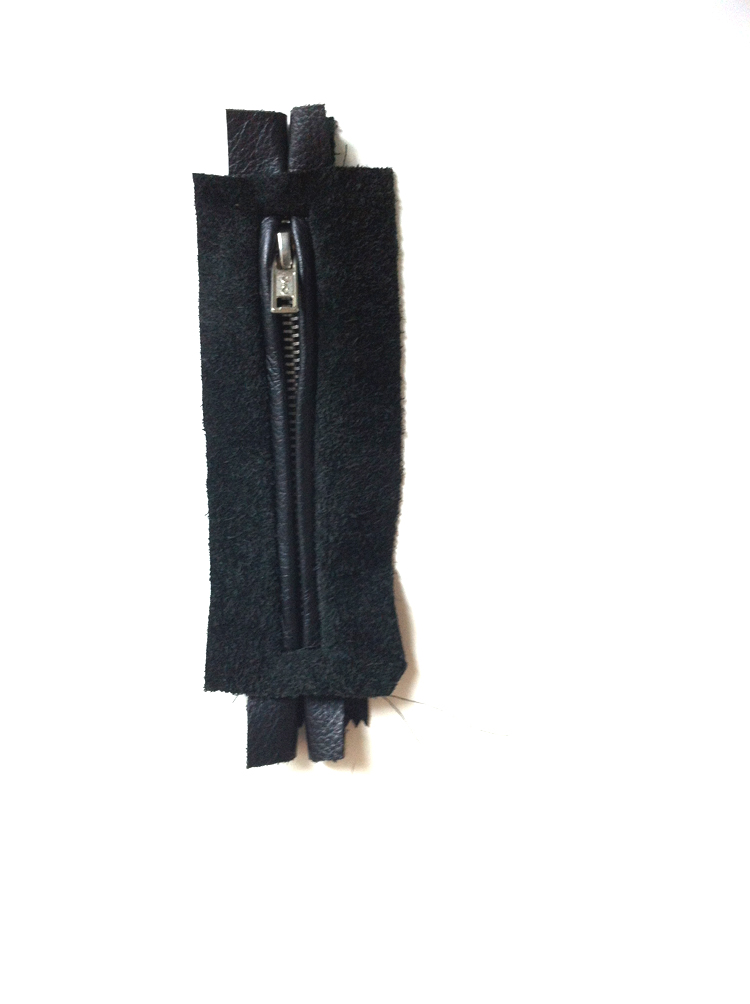 The leather hem tape saved me again as I used it to create the neatly folded welts, and to secure the zipper to the pocket before topstitching.
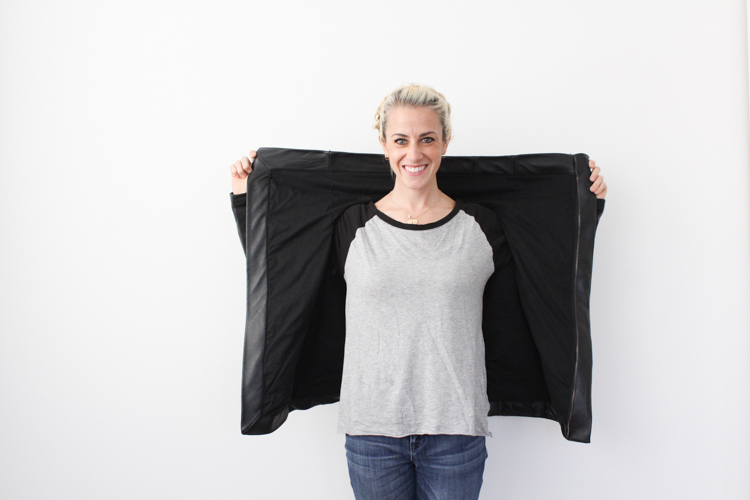
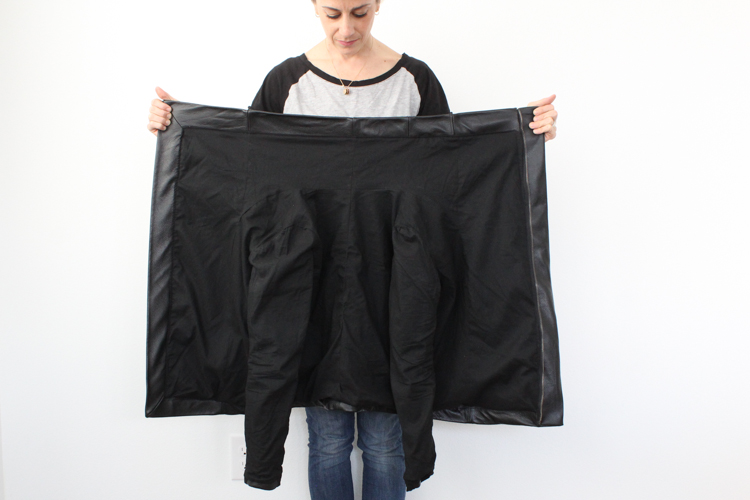
 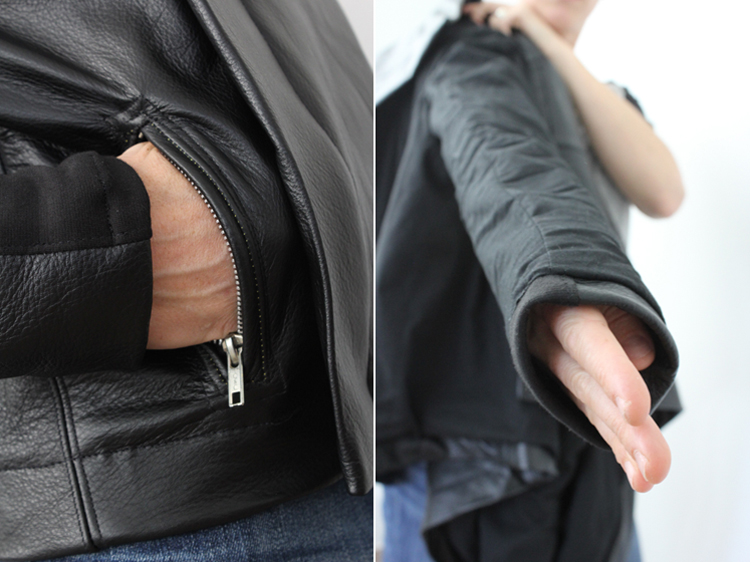 I took great care that the inside of this jacket would be as beautiful as the outside. The design required a beautiful lining at the upper end, as most of that shows when the zipper is undone. The lining is basically the same as the shell, but 2.5″ shorter around all of the edges where it meets the folded down leather. I assembled it completely, stitched it to the collar, then added sleeves. The sleeves were a fun experiment. I wanted to be able to machine stitch the lining to both the wrist and the shoulder for the most clean look. So, I first stitched the lining to the wrist, and turning that under formed the wrist hem. Then I pinned the shoulder and stitched around the shoulder seam, making sure to miss the front panels which were already attached and sort of in the way. With a little care I could get all the way around the shoulders. Because I wanted to machine stitch the lining all the way around the leather edge, forming the top-stitched detail on the outside of the jacket, I opened the center back seam to finish the lining construction before turning the jacket back right-side out and hand-stitching the center.
 And that is how you sew a leather jacket!
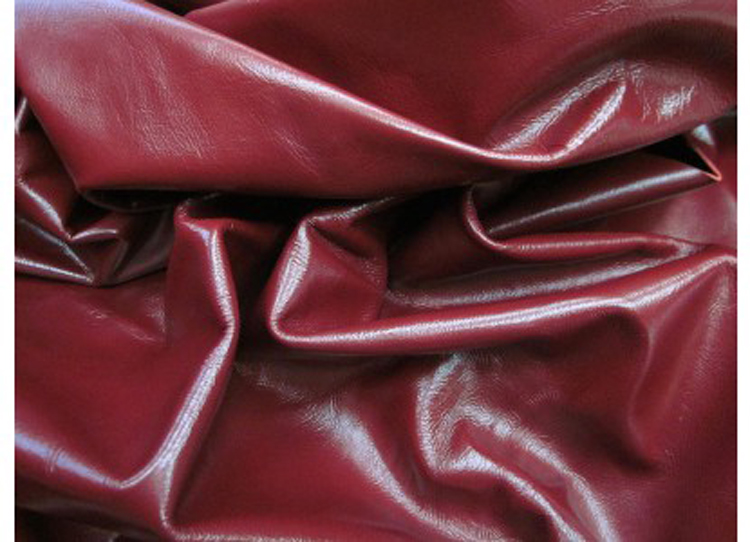
Now, who wants to win some leather? The Leather Hide Store has so generously offered to give away a beautiful and festive premium full grain Ruby Red hide! The hide is about 24 sq ft (more than enough for almost any project you have in mind!) It has a natural texture, medium finish, and very soft hand. The approximate weight is 2.6 ox/sq. ft and approximate thickness is 1.0-1.2 mm
If you’re not feeling up to making yourself a jacket here’s a few of my favorite leather tutorials from around the internet to give you an idea of all of the amazing projects you could use this for:
I got one of these no-sew diaper clutches as a baby shower gift and it’s still one of my favorite diaper bag essentials!
Everyone could use a darling fold-over leather clutch like this
These adorable leather baby mary janes
or these sweet moccasins
Add some leather to your favorite tee like this
a no-sew clutch like this would be sweet
I’ve been wanting to make this luggage set with leather and canvas
maybe you’d rather make some furniture and upholster it like this cool tufted bench
Looks like sky’s the limit! What will you do with the leather if you win? I can’t wait to hear. I had so much fun pushing my sewing boundaries with this project, I hope you enjoyed a peek into the process!


