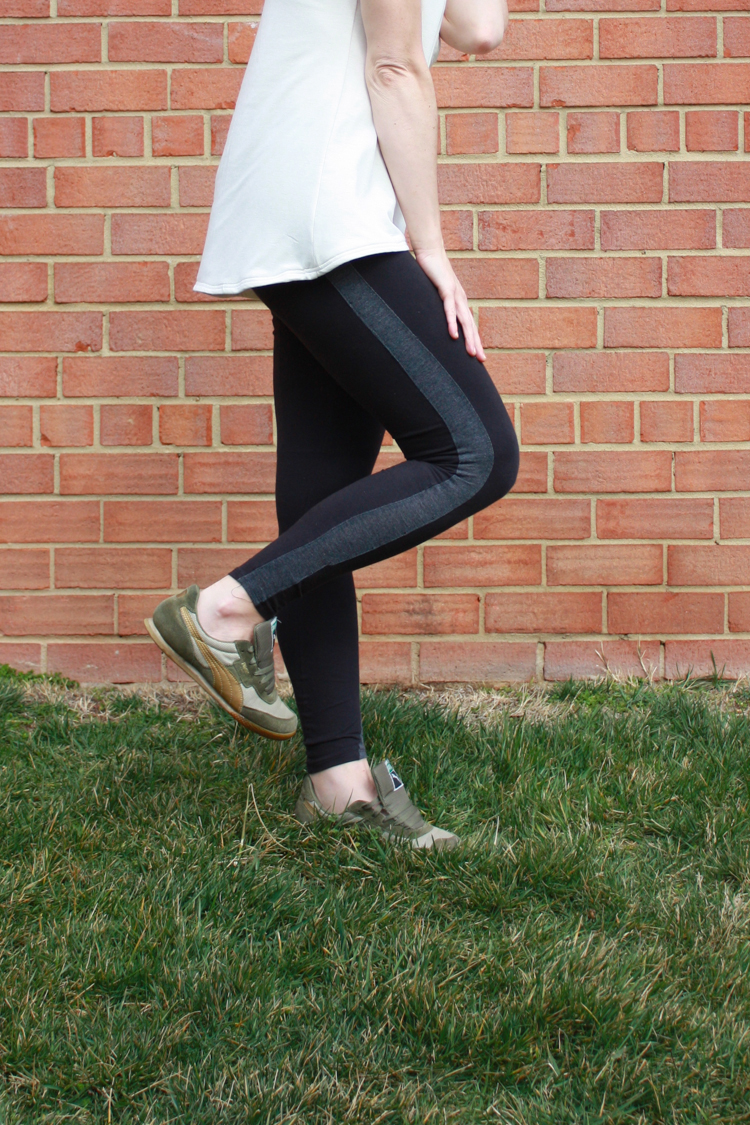
A few weeks ago I was getting packed for a quick trip to Texas, and I was struck with the immediate need for a pair of tuxedo stripe leggings. I think I was pulling subliminal inspiration from these pants and this post, and I had to have some for comfy, cool plane travel. Funny the life of a seamstress, right? “I must have xyz, so I’ll make xyz.” Pretty cool.
Aaaanyway. Since I have a fantastic basic leggings pattern, made to my own measurements using this tutorial that I made for Stretch Yourself, whipping these babies up was as simple as modifying the pattern with a couple slashes. Let me walk you though it, in case you want to make your own!
You’ll need two colors of stretchy knit, preferably a four-way stretch with some lycra or spandex in the blend (more about knits here.) About 1 yard of your main fabric and 1/4 yard of your stripe. Also, you’ll need a length of elastic that will fit around your waist.
For all basic drafting and construction of the leggings, I’m going to send you right on over to this post about drafting and sewing leggings. Today, I’m just going to show you the pattern variation to make the tuxedo stripe.
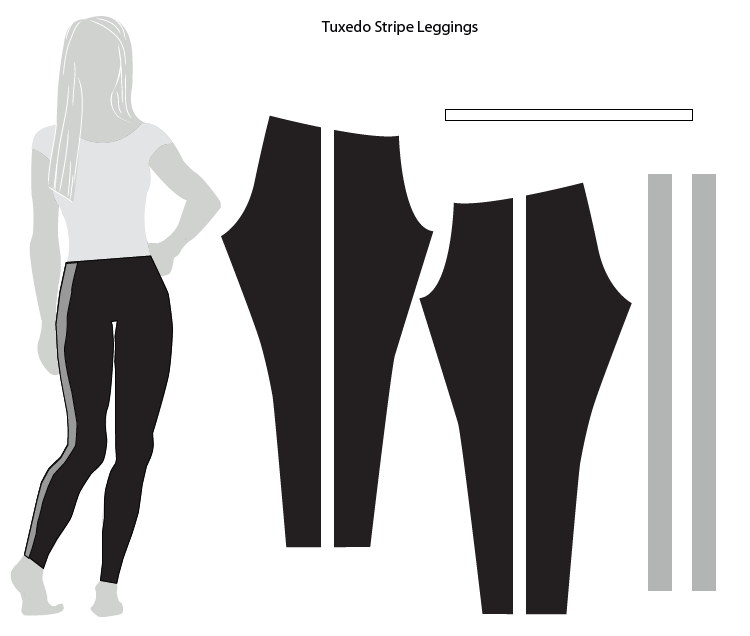
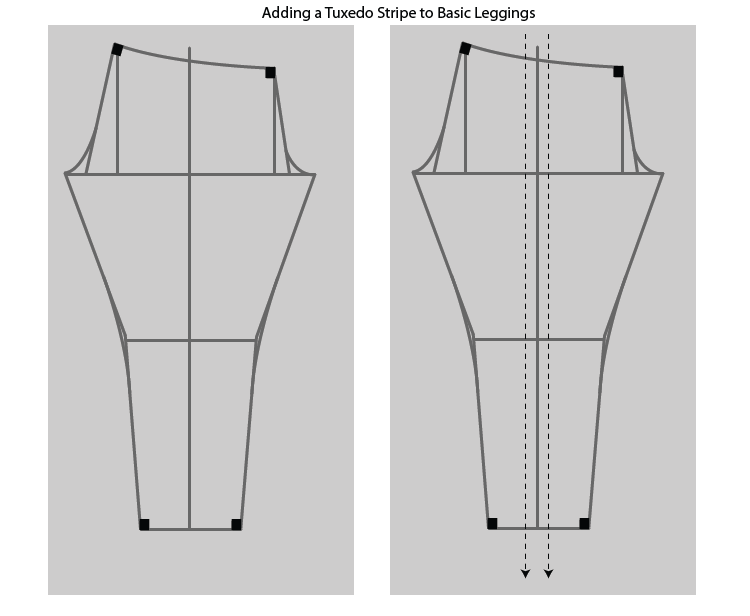
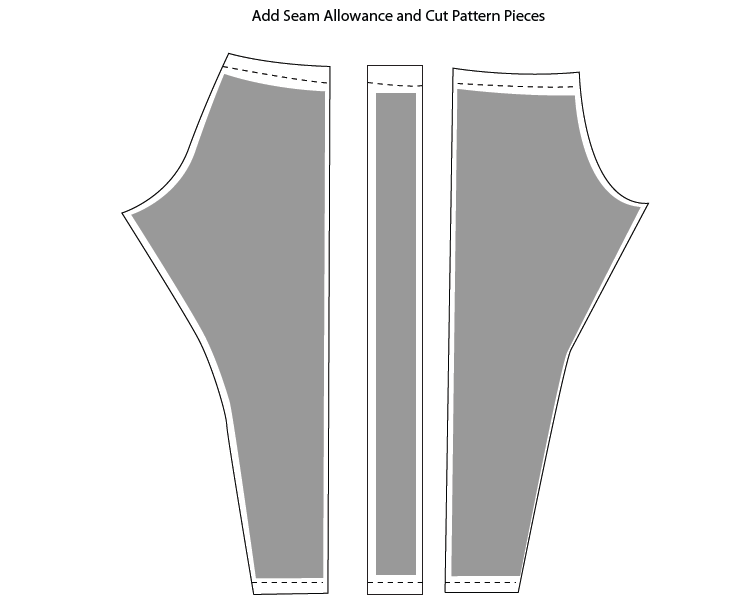
The basic pattern block for the leggings creates a single pattern piece to cut twice, one for each leg. The center line of the legging of the pattern is the outseam of the leggings, so to create a stripe along that outseam, you need to measure equal distance from the center line on the pattern and create lines along the length of the pattern, dividing it into three parts. When you slash the pattern along these lines before adding seam allowance, you create the tuxedo stripe legging pattern. The center piece becomes the stripe, and you can make it as narrow or wide as you like. Mine is about 1.5″ wide (so I drew my lines and slashed my pattern 0.75″ on either side of the center line.)
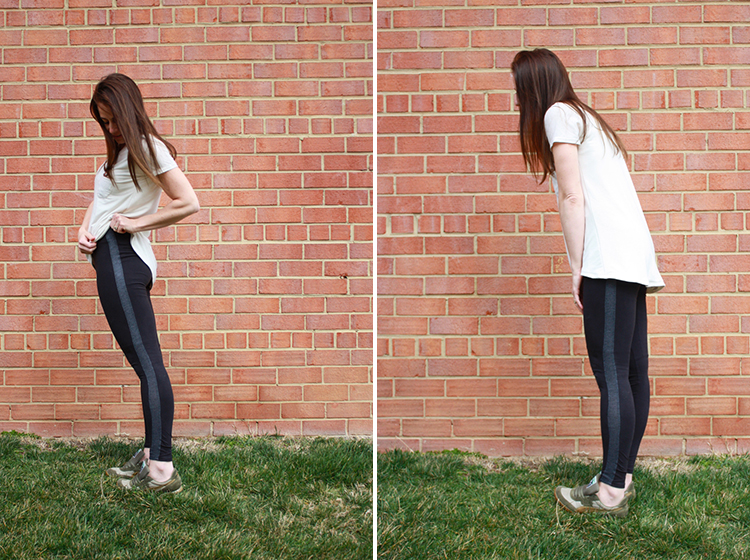
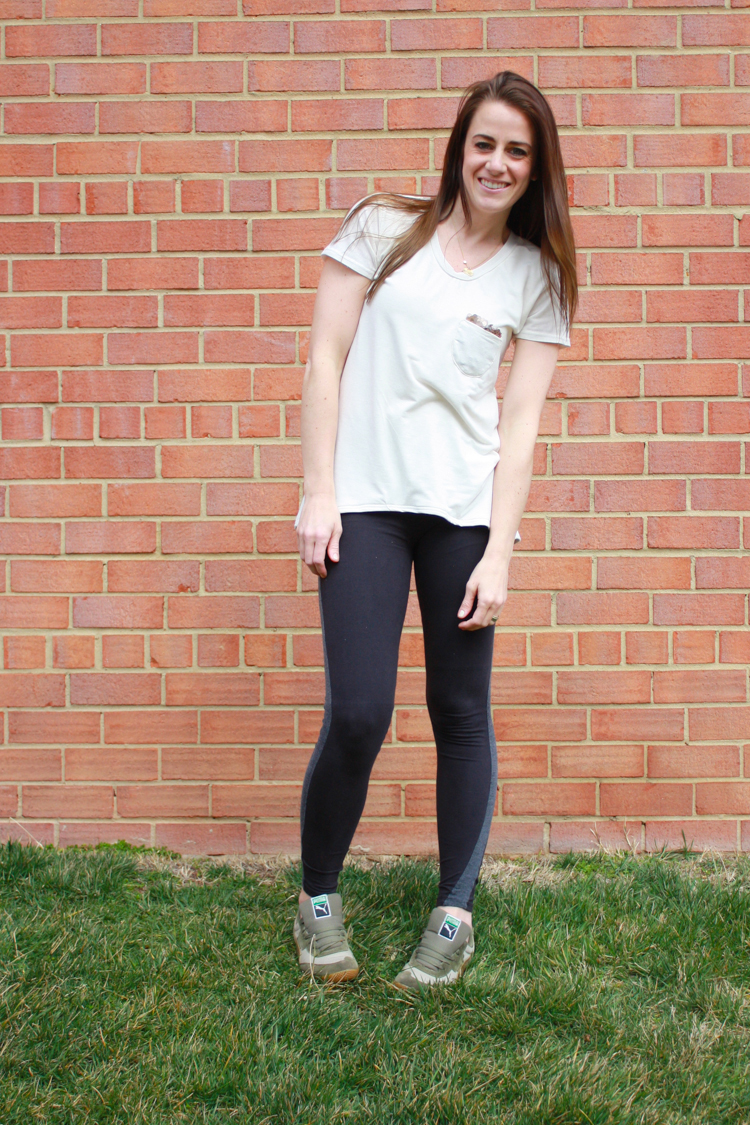
Once you’ve slashed your pattern block, you need to add seam allowance, as well as hem and waistband allowance to each piece. Then you’re ready to cut the pieces from your knit fabric and sew them together! Make sure you pay attention to the grain of your knit when cutting. I was a little reckless (as I tend to be) and cut both of my leg pieces together, without lining up the grain properly. You may notice in the photo below that my left legging leg twists slightly to the front. This is totally because of the off-center grain pulling the center. I don’t mind it all that much, but if I were more of a perfectionist, I might. And, I’ll be sure to pay more attention when cutting the next time I make these.
The only variation in the construction of the Tuxedo Striped Leggings and the basic version is that you must stitch the stripe back into the center of each leg piece before following the instructions in this post for basic legging construction.
I’m kind of totally in love with these pants and wear them far more often than I probably should. They’re comfy, but still have an edge of style because of the tuxedo stripe detail. Now, go forth and sew your own!
Also, see that cute tee shirt with a little pop of sparkle? It’s my newest Briar Tee, and I’ll be sharing the full DIY tomorrow over on Megan Nielsen Design Diary, so make sure to check it out!

