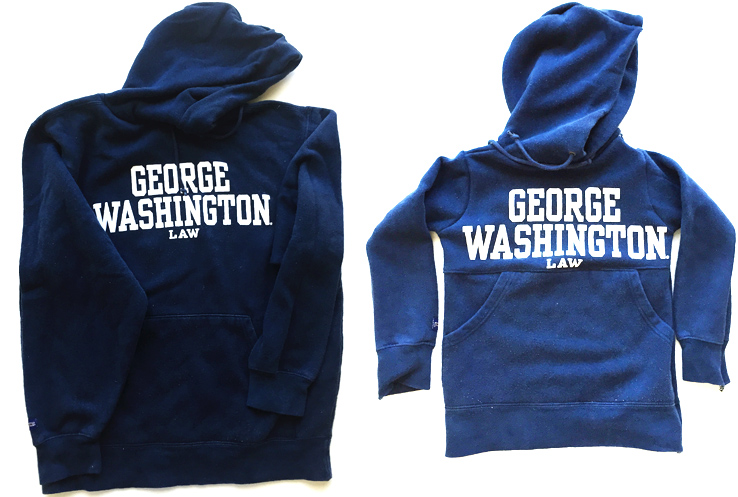
Yesterday I posted on Instagram (@livefreemiranda) about how my sewing project of the day was to shrink a size large men’s sweatshirt (specifically Dave’s college rugby hoodie) into a Milo-size version. The whole “Sweatshirt Shrinkfashion”, as I’m calling it, took less than an hour and turned out as a perfectly adorable mini version of the original. I promised a tutorial, which I figured I would illustrate like the last one, but I soon realized that I not only had enough time remaining during Plum’s nap to make another one and photograph steps, but also that I really NEEDED to make another one since Milo and Eliot are in that super fun stage where they really both want everything about their lives to be “fair” and “equal”, which I don’t always indulge, but since I had both time and another old college hoodie, thought I’d take advantage.
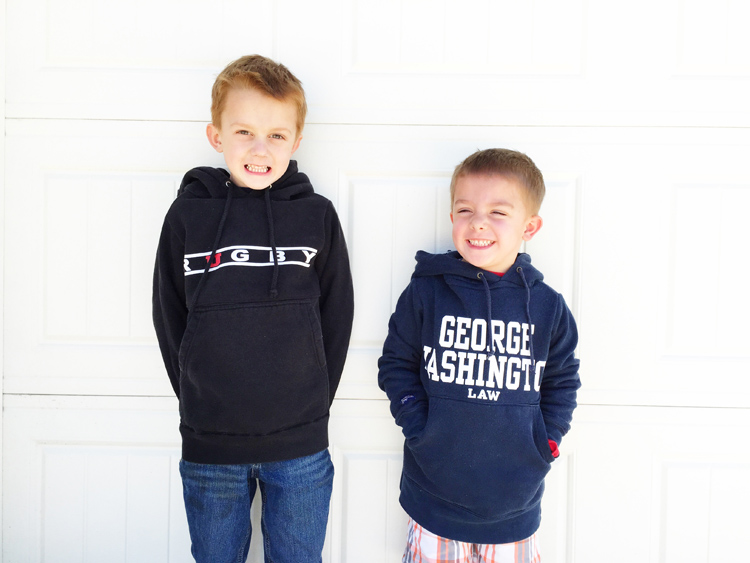
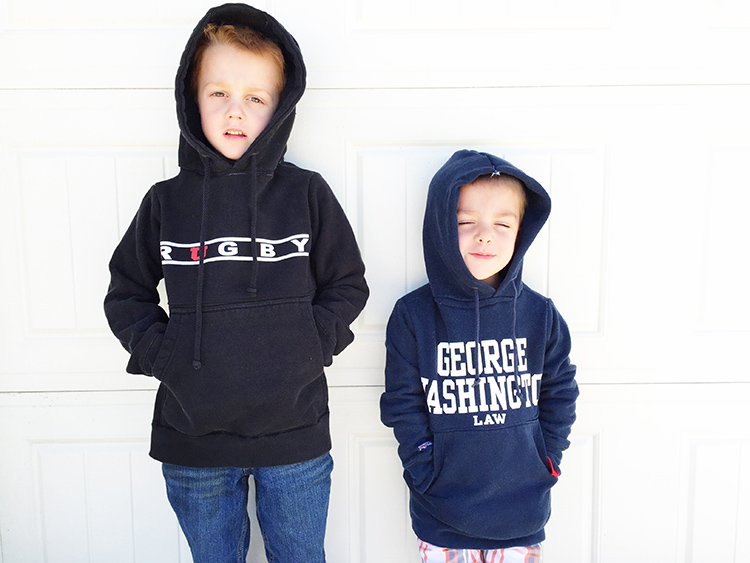 So there they are, my little boys looking like pre-teens in their shrunk-down college hoodies! I’ve been on a serious minimizing clothing and purging through our closet phase, and this project is a perfect way to preserve the sentimentality of these school shirts without feeling like we need to wear them ourselves. And these boys felt pretty cool wearing Dad’s school shirts.
 Read though for a step by step photographed tutorial of how to shrinkfasion your own hoodie!
Step 1: Cut the adult sized hoodie into pieces along the neck and seam lines, removing the hood and the sleeves. If you are trying to preserve a logo on the front, cut just below it (you actually only need to cut this line on the front side, but I toyed with the idea of putting the logos on the back instead, so I cut through both and ended up leaving them on the front.) The space just between the logo and the front pocket is your variable height space. The larger the size, the more of that space will stay. For Milo’s size 6 sweatshirt, I ended up cutting off about 2″. For Eliot’s size 4 sweatshirt, I cut about 4″.
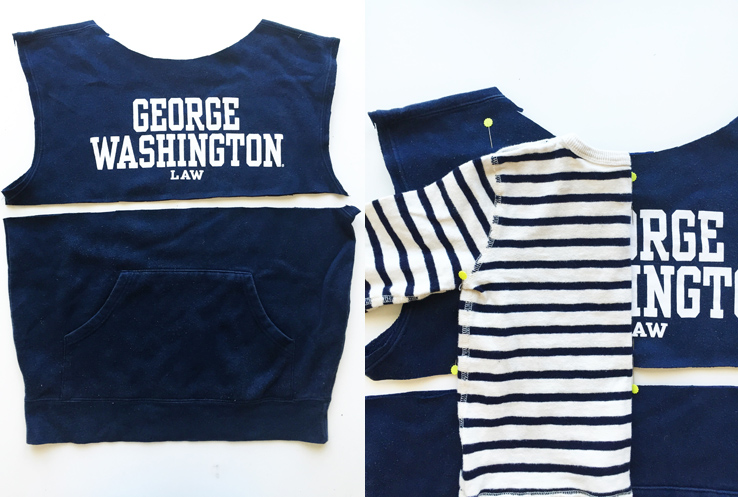
Step 2: Using an existing sweatshirt or sweater for size, pin along the neckline and center fold to mark where to cut. I put pins into all of the corners, then moved the shirt and cut about 1/4″ outside so I had a little seam allowance.
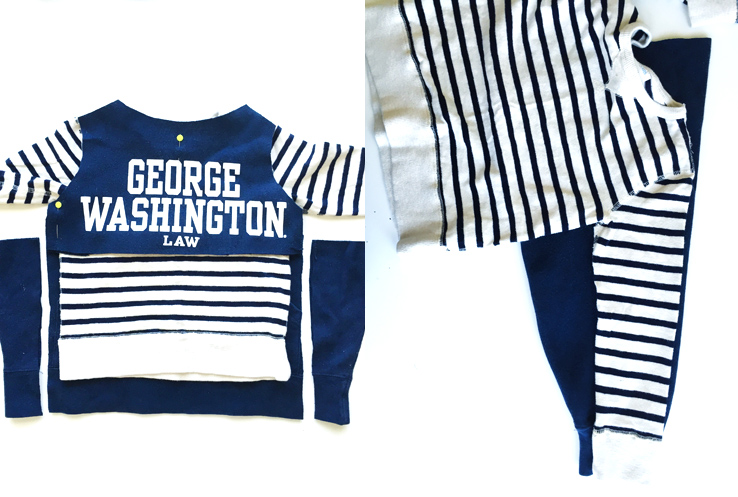
Step 3: To determine the needed length, lay the upper bodice piece on the top of the kids shirt, and the pocket piece beneath. Pin where they will need to meet for a good length (I wanted to keep the whole pocket, so Eliot’s sweatshirt is a about 1.5″ longer than his striped shirt.) Cut away the sides so the new bottom bodice matches the sides of the top bodice.
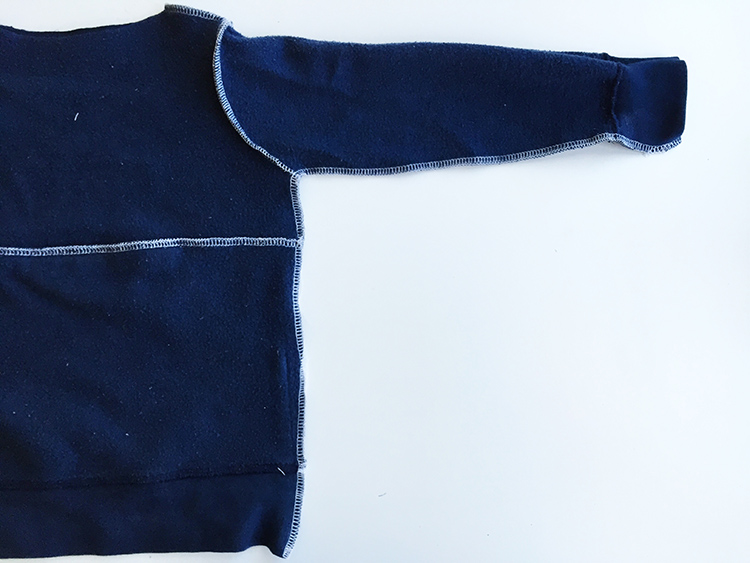
Step 4: Match up the cuffs of the sleeves on both shirts, and line up the top folds. Cut out sleeves, keeping the existing cuff.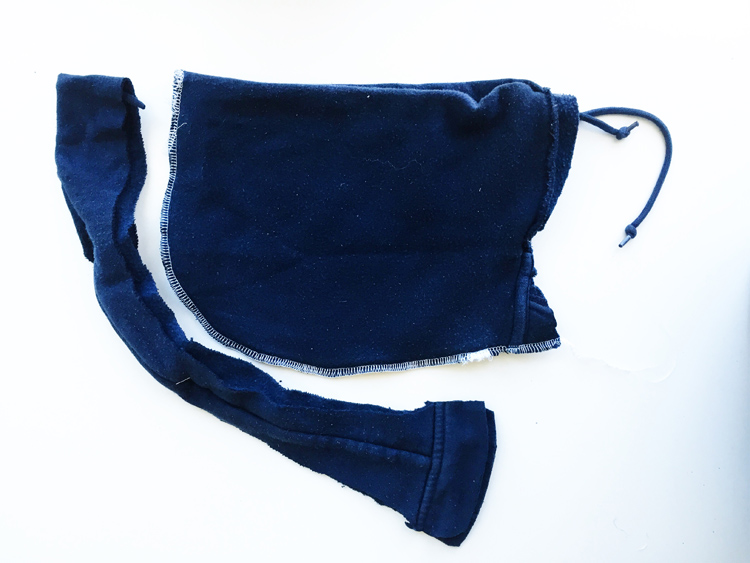
Step 5: Cut + stitch around the hood, taking about 1″ off the center. The neckline of the hood definitely needs to be reduced to fit into the new neck hole, but actually I found the hoods themselves may have been okay full size.
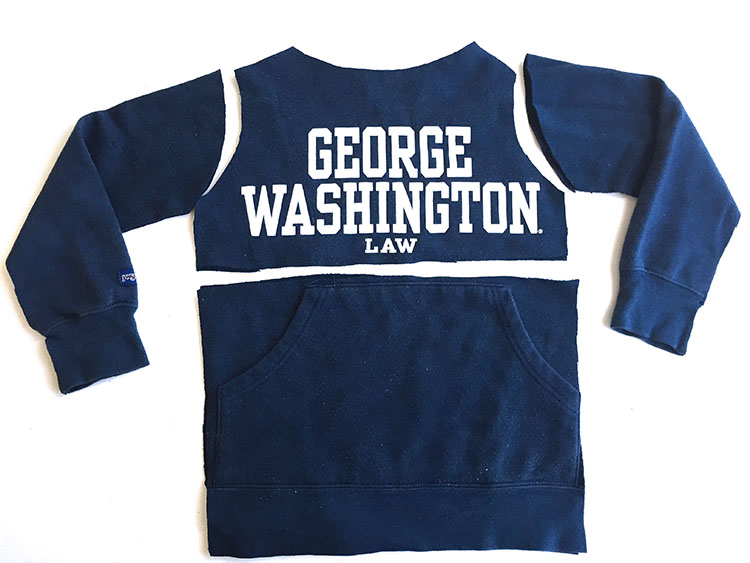 Now all of the pieces of the new, kid-sized hoodie should be cut out. It’s time to put them back together!
Step 6: Put right sides together along the center bodice seam and sew the pieces. I used a serger, but a sewing machine will work just great. Topstitch the seam allowance down to reduce bulk and make the seam look intentional. Repeat with the back bodice
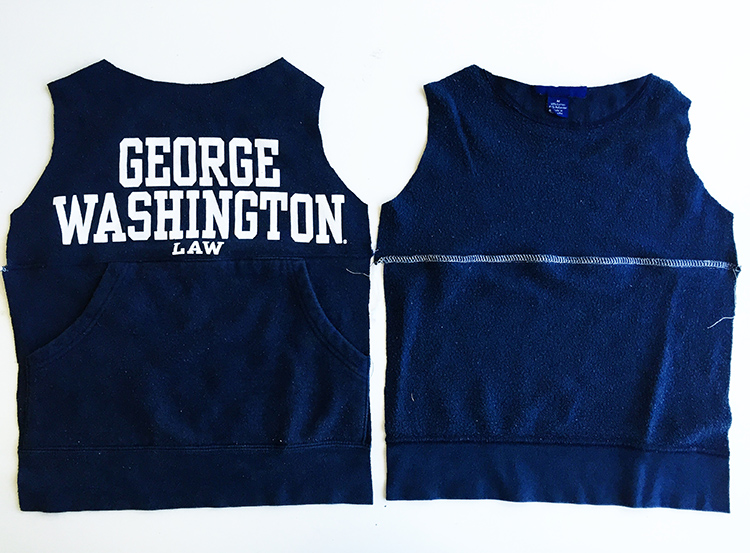
Step 7: With right sides together, sew the shoulder seams of the bodice. 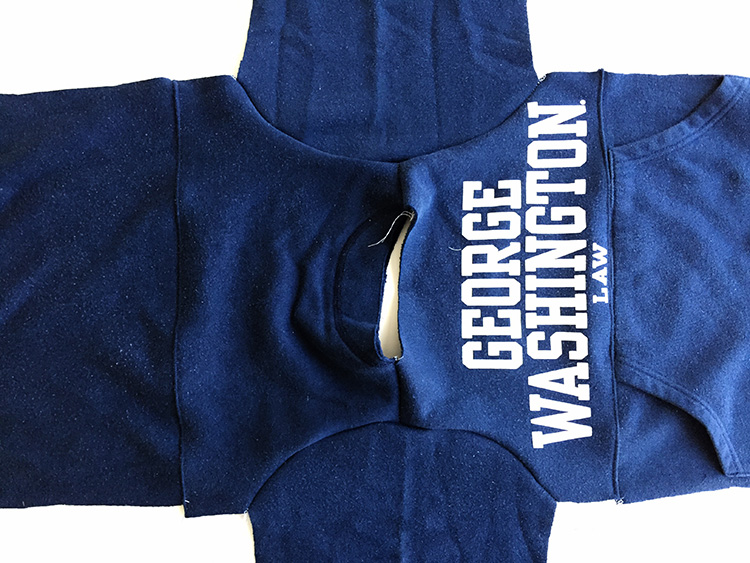 Step 8: Light the sleeves up along the arm syces, and sew the sleeves into place.
 Step 9: Using one long seam, sew up the side of the sweatshirt, beginning at the sleeve cuff and ending at the hem. Repeat on the other side.
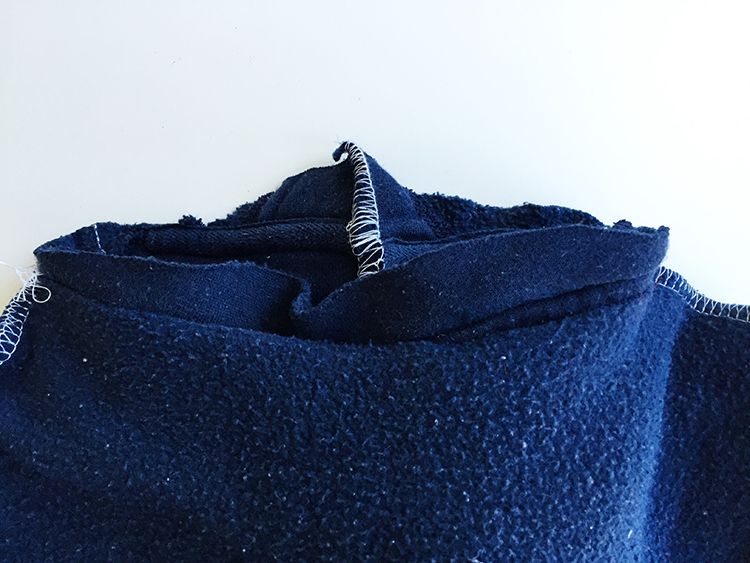 Step 10: Line the center front of the hood up with the center front of the neckline, and then align the rest of the hood. Sew in place with right sides of the hood inside the right sides of the sweatshirt.
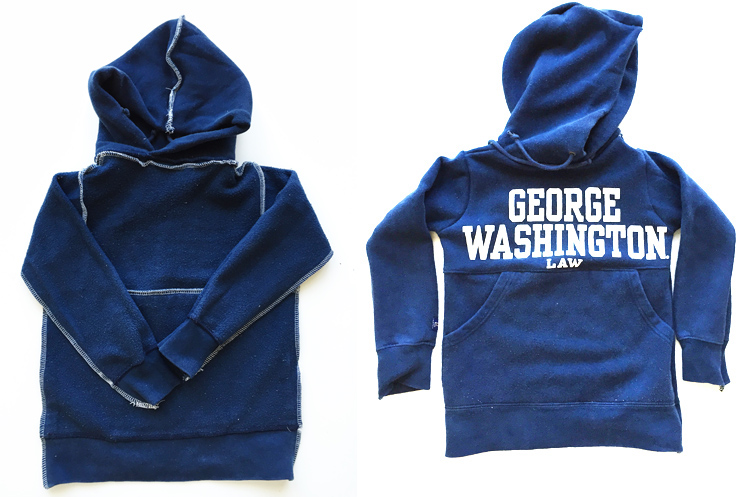 Baddabing Baddaboom, shrinkfasion finished! Turn that baby right side out and admire your handiwork! Then put it on the nearest kid and watch him/her turn into a mini teen before your eyes!

