I am so excited to finally be sharing a project that has been months in the works: The Button Up Refashion Swap. The idea to organize a refashion swap with a group of awesome bloggers bounced around in my head for a long time before I actually reached out to my friend Melissa and asked what she thought. She was all on board, and teamed up with me to invite 8 more amazing refashion and sewing bloggers to participate in this first (maybe of more?!) refashion swap. I’d love to introduce you to the participants:
Jennifer of Grainline Studio
Krista of Lazy Saturdays
Liz of Cotton & Curls
Megan of Megan Nielsen Designs
Melissa of I Still Love You
Miranda of One Little Minute (that’s me!)
Miriam of MadMim
Kate of See Kate Sew
Sunni of A Fashionable Stitch
Suzannah of Adventures in Dressmaking
The premise is simple: Each of these 10 awesome bloggers began with a basic button up shirt and refashioned it into something wonderful for her randomly assigned partner, creating a tutorial of the process. The only rule was to begin with a button up. Each participant was free to add or take away whatever she wanted to create a fun, new look. Today those tutorials are all published, showing off 10 new ways to refashion a simple button up! Make sure to check out what everyone came up with!
Now, let me show you the fun refashion that I created for the darling Kate of See Kate Sew:
Kate is adorable. She always looks put together and fresh. And she always (okay, almost always) wears dresses! Her blog is full of awesome refashions, sewing tutorials, and great ideas. She also has a little boy who she sews and refashions for, which is a wealth of ideas for me with my boys!
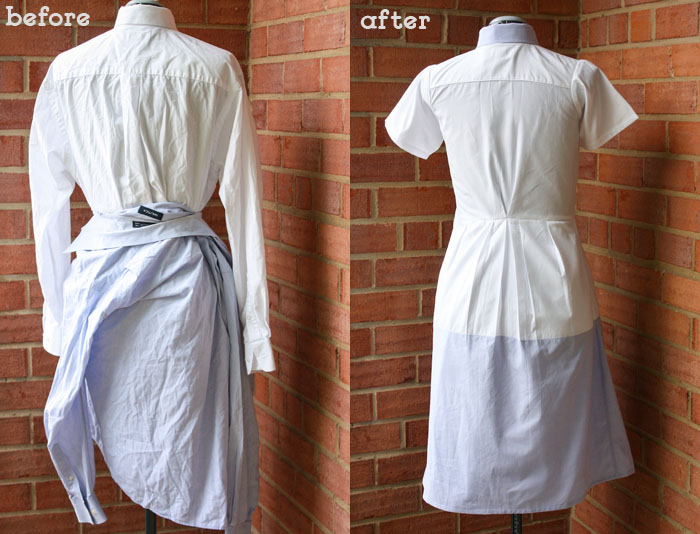
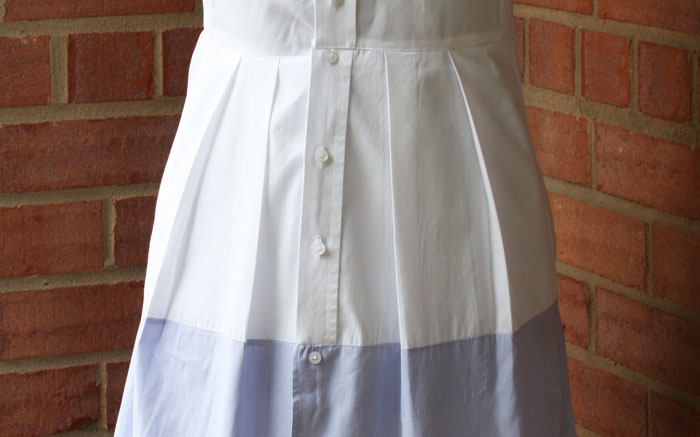
I knew that I wanted to make her something she would love and want to wear so I told her my idea to create a color blocked dress with a peter pan collar. She gave me the thumbs-up, and mentioned she also loves pleats… So, pleats she got! I used two mens XL button up shirts for this refashion, one chambray and one plain white. Using the button plackets of both shirts allowed for a simple transition from white to blue. And I love the blue collar. It’s super cute, right?!
After finishing our refashions, we sent them off, criss-crossing the country (with fingers crossed for a good fit, as we all worked from measurements.) Next week, you will get a chance to see each of the refashions modeled by it’s new owner as we do a little blog hop of the finished products. Here’s the schedule for the blog hop:
“Maternity” Monday, May 21st: Lizzie of Cotton & Curls, Krista of Lazy Saturdays (these two are both expecting!!)
Tuesday, May 22nd: Sunni of A Fashionable Stitch, Kate of See Kate Sew
Wednesday, May 23rd: Suzannah of Adventures in Dressmaking, Miranda of One Little Minute
Thursday, May 24th: Miriam of MadMim, Melissa of I Still Love You
Friday, May 25th: Megan of Megan Nielsen Design, Jennifer of Grainline Studio
I can’t wait to see how Kate looks in her new color blocked dress!
Want to make one of your own? I broke the tutorial for this dress into 6 sections, to make it easier to follow along.
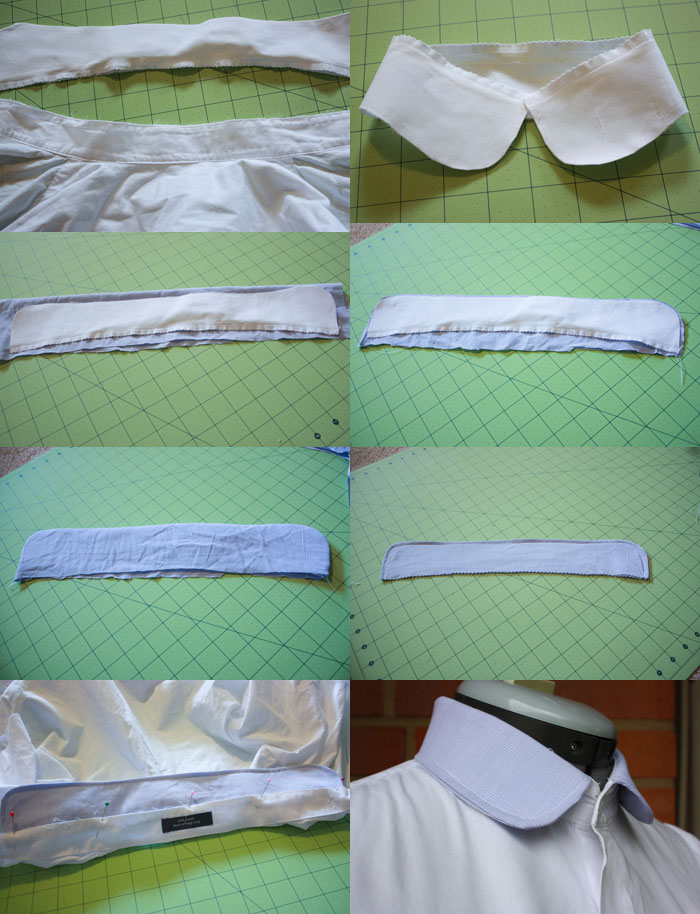
First up, the collar:
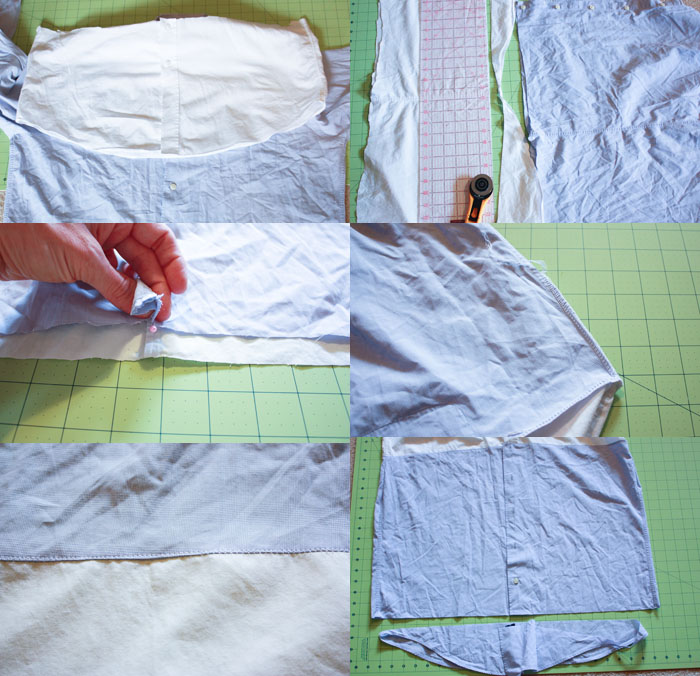
1. Unpick the collar from the shirt, leaving the collar band intact 2. Round off the points of the collar, creating the peter pan shape 3. Cut the arms off of the blue shirt, fold a piece in half, and lay the rounded collar leaf on top 4. Stitch around the rounded edge of the collar leaf, as close to the edge as possible, then trim the excess fabric off to 1/8″ or less 5. Flip the second layer of blue fabric over on top of the collar, covering it 6. Top stitch around the rounded edge of the collar, and trim the base with pinking shears 7. Insert the base of the newly re-covered collar back into the collar base, and pin in place 8. Stitch along the edge of the collar base, securing the new, blue, peter pan collar into place. (This could be a cool refashion by itself!!)
Now, for the bodice I used my dress form. It’s a nice tool, but you can totally complete a similar refashion without one. You will need a helper or a tailors pen to help you mark the fit on yourself. Here we go!
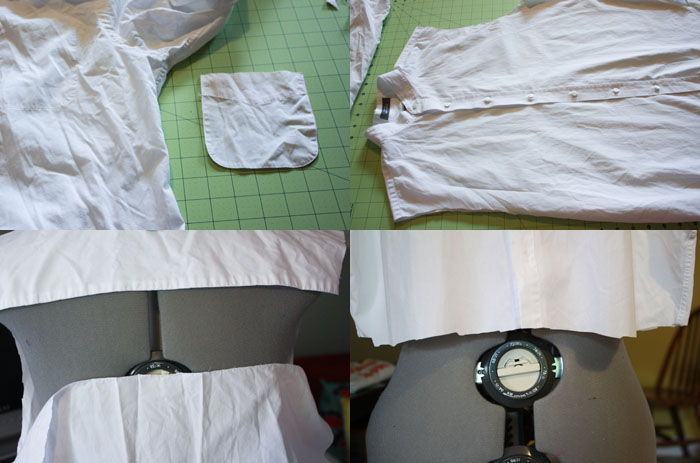
The bodice, part one:
1. Carefully unpick the pocket and iron to restore thread holes 2. Cut off both sleeves at the seams, and slice up both side seams (leave shoulder seams intact) 3. Unpick the base of the back from the yolk, and then re-attach after flattening the center pleat 4. Put the shirt on the dress form and cut off the shirt at the natural waist
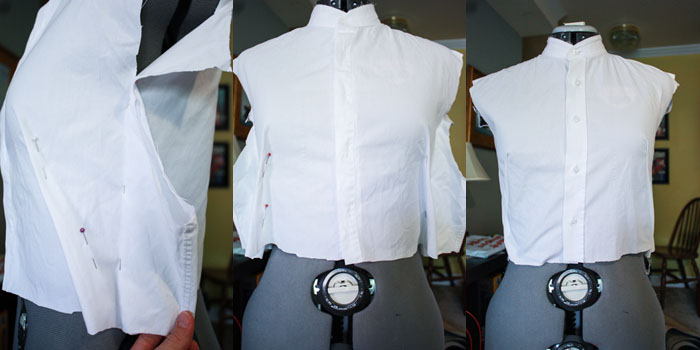
The bodice, part two:
1. Flip the shirt inside-out and pin to a good fit along the side seams 2. Also, pin along a diagonal line from the bust to the side seam to create a cool dart for the bust 3. Stitch along the pin lines, turn right side out and check the fit. Adjust as needed.
The skirt, part one:
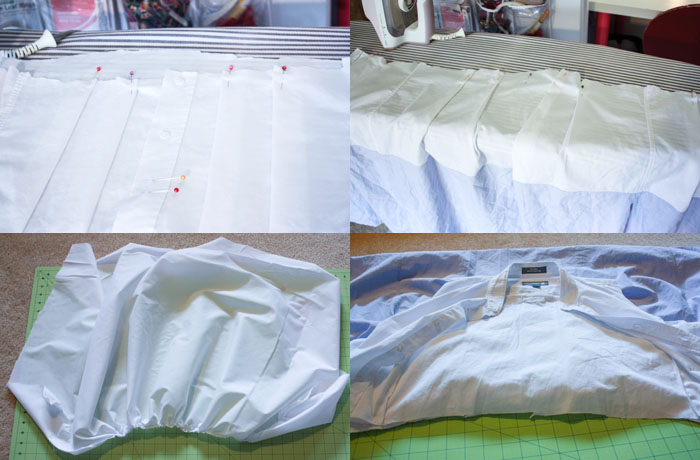
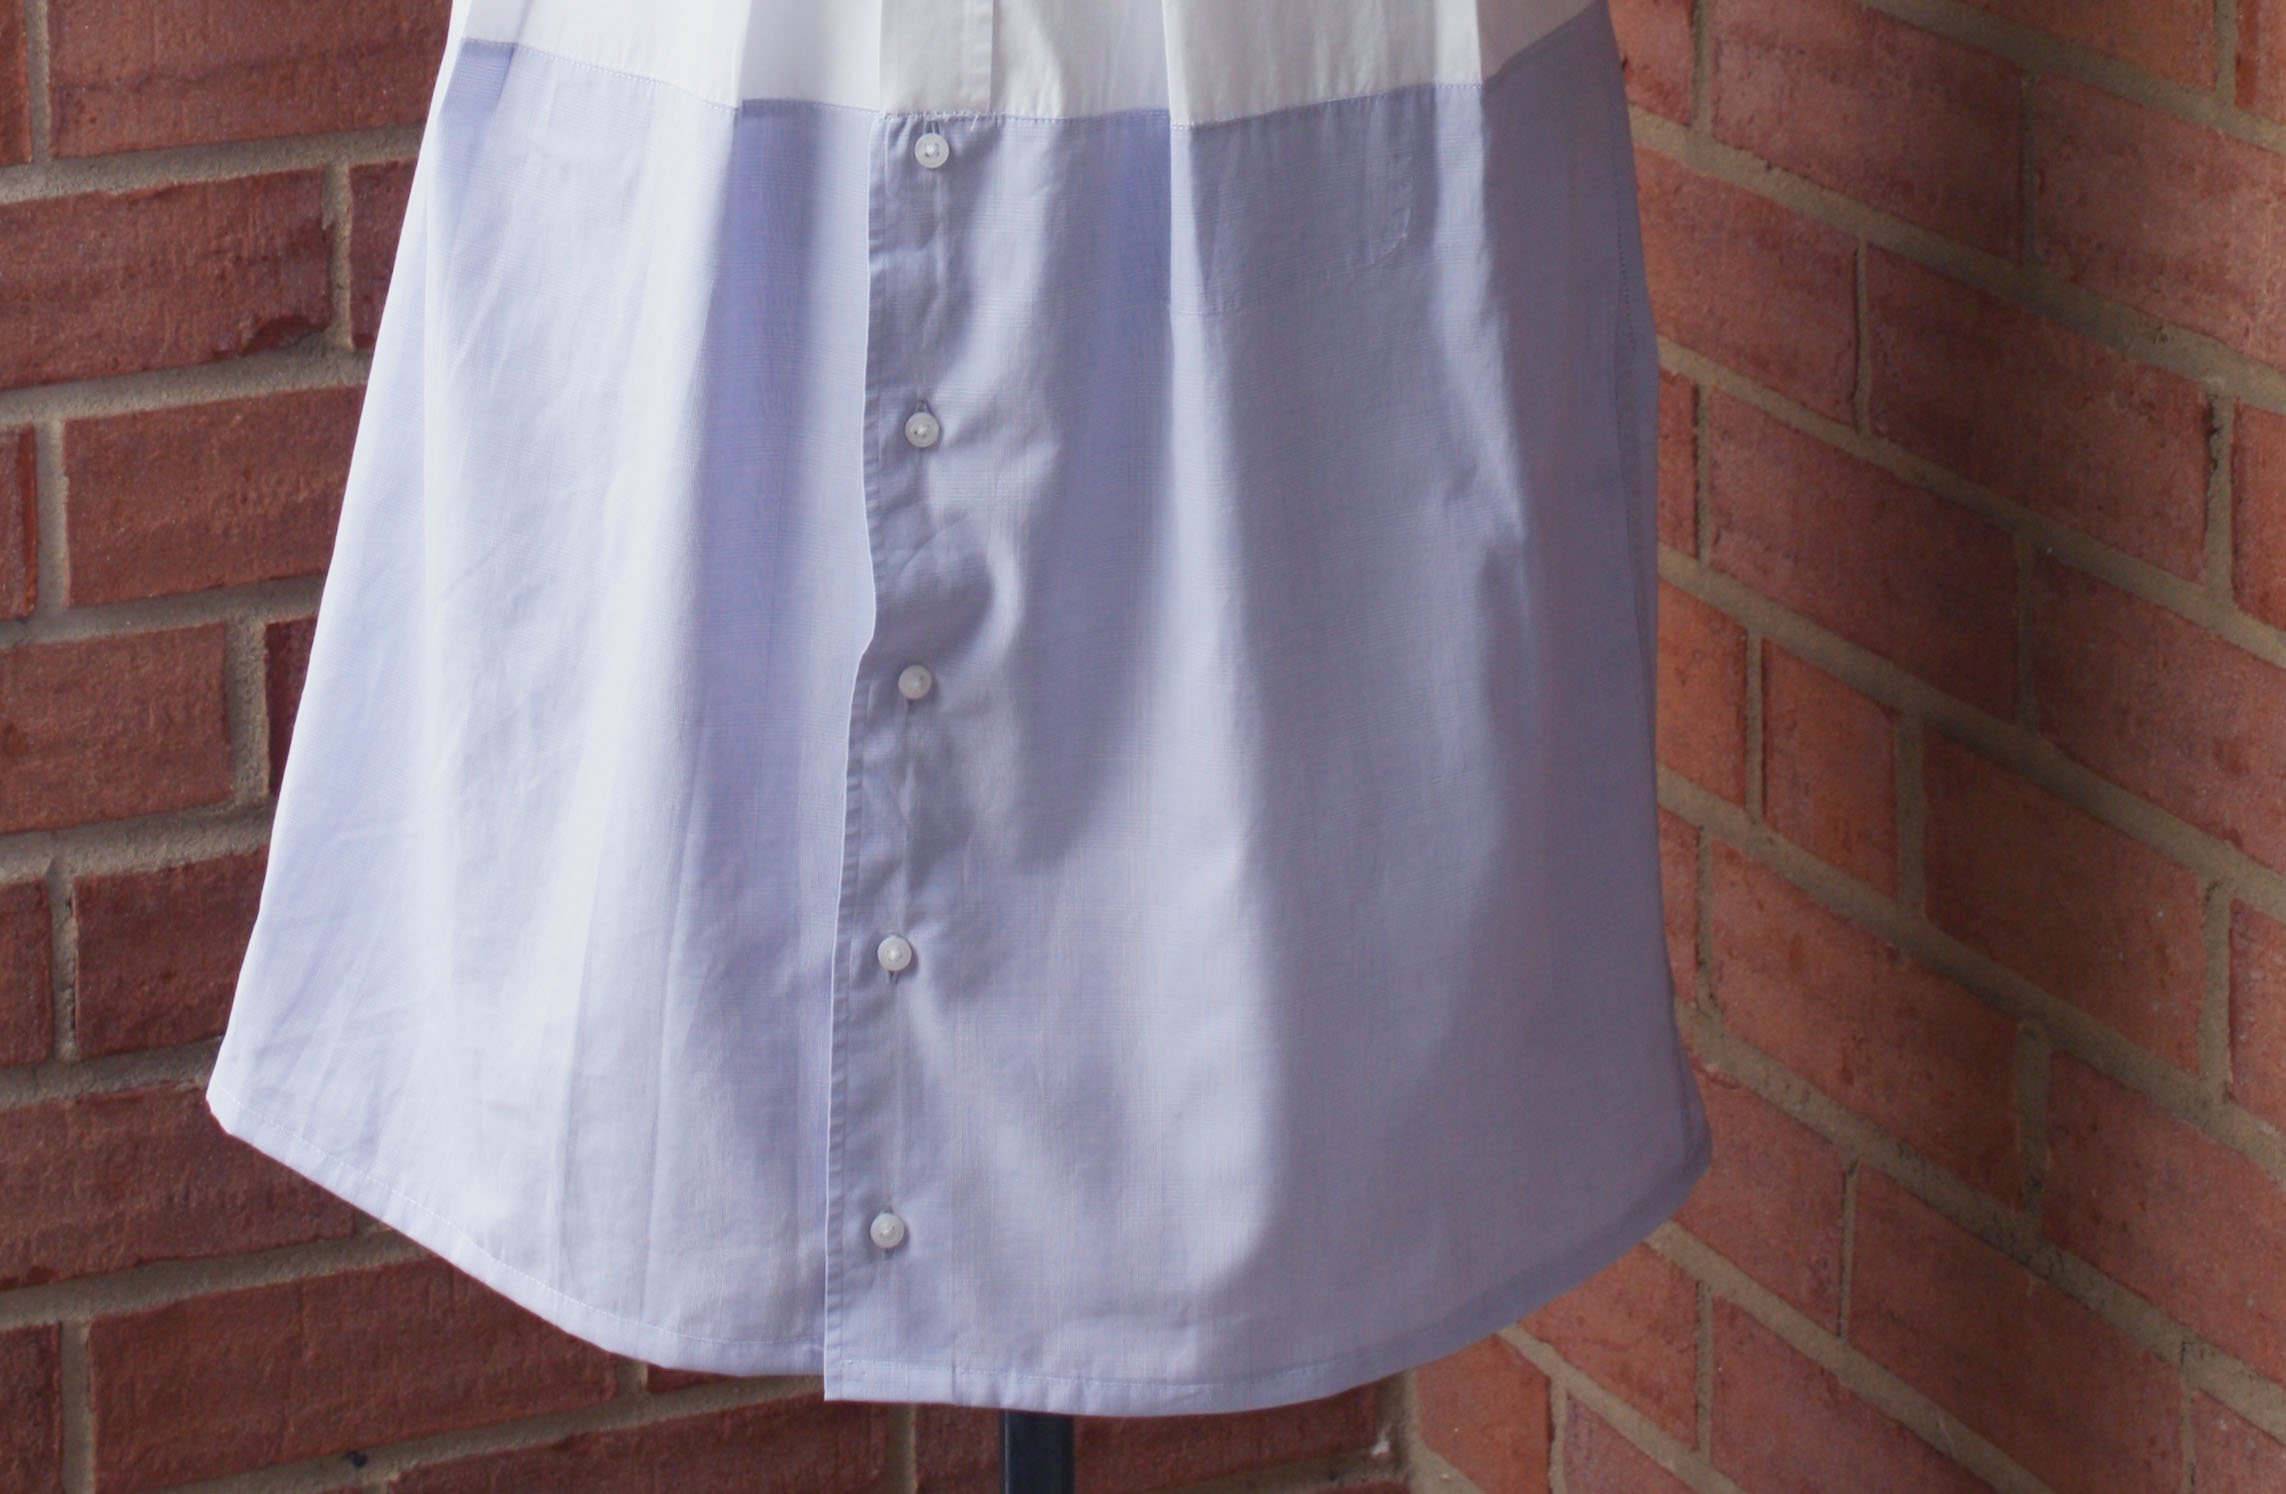
1. Cut your blue shirt straight across at the underarms and measure both white and blue pieces together to figure out the correct desired skirt length 2. Cut the bottom of the white shirt and the top of the blue shirt to even the edges. Unbutton both shirts and match the button placket up with right sides together 3. Pin the shirt at each end, and at the side seams, creating darts to narrow the width of one or the other shirt, if the sizes are slightly different (in this refashion, I eased a little out of the top of the blue to meet the side seams of the white) 4. Stitch around the edge, joining the two skirt pieces 5. Flip right sides up, press with an iron, and topstitch the seam 6. Even the hemline of the blue shirt (if you want) and hem to desired length.
The skirt, part two:
1. Using your natural waist measurement (divided in half for front and back) as a guide, plot out and pin your pleats. I had enough fabric to create 1″ pleats every 2″ from the button placket. (You can kinda just wing this, as long as you end up with the correct measurement from side seam to side seam) 2. Plot and pin pleats in the back. Sew a basting stitch along the top of the whole skirt to stay the pleats 3. If your white fabric is at all sheer, add a simple skirt lining by gathering muslin (finishing all of the edges with a serger or simple hem) and pinning it to the waist of the pleated skirt, with the open end in front, at the buttons 4. Unbutton both the bodice and the skirt and match up the side seams, and both ends of the button placket with right sides together. Stitch together. (After trying this on the dress form, I went back and also added a small pleat at the base of the bodice in the center back to take out a bit of bagginess. You can do the same if you have a similar problem!)
*Disclaimer: I have no idea how one is really supposed to use a French Curve…I just make it up as I go, and have seemed to do okay so far. So, here goes! Don’t make fun.
The sleeves:
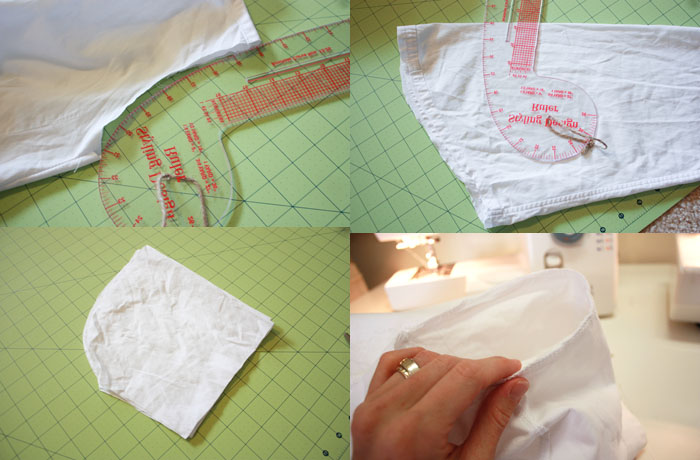
1. Measure the rounded edge of the armhole with a French Curve (or you could lay some paper underneath, trace the hole, and use that as a pattern!) 2. Lay the curve onto the folded sleeve that you cut from the white shirt and trace the round curve 3. Add about a half inch to the bottom edge to help ease the sleeve seam, and cut the sleeves to the desired length 4. With right sides together, sew up the side seam of the sleeve, making a tube. Stitch with a basting stitch along the curve of the sleeve, and pull the bobbin thread to ease the sleeve, with right sides together, into the arm hole. Match up side seams and stitch into place.
Whew! We’re done! Let’s admire our handiwork, shall we?
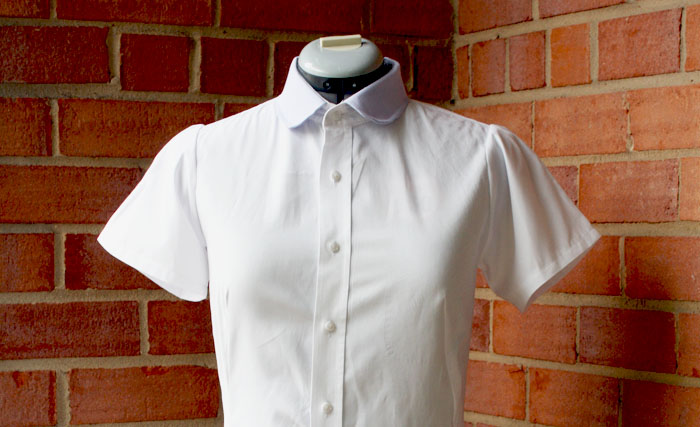
Nicely tailored bodice, crisp, blue peter pan collar, cool short sleeves…
…fitted natural waist, fresh pleats, color blocked skirt…
…continuing buttons, and modest hemline. It turned out great, and is hopefully something Kate will enjoy! I can’t wait to see it on her next week on Tuesday of the blog hop.


