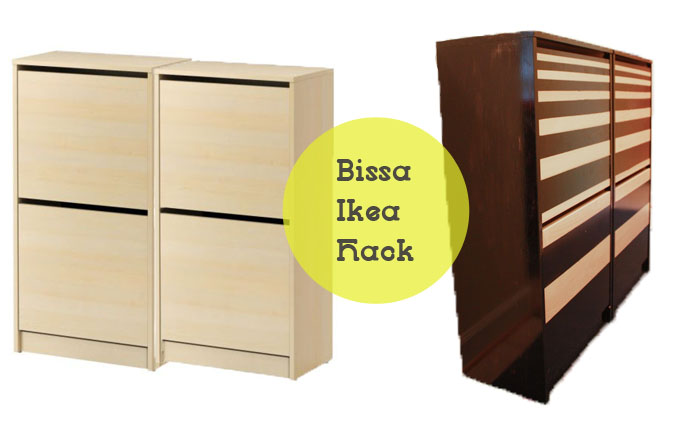
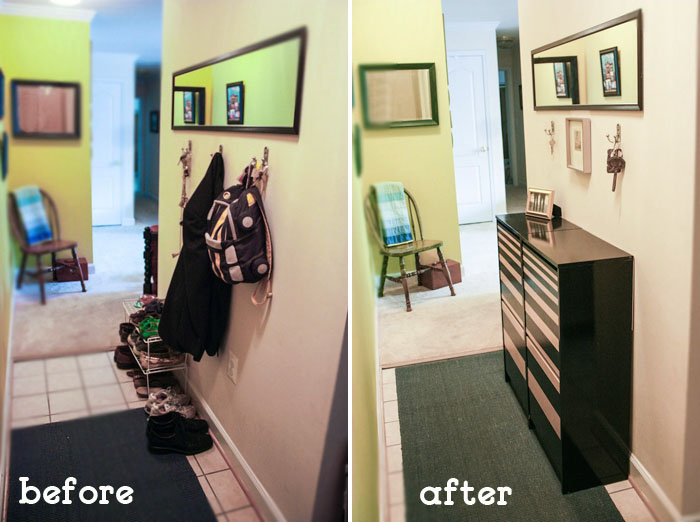
Isn’t Ikea the best? Everything in our house that is bought new (instead of on craigslist or thrifted) comes from Ikea. You just can’t beat the price for the design. I had been thinking up a solution for our entry hallway shoe-dump when my friend Ivy pinned this Ikea shoe cabinet (she’s an amazing pinner, btw). I followed her link and browsed through the selection at Ikea. Though the more expensive cabinets are cute, but I loved the price and the potential of the Bissa.
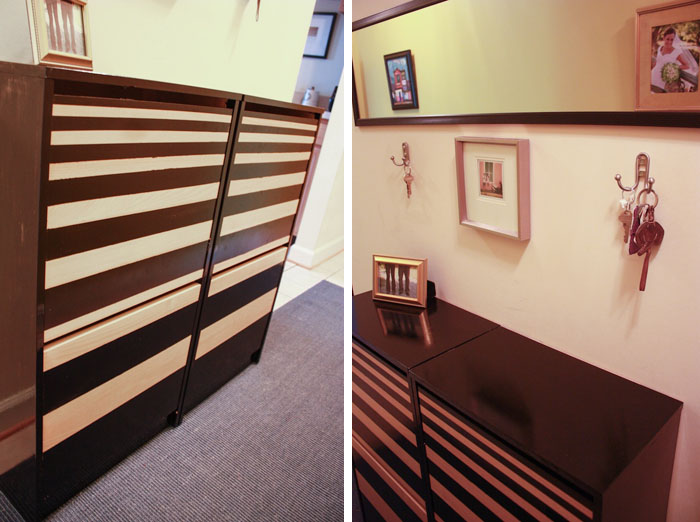
After finishing my huge bridesmaid order, I celebrated with a trip to Ikea and bought two cabinets, in an effort to contain our 10+ pairs of shoes in the hallway. I also thought they would look intentional as a pair rather than one lonely cabinet. I knew I wanted to upcycle them with some paint or stain. I originally intended to follow a similar vein to this awesome ikea hack (via stephmodo), and I even ordered four brass drawer pulls! As I stood looking at stains in Home Depot, though, I thought up this black and natural stripe, and changed plans. I’m happy with the result, and feel like it really fits me and my home well!
There isn’t a whole lot of info out there about staining a laminate, so I just gave it a try. I thought a stain would look better than my usual spray-paint, and I liked the idea of a little of the woodgrain showing through. I knew I needed to use an oil-based stain to stick to the laminate coating, and unfortunately that put the color options at several wood browns and black. Well, as is turns out, with black stain, not much grain shows through anyway, so I probably could have painted with regular oil-based paint for the same look, but it was a good experience to learn something new! The stain is especially shiny and tough, and I think it looks really nice. Here’s a look at the process:
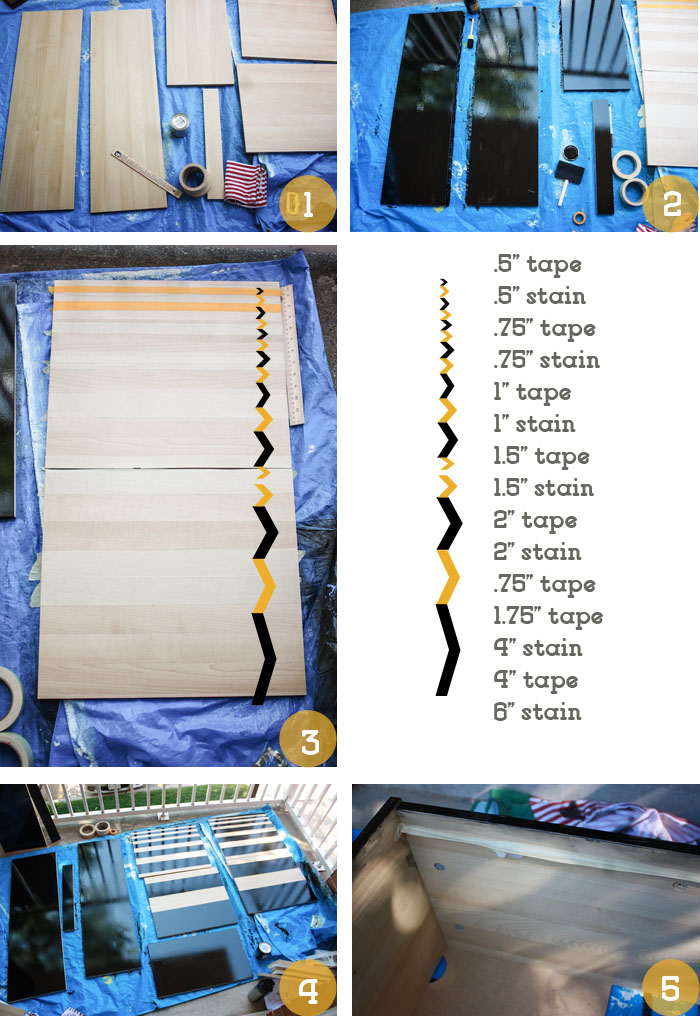
1. I stained all of the pieces individually before putting them together, so first I laid them all out flat on the patio
2. Starting with the sides and tops, I painted a thick coat of Minwax Polyshade in Classic Black. Because of the laminate finish on the wood, working with the stain was a little like using a dry erase marker on a board. If I didn’t have enough stain down and painted a stroke over a different stroke, it would brush the stain away! I learned the easiest method was to pour a puddle of stain on the wood, then use the foam brush to spread it evenly without doing to much extra stroking.
3. To make the stripes on the cabinets, I first taped off the various widths. I used combinations of two-inch and one-inch masking tape, and then used washi tape for the thinest lines. I just marked with a pencil the widths, then laid the tape as evenly as I could.
4. Once all of the stain was dry, I peeled the tape off to reveal my variable width stripes!
5. The stain needs to cure for 24 hours, so I waited until the next day to begin putting the pieces together. I realized as I was putting one of the cabinet doors on that a tiny bit of the inside of the cabinet was going to be visible. So, I decided to paint inside about an inch. I taped off the cabinet, folding the bottom half of the tape to itself to form a little shelf to catch the drips (so I didn’t have to take the whole thing apart again!) This worked perfectly, and another 24 hours later I removed the tape and finished putting the doors on!
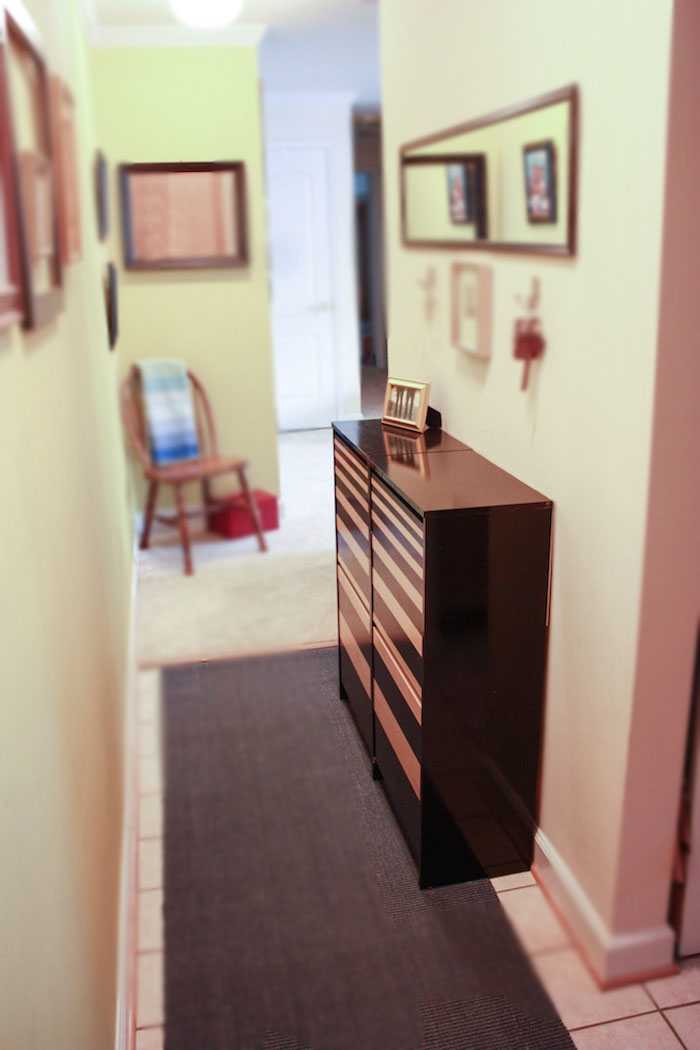
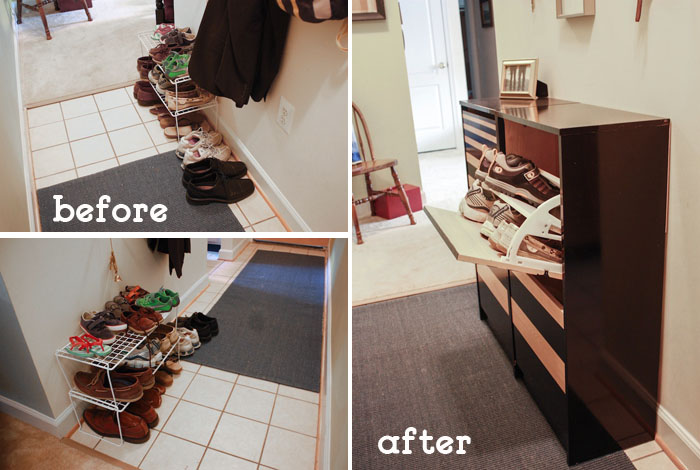
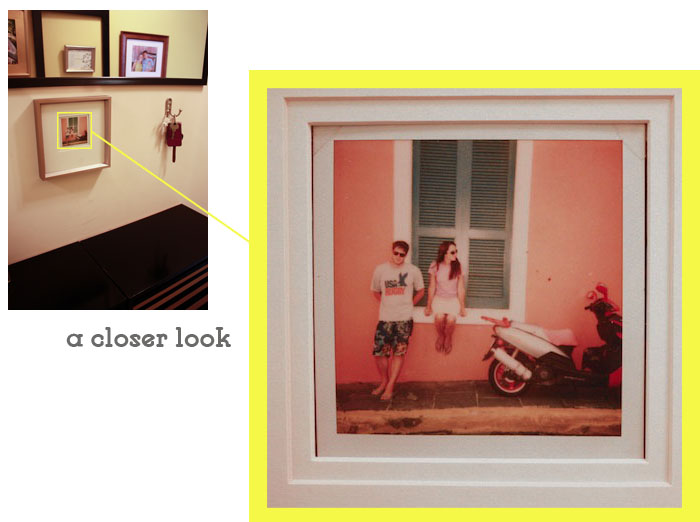
What a huge improvement! Our front door opens straight down this hallway, and it has always looked a little hodge-podge. The hooks were an okay idea, but kept getting piled with random hanging stuff, rather than the occasional jacket. And the shoes were just terrible. With the new Bissa Cabinets the hallway looks more like an intentional entry way! We can still remove our shoes, but they are hid away nicely behind closed doors. I love the fun personality of the stripe. It combines well with our California Dreaming paint color (hence the yellowy photos) for a great welcome into our eclectic abode. I kept some of the hooks for keys, but moved the hanging jackets back into closets. Then I added my favorite old polaroid of Dave, me, and the scooter we owned when we lived in Puerto Rico.
We had been married for only 6 months and we spent a few months working in a shop in Old San Juan. It was an amazing summer, and we loved the exploring the island aback this old scooter that we named Moses. The day we bought the scooter, we packed up our tent and a backpack of clothes, and rode it all the way from San Juan to Fajardo, then took it on the 4 am ferry with us to Culebra Island. That’s about a 4 hour road trip. that we took. going 40 mph. on a scooter. This photo reminds me of our young, adventurous love. I’m happy it’s finally found a place where I can see it every day!
Opening my front door has become so much more fun now that my striped Bissa stare back at me! I love the chance to take something cool, but ordinary, and put it over the top with a little work and creativity.

