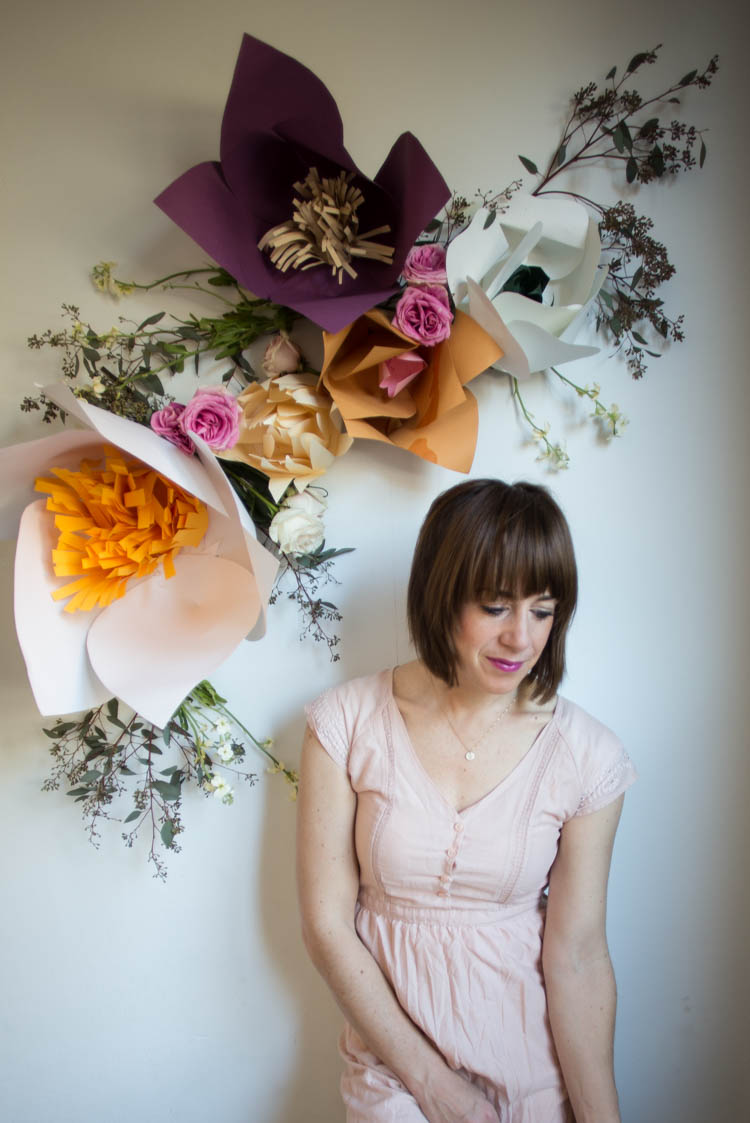
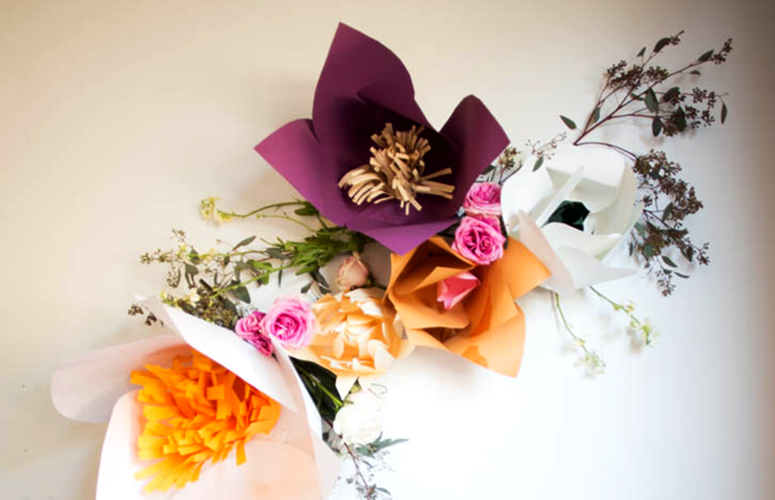
This month in my Friday DIY series I’ll be working with paper for each of the projects. I’m excited to explore using it in some different ways and three dimensional projects, like these huge paper flowers that I’ve been making for a couple years. The full tutorial for the oversized paper flowers is included in this post, along with some ways to modify the base steps to create endless types of blooms.
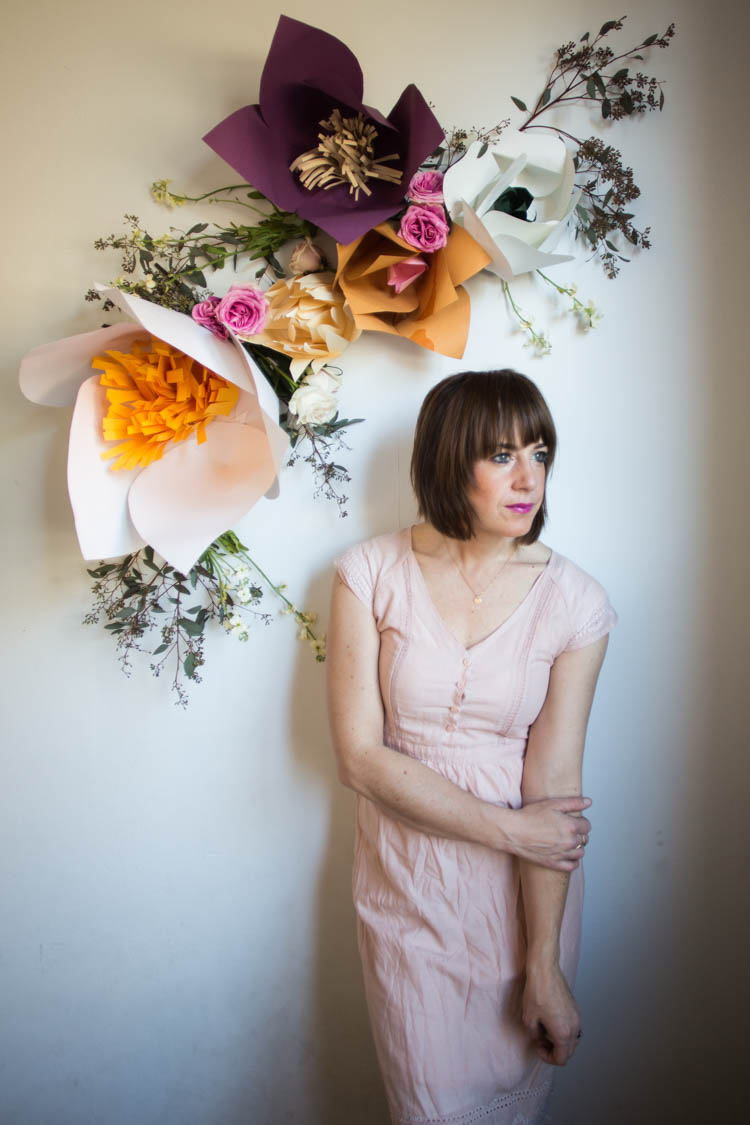
I love the way a few simple steps turns a flat, two dimensional medium that is so common like paper, into something with depth and beauty. As soon as I add fresh greenery and a few scattered fresh flowers, I feel like the installations take on a life of their own and create such an amazing ambiance. They are really spectacular and somewhat unexpected.
For the fresh greenery, you don’t have to look far! I’ve used clippings from my front yard, and wild flowers in cases when I haven’t had time or budget to grab florals from the store. The little bit of live greenery really makes all the difference.
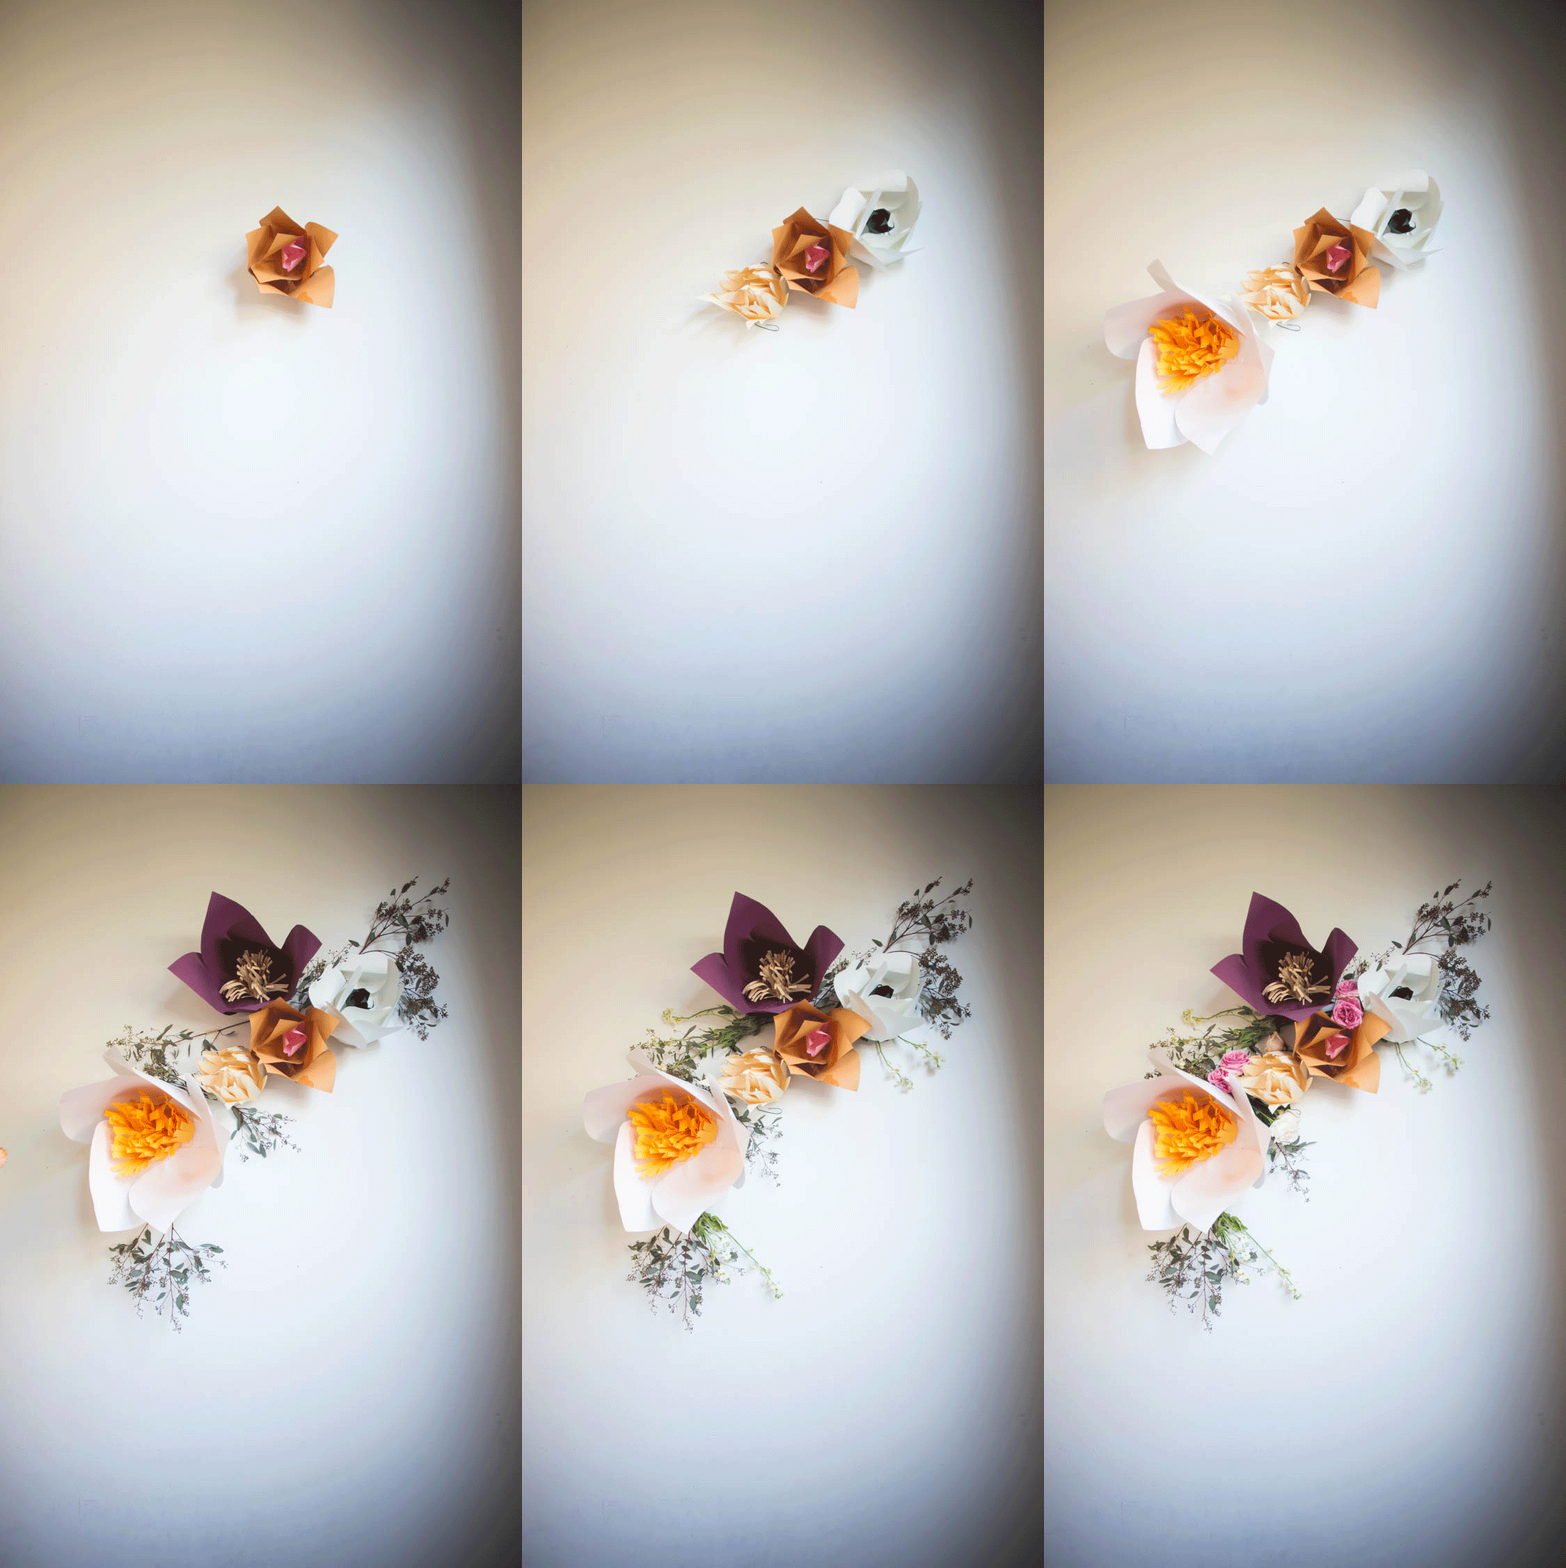
Ready to make some huge paper flowers to wow your friends and add some beauty to your next event?
Here’s what you need:
– pasteboard or card board, cut into 6-8″ circles
– colored cardstock, about 7 pieces per flower (8″ x 11″ for medium flowers or 12″ x 12″ for huge blooms)
– scissors
– a glue gun
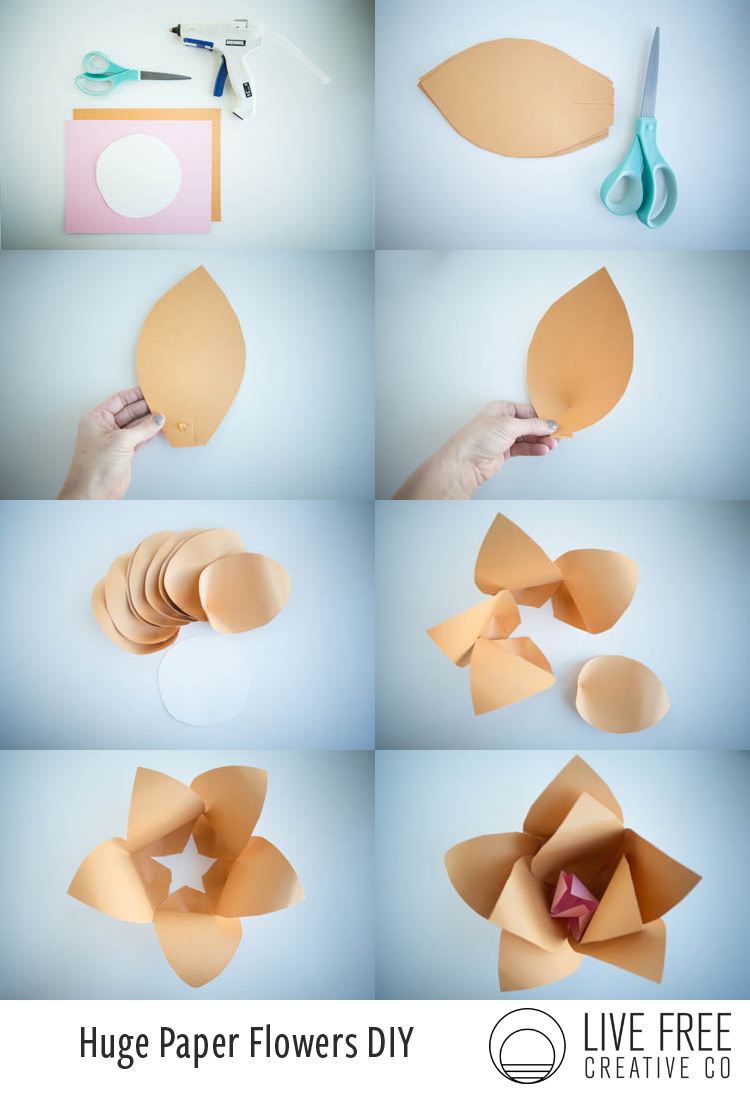
- Gather your supplies. Plug in the glue gun so it’s ready when needed.
- Cut 8 pieces of colored cardstock into the same basic petal shape. They don’t have to be perfect.
- Cut a slit in the base of each petal about 2″ long.
- Put a dot of hot glue onto one side of the slit, fold the other side on top of it, creating a three dimensional cone shape from the petal, and hold until the glue is dry.
- Continue step 4 with the remaining petals.
- Stack the petals into each other at the base, and gently roll the tips backward until they hold a slight curl. This curve adds to the organic feel of the petals.
- Grab a pre-cut poster board base and align the first 5 petals so that they fit around the edge. If you need to, set the petals inside from the edge so they fit edge to edge, because you can trim the base later.
- Glue each petal in place to form the outer edge.
- At this point, you can add a center with shredded paper, tissue paper, or more petals. Be creative! For this example, I add more petals before the center.
- Repeating the above steps, add the remaining three petals to the base, creating a second layer of petals.
- Cut three small petal shapes, repeat steps 2-4 to create dimensional petals, then glue them to the very center, covering the remaining white board.
- Trim the base until not visible if needed.
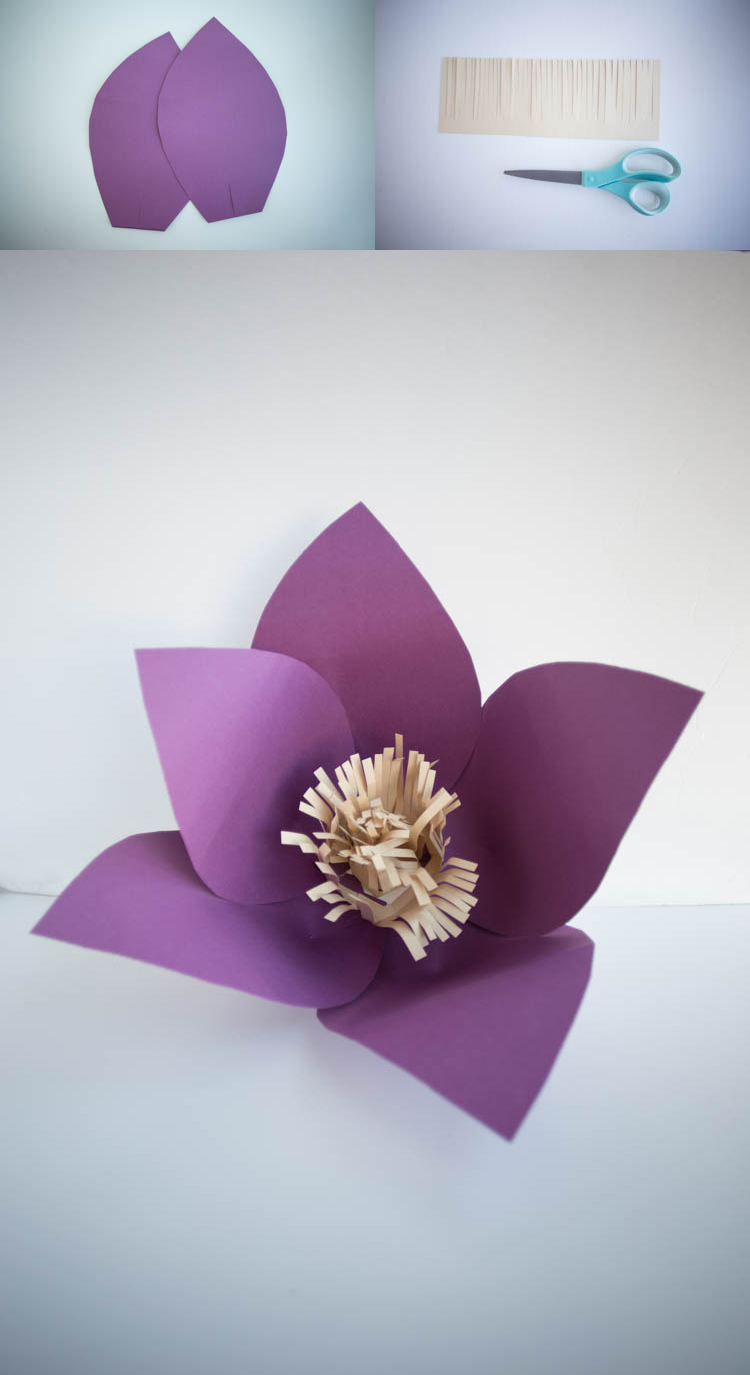
The core steps of the Huge Paper Flower DIY are cutting a petal shape, adding the slit for dimension, and then glueing the petals in a circle to the poster board base. The colors, shapes, quantity, sizes and center variations of each flower depend on you! Choose long, straight petals and make them stand straight up for a clustered flower. You’ll use more petals that way. Use a border of three huge petals and fill the whole center with fringed paper. Get creative and you’ll realized that with the basic steps of creating dimensional petals and glueing them to the base, you can’t go too wrong with what paper flowers you create.
- Follow all the above steps 1-8
- Cut a piece of paper in half and cut fringe about 1/4″ wide and about 3-4″ long.
- Repeat on the other half of the paper.
- Roll the two fringed papers into a circle about the size of the white board showing in the flower center.
- Cut a couple small 1/2″ slits in the bottom of the rolled paper that you can fold outward to create some flat legs for glueing the center to the poster board base.
- Hot glue the rolled fringe to the center of the flower.
- Using your fingers, gently crunch and bend the fringed edges of the paper to create some kinks and folds. This helps create a more natural, organic look.
Some other paper DIY’s you might like are:
These awesome Star Wars Origami Valentine’s.
I still love this Paper Reindeer Ornament and it would also work well as a gift topper or min decor.
These birthday ideas: Origami Money Cupcake and Origami Money Shirt

