• ABOUT
  • PODCAST
  • BLOG
    • MINIMALISM
    • DIY
    • SEW
    • DECORATE
    • EAT
    • TRAVEL
  • BOOK
  • CONTACT
  • ABOUT
  • PODCAST
  • BLOG
    • MINIMALISM
    • DIY
    • SEW
    • DECORATE
    • EAT
    • TRAVEL
  • BOOK
  • CONTACT
How to Make DIY Floating Shelves
July 5, 2018

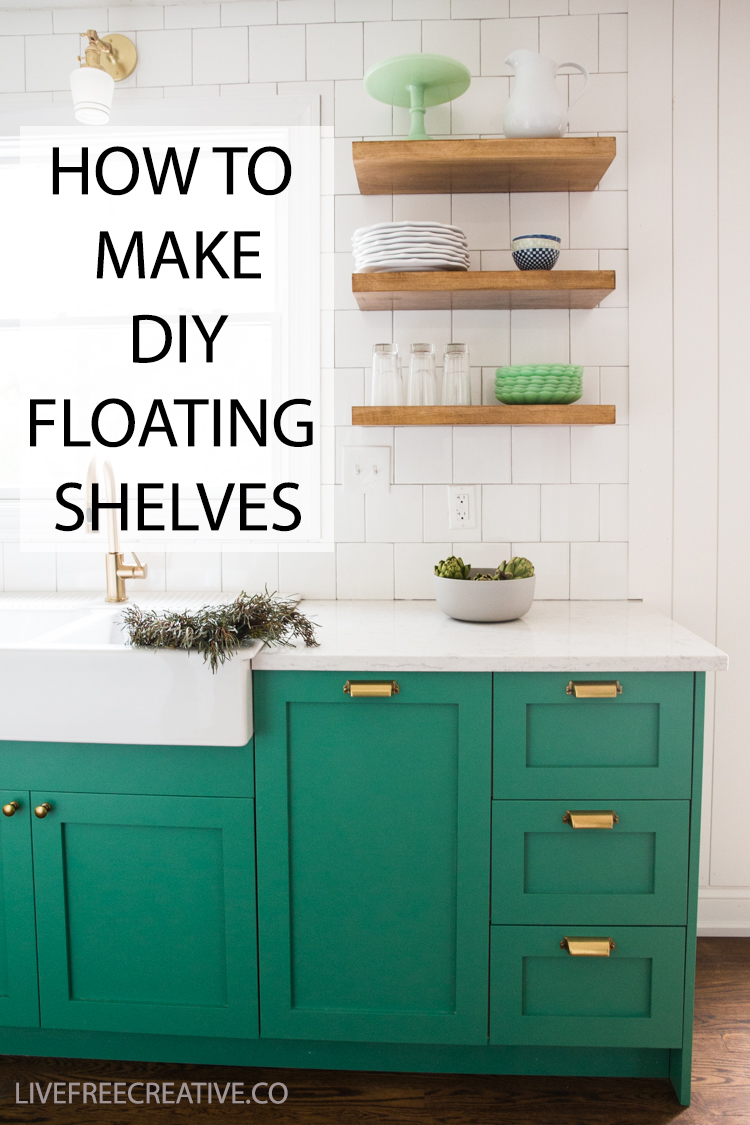
When I designed our kitchen remodel, I knew right away I wanted beautiful, wooden floating shelves. Not shelves with brackets, but true floating shelves coming straight out from the tiled backsplash wall. It was tricky to find exactly what I was looking for in the stain and length that I wanted, so I did what any self-respecting DIY-er would do and made them myself.

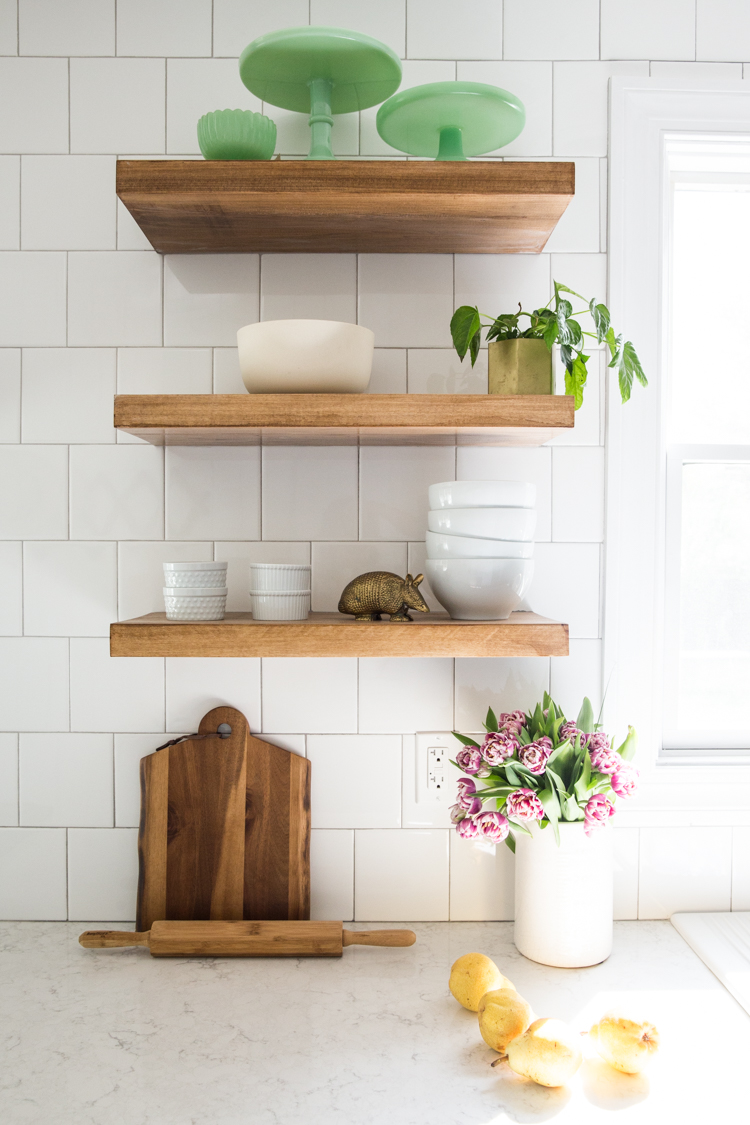
I have had a lot of interest and requests for this DIY, and I am excited to share. I also want to begin by confessing that this is not a beginner project, and may utilizing more skills, and tools, than the average crafter may have. I employed the help of one of my carpenters for his table saw (in Texas I would have borrowed from a friend), and there are definitely other ways to make this happen. But, if after reading through you decide a DIY isn’t your best option, these reclaimed pine shelves are lovely and probably the closest to what I wanted.

Why Choose Open Shelving?

Our kitchen is narrow and long. In order to keep the upper part of the room visually wide, I chose open shelving for daily dishes, decorative cake stands, and a couple little plant babies. I have had open shelves in every house we have lived in, and I absolutely love them.

I use the dishes frequently enough things don’t get dusty. Our ventilation system for the stove is great, so I don’t notice grease and grime on the dishes. And we have sufficient cupboard and drawer storage that anything I don’t want out has a place tucked away, so the floating shelves get to be a display place for styled and beautiful items. They really add to the overall look of the kitchen.

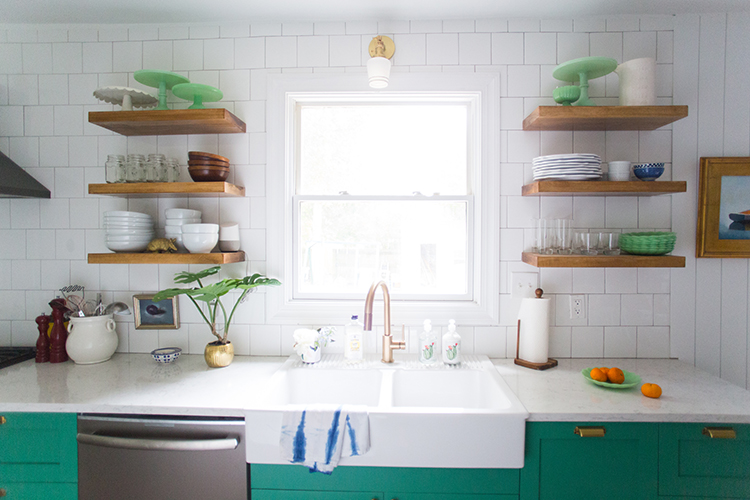
How to make Floating Shelves

What materials you will need:

  • Lumber, at least 1″ thick and in the desired width. Cut it to the desired length for each shelf.
  • Floating Shelf Brackets, heavy duty enough to hold the weight of dishes and cookware. These are the ones I bought and used for our kitchen and they have been amazing. These are good for shelves between 24″-48″.  Any longer and you would use more than one.
  • 13/16″ or 2omm paddle drill bit with an electric drill, for drilling the holes for the steel rods.
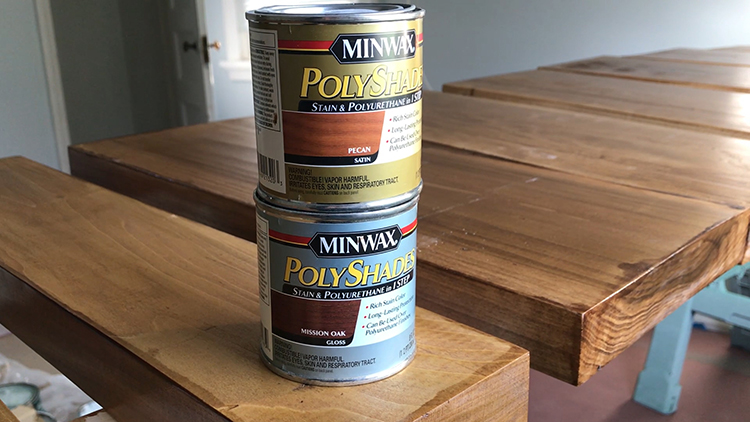
  • Stain and Poly, I used a mix of 2/3 Mission Oak and 1/3 Pecan Minwax Polyshade. I found the mix of darker and warmer stains to be the perfect color (I call it my Secret Sauce.)
  • Palm Sander with sandpaper, to smooth out the wood and cuts before staining and sealing.

Determine Length and Depth

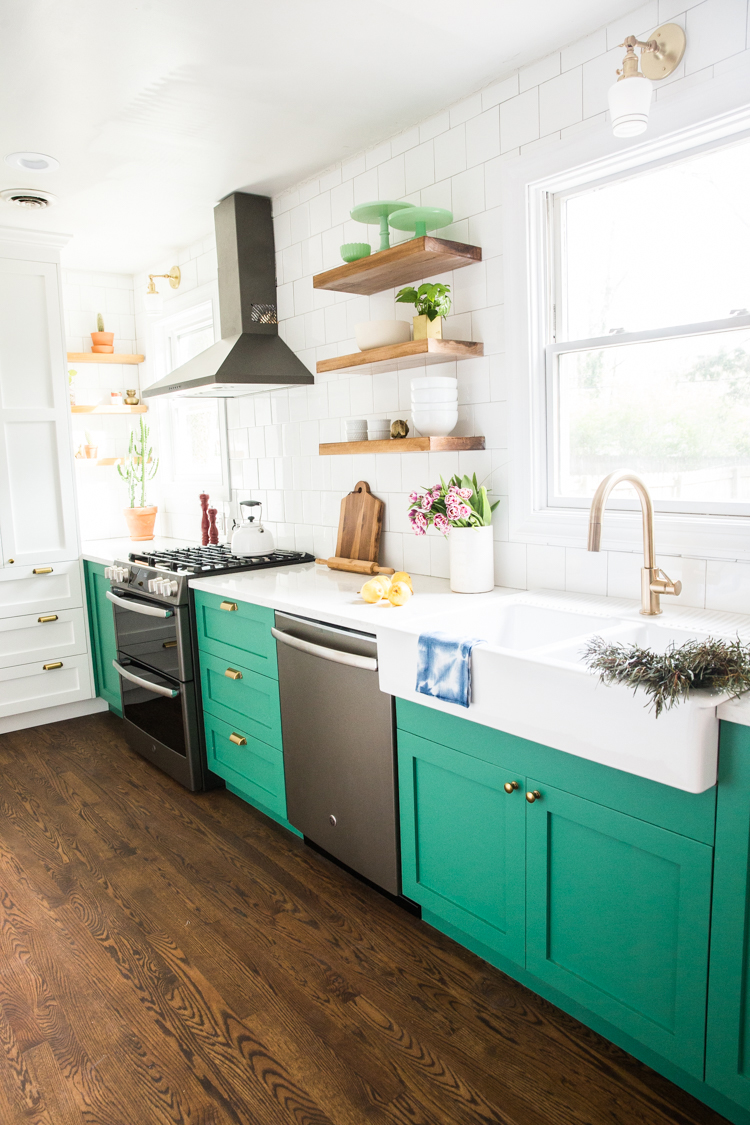
Determine the length and depth of shelves you want. I chose 24″ shelves with a depth of 11″ for our kitchen. The 24″ fit well between the window and the range hood, and I knew I needed at least 10″ deep for my plates and cups to fit well. The shelf depth is one of the reasons I chose to make my own, because most floating shelves I found online maxed out around 8″ deep, which just wasn’t deep enough to be practical.

Choose and Cut the Lumber

I was able to find 2x12x10 lumber at a specialty lumber store locally. Big box hardware stores (as much I love them) don’t have the same variety and types of wood as a specialty store. I chose poplar, which was hard enough to wear well, but not quite as dark or expensive as walnut or cherry. I loved the idea that I could mix and add my own stain to the lighter wood, making it whatever I wanted.

I had my carpenter cut the lumber into 6 24″ pieces using his table saw. I could have used a circular saw and saw horses, but since I had access to a carpenter at the time, I asked for his help.

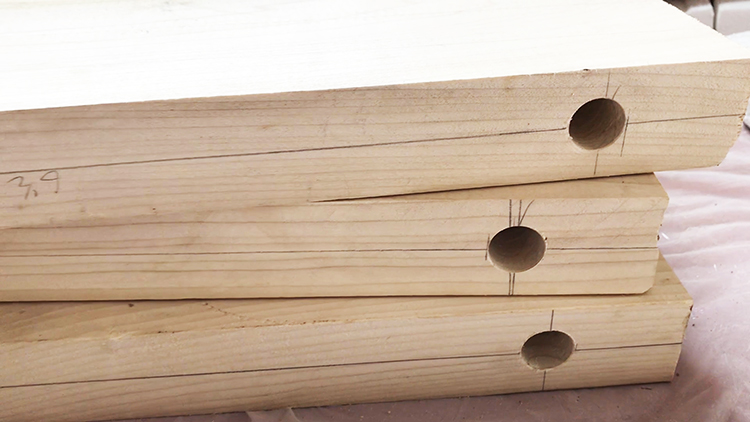
Drill Holes for the Brackets

The brackets each have 2 six-inch steel rods, spaced apart. Measure the distance on center between the two, then mark with a pencil. Use your 20mm paddle drill bit to drill straight down into each bracket to a depth of at least 6.5″. If you have access to a drill press, that would work well, too!

The holes need to be close to exact, so the shelves can slide right onto the rods once the brackets are installed onto the wall. We had some trouble with one of the nine we did, and I ended up drilling the hole on one side to about 1″ wide and 7″ deep so the rod would fit. Once I troubleshot it that way, it worked beautifully!

Sand and Stain the Shelves

Use a fine grit sandpaper to smooth all of the sides and edges of the shelves. The smoother, the better. I like using a palm sander, to make the process go a bit more quickly.

Sanding can be super messy, so make sure you are outside, or in a garage or workspace, because you will end up with sawdust all over the place by the time you finish. Once the shelves are all smooth and sanded, wipe them clean with a tack cloth to prepare to stain them.

I used a combination of 1 part Mission Oak to 2 parts Pecan stain for the perfect warm-but-not-too-orange wood stain color. My poplar wood had a pale green sheen when I began, so the warmth of the pecan and the darkness of the walnut balanced it nicely. Your own stain color will depend on your preference and the type of wood you begin with!

I brushed the stain onto the edges and one side, let it dry, then flipped them and stained the opposite side. I did about three coats before they looked finished.

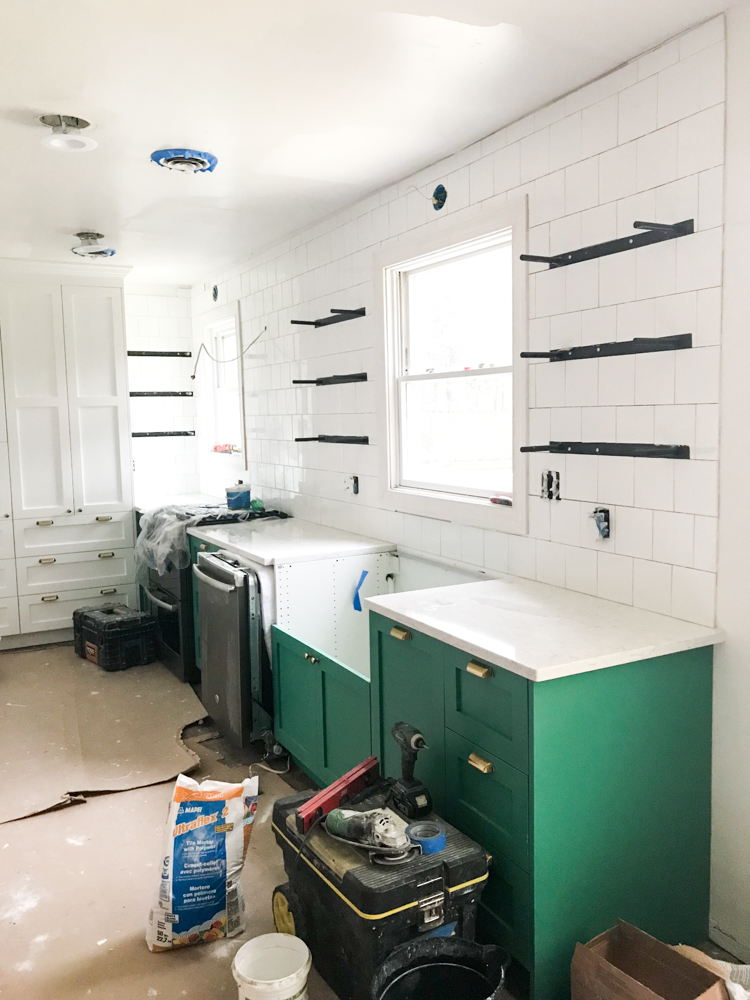
Install the Brackets

The brackets need to be either installed into studs, or anchored with some serious drywall anchors. I positioned mine so that at least one of the sides went into a stud, then we anchored the other side.

If you have a chance during a remodel to block out exactly where you want them to go, that is ideal. If you are only planning to style them with decorations, and don’t need to have them stable up to the 150 pound weight limit, you may be okay into drywall with anchors only.

The brackets are about 1/4″ thick, so in order for my shelves to sit flush against the tile backsplash, we installed them inline with the tile itself. The depth of the bracket and the depth of the ceramic tile were the same, so when I slid the lumber shelf onto the bracket, it sat flush on the wall.

If you are installing the bracket straight onto a wall, and want the shelf to sit flush the best idea is probably to route out the back of the lumber by 1/4″. You could use a router saw or a chisel. Alternately, you could sink the bracket into the drywall by 1/4″.

You may not mind the 1/4″ of space between the wood and the wall, and a little caulk would seal it off as well. So, you have options!

Slide on the Shelves

Once the brackets are in place on the wall, simply slide the stained shelves in place. You will want to test the shelves on their corresponding brackets before anchoring the brackets to the wall, to make sure that you can get the shelf on easily. So, when the bracket is up, you can slide each shelf onto the rods.

These brackets don’t come with any way to secure the shelf once they are installed, and rely on the depth of those rods into the wood for the stability. We are using our shelves for heavy dishes and kitchen wear, and haven’t had anything budge at all!

Caulk and Set

When all of the shelves are installed onto the brackets, finish the back edge with bit of caulk, if you want. We used white kitchen caulk to match the ceramic tile backsplash.You could also use a clear caulk, just to finish everything off.
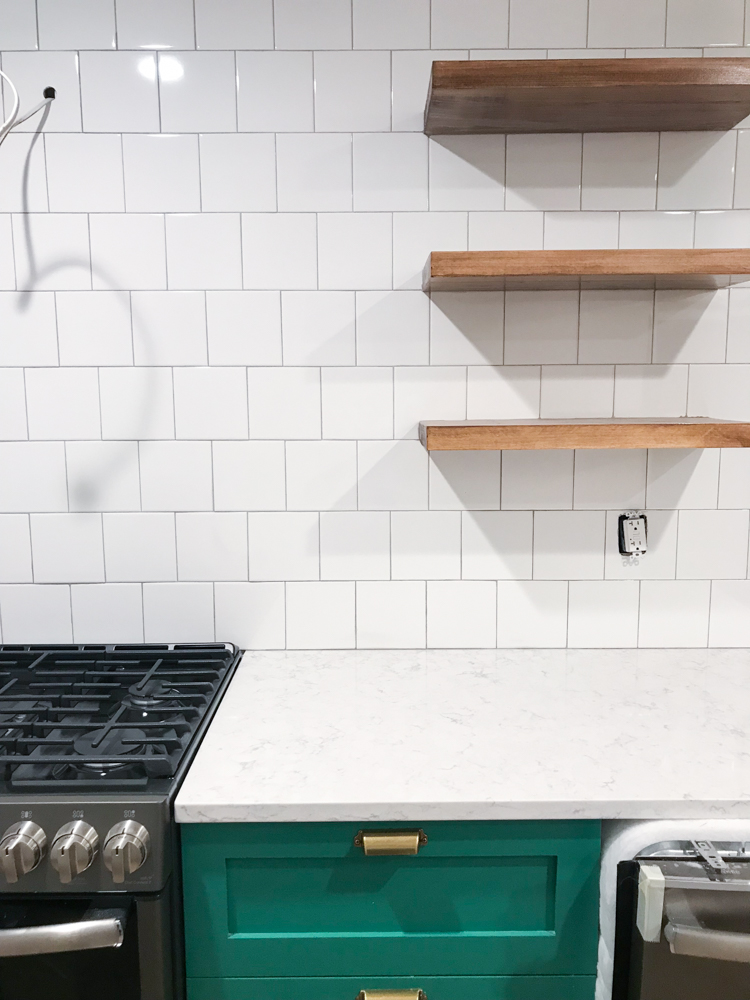
Style the Shelves

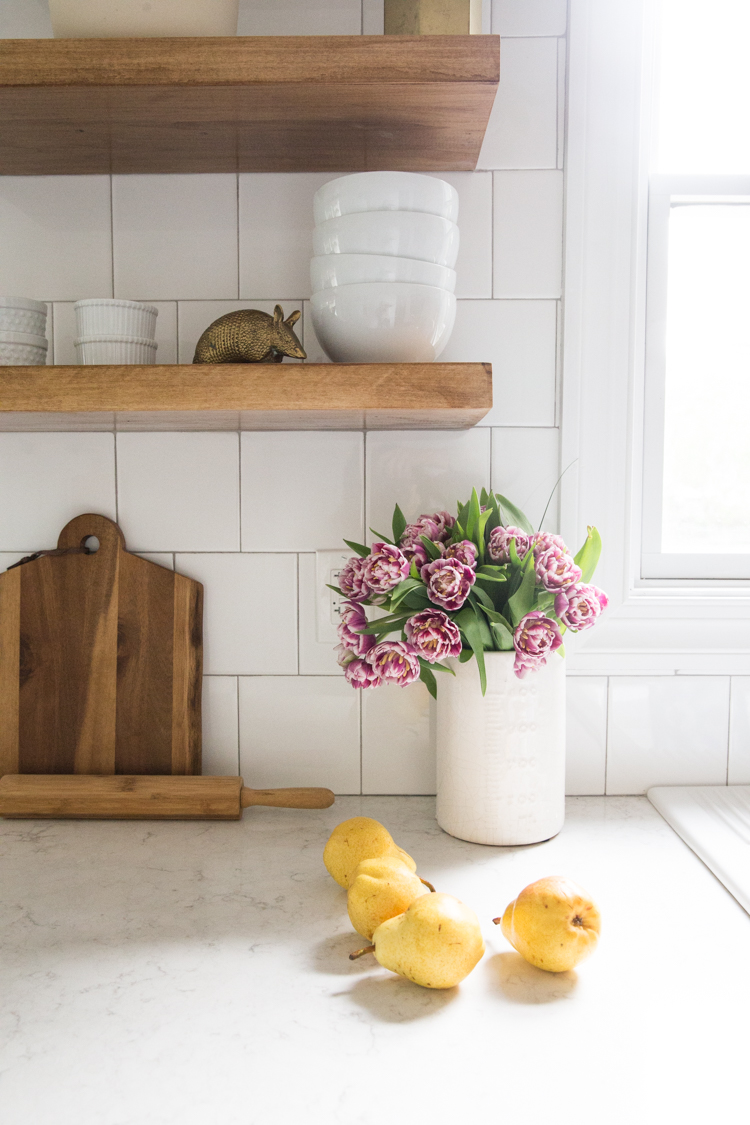
Your shelves are up! Now the fun part, styling them. I like to being with one or two big things, then go back in and full in with interesting items, colors, or accents. If you are styling kitchen shelving, make sure you put things where they make sense for the flow of the kitchen.

We have glasses next to the sink where we use them all the time, and the pretty cake plates on the highest shelves where they don’t need to be reached as often. Try to back up and take a picture with your phone to see the styling better than you can with your own eyes, then balance it and tweak as needed.

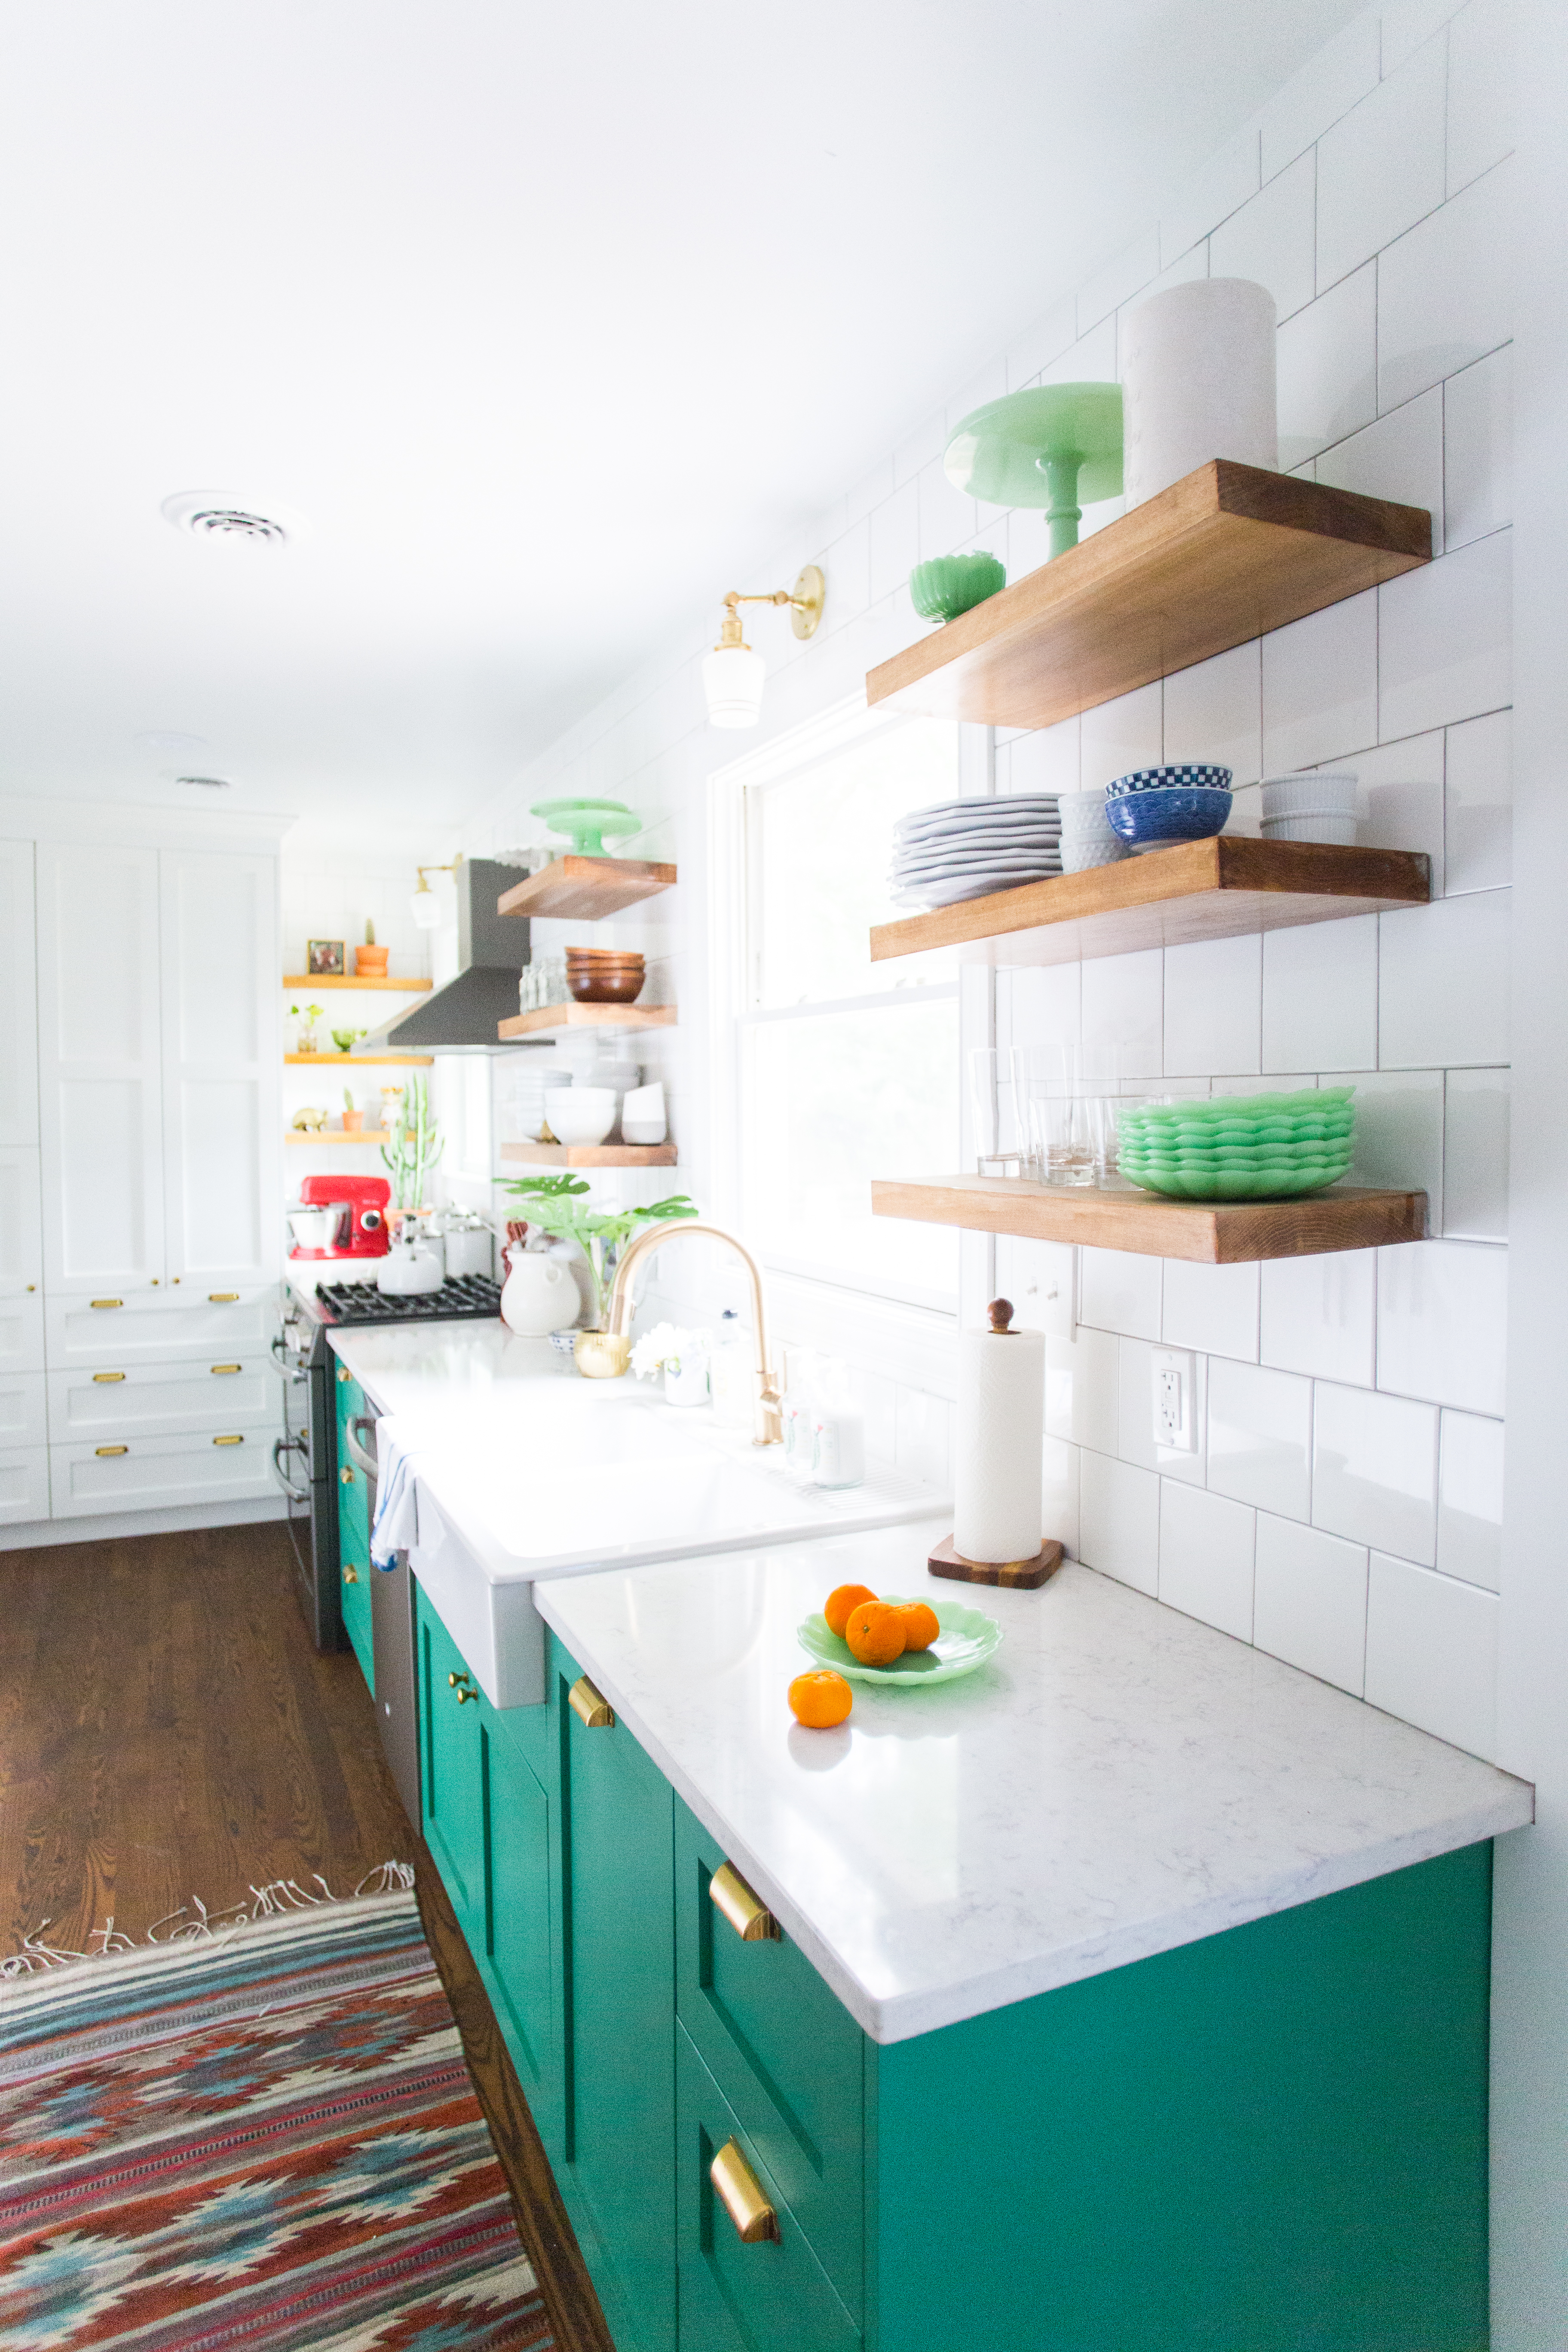
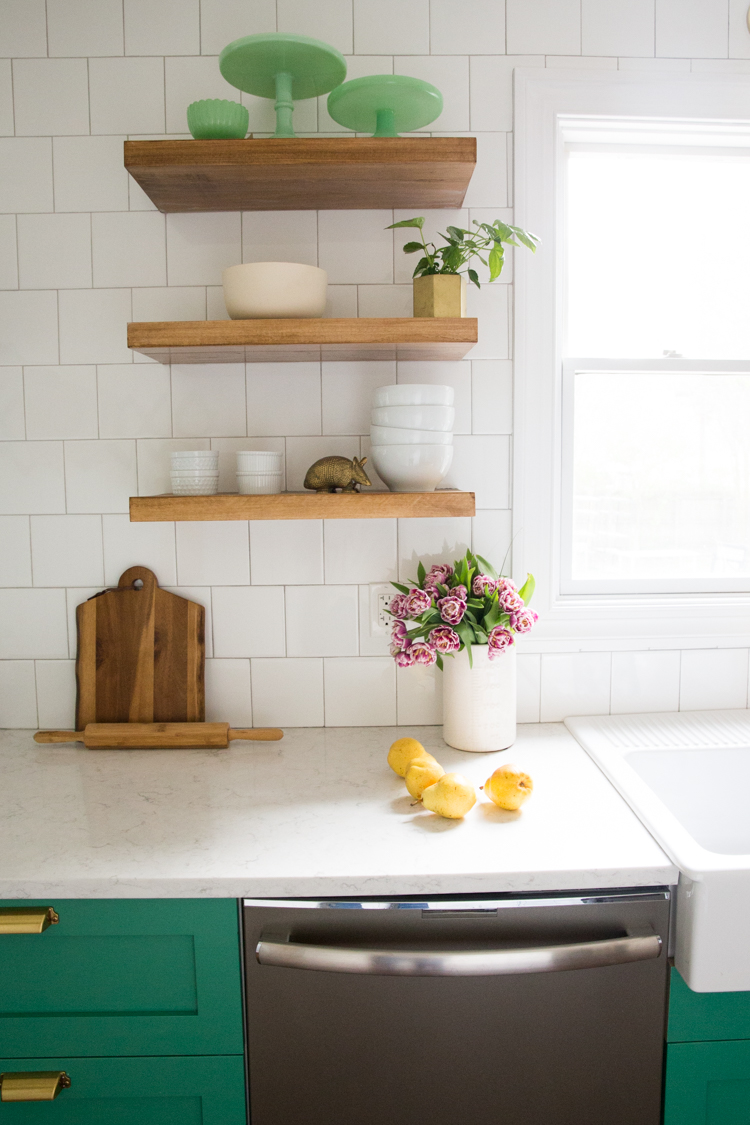
Now look how fancy! These DIY floating shelves are one of my favorite elements of our new kitchen, and I am thrilled with how they turned out.

It is worth the work, energy, and effort to make things the way you imagine them, and these shelves turned out exactly as planned.

The total cost for the nine shelves was around $450, or about $50 each. Not bad considering similar custom shelving can run into $200-300 per shelf.

I hope you got a good feel for this project, and wish you luck in completing your own floating shelves!

*UPDATE: 2 YEARS LATER!*

I always love an update on a DIY project, so I wanted to pop in today, two years after we finished this project and confirm how great these shelves are. The brackets are super solid, shelves are beautiful, and we still adore them.

People often ask me if the sag with so much weight– stacks of dishes and layers of glasses. Nope. They are straight, sturdy, and solid. 

We use the dishes on the bottom two shelves daily, so they never have time to collect much dust. Every couple months I take down everything from the top shelves, wipe them off, and re-style. Easy as can be.

I hope this tutorial has been helpful for you, and you love your own new shelves as much as we love ours!

xo Miranda 

Share

DIY  / Richmond Fixer Upper

  • ABOUT

    Welcome! I’m Miranda, the maker mama behind Live Free Creative Company.

  • More Than Enough Book


    Have you ever felt like you were running a race you couldn’t win in life? Like there was always something more to buy or to achieve in order for you to feel like you had “made it”?In this book, I share how my heart changed and I began to find real, lasting peace, abundance, and joy through focusing on what matters most and disregarding the rest.

    Find out more here.

  • ConvertKit Form

    Five Days to Freedom: Tips for Choosing Less Stuff and More Adventure in your Daily Life

    Five lessons with practical tips and exercises to help you feel more in control of your life!

    Success!

    There was an error submitting your subscription. Please try again.

    We won't send you spam. Unsubscribe at any time. Powered by ConvertKit
  • Recent on Instagram

    livefreemiranda

    Packing up for our 15th anniversary getaway (Costa Packing up for our 15th anniversary getaway (Costa Rica ☀️🌺🌴🥰) and grateful for this past month of relationship-focus. 

All of October the #livefreecreativepodcast episodes centered on ideas for a more intentional, connective marriage, in partnership with our fave all-natural intimate body oil @coconu 🥥 (watch my story highlight for more info!)

As I taught and implemented some simple tips, I noticed a measurable difference in my own partnership with Dave, and we’re so excited to continue building on that with this next week away together. 

Some of my favorite takeaways from the episodes are these: 

• Take care of yourself so you can take care of your relationship! (Ep 155)
• “Foreplay is everything that happens in between sexual encounters.” -@kristinbhodson (Ep 156)
• Have more fun simply playing together! (Ep 157)
• Learning to love one another is an ongoing process. (Ep 158)

The biggest takeaway is that great, loving, balanced marriages don’t happen on autopilot. They require an investment of intentional time, emotional energy, and commitment and can be so worth the effort!

Use LIVEFREE for 15% off your order of @coconu (it’s a perfect sexy stocking stuffer 🎁😉) and tune into the show for all of these tips and more.
    Slip-sliding into the holiday season this weekend. Slip-sliding into the holiday season this weekend. 🎃🦃🎁
Here’s a quick reminder that the most meaningful gifts of the year might not be under the tree (or on a cargo ship in the ocean. 😜🚢)

#lessstuffmoreadventure
    How well do you know your partner, TODAY? Do you How well do you know your partner, TODAY? 

Do you know their current stressors? Dreams? What they love to spend time doing and what they wish they could set down?

The Gottman Institute has found that one of the foundations of a solid, long-lasting relationship is what they call “marital friendship”. 

Marital friendship looks like getting to know your partner and then CONTINUING to get to know each other as life changes, circumstances shift, and your own core identities and understandings progress. 

This week on the #livefreecreativepodcast I share some ideas for building and updating your personal “Love Map” and even include a free, printable PDF to get the conversation started! 

Tune in on your favorite listening app. 💕
    Hi there! It’s been a little while since I intro Hi there! It’s been a little while since I introduced myself and thought I’d take a minute to share: 

1. I’m an RN patient educator turned online educator and intentional living specialist. I’m applying right now for a Master’s Degree program in Applied Positive Psychology, and look forward to adding new research and understanding to what I share in my podcast, online courses, and retreats! (🤞 I get in!)

2. I have been married 15 years, have 3 kids, 2 cats, 6 chickens, 1 dog, and love the mild chaos of our small and quite full house, #ourrichmondfixerupper.

3. I teach and share principles for wellbeing and living life on purpose in four main ways: 
• my free weekly podcast #livefreecreativepodcast
• one-on-one monthly creative mentorship
• 2x annual group online masterclass, opening again in January 2022
• small group work retreats #livefreecreativecamp and #lfcgrownupsummercamp, 2022 dates coming soon

4. I’m the author of More Than Enough, a non-fiction book about the lessons I learned during a year of not shopping. The experience and book were pivotal in my relationship to stuff and to myself.

5. I love reading, nature, tacos, running, diy projects, kitchen dance parties, loaded French fries, traveling, sleeping, teaching, making lists, trying new things, and the feeling I get when I still my thoughts for long enough to settle into the wholeness of the present moment.

6. I’ve been sharing online for over 14 years (first blogging, then Instagram…) and sometimes feel more disconnected because of the perpetual nature of these platforms. I crave the true connections we can make as humans in the real world and love using IG as a jumping off point to meet and gather, teach and learn with women in other, longer-lasting ways. 

7. I’m an Aquarius , enneagram 7, Generator, and a nuanced, unorthodox Mormon who truly believes we are all meant to walk our own pathways in this life, discovering our truest selves and finding alignment with her wholeness. ✨

Okay, that’s enough about me. Did you learn something new? 

Now, tell me something about you!! 

(Headshot by @heathermildenstein at Fall 2021 #livefreecreativecamp)
    Spending the weekend in a little corner of heaven Spending the weekend in a little corner of heaven called Idaho. 💛

I read a great article last week about how experiencing “moments of awe” and creating space to feel all of the perspective that feeling brings, can increase our overall wellbeing. 

Just stepping outside here feels like entering a wonderland— add in having fun with good friends (redesigning and styling @3in30podcast main floor ✨) and I feel pretty great. 

How will you take a moment to feel awed today? A walk outside? A quiet corner with a good book? Delighting in a lovely bite of delicious food? Remembering how lovely life can be invited even more of that loveliness into our experience.
    How much effort and intention do you put into your How much effort and intention do you put into your marriage every day? Week? Month? 

Did you know that some super simple (fun and easy) practices can keep your relationship running smoothly and help reduce the uncomfortable friction that comes when we work against— rather than in alignment with— our partner. 

Tune in to episode 157 of the #livefreecreativepodcast to hear more about these 5 practices! 

Which one jumps out to you as something you could implement easily today?
    Simple, beautiful, functional storage for the win! Simple, beautiful, functional storage for the win! ✨

In our little home (1400 sq ft) I am always on the lookout for forgotten spaces we could maximize with easy and affordable design solutions.

This over-the-keyboard nook is a perfect example of a little-used wall that transformed into an efficient family command center with about $150 of shelving supplies and 2 hours of effort.

 As soon as I finished I thought “Why on earth hadn’t I done that earlier! It’s MEANT to be like this!” 

Sending you a bit of confidence and creativity to use your own home to its fullest most meaningful potential! ✌️

#ourrichmondfixerupper
    “As long as you’re dancing, you can break the “As long as you’re dancing, you can break the rules. 

Sometimes breaking the rules is just extending the rules.

Sometimes there are no rules.”

— Three Things To Remember, Mary Oliver ✨

This whole week of #livefreecreativecamp was a gift— stepping outside of the passing of time to pause, reflect, gather, and connect.

Sometimes, even over a dozen years into this hobby-turned-business-turned-career, I wonder what I am even doing. If I’m doing it right or well. 

And then I remember: we’re all just sort of making it up as we go and doing the best we can with what we have. 

Dancing along to the beat of our own heart, and hopefully spreading joy along the way. 💛
    It’s impossible to put the experience of Creativ It’s impossible to put the experience of Creative Camp adequately into words. One part incredible community of supportive women meets one part deep solo work time, mixed with a beautiful location, thoughtful meals, inspired masterminds, and the kind of synergy that fills your heart to the brim. 💛

I am honored by the women who chose to step into the space I create for them, and fill it with such generosity and love.

I’m headed home with an added dose of gratitude, confidence, and friendship in my pocket. (Plus a solid first draft on an exciting new essay.✌️)

#livefreecreativecamp

Beautiful photos by @heathermildenstein
    In this week’s podcast, I sat down for a chat wi In this week’s podcast, I sat down for a chat with my friend and sex therapist @kristinbhodson to answer some community questions about sex. 💛

Our chat feels like and approachable, candid conversation with a friend, and I hope you’ll tune in and learn a little something new to increase the connection, desire, and pleasure in your own most intimate relationship.

For most of my own childhood I thought “sex” was a swear word 😂 so needless do say, there has been lots of learning, growing up, developing myself not only so my own personal relationship flourishes. Also because I know as I model a healthy, whole understanding of sex, my kids will grow up with so much more of that perspective. 

Tune in, save, share, and let me know your favorite takeaways! ☺️

#livefreecreativepodcast
    Last week we hosted our first annual #Coopstock ba Last week we hosted our first annual #Coopstock backyard bash! 🐓🎉

Celebrating our cute backyard chickens as a #HenUpOrganicsPartner was a great excuse to bring family, friends, and neighbors together to eat, chat, and enjoy live music (isn’t Luna amazing?🎶). 

I wanted a backyard flock for years before we finally made it happen, and these past three years have been a dream come true. We love taking care of our girls and @henuporganics ingredient list reads like our own grocery list: ancient grains, fruits, and vegetables. 💛

The whole night was magical, and I’m already looking forward to next year. 

Follow along to learn more about Hen Up® Organic Chicken Food by visiting https://clvr.li/HenUpCoopstock (also linked in my IG story and profile!)
    Four years ago, during our first fall living in Vi Four years ago, during our first fall living in Virginia, I rented a convertible for a day to take the kids on a leaf peeping drive through Shenandoah National Park. 🍂🍁😍

Tonight I finally spent 30 minutes compiling the video I took that day into a short montage, and remembered the fun and whimsy of that little adventure. (The kids have grown so much!! ❤️) 

I think it’s time for a repeat this year! ✌️

#lessstuffmoreadventure
    Follow @livefreemiranda on Instagram
    This error message is only visible to WordPress admins
  • FAVORITE CATEGORIES

    • DIY
    • SEW
    • DECORATE
    • EAT
    • LIFE
    • TRAVEL


© Copyright 2021 Live Free Creative Co | View our Privacy Policy