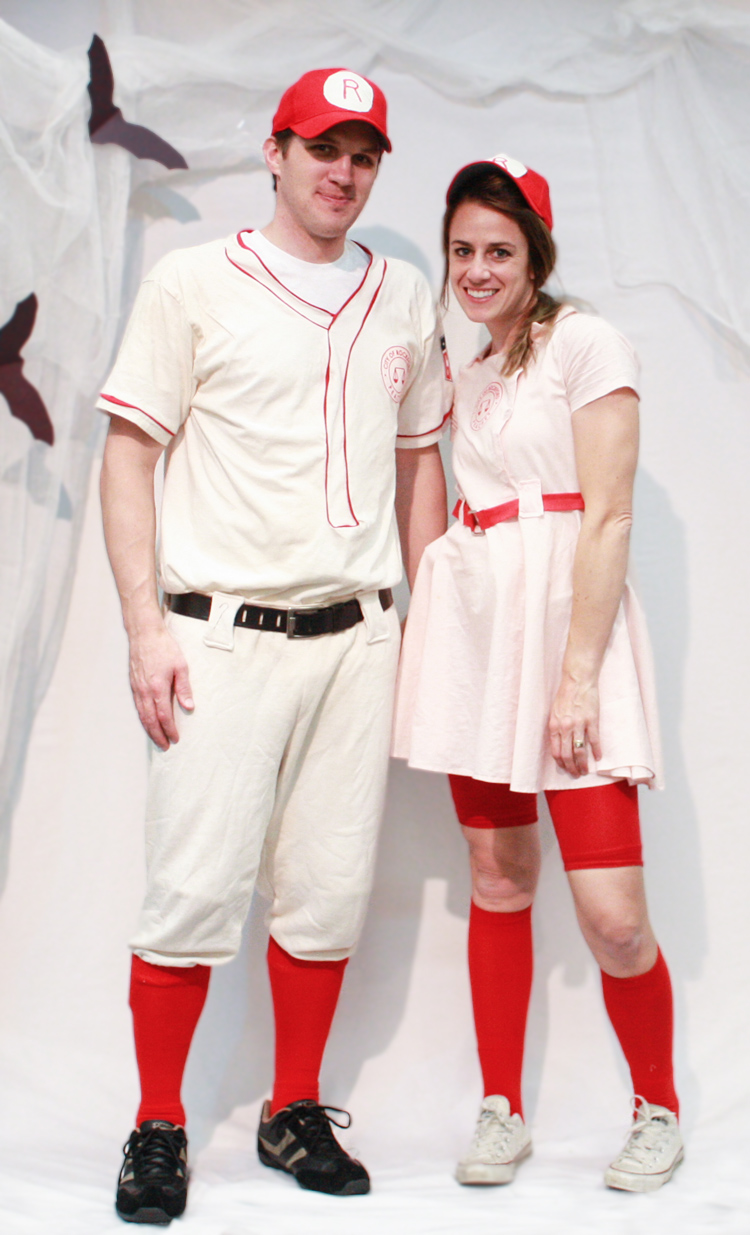
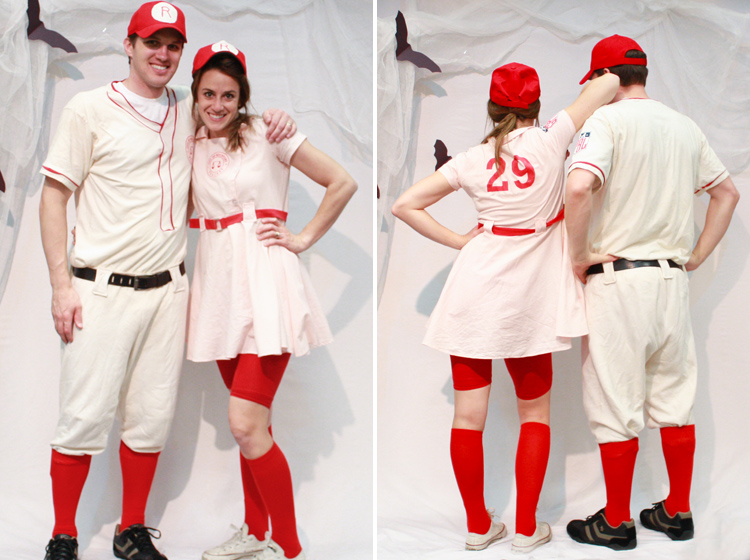
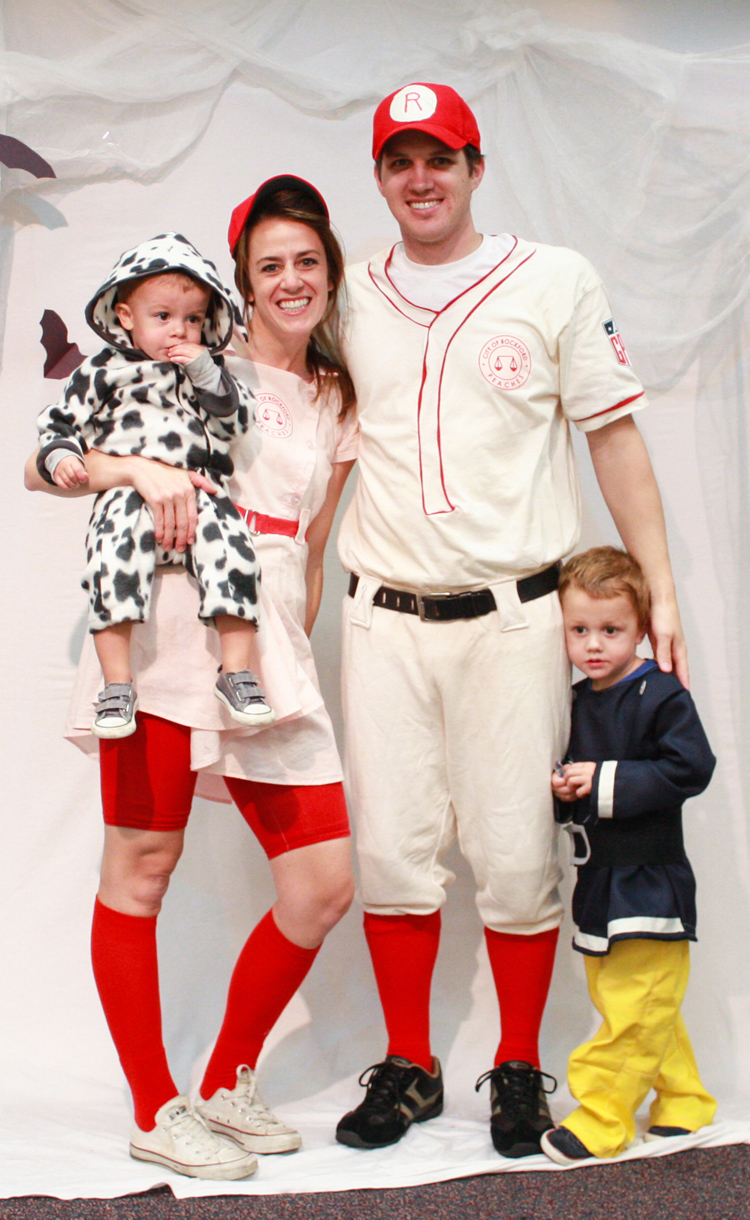
Happy Halloween! It’s felt a little like Halloween since June around here, since that’s about when I started thinking about and taking orders for costumes. You would think I’d be totally sick of them by now…but I’m not! Okay, the sewing through the night gets a little old, but I seriously adore creating costumes, and dressing up in them. This year, I had other plans for Dave and myself. We were going to match the boys’ fireman theme and dress up as a fire hydrant (Dave) and a burning building (me). A turn of events brought one of my homemade costumes back to me (the fit wasn’t quite right! Oops! It happens.) We took advantage of the perfect Rockford Peach Costume for me, and I whipped up a last minute Coach Jimmy Dugan costume for Dave. They were perfect! We even won the Best Team Costume at our friend’s Halloween Bash. I think we’ll tuck these ones away for the future. You never know when you’ll need a quick costume!
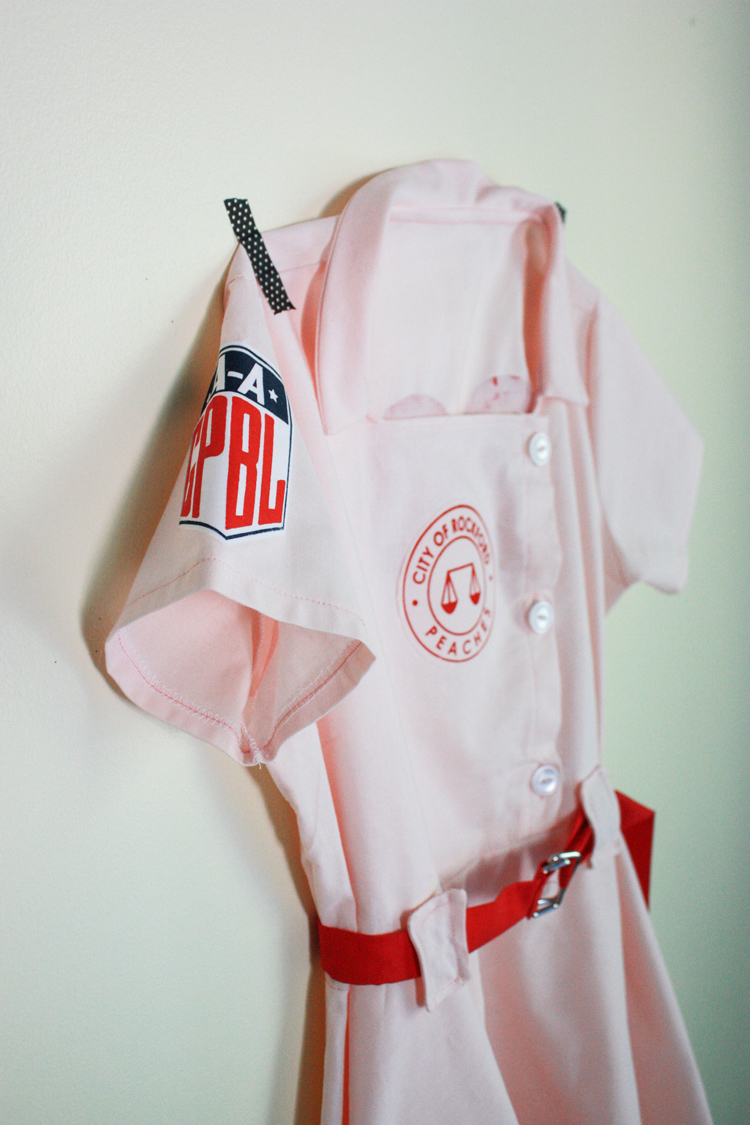
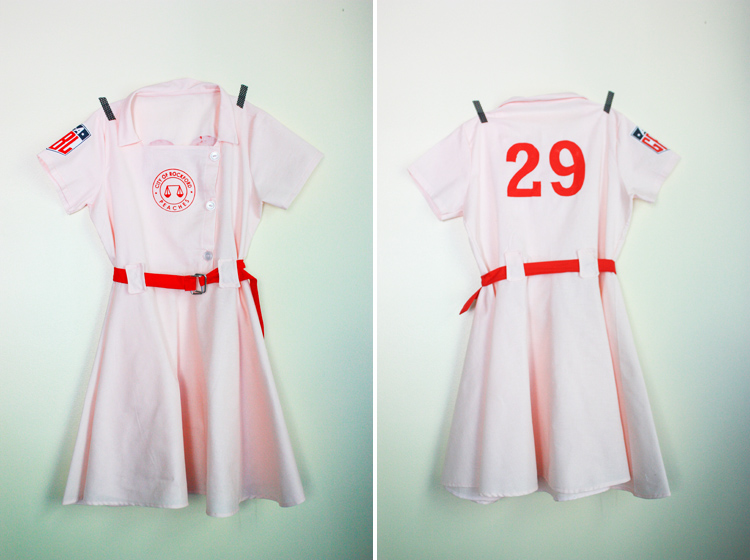
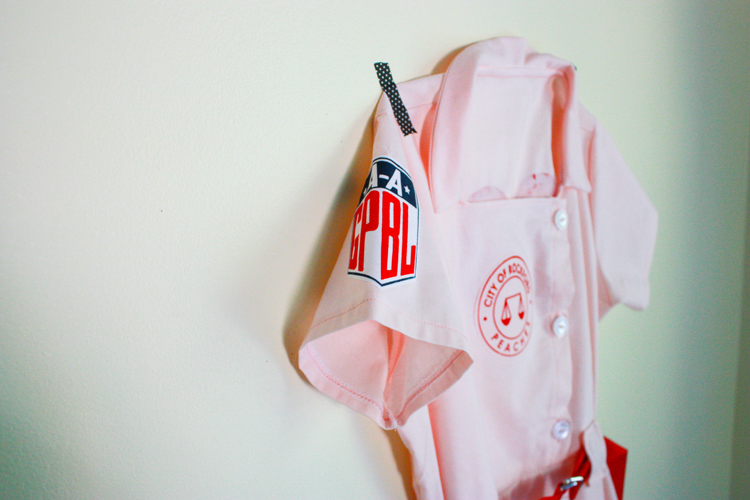
My Rockford Peach dress is an adult version of this little Peach Costume I made a couple years ago. I’ve made several of these now in both children and adult sizes, so it’s too bad that the fit on this one didn’t turn out as the client wanted. I use a basic bodice block for the top, then slash the front on the diagonal and add inches for the placket and buttons. The collar is a simple pointed collar, and the skirt is a basic circle skirt drafted to measurements. (If I had made this for myself, I’d have lengthened it a couple inches! It worked great with some homemade red bikers, though!)
I love the shape of this dress. In fact, it reminds me a lot of the little blue dress I made a few months ago. I think I’ll make one for myself in a shirting and see how it fits into my wardrobe. The client requested the number #29, but it was perfect, because I’m coming up on the big 3-0 and this was a fun Hurrah to the last Halloween of my twenties!
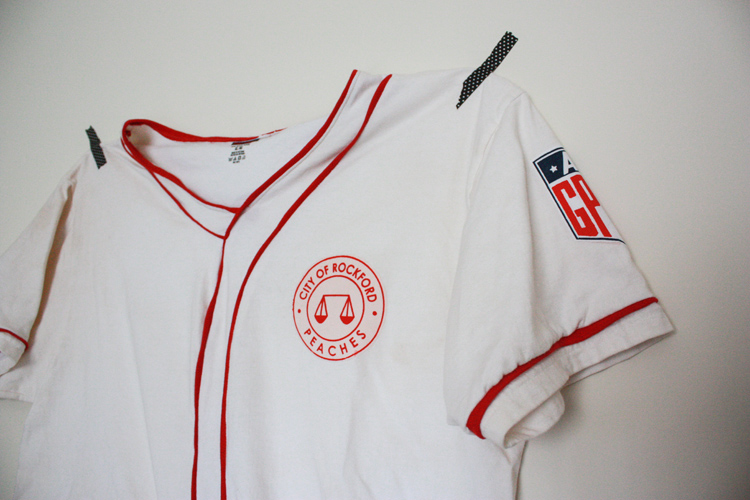
The details I get asked about the most on this costume are the patches. The first few times I made it, I cut the logos by hand and used the freezer-paper method to paint them. Then I got a silhouette cutter, and designed the logos there, which made the cutting process easier. But this year was by far the easiest and most professional. I designed the logos in illustrator, printed them onto transparencies, then screen printed the patches up at Pyramid Atlantic Art Center. I was able to print 6 sets of patches in about 10 minutes, once I had made the screens. Three sets were attached to costumes, two sets had been ordered last-minute for DIY costumes, and I was saving one extra set just in case…I had no idea I would need it to use on Dave’s costume!! That couldn’t have worked out better!
I bought our red socks and red caps at Wal-Mart. The caps are Washington Nationals caps. I cut circles out of white felt and used a fabric marker to draw the R, then I ironed them on with fusible interfacing. Dave was a little concerned that I had defaced a perfectly good baseball cap, especially one for our home team, but I assured him the felt will pull right off after Halloween. I hope it does!
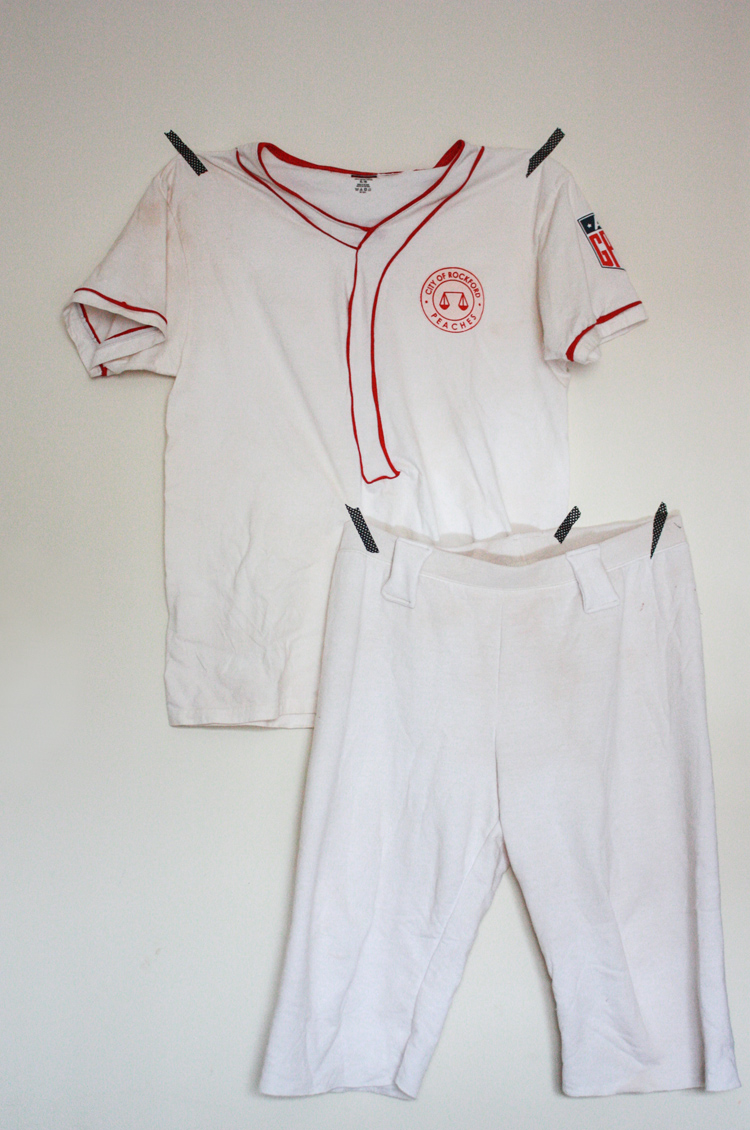
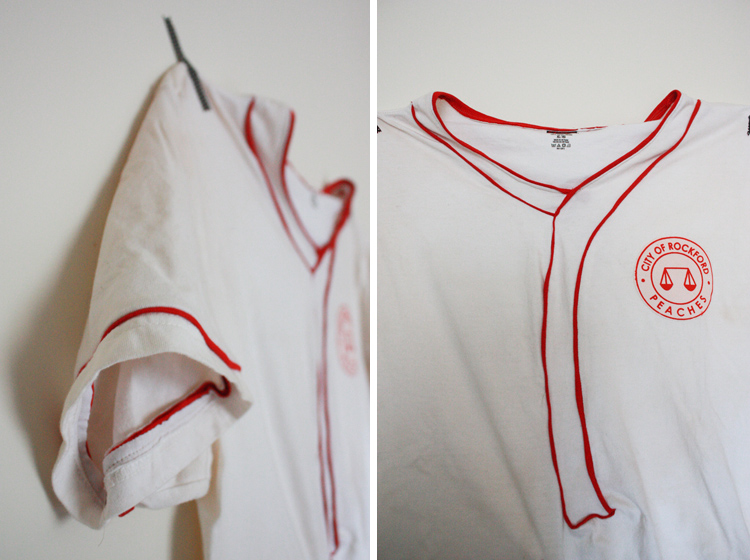
I’m beyond happy with how Dave’s last second costume turned out. I used a white tee shirt and a pair of white sweatpants as the starting point. First, I tea-dyed them a more natural-looking sepia tone. Have you ever tea-dyed? It’s super simple. Just boil a pot of water and add several tea bags, then drop in your fabric. Natural fibers absorb more color, and it tends to stick longer. I left these dying for about an hour, then rinsed them in cold water and put them in the dryer. The color came out great. They look old and a little dingy, which is perfect for a 1940’s baseball coach! If I wash them with detergent, it may all disappear, so I’ll stick to hand washing them.
I had Dave try on the tee before work, and I drew the lines where I wanted to add the piping detail. After the shirt was dyed, I cut along those lines, and then used a long strip of stretchy rib-knit, folded in half, to add the detail as I stitched the pieces back together. I did the same along the edge of the sleeves. You can see the unfinished edges inside. I literally sliced, sandwiched a band of piping, then stitched it back together! It couldn’t have been easier.
